🧢 Beautiful ✨ Detailed πŸ’ Adorable

Pokeball Amigurumi Pattern

Pokeball Amigurumi Pattern
4.2β˜… Rating
2-4 Hours Time Needed
2.2K Made This
βœ‚οΈ

Intermediate Level

Ideal for those with basic crochet experience, featuring slightly more advanced stitches and techniques to expand your skills.

⏱️

Bite-Sized Project

Finishes in 2-4 hoursβ€”perfect for an afternoon of creative relaxation.

🎁

Tiny Treasure

Small, sweet, and gift-worthy creations that fit perfectly in the palm of your hand with detailed charm.

About This Pokeball Amigurumi Pattern

This pattern creates a small crocheted Pokeball amigurumi with a crocheted center button and a felt band for clean color separation. The instructions include every round for shaping the ball and a simple round button to attach to the front. You will learn basic increases and decreases to shape a sphere and switch colors neatly.

Pokeball Amigurumi Pattern crochet pattern - detailed view of completed project

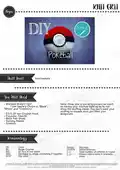
Finished size is small and gift-friendly using worsted weight yarn and a 3.25 mm hook. Includes notes on a felt band and button placement for a polished look.

Why You'll Love This Pokeball Amigurumi Pattern

I absolutely love this pattern because it turns a simple crochet sphere into an instantly recognizable Pokeball with minimal supplies. I enjoy how quickly it comes together β€” you can finish a complete ball in just an afternoon and have a handmade gift ready. I also love the clean look you can achieve by adding the felt band; it gives a professional finish without complicated colorwork. Making the small button is one of my favorite finishing steps because it adds so much character with very little effort.

Pokeball Amigurumi Pattern step 1 - construction progress Pokeball Amigurumi Pattern step 2 - assembly progress Pokeball Amigurumi Pattern step 3 - details and accessories Pokeball Amigurumi Pattern step 4 - final assembly and finishing

Switch Things Up

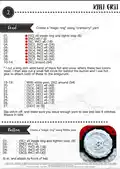
I love experimenting with colors on this pattern; swap the cranberry for bright pink or blue to create personalized "balls" with character.

You can make a tiny keychain version by using fingering weight yarn and a much smaller hook for a mini Pokeball.

For a chunkier, cuddlier Pokeball, use bulky yarn and a larger hook to create an oversized plush version.

I often replace the felt band with a crocheted black band for a fully yarn-only finish when I want everything washable.

Try embroidering small details on the white button to give different expressions or insignia for fandom variations.

I sometimes add a small loop of yarn at the top to hang the Pokeball as an ornament or keyring attachment.

If you want a more realistic look, use a firmer stuffing and add a little weight inside the bottom to help it sit upright.

I recommend testing different yarn textures; a soft acrylic gives a smooth finish while a wool blend adds slight fuzziness for a vintage feel.

Consider making a set in graduated sizes and mounting them in a display box for a unique handmade gift set that shows off variations.

When gifting, I like to pair the Pokeball with a tiny crocheted Pokemon or a themed card for a complete present that feels extra special.

Common Mistakes & How to Fix Them

βœ— Using a large hook with worsted yarn can make your stitches loose and show stuffing; switch to the recommended 3.25 mm hook or tighten your tension to prevent stuffing from showing. βœ— Not leaving a long sewing tail when closing the last stitches makes attaching the ball harder; leave enough yarn to sew through the last six stitches and anchor securely. βœ— Skipping the felt band step can make the color change look messy and uneven; cut a one-inch black felt band and glue it around the middle to hide the seam cleanly. βœ— Overstuffing the ball can distort the spherical shape and cause the stitches to stretch; stuff gradually and evenly until the shape is smooth and firm but not overly tight.

Pokeball Amigurumi Pattern

Create a classic Pokeball amigurumi with clear, step-by-step crochet rounds and a simple button detail. This pattern guides you through color changes, shaping, and finishing touches so your ball looks neat and professional. Perfect for gifting, decor, or as a playful addition to your handmade collection.

Intermediate 2-4 Hours

Materials Needed for Pokeball Amigurumi Pattern

β€” Main Fabric

  • 01
    Worsted Weight Yarn (Vanna's Choice recommended) in 'Cranberry' for red top
  • 02
    Worsted Weight Yarn (Vanna's Choice recommended) in 'White' for lower half and button
  • 03
    Worsted Weight Yarn (Vanna's Choice recommended) in 'Black' for accent (felt also used)
  • 04
    Black felt sheet for middle band and small backing circle

β€” Tools Required

  • 01
    Crochet hook size D/3.25 mm
  • 02
    Polyester fiberfill (stuffing)
  • 03
    Darning needle for sewing and weaving in ends
  • 04
    Scissors
  • 05
    Hot glue (for attaching felt band and felt backing to button)
  • 06
    Pins for placement (optional)

Progress Tracker

0% Complete

β€” Base :

Info :

Refer to the circular diagram for the visual base increase pattern. Symbols: β—‹ = Chain (CH). X = Single Crochet (SC). V (arrow) = Increase (2 in 1 stitch).

β€” Head :

Round 1 :

●[SC] x6 inside ring and tighten loop (6)

Round 2 :

●[INC] x6 (12)

Round 3 :

●[SC, INC] x6 (18)

Round 4 :

●[SC2, INC] x6 (24)

Round 5 :

●[SC3, INC] x6 (30)

Round 6 :

●[SC4, INC] x6 (36)

Round 7 :

●[SC5, INC] x6 (42)

Round 8 :

●[SC6, INC] x6 (48)

Round 9 :

●[SC7, INC] x6 (54)

Round 10-14 :

●[SC] around (54)

Info :

* I cut a long inch wide band of black felt and cover where these two colors meet. I then also cut a small felt circle for behind the button and I use hot glue to attach both of these to the amigurumi.

Round 15-19 :

β—‹With white yarn, [SC] around (54)

Round 20 :

β—‹[SC7, DEC] x6 (48)

Round 21 :

β—‹[SC6, DEC] x6 (42)

Round 22 :

β—‹[SC5, DEC] x6 (36)

Round 23 :

β—‹[SC4, DEC] x6 (30)

Round 24 :

β—‹[SC3, DEC] x6 (24)

Round 25 :

β—‹[SC2, DEC] x6 (18)

Round 26 :

β—‹[SC1, DEC] x6 (12)

Round 27 :

β—‹[DEC] x6 (6)

Info :

Slip stitch off, and make sure you leave enough yarn to sew into last 6 stitches. Weave in tails.

β€” Button :

Info :

Create a "magic ring" using White yarn.

Round 1 :

β—‹[SC] x6 inside ring and tighten loop. (6)

Round 2 :

β—‹[INC] x6 (12)

Round 3 :

β—‹[SC1, INC] x6 (18)

Round 4 :

β—‹[SC2, INC] x6 (24)

Round 5 :

β—‹[SC3, INC] x6 (30)

Info :

Sl st. and attach to front of ball. Back the button with the small black felt circle and secure with hot glue if desired.

Assembly Instructions

  • Cut a one-inch wide band of black felt and glue it around the circumference where the red and white sections meet to hide the color join.
  • Cut a small black felt circle to place behind the crocheted white button and attach with hot glue for a clean finished look.
  • Sew the crocheted white button to the front of the ball through the last six stitches, leaving a long tail to secure the button firmly.
  • After closing the ball, weave in all tails securely and use a darning needle to hide ends inside the amigurumi.
  • Pin the felt band and button placement before gluing or sewing to ensure even spacing and symmetry around the ball.

Important Notes

  • πŸ’‘Hook size is less important than stitch tightness; keep stitches tight enough to prevent stuffing from showing through.
  • πŸ’‘Leave a long sewing tail when finishing the last round so you can close and attach the button securely.
  • πŸ’‘Use hot glue to attach felt pieces for a neat finish, but pin and check placement before gluing to ensure symmetry.

This Pokeball amigurumi pattern is a quick, satisfying project that makes a perfect small gift or playful decoration. Follow the clear round-by-round instructions and add the felt band for a professional finish. Try making a set in different sizes and colors to create a whole collection. 🧢✨🎁

You ask,

we answer.

FAQs

What size will the finished piece be?

The finished Pokeball measures approximately 8-10 cm (3-4 inches) in diameter when using worsted weight yarn and a 3.25 mm hook; size may vary with yarn and tension.

Can I use a different yarn weight?

Yes, you can use a different yarn weight, but your final size will change; choose a suitable hook for the yarn weight and expect the ball to be larger or smaller accordingly.

Do I need any sewing or gluing to finish the pattern?

Yes, you will sew the button to the ball and the designer recommends using a felt band and glue to hide the color join for a clean finish, though you can also crochet a band if preferred.

How long does this project typically take to complete?

Most crocheters finish this small amigurumi in 2-4 hours, depending on experience and how much time is spent on finishing touches like the felt band.

Is this pattern suitable for beginners?

This pattern is rated intermediate since it includes color changes, shaping with increases and decreases, and finishing steps; beginners with basic single crochet experience can attempt it with patience.