🧢 Beautiful ✨ Detailed πŸ’ Adorable

Positive Potato Amigurumi Pattern

Positive Potato Amigurumi Pattern
4.5β˜… Rating
1-2 Hours Time Needed
1.2K Made This
βœ‚οΈ

Beginner Friendly Level

Perfect for those just starting their crochet journey, with clear instructions and simple techniques

⏱️

Quick Make

Complete in under 2 hoursβ€”lightning fast fun for instant gratification and quick gifts.

🎁

Tiny Treasure

Small, sweet, and gift-worthy creations that fit perfectly in the palm of your hand with detailed charm.

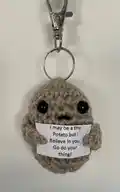
About This Positive Potato Amigurumi Pattern

This pattern creates a tiny Positive Potato amigurumi keychainβ€”an adorable, portable crochet toy with a printable saying. It uses simple rounds and basic decreases to shape a small oval potato body that measures about 7 cm. The design includes tiny arms to hold a paper saying, safety eyes (or embroidered for young children), and an optional clip for attaching to bags.

Positive Potato Amigurumi Pattern crochet pattern - detailed view of completed project

Quick and easy to make, this pattern is perfect for craft stalls, classroom gifts, or thoughtful handmade tokens. The instructions include materials, stitch abbreviations, and assembly steps so you can finish one in a short craft session.

Why You'll Love This Positive Potato Amigurumi Pattern

I absolutely love this pattern because it is such a fast and satisfying make that still feels special. I enjoy how a few simple rounds transform yarn into a tiny character full of personality. The little arms holding a printed saying are my favourite detail β€” they make each potato expressive and gift-ready. I also love that you can customise the sayings and eye styles to make each potato unique. This pattern is perfect for using small scraps of yarn and making many tiny tokens to brighten someone's day.

Positive Potato Amigurumi Pattern step 1 - construction progress Positive Potato Amigurumi Pattern step 2 - assembly progress Positive Potato Amigurumi Pattern step 3 - details and accessories Positive Potato Amigurumi Pattern step 4 - final assembly and finishing

Switch Things Up

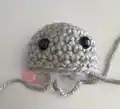
I love changing up the colours to make themed potatoes β€” try pastels for a sweet version or autumn browns for a harvest set.

I often make mini sets by using finer yarn and a smaller hook to create tiny keyrings perfect for party favours.

To make a chunkier, cuddlier potato, I use bulky yarn and a larger hook which gives a completely different feel and size.

I sometimes replace the printed saying with a tiny felt flag or crocheted pennant for a washable, durable option.

For safety with young children I embroider the eyes and mouth instead of using safety eyes and paper sayings.

I like to add tiny accessories like a crocheted scarf, a little hat, or a sewn-on heart to personalise each potato.

If I want posable arms I slip a short piece of floral wire into the arm before sewing it closed to allow gentle shaping.

I experiment with different facial expressions by moving the eyes or changing the embroidered mouth to create moods from surprised to sleepy.

Try printing different sayings or hand-writing messages on lightweight fabric and sealing with clear tape to create unique sentiments.

I also enjoy making a set of potatoes with matching keyrings in different sizes for a coordinated gift set β€” it makes a lovely present.

Common Mistakes & How to Fix Them

βœ— Skipping stitch markers when working in continuous rounds leads to misplaced increases or decreases; place a marker at the first stitch of every round and move it after each round to maintain correct stitch counts. βœ— Not stuffing in stages causes lumps or uneven shaping; stuff gradually, adding small amounts at a time and shaping as you go to achieve a smooth potato form. βœ— Forgetting to count stitches frequently results in incorrect sizing and shaping; count your stitches after each round, especially after increases and decreases, to catch mistakes early. βœ— Placing safety eyes too low or too close together can look awkward; follow the placement instruction exactly (between rows 5 and 6 with 3 sts between) and check placement before securing or embroider instead for safety. βœ— Pulling your final closing thread too tightly without evenly distributing the stitches can pucker the body; gently weave the tail through the last stitches, pull evenly and tidy with a yarn needle so the closure is smooth.

Positive Potato Amigurumi Pattern

Make a tiny, cheerful Positive Potato keychain with this quick and friendly crochet pattern. You will love how fast these little potatoes come together β€” perfect for gifts, classroom rewards, or pocket-sized cheer. The pattern uses simple stitches and clear instructions so you can crochet with confidence and creativity. Finished size is approximately 7 cm (2.75").

Beginner Friendly 1-2 Hours

Materials Needed for Positive Potato Amigurumi Pattern

β€” Main Fabric

  • 01
    20g 8ply (DK) yarn in beige or any potato-coloured yarn (any yarn and crochet hook can be used as size is unimportant)
  • 02
    Black yarn - small amount to embroider mouth
  • 03
    Stuffing - small amount for a 7 cm potato
  • 04
    2 x 8mm safety eyes (use embroidered eyes if for a child under 3)
  • 05
    Small clip or clasp for attaching to backpacks or keyrings (optional)

β€” Tools Required

  • 01
    Crochet hook size 3.5mm (UK 9, US 4)
  • 02
    Scissors
  • 03
    Yarn needle for sewing and weaving in ends
  • 04
    Stitch marker (or scrap yarn) to mark the beginning of rounds
  • 05
    2 x 8mm safety eyes (or embroidery needle and black yarn for embroidered eyes)
  • 06
    Polyester stuffing
  • 07
    Pins for assembly and positioning arms/saying
  • 08
    Printer and sticky tape to print and strengthen the small 'saying' paper (optional)
  • 09
    Small clip or keyring clasp for attaching to bags (optional)

Progress Tracker

0% Complete

β€” Body :

Round 1 :

With 3.5 hook and 8ply yarn, 6dc into magic circle (6)

Round 2 :

2dc in each around, (12), PM and move after every round

Round 3 :

(dc, 2dc) around, (18)

Round 4-8 :

dc around, (5 rounds)

Info :

Place eyes between rows 5 and 6 with 3 sts in between.

Round 9 :

(dc 5, 2dc) around, (21)

Round 10 :

dc around,

Round 11 :

(dc 6, 2dc), around, (24)

Round 12 :

dc around,

Round 13 :

(dc 6, dc dec) around, (21)

Round 14 :

(dc 5, dc dec) around, (18)

Round 15 :

(dc, dc dec) around, (12)

Info :

Stuff potato

Round 16 :

(dc dec) around, (6), top up stuffing, cut yarn and thread through the last 6sts and pull up tight, FO

β€” Arms/hand :

Round 1 :

Leaving a long end, ch 3, turn

Round 2 :

dc in 2nd ch from hook, dc, (2), turn

Round 3-4 :

ch 1, dc 2

Round 5 :

dc dec, FO leaving a long end of yarn.

β€” Assembly :

Info :

Print the sheet of 'sayings'. Cut out your chosen 'saying' leaving a margin on each side (see pic).

Info :

Place a piece of sticky tape across the 'saying' to strengthen it.

Info :

Centre the 'saying' on the body of the potato, place the arms on each side so that the hands are on the margin of the 'saying' (see pic). Pin the arms in place and using the long yarn end, stitch firmly across the end.

Info :

Using the long end of yarn, at the hand end, and holding the 'saying' in place, push the needle through the 'saying' in the middle of the margin, (see pic), secure the end firmly by weaving through the body.

Info :

Make a mouth using black yarn.

Info :

Attach a clasp or keyring chain, (optional)

Assembly Instructions

  • Centre the printed and taped 'saying' on the front of the potato body and pin it in place so it is level with the eyes.
  • Position the two arms on either side of the saying so the hands sit on the paper margin, then pin the arms in place for symmetry.
  • Using the long yarn end from each arm, stitch each arm securely to the body across the hand end and weave the yarn through the body to lock it in place.
  • With the long yarn tail and a needle, push through the margin of the saying in the middle and stitch through to the body, securing the paper so it cannot move.
  • Embroider a small mouth with black yarn and attach a clasp or keyring chain to the top center of the potato if making a keychain (optional).

Important Notes

  • πŸ’‘Use safety eyes only for items not intended for children under 3; embroider eyes instead if the toy is for a young child.
  • πŸ’‘Place eyes between rows 5 and 6 with exactly 3 stitches between them for correct facial placement.
  • πŸ’‘Stuff gradually and shape as you go to achieve a smooth rounded potato shape without lumps.
  • πŸ’‘Leave long yarn tails on the arms for sewing in place; this makes secure attachment much easier and neater.

These tiny Positive Potatoes are designed to bring a smile and a little encouragement wherever they go. They are quick to make, wonderfully portable, and perfect as gifts or classroom treats. Customize the sayings and faces to create a collection of cheerful mini potatoes. πŸ₯”πŸ§Άβœ¨

You ask,

we answer.

FAQs

What size will the finished piece be?

The finished amigurumi measures approximately 7 cm (2.75 inches) tall when made with 8ply (DK) yarn and a 3.5 mm hook.

Can I use different yarn weights for this pattern?

Yes, you can use different yarn weights, but the finished size will change; use a larger hook for bulkier yarn or a smaller hook for finer yarn and adjust stuffing accordingly.

Are safety eyes safe for children?

Safety eyes are fine for adult-made decor but not recommended for toys intended for children under 3; embroider the eyes with black yarn instead for child-safe versions.

How long does this project typically take to complete?

This is a quick make; most crafters can complete one Positive Potato in under two hours, depending on experience and finishing speed.