🧢 Beautiful ✨ Detailed πŸ’ Adorable

Pusheen Cat with Ice Cream Amigurumi Pattern

Pusheen Cat with Ice Cream Amigurumi Pattern
4.6β˜… Rating
5-7 Hours Time Needed
2.2K Made This
βœ‚οΈ

Intermediate Level

Ideal for those with basic crochet experience, featuring slightly more advanced stitches and techniques to expand your skills.

⏱️

Weekend Treat

Takes 5-7 hours, making it an enjoyable project to finish over a couple of days.

🧸

Cute Companion

An adorable friend to cherish, handcrafted with love to bring comfort and joy for years to come.

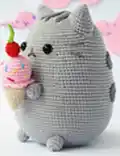
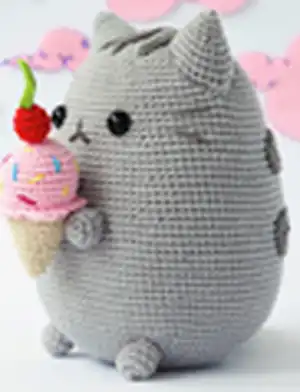
About This Pusheen Cat with Ice Cream Amigurumi Pattern

This pattern creates a sweet Pusheen-style cat holding an ice cream cone, worked in continuous spiral rounds with separate pieces sewn on. The design includes stripes, a striped tail, tiny feet and a small ice cream with sprinkles and a cherry. You will learn shaping with increases and invisible decreases, plus simple surface embroidery for whiskers and hair detail.

Pusheen Cat with Ice Cream Amigurumi Pattern crochet pattern - detailed view of completed project

Finished size is approximately 17 cm using recommended yarn and hook. The pattern lists all materials, abbreviations and step-by-step rounds for each piece.

Why You'll Love This Pusheen Cat with Ice Cream Amigurumi Pattern

I absolutely love this pattern because it captures the playful charm of Pusheen in a compact and huggable amigurumi. I enjoy the clear shaping that creates a rounded, stable body and the fun detail work like stripes, hair and a tiny ice cream. I appreciate how the pattern is written in continuous rounds, which gives a smooth, seamless finish that looks professional. I also love that it includes small accessories (ice cream and cherry) that let you add personality and color to each finished toy.

Pusheen Cat with Ice Cream Amigurumi Pattern step 1 - construction progress Pusheen Cat with Ice Cream Amigurumi Pattern step 2 - assembly progress Pusheen Cat with Ice Cream Amigurumi Pattern step 3 - details and accessories Pusheen Cat with Ice Cream Amigurumi Pattern step 4 - final assembly and finishing

Switch Things Up

I love experimenting with colors when I make this Pusheen pattern; try pastel greys and soft pinks for a sweeter look.

I often swap the ice cream colors for seasonal palettes β€” pumpkin orange for fall or mint green for a spring vibe.

I sometimes use a bulkier yarn and a larger hook to create a chunky, cuddly version that finishes much bigger and squishier.

For a tiny keychain version I use thin sport yarn and a smaller hook; it makes a cute pocket-sized Pusheen.

I like to add felt clothes or tiny crocheted accessories like a scarf or bow to personalize each cat I make.

You can change eye sizes to alter the expression β€” smaller eyes for a cuter, more subtle look; larger eyes for a more cartoonish effect.

I often embroider different whisker styles or give Pusheen a small smile to change the personality of the toy.

Try adding wire inside the tail or limbs if you want poseable elements, but secure and cover wire carefully for safety.

I recommend experimenting with different stripe patterns on the back to create unique characters from the same base pattern.

If I want a more textured surface I stitch the stripes in a contrasting yarn and embroider over them for added definition.

Common Mistakes & How to Fix Them

βœ— Skipping a stitch marker when working continuous spiral rounds causes you to lose your starting point; place a marker in the last stitch of each round and move it up as you go. βœ— Forgetting to add safety eyes before closing the head results in having to reopen seams; attach the eyes between rounds 42 and 43 with 11 stitches between them before stuffing. βœ— Overstuffing the head or body will distort shaping and make sewing parts difficult; stuff gradually and add small amounts until you achieve the desired shape. βœ— Not checking stitch counts after increases or decreases leads to uneven shaping; count stitches regularly, especially after increase/decrease rounds to ensure accuracy. βœ— Changing colors without securing ends can cause unraveling later; carry colors neatly or leave long tails to weave in and secure them before finishing. βœ— Rushing invisible decreases can create visible gaps or bumps in the fabric; work invdec carefully and maintain even tension to keep a smooth finish.

Pusheen Cat with Ice Cream Amigurumi Pattern

Make an adorable Pusheen cat holding a tiny ice cream with this charming amigurumi pattern. You will enjoy the clear, step-by-step rounds and easy-to-follow assembly instructions to create a cuddly 17 cm plush. The pattern includes full details for stripes, tail, ears, hands, ice cream scoop and cherry so you can finish a polished toy. Perfect for gifting or keeping as a cute handmade companion.

Intermediate 5-7 Hours

Materials Needed for Pusheen Cat with Ice Cream Amigurumi Pattern

β€” Main Fabric

  • 01
    Light grey DK light worsted (number 3) yarn - 100-150 g (main body)
  • 02
    Dark grey DK light worsted (number 3) yarn - small amount for stripes and tail
  • 03
    Light brown sport/baby yarn (number 2) - small amount for ice cream cone
  • 04
    RosΓ© sport/baby yarn (number 2) - less than 50 g for ice cream scoop
  • 05
    Red sport/baby yarn (number 2) - less than 50 g for cherry
  • 06
    Green sport/baby yarn (number 2) - less than 50 g for cherry stalk
  • 07
    Embroidery thread or dark grey/black yarn for nose, mouth and whiskers - small amount

β€” Tools Required

  • 01
    Crochet hook size 4/2.5 mm
  • 02
    Safety eyes 12 mm (2 pieces)
  • 03
    Stitch markers (use a stitch marker in the last stitch of each round)
  • 04
    Yarn needle for sewing and weaving ends
  • 05
    Embroidery needle
  • 06
    Pin-needles
  • 07
    Scissors
  • 08
    Polyester stuffing

Progress Tracker

0% Complete

β€” Head/Body :

Round 1 :

6 sc in magic ring (6)

Round 2 :

2 sc in each stitch around (12)

Round 3 :

(1 sc, inc) x6 (18)

Round 4 :

(2 sc, inc) x6 (24)

Round 5 :

(3 sc, inc) x6 (30)

Round 6 :

(4 sc, inc) x6 (36)

Round 7 :

(5 sc, inc) x6 (42)

Round 8 :

(6 sc, inc) x6 (48)

Round 9 :

(7 sc, inc) x6 (54)

Round 10 :

(8 sc, inc) x6 (60)

Round 11 :

(9 sc, inc) x6 (66)

Round 12 :

(10 sc, inc) x6 (72)

Round 13 :

(11 sc, inc) x6 (78)

Round 14 :

(12 sc, inc) x6 (84)

Round 15 :

(13 sc, inc) x6 (90)

Round 16 :

(14 sc, inc) x6 (96)

Round 17-30 :

sc around (96)

Round 31 :

14 sc, invdec (90)

Round 32-35 :

sc around (90)

Round 36 :

(13 sc, invdec) x6 (84)

Round 37-40 :

sc around (84)

Round 41 :

(12 sc, invdec) x6 (78)

Round 42-43 :

sc around (78)

Round 44 :

(11 sc, invdec) x6 (72)

Round 45-48 :

sc around (72)

Round 49 :

(10 sc, invdec) x6 (66)

Info :

Add safety eyes between round 42 and 43. With 11 stitches in between. Stuff as you go.

Round 50 :

(9 sc, invdec) x6 (60)

Round 51 :

(8 sc, invdec) x6 (54)

Round 52 :

(7 sc, invdec) x6 (48)

Round 53 :

(6 sc, invdec) x6 (42)

Round 54 :

(5 sc, invdec) x6 (36)

Round 55 :

(4 sc, invdec) x6 (30)

Round 56 :

(3 sc, invdec) x6 (24)

Round 57 :

(2 sc, invdec) x6 (18)

Round 58 :

(1 sc, invdec) x6 (12)

Round 59 :

invdec around (6)

Info :

To close the last round, cut yarn, leaving a yarn end. With a yarn-needle go into outer loops from inside out, pull tight to close hole.

β€” Ears (2x) :

Round 1 :

6 sc in magic ring (6)

Round 2 :

(1 sc, inc) x3 (9)

Round 3 :

sc around (9)

Round 4 :

(1 sc, inc) x3, 3 sc (12)

Round 5 :

(1 sc, inc) x6 (18)

Round 6 :

sc around (18)

Round 7 :

(1 sc, inc) x6, 6 sc (24)

Round 8 :

sc around (24)

Round 9 :

(2 sc, inc) x6, 6 sc (30)

Info :

Cut yarn. Keep a longer yarn tail for sewing. The side with the increases will later be at the outer edge of the head and the side without will be on the inner side.

β€” Stripes on the back :

Info :

With dark-grey. Leave a long piece of yarn to sew the stripes to the back later.

Smaller stripe R1 :

ch 26, beginning in second ch from hook 25 sc, ch1, turn

Smaller stripe R2 :

25 sc, ch 1, turn

Smaller stripe R3 :

25 sc, (inc) x3, 22 sc, (inc) x3, slst (60)

Bigger stripe R1 :

ch 29, beginning in second ch from hook 28 sc, ch 1, turn

Bigger stripe R2 :

29 sc, ch 1, turn

Bigger stripe R3 :

27 sc, (inc) x3, 26 sc, (inc) x3, 1 sc, slst (67)

β€” Tail :

Round 1 :

6 sc in magic ring (6)

Round 2 :

2 sc in each stitch around (12)

Round 3-4 :

sc around (12)

Info :

Color change to light-grey

Round 4-7 (4 rounds) :

sc around (12)

Info :

Change to dark-grey

Round 7-10 (4 rounds) :

sc around (12)

Info :

Change to light-grey

Round 11-14 (4 rounds) :

sc around (12)

Info :

Change to dark grey:

Round 15-18 (4 rounds) :

sc around (12)

Info :

Stuff tail. Hold both sides of the last round together. Slst across to close the tail. Cut yarn, leaving a yarn end for sewing on the body later.

β€” Hands/Feet (x4) :

Round 1 :

6 sc in magic ring (6)

Round 2 :

2 sc in each stitch around (12)

Round 3-4 :

sc around (12)

Round 5 :

(1 sc, invdec) x3, 3 sc (9) Stuff.

β€” Ice Cream :

Round 1 :

6 sc in magic ring (6)

Round 2 :

2 sc in each stitch around (12)

Round 3 :

(1 sc, inc) x6 (18)

Round 4 :

(2 sc, inc) x6 (24)

Round 5 :

(3 sc, inc) x6 (30)

Round 6-10 :

sc around (30)

Round 11 :

(3 sc, invdec) x6 (24)

Round 12 :

in FLO: [hdc + sc]* x3, slst in next stitch, skip one stitch] repeat around *in same stitch

Round 13 :

in BLO sc around (24)

Info :

Color change to brown for cone

Round 14-15 :

Sc around (24)

Round 16 :

(3 sc, invdec) x5 (20)

Round 17 :

sc around (20)

Round 18 :

(2 sc, invdec) x5 (16)

Round 19 :

sc around (16)

Info :

Stuff icecream.

Round 20 :

(1 sc, invdec) x5 (10)

Round 21 :

sc around (10)

Round 22 :

Invdec around (5)

Info :

Cut yarn, hide yarn end. Embroider sprinkles.

β€” Cherry :

Round 1 :

6 sc in magic ring (6)

Round 2 :

2 sc in each stitch around (12)

Round 3-4 :

sc around (12)

Info :

Stuff.

Round 4 :

invdec around (6)

Info :

Close last round

Info :

With green yarn. Ch 11, beginning in second ch from hook slst 10. Fasten off. Sew stalk to cherry. Sew cherry on ice cream.

β€” Assembly :

Info :

Sew on ears, tail and feet. Position the tail and feet so that the cat can stand.

Info :

Sew on stripes, the smaller stripe on top. Embroider on hair, by taking the yarn double and going over each stripe twice.

Info :

Embroider on nose/mouth with dark grey/black yarn between the eyes. Embroider on whiskers.

Info :

Then position the ice cream and sew on the hands to the body. Sew ice cream to the hands.

Assembly Instructions

  • Sew on ears to the top sides of the head, aligning the increases to the outer edge and using the longer yarn tail for secure sewing.
  • Position and sew the tail onto the lower back of the body so the cat balances and can stand upright.
  • Attach the feet evenly at the base of the body so the cat sits steadily; reposition to check balance before final sewing.
  • Sew the stripes onto the back, placing the smaller stripe above the larger stripe and using a long yarn tail to secure them from the inside.
  • Embroider hair lines, nose, mouth and whiskers after features are positioned, then sew the ice cream to the hands and secure hands to the body.

Important Notes

  • πŸ’‘Use stitch markers and place one in the last stitch of each round to track your starting point for continuous spiral rounds.
  • πŸ’‘Stuff pieces gradually and consistently for a smooth shape; overstuffing can distort the amigurumi's proportions.
  • πŸ’‘Add safety eyes before closing the head; attach them between rounds 42 and 43 with 11 stitches between them for correct spacing.
  • πŸ’‘Work in continuous spiral rounds without slipstitch joins to maintain a seamless appearance as noted in the pattern.
  • πŸ’‘Keep long yarn tails when cutting off pieces intended for sewing so you have enough to securely attach parts.

This adorable Pusheen Cat with Ice Cream is perfect for gifting or brightening your shelf with handmade charm. The pattern guides you through every round so you can create a polished, cuddly friend with personality. Enjoy every stitch and celebrate your finished Pusheen! 🧢😸

You ask,

we answer.

FAQs

What size will the finished piece be?

The finished amigurumi measures approximately 17 cm tall when using the recommended DK yarn (#3) and 2.5 mm hook.

Can I use different yarn weights for this pattern?

Yes, you can substitute yarn weights but this will change the final size; adjust the hook size accordingly for gauge and proportions.

Do I need prior crochet experience for this pattern?

This pattern is rated intermediate, so basic knowledge of single crochet, increases, invisible decreases and working in the round is recommended.

How long does this project typically take to complete?

Most crocheters complete this project in 5-7 hours, though time may vary depending on experience and how many accessories you add.

Where should I place the safety eyes?

Attach the safety eyes between rounds 42 and 43 with 11 stitches between them before stuffing the head to ensure correct placement.