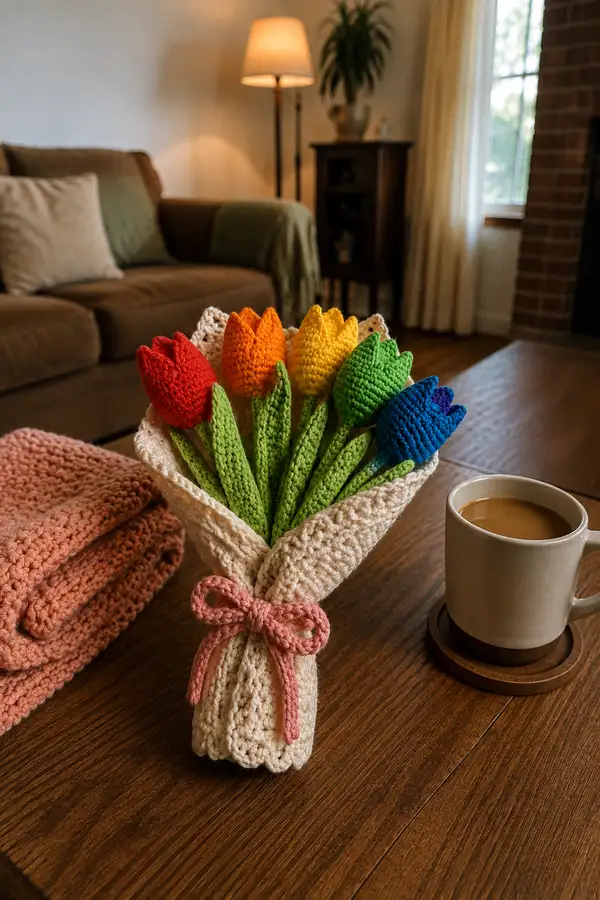
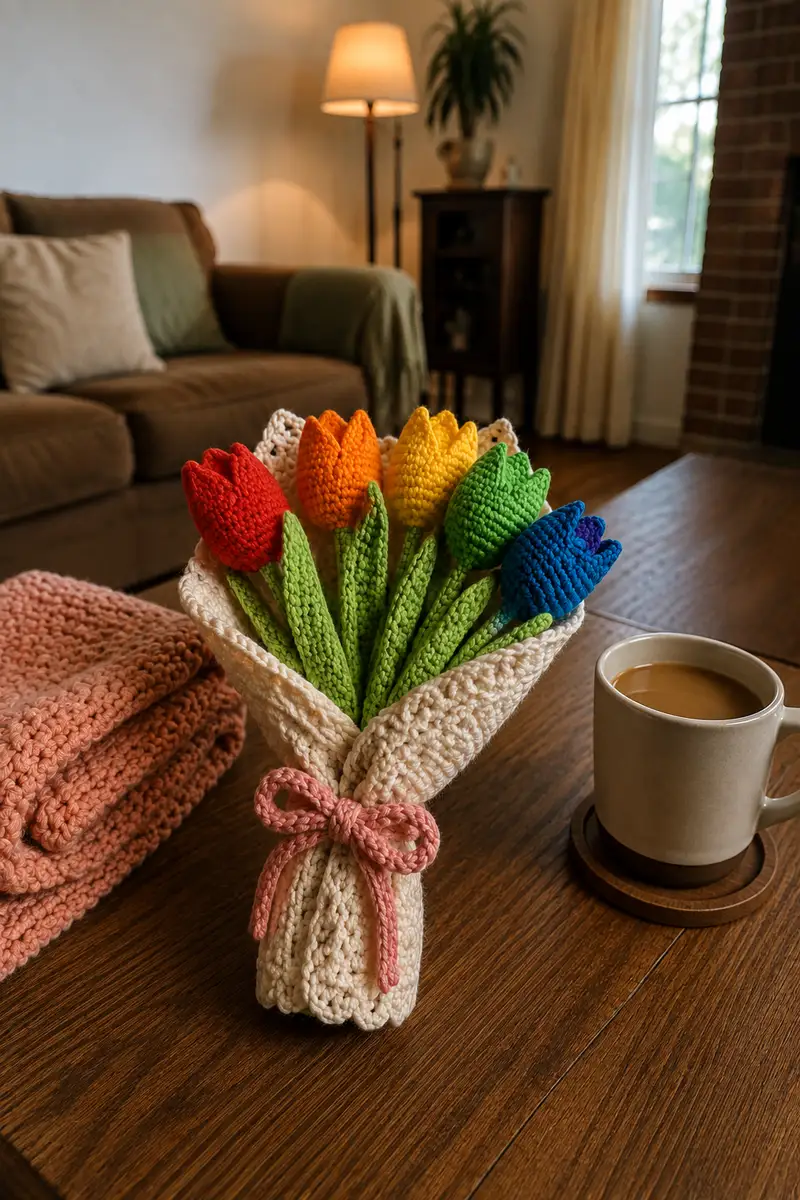
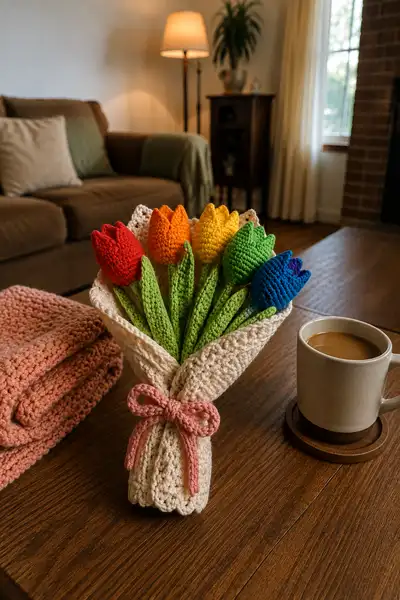
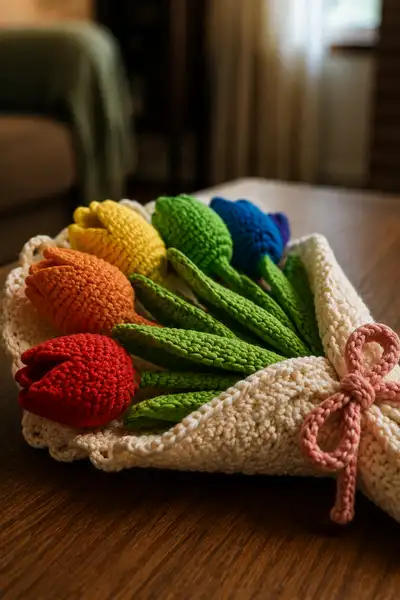
Create a bright, handmade bouquet of crochet tulips that look fresh year-round. This pattern includes fully shaped tulip heads, long stitched stems, tapered leaves, a scalloped wrap and a pretty bow — all shown in a rainbow of colors. Sturdy cotton yarn gives each flower crisp petals and a clean finish, perfect for gifting or decorating. Detailed step-by-step instructions make assembly and finishing straightforward.
Progress Tracker
0% Complete
— Notes :
Info :
This pattern is written for one tulip and includes instructions to make six flowers (red, orange, yellow, green, blue, purple). Use cotton or cotton-blend worsted weight yarn for crisp petals and structure. Work in continuous rounds unless otherwise specified. Use a stitch marker to mark first stitch of each round. Repeat sections as instructed to make additional flowers.
— Tulip Head (Make 6 - one per color) :
Round 1 :
6 sc in magic ring (6)
Round 3 :
(1 sc, 1 inc) x 6 (18)
Round 4 :
(2 sc, 1 inc) x 6 (24)
Round 5 :
(3 sc, 1 inc) x 6 (30)
Round 6 :
(4 sc, 1 inc) x 6 (36)
Info :
Change to your tulip color if you began the head with a neutral. From Round 6 onward the head is worked entirely in the tulip color. Keep tension even so the petal shaping rows will sit neatly.
Round 7 :
(5 sc, 1 inc) x 6 (42)
Round 8 :
(6 sc, 1 inc) x 6 (48)
Round 9-12 :
1 sc in each st (48) (work four rounds even to build head height)
Info :
At the end of Round 12 place stitch markers to divide the 48 stitches into 6 equal sections of 8 stitches — these mark the base positions of the 6 petals that will form at the top of the tulip. Count and confirm sections now so petals align symmetrically.
Round 13 :
(6 sc, 1 dec) x 6 (42)
Round 14 :
(5 sc, 1 dec) x 6 (36)
Round 15 :
(4 sc, 1 dec) x 6 (30)
Info :
Stuffing :
Begin adding a small amount of stuffing firmly but not overly tight. The tulip head needs enough stuffing to give shape but still allow the petals to be flexible. Continue stuffing after each decrease round to maintain evenness.
Round 16 :
(3 sc, 1 dec) x 6 (24)
Round 17 :
(2 sc, 1 dec) x 6 (18)
Round 18 :
(1 sc, 1 dec) x 6 (12)
Info :
At this point the head is a closed small ball. We will open and reform the top to create the petal edges. Fasten off leaving a long tail (20-30 cm) for sewing later, but do not close completely if you plan to insert stem through center.
Round 20 - Petal Base Re-form :
Rejoin yarn at top of head where you want the first petal cluster (this will be worked across the top of the head). Using sl st and ch to form base: *sl st into next st, ch 2, sc in same st, sl st into next* around to create 6 small loops — place each loop at the 6 marked sections (these are not counted stitches, they are petal anchor points).
Info :
These petal anchors will receive the petal shaping rows. Use your stitch markers placed previously to find the correct positions. Petals are worked as short clusters across several top stitches to create the tulip crown.
Round 21 - Petal Round A :
Working into the first petal anchor: ch 1, (sc, hdc, 2 dc) in the anchor loop, sl st to next anchor, (sc, hdc, 2 dc) in next anchor — repeat for all 6 anchors. After the 6th petal sl st to join and finish the round. (This creates 6 petal clusters made of a small fan each.)
Round 22 - Petal Round B :
For each petal fan: ch 1, in same petal fan work (sc, sc, hdc, dc, dc) to lengthen petal; sl st to base between fans. Repeat across all 6 petals to form pointed tulip petals; finish with a sl st and fasten off, leaving a tail for sewing if needed.
Info :
Adjust petal height by adding or subtracting a row of increases to make petals taller or shorter. If you prefer rounded petals, substitute (sc, hdc, 2 dc, hdc, sc) for a fuller shape. Weave in tails or leave for sewing to stem.
— Flower Interior Option (Optional - small inner petal) :
Round 1 :
With a slightly darker or contrasting color, ch 4, join to form ring, ch 1, 6 sc in ring (6)
Round 2 :
(1 sc, inc) x 3 (9)
Round 3 :
1 sc in each st (9)
Info :
Sew this little cup inside the top of the head before finishing petal shaping to give depth and a pop of color visible between petals if desired.
— Stem (Make 6) :
Round 1 :
6 sc in magic ring (6)
Round 3 :
1 sc in each st (12)
Info :
For a sturdier stem suitable for posing, insert a length of floral wire or pipe cleaner through the center of the tube before you finish stuffing. Trim the wire so two to three inches extend into the head where you will secure it with whip stitches. Fold wire ends over or cap them to avoid sharp points.
Round 4-30 :
1 sc in each st (12) — work 27 rounds even to desired stem length (approx 24-28 cm depending on yarn and tension). Adjust number of rounds to create shorter or longer stems for arrangement variety.
Round 31 :
(3 sc, 1 dec) x 3 (9) — narrow slightly at base if you will insert the stem into a foam holder or into the wrap tip
Round 32 :
1 sc in each st (9)
Info :
Stuff the stem lightly as you go. A firm stem at the base is not necessary — we want the stem to feel natural. If inserting wire, stuff around the wire to create a smooth exterior. Fasten off leaving a long tail for sewing to the head.
— Leaves (Make 12 total - 2 per stem) :
Round 1 :
Ch 12, sc in 2nd ch from hook, sc in next 3 ch, hdc in next 2 ch, dc in next 2 ch, hdc in next ch, sc in last 2 ch (count back along other side of chain: sc in same last ch, sc in next ch, hdc in next, dc in next 2, hdc in next 2, sc in next 3) — join with sl st to first sc. (This creates a symmetrical leaf shape approximately 14-16 sts around)
Info :
Work the leaf flat in rows or join and work in rounds. For a ribbed texture work 1–2 rows in BLO so the raised ribs mimic leaf veins. Pin the leaf on a flat surface and lightly shape with steam or damp blocking if cotton yarn allows.
Round 2 :
Ch 1, 1 sc in each st around for one round to even the edge (approx 16 sc). Fasten off leaving long tail for sewing. If you prefer a pointed leaf, perform decreases toward the tip during the rounds: (sc2tog) over the tip area for two rounds.
Round 3 :
Optional: Add a central vein by embroidering a line of sl sts along the leaf center using contrasting green or same green color.
Info :
Each leaf should be approximately 12-18 cm long depending on tension. Make two leaves per stem: one larger & one slightly smaller for a natural arrangement. If you used BLO to create texture, the leaf will naturally curl and can be flattened when arranging.
— Wrap / Bouquet Cone :
Info :
The wrap is worked flat as a long rectangular panel that will be folded into a cone and secured around the stems. Use the cream/neutral color shown. You may hold yarn doubled for a thicker, softer wrap if desired.
Round 1 (Row 1) :
Ch 48 (or ch 56 if you want a wider wrap). Row 1: sc in 2nd ch from hook and across. (47 sc)
Round 2 (Row 2) :
Ch 1, turn, sc in BLO across (47) — this creates a subtle ridge edge suitable for folding.
Round 3-12 (Rows 3-12) :
Ch 1, turn, sc across (47) — continue even to build length to approximately 30-35 cm (10 rows will create a medium-length wrap; add rows if you want a longer wrap)
Info :
If using worsted held double, you may need fewer rows to achieve the same height. The wrap pictured has a scalloped edge at the top — we'll add the scallop after the panel is complete. Block or steam lightly to shape the panel before folding.
Round 13 (Scallop Edge) :
Along the top edge sc the length, then work scallops: *skip 2 sts, 5 dc in next st, skip 2 sts, sl st in next st* across to create shallow scallops. Fasten off and weave ends.
Round 14 (Finishing bottom) :
Fold the panel diagonally into a cone and seam the shorter side using whip stitch. Add a few reinforcing stitches along the seam to keep a cone shape. Turn cone so scalloped edge is at top.
Info :
Trim any excess so that cone sits upright when you insert the stems. If the cone is floppy, add a round of single crochet along the bottom to stiffen or insert a disposable cardboard circle at the base for stability.
— Bow / Cord :
Round 1 :
Ch 60 (or longer for bigger bow), sl st into 2nd ch from hook and across working slip stitches back along chain to form a firm cord. Fasten off and leave tails for tying. Alternatively, braid three strands of yarn for a textured cord.
Round 2 :
To form looped bow, fold cord into a loop and secure center with a short length of yarn wrapped tightly, then shape loops and fasten.
Info :
Make a decorative bow and sew or glue it to the wrap cone. You can also make the bow removable by tying it around the cone rather than sewing it on.
— Assembly & Finishing :
Info :
Before assembly, block leaves and wrap panel if needed. Arrange flowers by alternating colors and stem heights for a natural bouquet. Trim any excess yarn tails and weave in ends before final placement in wrap.
Step :
Insert stem: push stem through the center hole at the base of each tulip head and center the head on the stem. Sew the head to the stem opening with a yarn tail from the head using matched yarn and a yarn needle. Whip stitch through the last round of the head to the top few rounds of the stem to secure.
Step :
Attach leaves: Position leaves along lower third of each stem. Sew each leaf on by the short tail left at the leaf base, stitching through the stem tube and wrapping around to hide stitches. Attach one larger leaf and one slightly smaller opposite it for balance.
Step :
Arrange stems: Group the six stems together, vary lengths by trimming the bottom of stems (cut woven yarn or leave longer and tuck) so some tulips sit slightly higher. Secure the stems inside the wrap cone with a few stitches around the center or with a small elastic temporarily while sewing the wrap seam closed around them.
Info :
If you inserted floral wire, be sure to wrap the wire with floral tape or felt before final assembly to prevent scratching the wrap lining or poking through the cone.
Step :
Finish wrap: Fold the top scalloped edge of the wrap outward as pictured. Tuck stems inside and gather the wrap at the base. Tie the braided bow around the gathered area and sew a few stitches through the wrap layers to keep it secure if you plan to ship the bouquet.
Step :
Final shaping: Gently bend or shape petals and leaves by hand for a florist-like arrangement. Use light steam from an iron (if yarn fiber tolerates heat) to set curves, being careful not to press directly on petals.
Info :
Weave in all ends and trim tails close. For extra longevity, you can add a small dab of fabric glue at joins or apply a protective spray suitable for yarn to keep colors vibrant.
— Alternative Flower Size (Optional) :
Info :
To make smaller or larger tulips change hook size or yarn weight. For smaller tulips use fingering or sport weight yarn with a 2.5–3.0 mm hook and reduce rounds proportionally; for larger statement blooms use bulky yarn with a 5.0 mm hook.
— Troubleshooting Tips (throughout) :
Info :
If the head looks lumpy, redistribute stuffing by pushing it gently from the outside to fill any hollow areas. If petals flare too widely, add an additional inner round at the petal base to tighten the crown. If stems wobble, insert a longer piece of wire and wrap it with extra yarn for thickness. Always test a single flower assembly before committing to all six to adjust proportions and contrast to your taste.
Your rainbow tulip bouquet is now complete — a cheerful, long-lasting arrangement that brightens any tabletop! I love how the cotton yarn creates crisp petals with a clean, modern look. Tuck it into a vase or gift the bouquet wrapped in the included cone for a handcrafted present full of charm. 🌷🧶💛