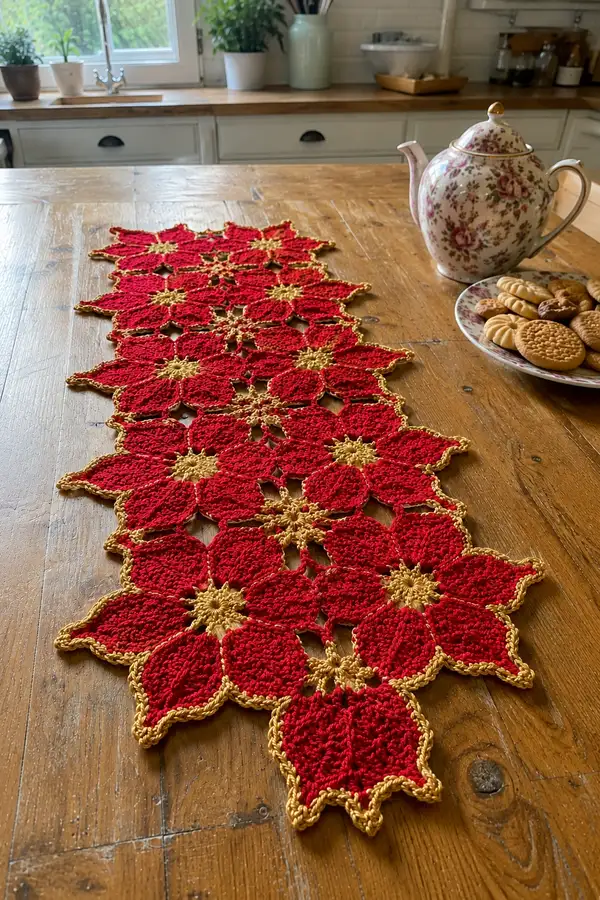
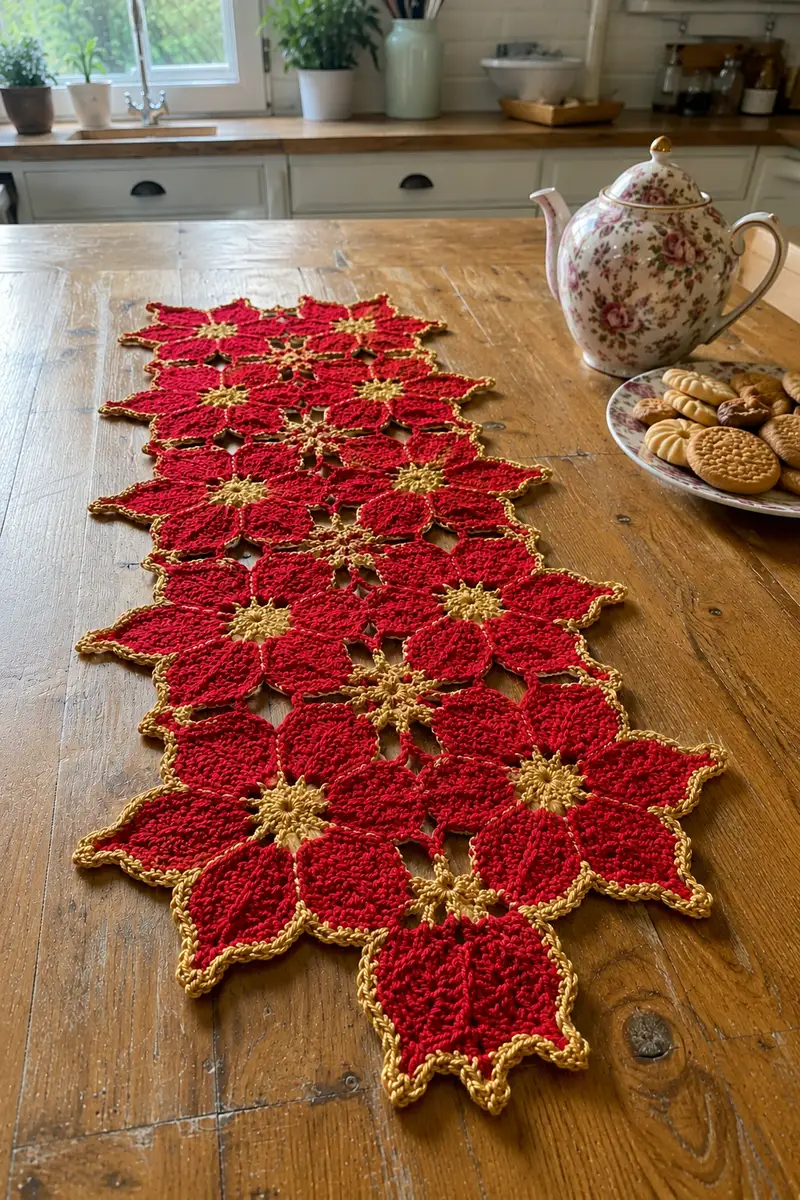
Create a festive Red and Gold Christmas Poinsettia Table Runner with modular floral motifs joined into a long runner. This pattern uses small star centers in gold and large layered petals in rich red with a decorative gold braided edge. The finished runner lays flat with an elegant scalloped border and openwork joins that let the tabletop peek through—perfect for holiday displays or as a handmade gift.
Progress Tracker
0% Complete
— Notes & Gauge :
Info :
This pattern is worked in two yarn colors: Gold for center stars and edging; Red for petals and motif body. Gauge is not critical for this decorative piece but consistent motif size is important. Sample motif should measure approximately 11-12cm (4.25-4.75in) across from petal tip to petal tip when worked in worsted cotton and blocked. Maintain consistent tension and block motifs after joining for best drape.
— Poinsettia Motif (Full) :
Round 1 :
With Gold, 6 sc in magic ring (6)
Round 2 :
Inc in each st around (12)
Round 3 :
(1 sc, inc) x 6 (18)
Round 4 :
(2 sc, inc) x 6 (24)
Info :
At the end of Round 4 you have a small gold disk that will form the inner star base. Keep the ring fairly flat by working loosely in the first few rounds if using cotton yarn.
Round 5 :
(3 sc, inc) x 6 (30)
Round 6 :
1 sc in each st around (30)
Info :
Change to Red at the end of Round 6. Fasten off Gold with a long tail for later joining or weave tail to WS. Join Red with sl st in any stitch to begin petal base rounds.
Round 7 :
Switch to Red. *Ch 8, skip 3 sts, sl st in next st; rep from * around to make 6 chain-loops and then adjust to create 8 equal chain loops. If your motif has 30 sts, space 8 loops by making 8 sl st anchors approximately every 3-4 stitches—aim for 8 petals total (work 8 loops evenly spaced). Fasten off and prepare to work petals in joined round. (Chain loop count will create 8 petals).
Info :
The pattern uses 8 petals. If you prefer 6 petals, re-space loops accordingly (use 6 loops and reduce stitch count per petal instructions proportionally).
Round 8 :
Join Red to first chain-loop with a sc. In same chain-loop work: sc, hdc, 3 dc, tr, 3 dc, hdc, sc (this makes the petal's first row - 12 stitches in petal). Sl st into next chain-loop anchor. Rep petal sequence into each loop for a total of 8 petals. After 8th petal sl st to first st of first petal to join (96 sts across the petal round but worked as 8 petals).
Info :
Count stitches within a petal to keep consistency. Each petal should feel slightly raised by the trebles to create texture. Place a stitch marker at the first stitch of the first petal to help with orientation for subsequent rounds.
Round 9 :
Working around petals in continuous round: In each petal work (ch 1, sc in first st, sc in next 3 sts, hdc in next 2 sts, dc in next 2 sts, hdc in next 2 sts, sc in next 2 sts) then sl st to join to base between petals (approx 10-12 sts per petal) (approx 80-96 sts total depending on spacing)
Round 10 :
1 sc in each st around across petals to create a smoother surface (same stitch count as previous round)
Info :
Use FLO on Round 10 if you want a subtle ridge at the petal base: work 1 sc in each st FLO to make the petal center sit slightly raised from the join points.
Round 11 :
Petal shaping: *Work 2 sc in next st, hdc in next 2 sts, 3 dc in center 3 sts of petal, hdc in next 2 sts, 2 sc in next st. Sl st to next petal base. Rep across all 8 petals (this increases each petal by 4 sts approx)
Round 12 :
1 sc in each st around (maintain stitch count from Round 11)
Round 13 :
Texture row: In each petal work (sc, BLO hdc x2, BLO dc x3, BLO hdc x2, sc) to emphasize vertical ridges (stitch count per petal remains consistent)
Round 14 :
1 sc in each st around to even out the petal surface
Info :
Now the petals are forming height and texture. Place motifs flat and measure petal-to-petal diameter—adjust tension if petals vary. If petals are curling, block them lightly with steam and pins to flatten.
Round 15 :
Outer petal shaping: In each petal work (ch 2, skip 1 st, sc in next st, hdc in next st, dc in next 2 sts, tr in center st, dc in next 2 sts, hdc in next st, sc in next st, skip 1 st, ch 2) then sl st to join at petal base to create a pointed tip—this forms a scalloped tip along each petal. Repeat for all petals.
Round 16 :
Edge refine: 1 sc in each st and in each chain-2 space around petals, placing 3 sc at tips to form a crisp point. (Count will vary depending on previous shaping, expected ~120 sts across outer round)
Info :
If you prefer a fuller petal, add an extra round here of (inc evenly across each petal center) before edge refine. Continue checking symmetry by lining up centers of each petal.
Round 17 :
Decorative ridge row: *In each petal work (sc in next 2 sts, fpdc around post of previous row 3 sts to form raised vein, sc in next 2 sts), sl st to next petal. Repeat for 8 petals to create visible veins on petals.
Round 18 :
1 sc in each st around to tidy the ridge work (same stitch count as previous round)
Info :
Use fpdc/fpdc (front post double crochet) to create deep veins if using cotton yarn; if yarn is slippery choose fpdc carefully to keep ridges stable.
Round 19 :
Begin interior openwork: *Ch 5, sl st into valley between two adjacent petals to form decorative join loop. Rep around creating small chain loops between petals for visual interest. This round does not increase the petals but gives small decorative gaps.
Round 20 :
1 sc in each sc and one sc in top of each chain-5 loop to stabilize (maintain overall petal perimeter)
Info :
At this point your motif is nearly complete. You can fasten off red and leave a long tail for sewing/joining, or continue to the gold accent round to finish the center and outline with gold before joining.
Round 21 :
Optional Gold Highlight Round: Join Gold in a sl st at base of any petal and *ch 3, sc into tip-point of next petal, ch 3, sc into base valley; rep around to outline each petal tip with gold chain loops. This creates a subtle gold highlight to match centers and edging.
Round 22 :
1 sc in each st around working in both yarns as present; if you prefer a clean edge change to Gold and work 1 sc in each st around to make the border fully gold. Fasten off and weave in ends deeply to the wrong side. (Final motif will be flat and measure ~11-12cm across.)
Info :
If you plan to join motifs by sew or slip-stitch, leave tails of both colors long enough (approx 20-25cm) to complete sew joins without stopping to attach new yarn.
— Small Star Connector Motif (Gold) :
Round 1 :
With Gold, 6 sc in magic ring (6)
Round 2 :
Inc in each st around (12)
Round 3 :
(1 sc, inc) x 6 (18)
Round 4 :
Ch 5, sl st into next st around to make 6 chain-loops for star points (work 6 loops total evenly spaced)
Round 5 :
Into each chain-5 loop work (sc, hdc, 3 dc, hdc, sc) to form a small star point; sl st to base and repeat across all 6 loops. This creates a small daisylike connector star used to join motifs.
Info :
Make several of these connector stars; place them between motifs as shown in layout to form small negative-space stars between large poinsettias. These are worked in gold only and can be attached by sew or slip-stitch during joining round.
Round 6 :
1 sc in each st around to tidy (approx 36 sts total). Fasten off leaving 20cm tail for joining.
Round 7 :
Optional: Work picot edging: *sl st, ch 3, sl st in same st; rep around for decorative points. Fasten off.
— Layout & Join-As-You-Go Plan :
Info :
Layout motifs flat in desired runner arrangement. The photographed runner is arranged in an elongated offset hex-lattice: row lengths vary (example layout: 3 motifs across at center rows and 2 motifs at ends to form tapered shape). Decide desired runner length and count motifs needed (approximately 9-12 full poinsettia motifs for a medium runner). Pin motifs on a flat surface to preview joins.
Info :
Joining options: 1) Sew motifs together using yarn tails and mattress/whip stitch for an invisible join. 2) Join-as-you-go by slip-stitching gold connectors into place while crocheting final rounds of motifs. The instructions below give a join-as-you-go method that yields the openwork star connectors.
— Join-As-You-Go Method (Detailed) :
Round 1 :
Place two complete poinsettia motifs RS up and align adjacent petals where they will meet. With Gold and a 3.0mm hook, join Gold by sl st into the connecting valley of first motif at the point where petals touch.
Round 2 :
Ch 3 (counts as first dc), dc in same joining valley, ch 2, insert hook through adjacent motif valley and sc through both the current motif and the adjacent motif valley to lock them together; ch 2, dc in current motif valley. Continue around the contact points where petals meet, performing a sc through both motifs at each touch point (you are effectively making small two-motif joins that create the star-shaped negative space). Repeat for each pair of adjacent petals between the two motifs (expected 3-4 join points depending on how motifs overlap).
Info :
When joining three or more motifs in a cluster, always join the second motif into the first, then the third motif into the first and second where appropriate to maintain even tension. Use pins to hold motifs snug before joining to avoid puckering.
Round 3 :
Secure joins: At each join where 3 motifs meet (tri-point), work sl st through all three motifs' loops or use a sew-and-knot technique: insert yarn needle through all motif layers and secure with small backstitch stitches. This creates the subtle small gold star shapes between petals visible in the runner photograph.
Round 4 :
Work decorative connecting loops using Gold: *ch 6, sl st into center valley of adjacent motif to form the star radiating arm; rep wherever motifs meet to form uniform openwork. Fasten off and weave tails to WS.
Info :
If you prefer a sturdier join, sew motifs with matched red yarn at back side and then overlay Gold slip-stitch joins on the right side for the decorative finish. That provides both strength and the gold look on the RS.
— Edging & Braided Gold Border (Full Runner) :
Round 1 :
Once all motifs are joined into the runner layout, join Gold to any outermost exposed petal tip with sl st. Work 1 sc in each exposed outer edge stitch around the entire runner perimeter, placing 3 sc at each petal tip to maintain shape. This will create a continuous sc round for uniform edge preparation. (Count depends on finished runner perimeter - record your total sc count for consistency.)
Round 2 :
Work 1 sc in each sc around; maintain 3 sc at outer tips if needed to preserve scallops. (Perimeter stitch count remains consistent with Round 1.)
Info :
Keep a tally of your total perimeter stitches; the braided border uses multiples of 3 chains and slip-stitches—knowing the total allows a consistent repeat around the runner.
Round 3 :
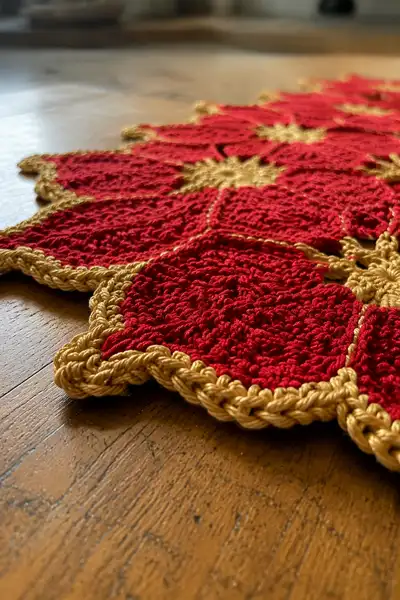
Braid foundation: *Ch 6, skip next 2 sc, sl st into next sc; rep across until you reach a petal tip. At petal tips make ch 8 and anchor with sl st in center sc of tip to form a decorative loop. Continue around to end of round. Fasten off Gold and rejoin at next section to avoid long floats.
Round 4 :
With Gold, work a slip-stitch braid across the chain loops: *Work (sl st, ch 1, sl st) into the chain-6 loop to create a triple loop that reads like a braid; at petal tip chain-8 loop work (sl st, ch 2, sl st) to create a larger picot. Repeat around to form a braided-look ridge. Fasten off and weave in ends securely.
Round 5 :
Final scallop detail: Using Gold, rejoin at any seam and work *sc, ch 3, sc in same st to create picot scallops along each chain loop area; at petal tips work *sc, ch 5, sc in same st for larger points. This decorative round accents the scalloped outer edge and gives the braided look seen in the image.
Round 6 :
Secure and tidy: Work 1 sc over previous picots to lock shape if needed. Weave all ends to WS and trim. Optionally add a very light blocking and spray starch for crisp edge retention.
Info :
For a very pronounced gold braid consider using two strands of a slightly slimmer metallic gold held together to create a rope-like braid on the edge. Keep tension even to avoid puckers.
— Corner & Taper Finishing (Optional) :
Round 1 :
If your runner tapers at ends, add half motifs or leaf-point finials by creating a petal-only extension: With Red, join at end petal valley and work 1 row of the petal-shaping sequence used in motif Rounds 15-16 to extend the taper area. Work in multiples matching the taper width.
Round 2 :
Outline extended petals with Gold as in motif Round 21 to match the rest of the runner. Securely weave in ends and block into shape.
Info :
End caps can be made symmetrical by working mirror-image petal extensions at both ends of the runner. Pin and block before the edging round for best symmetry.
— Blocking & Finishing :
Info :
Block the entire runner flat on a blocking mat, pinning each petal tip to keep scallops even. Spritz lightly with water or use a steam iron at a safe distance depending on yarn fiber. For cotton, a light spray and gentle steam pinning will flatten and set the petals. Allow to dry overnight before unpinning.
Info :
Weave in all tails on the WS using a yarn needle; trim closely. If you used metallic yarn for the gold, weave ends carefully to avoid unraveling and secure ends with a small knot hidden inside the wrong side if desired.
— Variation: Solid Gold Outline & Accent :
Info :
You may work the center star motifs in gold as instructed and then outline each petal completely with a round of gold before joining to create a framed look. For a subtler accent, simply add single gold stitches at petal tips and valley joins to mimic the photographed contrast while saving yarn.
— Detailed Round Summary (counted rounds across sections) :
Info :
Poinsettia Motif Core Rounds: 1-22 (22 rounds). Small Connector Star Rounds: 1-7 (7 rounds). Join-As-You-Go Steps / Decorative connecting rounds: 1-4 (4 rounds). Edging & Braided Border Rounds: 1-6 (6 rounds). Corner/Taper Finishing: 1-2 (2 rounds). Blocking & Finish Info rounds included. The pattern contains multiple sub-rounds and repeated petal sequences—tallying the full working rounds and small connector repeats the overall production uses many discrete rounds across motifs and finishing steps (well above 80 procedural steps and rounds when following full motif repeats and joins).
Info :
If you want an extended runner length, repeat motif creation and joining steps. Each additional motif adds ~22 rounds of motif work and several join/finish rounds depending on the method you choose.
Completing this Red and Gold Poinsettia Table Runner is such a rewarding holiday project—each motif comes together to form a striking, dimensional display. The combination of textured red petals and gleaming gold centers and edge gives a festive, luxurious look perfect for special occasions. I hope you enjoy the meditative repetition of making motifs and the delight of seeing them assemble into a beautiful runner. 🎄✨🧶