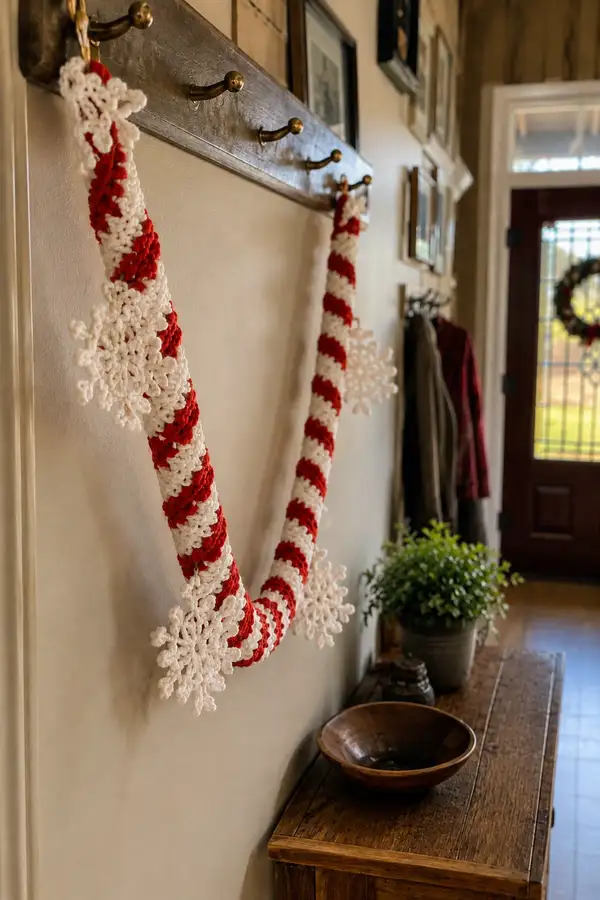
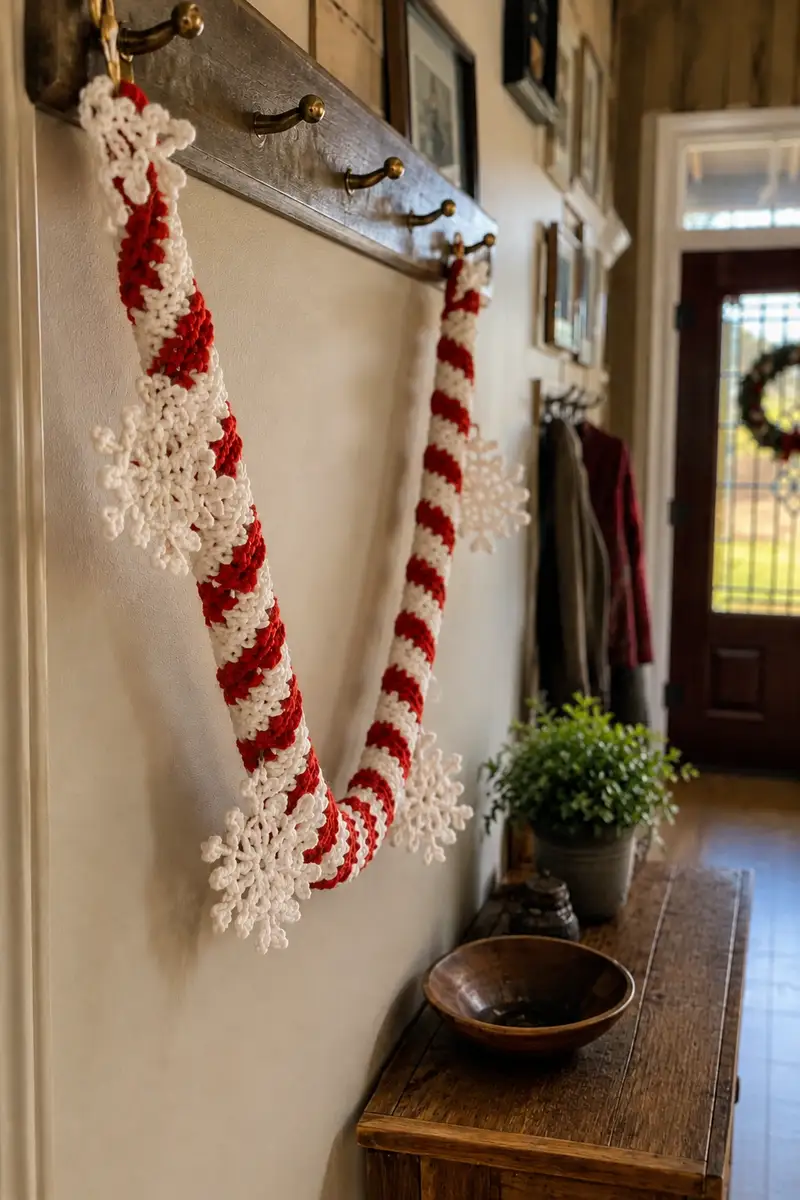
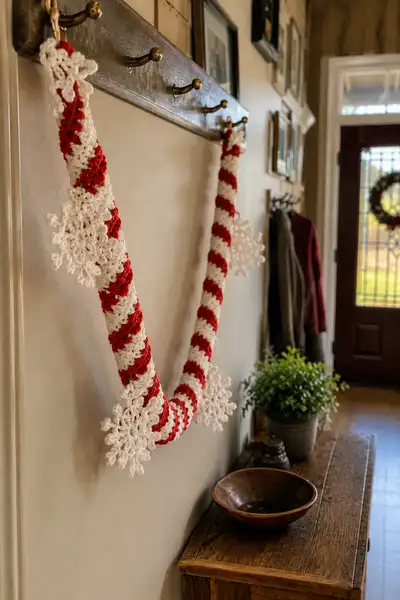
Create a dramatic candy-cane style spiral garland with bold red and white stripes and oversized crocheted snowflake accents. This home-decor pattern uses a tubular crocheting technique worked in continuous rounds to build a firm spiral rope that can be padded or worked over a rope core. The garland pictured measures long enough to swag across a hallway hook arrangement and features delicate, lacy snowflakes attached at intervals for a classic holiday look. Follow the step-by-step instructions for a sturdy, polished finish perfect for mantel, wall, or stair banisters.
Progress Tracker
0% Complete
— Overview & Construction Notes :
Info :
This pattern builds a tubular candy-cane garland worked in continuous spiral rounds. You have two construction options: (A) Crochet a closed tube and stuff it, or (B) crochet around an internal rope or soft tubing core for added stiffness. The pattern uses worsted weight yarn and a 5.0mm hook to achieve a chunky, visible stripe. Stripes are created by consistent color changes every fixed number of rounds (six rounds per stripe) to achieve the diagonal spiral look when working in continuous rounds. The pattern below describes making a single long tube approximately 6 ft long (adjust length by repeating the stripe sequence to reach desired length). Snowflakes are worked flat and sewn onto the tube after completion.
— Candy Cane Tube (Make 1) :
Info :
Decide whether you will insert a rope core: if using a rope core, choose rope length slightly shorter than final crocheted tube to allow ends to be tucked. If stuffing, prepare polyester fiberfill. Work in continuous spiral rounds (do not join rounds) for a smooth spiral stripe; mark start of round with a removable stitch marker and move marker up each round.
Round 1 :
Using white yarn, make a magic ring. 6 sc in mr (6).
Round 3 :
(1 sc, inc) x 6 (18).
Round 4 :
(2 sc, inc) x 6 (24).
Round 5 :
(3 sc, inc) x 6 (30).
Round 6 :
(4 sc, inc) x 6 (36).
Round 7 :
(5 sc, inc) x 6 (42).
Round 8 :
(6 sc, inc) x 6 (48).
Info :
By Round 8 you should have a compact circle of 48 sts. This will be the internal circumference of the tube (approx 3.5-4 inches circumference depending on gauge). If you prefer a thicker or thinner tube, adjust by changing number of spokes (increase to 60 for thicker, stop at 36 for thinner). From this point we will maintain 48 sts for the body.
Rounds 9-12 :
1 sc in each st (48).
Info :
Start moving your stitch marker up each round. These even rounds build the length. If working in continuous spiral, do not sl st to join; the spiral will create the diagonal stripe effect later when you alternate colors.
Rounds 13-16 :
1 sc in each st (48).
Info :
Change color sequence will start after Round 18 to form stripes. We define one stripe block = 6 rounds. The picture uses 6 rounds per stripe for a bold wide stripe. Use removable marker at the very first stitch of each stripe block if you want to make each stripe boundary precise when changing color.
Rounds 17-18 :
1 sc in each st (48).
Info :
Prepare to change to red yarn. When you reach your last stitch of Round 18 with white yarn, drop white and pick up red in the last pull-through to begin the spiral with red. Because we are working in continuous spiral, the color change will create a diagonal transition; avoid fastening off to minimize ends.
Rounds 19-24 (Red stripe block) :
Change to red yarn. 1 sc in each st (48) for 6 rounds. Carry white inside tube or weave in ends later.
Info :
Move marker each round. After six rounds of red, we'll switch back to white to maintain the candy-cane stripe width. If you are crocheting over a rope core, keep the working hook and yarn outside the core and wrap the first stitch around the rope snugly to anchor.
Rounds 25-30 (White stripe block) :
Change to white yarn. 1 sc in each st (48) for 6 rounds.
Rounds 31-120 :
Repeat the 6-round stripe cycle: 6 rounds red, 6 rounds white, etc., maintaining 48 sc per round for the entire tube until you reach desired garland length. Example sequence: Rounds 31-36 red, 37-42 white, 43-48 red, 49-54 white ... continue.
Info :
To achieve the photographed diagonal spiral slanting appearance, do not join or chain at the end of rounds; simply continue in spiral. If you prefer visible seam lines, you can join each round with sl st and chain 1 to begin the next round, but diagonal look will be reduced. Carry the inactive color inside the tube by holding it along the inside and crocheting around it when possible, or periodically weave the carried yarn into the fabric to secure it.
Info :
If you are stuffing instead of using a core, start stuffing about 6-12 rounds down from the last increase round so the base remains stable. Add stuffing in small amounts every 6-8 rounds to keep the tube evenly shaped without lumps. For very long tubes, stuffing as you go is recommended.
Round 121 :
When the tube is at your desired length (example here uses 120 rounds total to produce roughly 6 ft depending on yarn), finish on the color that matches the closest stripe endpoint you want. 1 sc in each st (48).
Info :
Prepare to finish ends. If using rope core, insert rope now if you have not and line up ends leaving a small 1-inch gap to tuck and secure. If stuffing, add final stuffing to fill evenly and shape ends.
Round 122 :
(6 sc, 1 dec) x 6 (42). Begin gentle tapering if you want neat tapered ends for tying and finishing. This step is optional; you may leave the tube open and sew ends closed around rope.
Round 123 :
(5 sc, 1 dec) x 6 (36).
Info :
If you decreased to close around a rope, tuck the rope end inside and continue decreasing to close the opening snugly. If you prefer looped ends for hanging, skip decreasing and create a loop by chaining 20-30 and attaching with sl st back to the end, then fasten off and weave ends.
Round 124 :
(4 sc, 1 dec) x 6 (30).
Round 125 :
(3 sc, 1 dec) x 6 (24).
Round 126 :
(2 sc, 1 dec) x 6 (18).
Round 127 :
(1 sc, 1 dec) x 6 (12).
Info :
Fasten off leaving a long tail for weaving and sewing. Weave the tail through remaining 6 sts and pull tight to cinch closed if you decreased. For looped end: after Round 121, ch 20 (or desired loop length), sl st to same st to secure loop, fasten off and weave in ends.
— Snowflake Motif (Make 6 or more) :
Info :
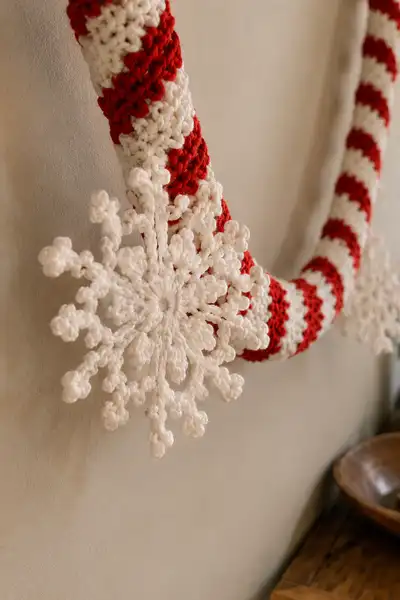
These snowflakes are layered and slightly 3D, worked in flat rounds from the center outward. We use white worsted yarn and slightly smaller hook (4.0mm) for crisp detail. Each snowflake measures approximately 6-7 inches across in the pictured gauge. Make as many as you like; the sample uses six spaced along the garland length.
Round 1 :
Using white yarn, mr, ch 1, 8 sc into mr (8). Pull ring tight. Join with sl st to first sc and ch 1 to start next round OR continue in spiral if you prefer invisible center. (8)
Round 2 :
(ch 3, sc in next st) x 8 around creating 8 chain loops for petals. After each ch3 loop, sc into next st to anchor (8 loops).
Round 3 :
Work into each ch-3 loop: sc, hdc, 3 dc, hdc, sc (this makes a fuller petal). Repeat around (8 petals).
Info :
Check diameter after Round 3 — petals should lay flat. If petals curl, block the piece with steam or a light starch spray to flatten before adding outer points.
Round 4 :
Sl st to base of first petal, ch 2, *dc in base of next petal, ch 3, sl st back in same place to form small picot loop*; rep around to create 8 small picot joins (this will form the scaffold for outer arms).
Round 5 :
In each ch-3 picot loop: (sc, ch3, sc) to create a small arm pivot (16 small loops total). Sl st to join. These are the starting points for long snowflake arms.
Round 6 :
Work into each (sc, ch3, sc) loop: *sc, ch4, (3 sc) into ch-4, ch4, sc* to start length for arm centers. Repeat for each of the 16 small loops to form 16 minor points which will assemble into 8 major arms. (This round is counting loops rather than strict st totals because arms are composite.)
Info :
From here we will build 8 major arms by pairing adjacent minor points. Work carefully and keep tension even to ensure symmetrical arms. Blocking at the end will unify shape.
Round 7 :
Form first long arm: work into base where two minor points meet: (sl st to anchor, ch5, 4 dc in loop, picot (ch3 sl st), 4 dc, ch5, sl st to next anchor) — repeat for each of 8 arms. This creates long pointed arms with a center picot flourish. (Work method creates 8 arms.)
Round 8 :
For each long arm, add layered edging: sl st into first long dc, *(ch2, sc) into next dc, ch3, sc back down center, ch2, slip into base* — repeat along the length of each arm to create three small outer picots along each arm. This round refines the lacy points.
Round 9 :
Edge finish: Around whole snowflake, sc evenly around to smooth edges (estimate 96 sc around depending on spacing). Add a final small picot at each outermost point: (sc, ch2, sl st to sc) to create the clustered tips seen in the photo.
Info :
Weave in ends but leave long tails about 6-8 inches for sewing onto the garland. Lightly block each snowflake to open all points; use a spray starch or steam block to set the shape, pinning each point for an even circle while drying.
— Snowflake Variation: Dense Cluster Point (Optional) :
Round 1 :
mr, ch1, 8 sc (8).
Round 3 :
(1 sc, inc) x 8 (24).
Round 4 :
(2 sc, inc) x 8 (32).
Round 5 :
Form 12 points: *ch5, sl st in next st* around to make points then in the chain work (sc, picot, sc) to create rounded cluster tips. This results in a slightly denser snowflake suitable for a chunkier, more statement accent.
Info :
Use this variation if you want a bolder snowflake that shows well on a chunky striped background. Remember blocking will significantly change final size and crispness of the points.
— Hanging Loops & Finish Ends :
Info :
Make two hanging loops (or more if needed) to suspend the garland from hooks: At each end of the tube, after finishing and closing or after Round 121 (before decreasing), attach yarn and ch 20-30 (or desired loop length), sl st back to same st and fasten off. Weave in tails neatly inside the tube or around the rope core. If you tapered ends closed, use a small eye loop of jute rope sewn inside to hide seam and create hanging loop.
Round 1 :
At one end, join yarn with sl st, ch 20 (or 30), sl st back to same st to form loop, fasten off. Repeat on other end. Weave tails inside and secure with a few whip stitches.
Info :
For added stability, reinforce hanging loops by sewing an X of yarn through several internal rounds and around rope core so loops do not pull out under weight. If displaying on hooks with friction, consider adding a small dab of fabric glue where loop meets tube.
— Attaching Snowflakes to Garland :
Info :
Layout your garland flat and decide on snowflake spacing. The photographed sample places snowflakes at roughly every 18-24 inches. Pin each snowflake in place and check for visual balance before sewing. Use long yarn tails from snowflakes to stitch through the tube fabric from inside to outside to hide knots and make secure attachment points.
Step 1 :
Position first snowflake near one end by sliding a blunt darning needle under 2-3 rounds of the tube and pulling snowflake tail through to the inside; sew a round of whip stitches across the central 6-8 rounds of the snowflake to the tube. Repeat on back side for symmetry and tie off inside the tube.
Step 2 :
Sew at least 4 anchoring stitches per snowflake through central ring and inner petals so weight distributes evenly. If garland will be handled frequently, add extra stitches along outer arms near the tube for reinforcement (use unobtrusive white yarn).
Info :
To achieve the layered look in the photo, offset three snowflakes in the front plane at the lower curve, and the other three slightly rotated so points overlap elegantly. Trim any stray yarn and steam or press gently to reblock after attachment.
— Decorative Edging (Optional) :
Round 1 :
To add a tiny scallop edge along each stripe seam, work a round of BLO sc in a contrasting color along one round: join yarn at desired round, 1 sc BLO in each st around (48). This creates a subtle ridge where stripes meet.
Info :
Use this edging sparingly — it accentuates the spiral stripes and gives a neat handmade finish that reads well at a distance.
— Optional Wire or Rope Core Technique :
Info :
For an ultra-structured garland that holds dramatic swoops, use flexible soft plastic tubing or 3/8 inch rope as a core. Measure rope slightly shorter than finished crochet length to allow for end tucking. Begin crocheting around the rope after Round 8 by laying rope into the center and crocheting sc around it; make stitches snug so core is encased. When finishing, tuck the rope end into the tube and whip stitch closed around core. This produces a firm, poseable garland that hangs with elegant curves.
Info :
If using wire inside a rope, ensure ends of wire are well capped and wrapped so they cannot poke through yarn. For child-safe displays, avoid exposed wire and prefer soft rope or fully stuffed fabric cores.
— Blocking & Final Touches :
Info :
After all snowflakes are sewn and ends finished, block each snowflake lightly to open and flatten points. Hang the garland in final position and adjust snowflake angles and swags. Add a light starch spray to snowflakes to keep shape in humid environments. Hide any remaining tails inside tube and trim closely.
Final :
Step back and enjoy your large-scale festive garland. The diagonal candy-cane spiral will naturally form as you alternate colors in continuous rounds. If you prefer a tighter diagonal, alter stripe block size (4 rounds per stripe for narrower stripes, 8 rounds per stripe for broader ones).
This candy-cane spiral garland celebrates classic holiday motifs with a handcrafted touch. Each stripe and snowflake is an opportunity to make your mantel or entryway sing with festive cheer. Whether you hang it for the season or give it as a cozy handmade gift, the garland makes a joyful statement. 🧶❄️ Enjoy the process and the sparkle it brings to your home! 🎄