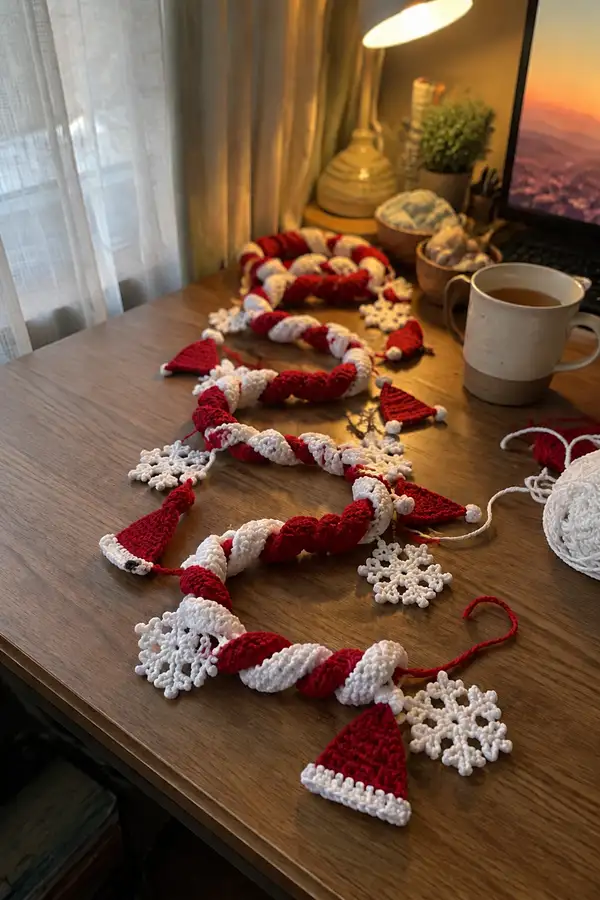
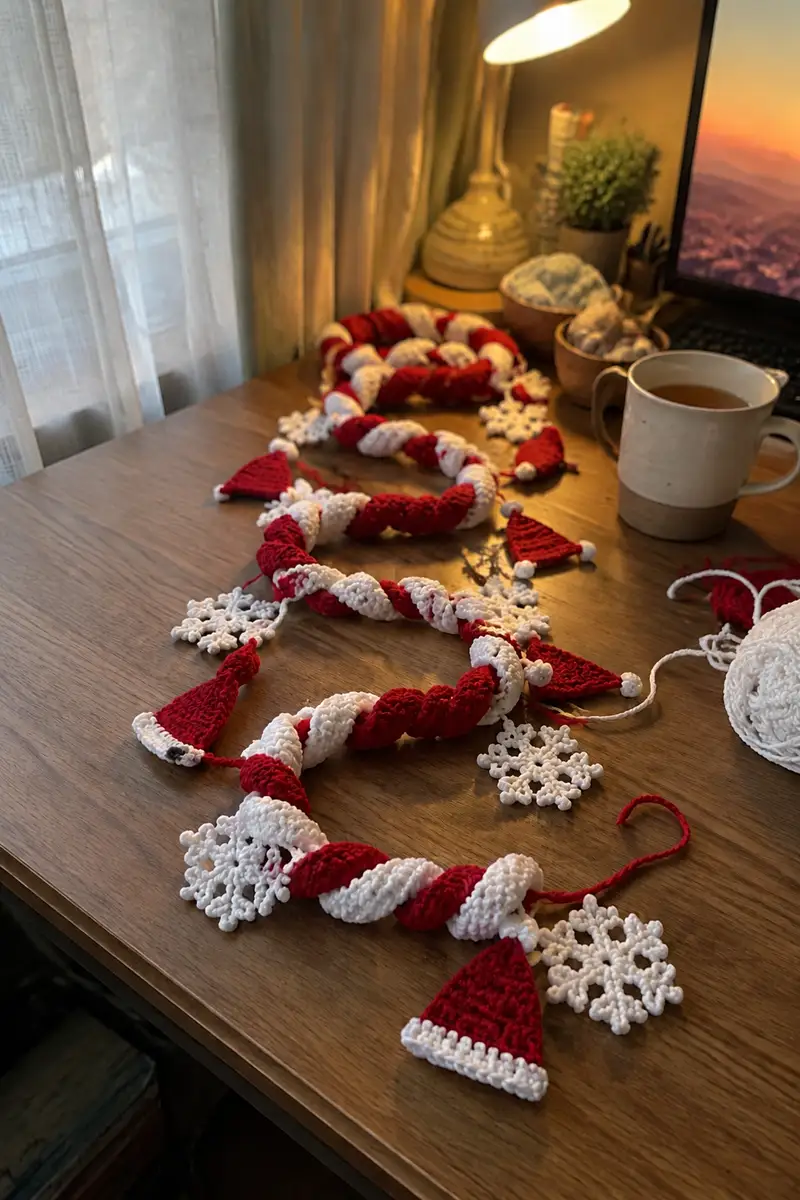
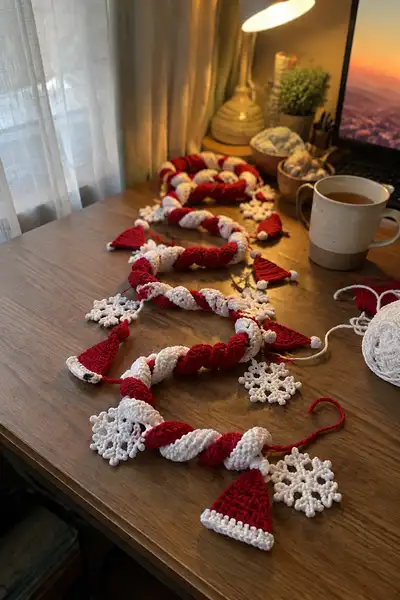
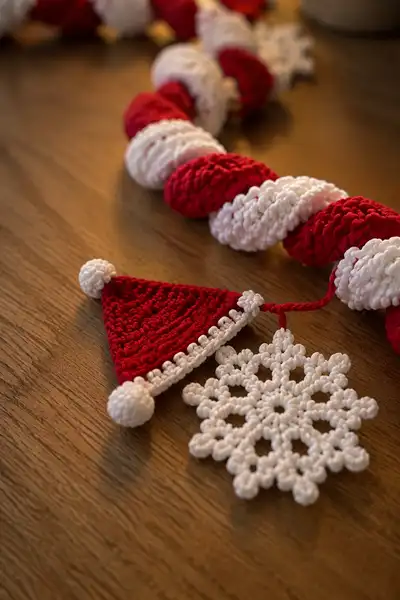
Create a festive red-and-white spiral garland trimmed with tiny Santa hats, bobble-tipped pom-poms, and lacy snowflake motifs. This pattern teaches you to crochet long spiral ropes and attach handmade triangular hats and star-like snowflakes for a whimsical holiday display. The finished garland is lightweight, drapey, and perfect for mantels, stair rails, doorways, or window frames.
Progress Tracker
0% Complete
— Long Spiral Strip (Make 2 identical strips: one Red, one White) :
Info :
Each spiral rope is built from a long flat crocheted strip that will be twisted together with its contrasting partner. Choose a comfortable length for your garland; the sample photographed uses two strips of about 150-160 cm each before twisting. Use a hook one size smaller than yarn label for a firm fabric that hides stuffing and provides good texture.
Foundation :
Chain 170 (or chain desired length + 2 for turning). This chain yields approximately a 150-160 cm strip when worked tightly with sc; adjust if you want a longer or shorter garland.
Row 1 :
Starting in 2nd ch from hook, 1 sc in each ch across. Turn. (169 sc)
Row 2 :
Ch 1, 1 sc in each st across. Turn. (169 sc)
Row 3 :
Ch 1, 1 sc in each st across. Turn. (169 sc)
Info :
Work with consistent tension to keep the strip straight. If your strip begins to tilt, block it lightly or adjust your starting chain tension. Use stitch markers at every 20th stitch during the first strip to check consistent stitch count as you progress.
Row 4-8 :
Ch 1, 1 sc in each st across. Turn. (169 sc)
Info :
After 8 rows your strip will be about 1.7-2 cm thick depending on yarn. The photographed spiral is made from repeated blocks of 8 rows to create a chunky textured rope when twisted. Continue until your strip reaches the desired length. For the sample length, you will repeat rows 1-8 a total of 20 times (160 rows) to create a long strip — however you can reduce repeats for shorter garlands.
Rows 9-40 :
Ch 1, 1 sc in each st across. Turn. (169 sc)
Info :
Every 8-10 rows, check the strip length against your partner strip to ensure matching size. Keep both strips consistent to achieve a uniform spiral. If you plan to tightly roll the strip for a thicker rope, add extra rows; for a looser spiral, omit rows.
Row 41-80 :
Continue repeat of ch 1, 1 sc each st across until strip reaches final length (for 150-160 cm aim for about 160 rows total across the whole piece — in practice you will work both strips side-by-side and measure). Fasten off leaving a 30 cm tail for joining. Weave in starting tail into the first 10 rows so it does not show along the edge.
Info :
For a more rope-like tube, slightly roll the finished strip and stitch its long edges together with whip stitch using the tail left at the end to form a flat tube. For the photographed garland, the maker left the strips flat and twisted them together to form the spiral texture; either method works — the flat strip method gives a lightweight garland while tubular sewing produces a chunkier rope.
— Strip Joining & Twisting :
Info :
Lay the red and white strips side by side, matching ends. If you sewed edges to form a tube, you will have two tubes; if you left strips flat, treat them as flat bands. Temporarily tack one end together using a loose contrasting yarn stitch so they rotate together as you twist.
Step 1 :
Secure one end of both strips to a heavy object or pin to a sofa arm so the strips are anchored. Hold the other end and begin to twist the strips around each other in the same direction until you achieve an even candy-cane spiral. The amount of twist depends on strip width; aim for four to six visible spiral turns per 20 cm for a defined candy-cane effect.
Step 2 :
Once you have the spiral tension you like, use matched yarn tails to whip-stitch the two strips together along their length every 3-4 cm on the underside so the visible twist remains uninterrupted. Avoid stitching too frequently or you will flatten the spiral. Fasten off and weave tails securely.
Info :
If you prefer modularity, leave the strips untacked and use discreet tied connectors (small braids or crochet chains) at intervals to hold the twist; this allows you to untwist and store strips separately.
— Santa Hat Motif (Make 12-16) :
Info :
The little triangular hats are crocheted flat in alternating increases to form a tapered cone, then trimmed with a white picot-like edge and finished with two small bobbles (one at tip and one at base corner). These are lightweight and sewn to the garland on short braided cords.
Round 1 :
With Red, ch 2. 3 sc in 2nd ch from hook. (3)
Round 2 :
Ch 1, turn. Inc in each st across (6). (6)
Round 3 :
Ch 1, turn. (1 sc, inc) x 3 (9). (9)
Round 4 :
Ch 1, turn. (2 sc, inc) x 3 (12). (12)
Info :
These early rounds create the hat width. The triangle grows quickly; keep edges tidy by turning consistently and placing mark on corner stitches if needed.
Round 5 :
Ch 1, turn. (3 sc, inc) x 3 (15). (15)
Round 6 :
Ch 1, turn. (4 sc, inc) x 3 (18). (18)
Round 7 :
Ch 1, turn. 1 sc in each st across (18). (18)
Info :
At this stage the hat reaches a triangular shape. If you would like a larger hat, continue increase rounds repeating the pattern (n sc, inc) x 3 to add increments of 3 sts per round.
Round 8 :
Ch 1, turn. (5 sc, inc) x 3 (21). (21)
Round 9 :
Ch 1, turn. 1 sc each across (21). (21)
Round 10 :
Ch 1, turn. (6 sc, inc) x 3 (24). (24)
Round 11 :
Ch 1, turn. 1 sc in each st across (24). (24)
Info :
Trim: Switch to White yarn. Join with sl st at hat base edge. Work one row of sc evenly across the base to create a neat bottom edge. Count to ensure 24 sc baseline; add or skip a few sc to keep hat base even if your stitch counts varied slightly during increases.
Round 12 :
With White, ch 1, 1 sc in each st across the base row; fasten off leaving 12 cm tail for sewing. (24)
Round 13 :
Using White, rejoin at one base corner. Ch 3, *sl st into next st, ch 1* repeat across to create small looped picot trim. Fasten off. (12 picot loops approx)
Info :
Tip: Make small bobble for hat tip using White. With White, make mr, work 6 sc into ring, pull tight, leave long tail to sew. Slightly flatten and sew to the top point of the red triangle. For the bottom corner pom, repeat and sew to the tip at the bottom center or to the hanging cord as pictured.
Round 14 :
Make 1 small bobble (see Info) and sew at tip. Weave in ends. Block lightly if desired to flatten seams and make hats uniform.
Info :
Make 12-16 hats depending on garland length, spacing hats every 8-15 cm along the spiral for balanced look. To attach, make a short 12-16 ch braid in Red or White and secure one end to hat top corner; use the other end to sew or tie to spiral rope.
— Snowflake Motif (Make 8-12) :
Info :
The snowflake is worked in rounds from a small central ring with chain loops and picots forming six points. Work tightly and block them pinned to a snowflake template for crisp shape and even points.
Round 1 :
With White, make mr, ch 3 (counts as dc), 11 dc into ring, pull tight. Join with sl st to top of ch-3. (12 dc)
Round 2 :
Ch 1, *sc in next dc, ch 5, sc in next dc* repeat around to create 6 chain loops. (6 ch-5 loops)
Info :
Make sure loops are even. Use stitch markers to mark the center of each loop and tension the chain loops gently before moving to next round. This round forms the base for the snowflake points.
Round 3 :
Working into each ch-5 loop: *(sc, ch 3, (dc, ch 2, dc) in next ch, ch 3, sc) in loop; sl st to next base loop* Repeat for all 6 points. (creates six small petal clusters)
Round 4 :
Ch 1, into each ch-3 space on point: (sc, picot, sc) to create tiny peaks: *sc in ch-3, ch 3, sl st in 3rd ch (picot), sc in same space* Repeat around each point making 3 picots per point for ornate edging. Fasten off and weave ends. (36 tiny picots total)
Info :
Blocking: Pin snowflake to template (approx 8-9 cm diameter in sample) and spray lightly with water then allow to dry completely. This will open points and set the motif flat so it hangs well on the garland.
— Pom-Pom Bobbles (Make 18-24 small bobbles) :
Info :
The bobbles are extra small rounds used to finish hat tips and as end beads on hanging cords. These are crocheted as tight little spheres using a magic ring and short rounds of sc to keep them compact.
Round 1 :
With White, mr, 6 sc into ring. Pull tight. (6)
Round 2 :
(1 sc, inc) x 3 (9). (9)
Round 3 :
(2 sc, inc) x 3 (12). (12)
Round 4 :
1 sc in each st around (12). (12)
Round 5 :
4 dec evenly (4). (4)
Round 6 :
2 dec (2). (2) Fasten off leaving long tail for sewing; thread tail through remaining 2 sts and pull closed to form compact bobble then secure and weave in end.
Info :
If you prefer fluffier pom-poms, wrap yarn around a small pom-pom tool or your fingers, tie tightly and trim to shape, then hand-stitch to hat tips or braid ends. Sew bobbles firmly with the tail left to avoid loosening.
— Braided Hanging Connectors (Make many) :
Info :
Small braided cords (12-20 ch long) are used to suspend hats and snowflakes from the spiral. Braids maintain the color rhythm and are quick to make.
Step 1 :
Cut three strands of yarn (approx 30 cm each) of the color you want for the braid. Tie them together at one end leaving a 3 cm tail. Braid for desired length and tie a knot at the end. Alternatively, ch 12-20 and work sc in each st to create a sturdy crochet chain cord.
Info :
For a neat finish, whip-stitch the top of the braid to the motif using a tidy backstitch and hide tails inside the motif. Leave a 6-10 cm tail at the top of the braid to sew to the spiral and allow for minor adjustments in hanging length.
— Alternate Spiral: Tube Method (Optional thicker spiral) :
Info :
For a chunkier garland, make two round tubes instead of flat strips. Tubes are worked in joined rounds along a small circumference and lengthened by repeating even rounds. This method is denser and produces a rounded candy-cane effect similar to photographed thick spirals.
Round 1 :
With Red, mr, 6 sc into ring. (6)
Round 2 :
Inc in each st around (12). (12)
Round 3 :
(1 sc, inc) x 6 (18). (18)
Round 4 :
(2 sc, inc) x 6 (24). (24)
Round 5-220 :
Work even rounds making 1 sc in each st around until the tube length reaches the desired measurement (for a 150 cm long tube you will repeat many times). Fasten off leaving long tail for sewing the two tubes together in spiral form. Make matching white tube following same rounds.
Info :
Tube math: Maintain stitch count along length; do not increase after round 4 unless you want a conical tube. Joining two tubes later follows same twisting and tacking approach as flat strip method.
— Finishing & Assembly :
Info :
Arrange your motifs along the spiral before permanent attachment. Lay the twisted rope flat on the floor or table and drape it in the curve you intend to hang. Space hats and snowflakes in an alternating rhythm: in the sample, motifs were spaced about every 8-12 cm with clusters of two snowflakes between hats in places.
Step 1 :
Using the braided hanging connector, sew one end to the top stitch of each hat or snowflake so it hangs straight. Secure by sewing through several stitches of the motif and the underside of the braided connector, then weave tails through motif interior.
Step 2 :
Attach the free end of the braid to the spiral by sewing into the underside of the spiral with the long tail; pull the braid up so the motif faces forward and rests naturally against the twist. Use a few tight stitches around the spiral to prevent rotation.
Info :
For a more secure attachment, weave the braid under the spiral, make an extra stitch through both layers and knot. This technique is ideal for garlands that will be handled often or used outdoors in sheltered areas.
Step 3 :
Sew small bobbles at select spiral joints and the ends of the garland to hide knots and create cute accents. Add a loop at each end of the garland (approx 6 ch) for hanging. Reinforce ends with several whip stitches to the spiral core for durability.
Info :
Trim all loose tails and weave them well into the underside of the spiral to keep the front clean. Lightly steam-block the entire garland if needed (avoid heavy steam on acrylic blends). Photograph and enjoy!
— Optional: Personalization & Variations :
Info :
Swap the Santa hats for tiny mittens or stars. Make the snowflakes in glitter or metallic yarn for extra holiday shimmer. Add wooden beads threaded on the braided connectors for rustic charm or use a thinner sport-weight yarn for a more delicate spiral.
Step :
To add names, embroider initials on fat white bands of the hats before attaching, or tie small tags to the braid for personalized gift garlands.
Info :
Cleaning: Handwash in cool water with gentle soap, reshape while damp and lay flat to dry. Spot clean motifs for quick refreshes.
Finishing this red-and-white spiral garland is such a cozy accomplishment — every hat and snowflake adds personality and holiday cheer to your home. The twisting technique creates a timeless candy-cane look while the lacy snowflakes bring delicate contrast. Hang it on your mantel, stair banister, or across a window and enjoy the handmade sparkle this season. 🧶✨🎁