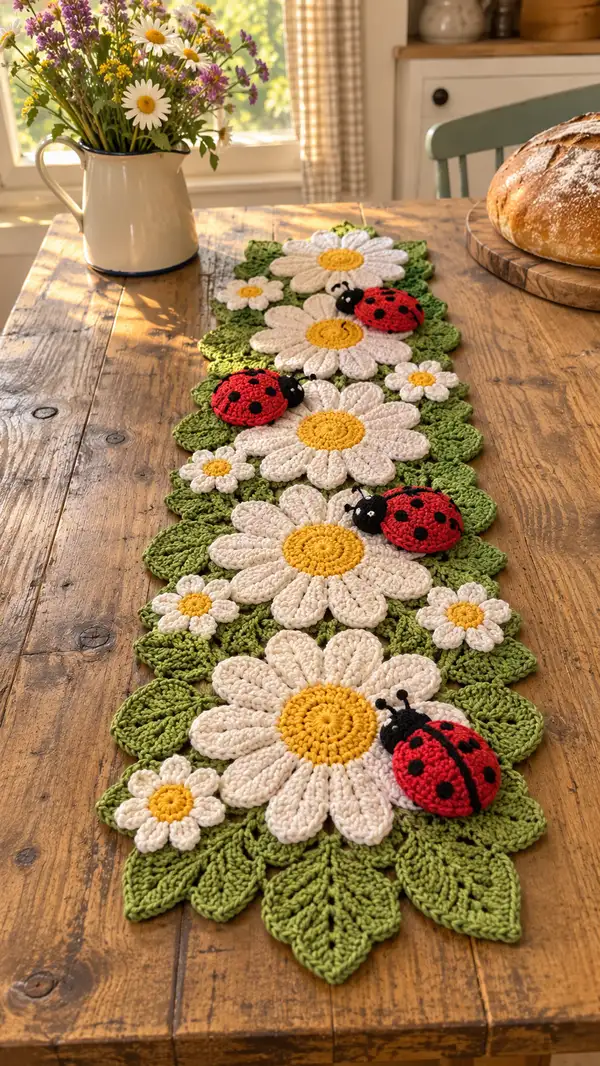
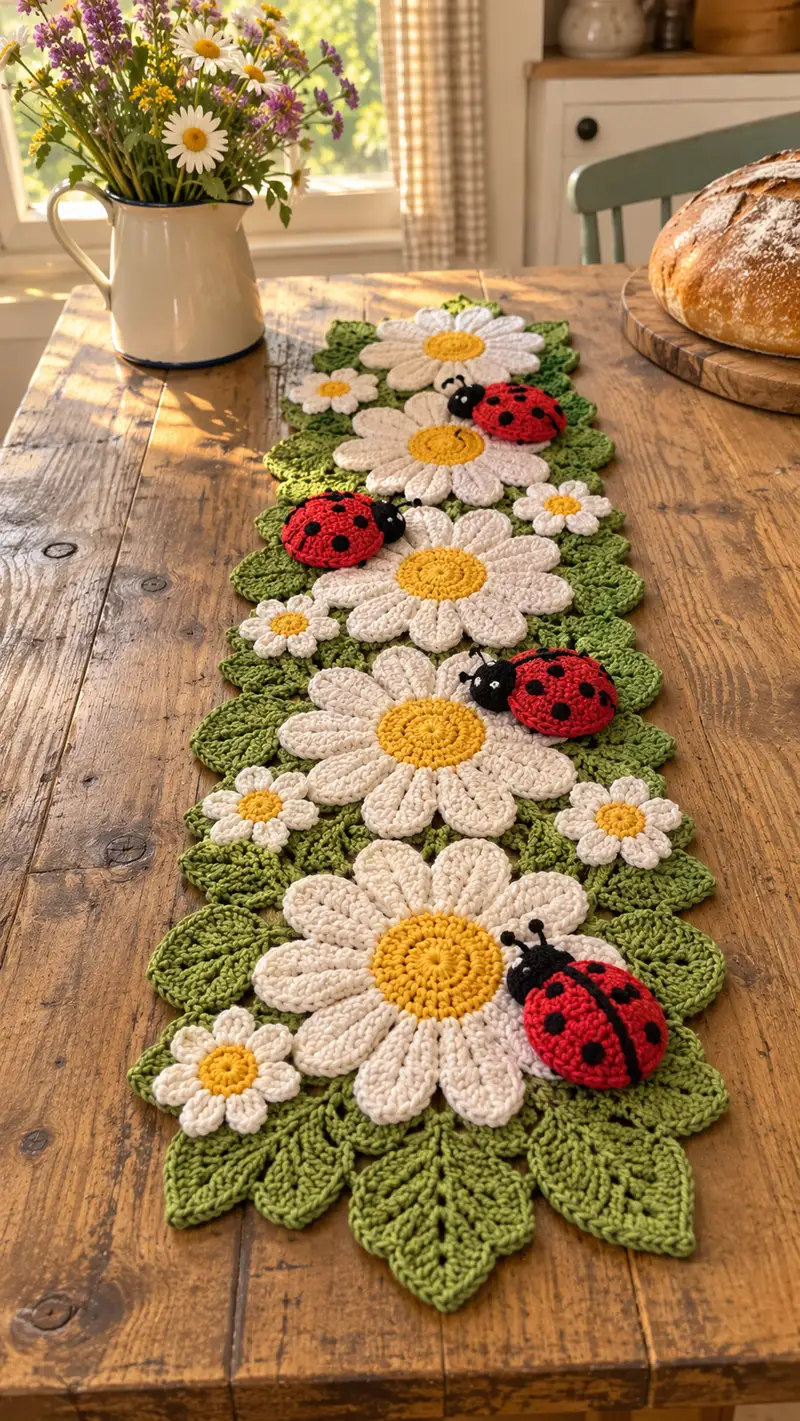
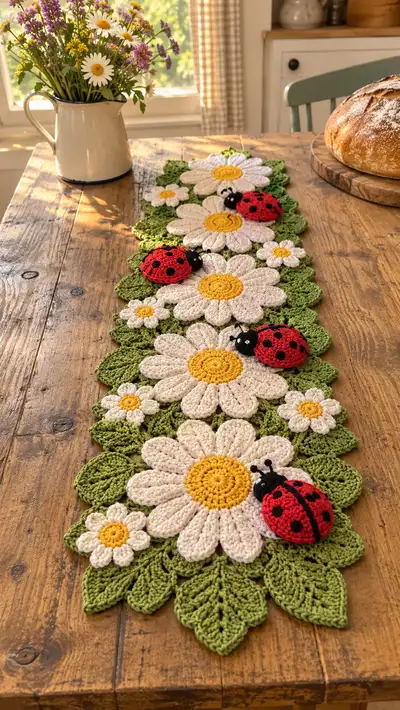
A bright, whimsical table runner featuring large white daisies with sunny yellow centers, leafy green connectors and playful red ladybug appliques. Perfect for spring and summer tabletops, this modular pattern uses flower, leaf and beetle motifs that are crocheted separately and sewn together. The design creates a long, scalloped runner with layered texture and charming 3D details that sit beautifully on wood or fabric surfaces.
Progress Tracker
0% Complete
— Large Daisy Centre :
Round 1 :
6 sc in magic ring (6)
Round 2 :
Inc in each st around (12)
Round 3 :
(1 sc, inc) x 6 (18)
Round 4 :
(2 sc, inc) x 6 (24)
Round 5 :
(3 sc, inc) x 6 (30)
Round 6 :
(4 sc, inc) x 6 (36)
Round 7 :
(5 sc, inc) x 6 (42)
Round 8 :
(6 sc, inc) x 6 (48)
Round 9-10 :
1 sc in each st (48)
Info :
Use sunflower yellow yarn for center. Keep rounds tight and work with a slightly smaller hook if your centers are loose. These rounds form a compact, flat disc that will anchor the petals.
Round 11 :
Sl st to next st to even placement then ch1, 1 sc in same st and evenly 1 sc in next 47 sts (48) - fasten off and leave a long tail for sewing to petals
Info :
Make as many centers as required for your runner: the photographed runner uses 5 large centers and several small centers. Block lightly flat if desired to give perfect circular shape.
— Large Daisy Petals (make for each center) :
Round 1 :
Attach white yarn to a stitch on the center with sl st, ch6, (dc, tr, dc) into the 2nd ch from hook to form a petal tip, sl st into next center st to anchor petal. Repeat petal formation around center, making 12 petals total, spacing petals by placing each sl st into each 4th stitch of the center round (12 petals)
Round 2 :
Turn petals up: Work along the base of each petal on the existing loop: sc into sl st that joins petal to center, ch2, (3 dc) in petal top, ch2, sc into next base sl st to anchor. Repeat around to embellish petals (12 petals)
Round 3 :
For fuller petals: In each petal, (1 sc, ch1, 5 tr, ch1, 1 sc) worked around the petal top and anchored at the base gives a plump, textured petal. Repeat for 12 petals (12 petal clusters)
Round 4 :
Edge each petal with 6 sc around the outer curve to tidy the shape, join with sl st and continue to the next petal. Center and petals remain attached forming a single motif (approx stitch count varies by petal shaping but center base remains 48)
Info :
Keep tension consistent when forming petals so petals align evenly. If petals are too long or short, adjust chain count in Round 1 to ch5 or ch7 for smaller or larger petals respectively.
Round 5 :
Work 1 sc into every base stitch around the center and through the petal anchor points to ensure motif lays flat (approx 48 sc around base)
Round 6 :
Optional: Work 1 round of sc in BLO around the base to create a slightly raised inner ridge for a more defined look (48)
Info :
If you want a puffed petal effect like the photo, use elongated puff or cluster stitches for the petal bodies: yarn over twice for tr-puff clusters, finish each cluster by pulling through all loops and securing with a ch1 between clusters.
Round 7 :
Fasten off and weave ends through the underside. Block petals lightly if needed to make them uniformly flat and rounded.
— Small Daisy (mini motif) :
Round 1 :
6 sc in magic ring (6)
Round 2 :
Inc in each st around (12)
Round 3 :
Sl st to next st then ch5; (dc, tr, dc) in 3rd ch from hook, sl st to next center stitch; repeat to make 6 small petals (6 petals)
Round 4 :
Sc around the base to tidy (12 sc), fasten off and weave in ends
Info :
Mini daisies are used as filler motifs between larger daisies and leaves—make a matching number and place them where small gaps appear in your layout.
— Leaf Motif :
Round 1 :
6 sc in magic ring (6)
Round 2 :
Inc in each st around (12)
Round 3 :
(1 sc, inc) x 6 (18)
Round 4 :
(2 sc, inc) x 6 (24)
Round 5 :
Ch1, 1 sc in next 6 sts, ch1, turn to work along edge: 1 sc in next 6 sts, do not join — this sets the base for the leaf tip shaping (24)
Round 6 :
Work up the tip: ch3 (counts as dc), 2 dc in next st, 1 tr in next, 2 dc in next, ch3 and sl st to next base st to start returning down the other side to mirror tip (this creates a pointed leaf tip)
Round 7 :
Return along the opposite edge using dc and hdc to match the first side, finishing with sc at the base join (24 around base remain unchanged)
Info :
To create central veins: use surface slip stitch lines from base to tip, or work a row of fpdc down the center in one round for raised vein detail. Leaves will be joined together to form the scalloped runner foundation.
Round 8 :
Edge work: 1 sc into each stitch around the leaf perimeter; add 3 sc in each base corner to give a slight ruffle and ensure easy joining later (approx 30 sc around, depending on shaping)
Round 9 :
Fasten off and block leaf flat with pins to open the veins and give consistent shape. Make many leaves (photograph uses sets of 5-7 leaf motifs per flower group; plan layout accordingly)
— Ladybug Body (make 3 or as many as you like) :
Round 1 :
6 sc in magic ring (6)
Round 2 :
Inc in each st around (12)
Round 3 :
(1 sc, inc) x 6 (18)
Round 4 :
(2 sc, inc) x 6 (24)
Round 5 :
(3 sc, inc) x 6 (30)
Info :
Switch to bright red yarn now for the ladybug shell. Work with a slightly smaller hook if you want a tighter fabric so stuffing won't show through.
Round 6 :
1 sc in each st around (30)
Round 7 :
(4 sc, inc) x 6 (36)
Round 8 :
1 sc in each st around (36)
Round 9 :
(5 sc, inc) x 6 (42)
Round 10 :
1 sc in each st around (42)
Info :
These increases build the dome shape for the ladybug shell. Work evenly and join rounds with sl st to maintain a neat spiral if you prefer. The photograph shows a half-sphere shell; final shaping will flatten slightly when assembled onto daisy petals.
Round 11 :
(6 sc, inc) x 6 (48)
Round 12-14 :
1 sc in each st around (48)
Round 15 :
(6 sc, dec) x 6 (42)
Round 16 :
(5 sc, dec) x 6 (36)
Info :
Begin stuffing the shell lightly from this round onward. Stuff in small amounts until the dome feels rounded but still soft enough to sit flat when attached to a petal.
Round 17 :
(4 sc, dec) x 6 (30)
Round 18 :
(3 sc, dec) x 6 (24)
Round 19 :
(2 sc, dec) x 6 (18)
Round 20 :
(1 sc, dec) x 6 (12)
Info :
Fasten off leaving a long tail for sewing to the daisy. Stuff final bit so dome is plump but not overfilled. Use yarn needle to close opening and weave tail to underside for secure attachment.
— Ladybug Underside & Body Panel (optional flat underside to sew on petals) :
Round 1 :
With red yarn, ch6, join into a ring with sl st, ch1; 12 sc in ring (12)
Round 2 :
(1 sc, inc) x 4 = (16)
Round 3 :
1 sc in each st (16) - fasten off leaving a tail for sewing. This small disc can be sewn to the bottom of dome before closing for a smooth join to the petal surface.
Info :
Sew this disc to the underside of the stuffed shell to create a flat base for stable positioning on petals. Use mattress stitch to create an invisible seam.
— Ladybug Head :
Round 1 :
5 sc in magic ring with black yarn (5)
Round 2 :
Inc in each st around (10)
Round 3 :
1 sc in each st around (10)
Round 4 :
(1 sc, dec) x 3 then 1 sc in remaining stitch (7)
Round 5 :
Fasten off leaving a long tail. Lightly stuff head and sew onto one end of the ladybug shell, aligning so the head slightly overlaps the shell edge as seen in the photo.
Info :
Embroider small white eye highlights with a tiny french knot or attach 6mm safety eyes before closing the head. If using safety eyes, position them on round 2 of the head before stuffing fully.
— Ladybug Spots and Back Stripe (Embellishments) :
Round 1 :
With black yarn, ch2, make a small circle: 6 sc in magic ring, sl st to close, fasten off leaving long tail for sewing (6) - make 6-8 spots per beetle depending on size
Round 2 :
For a narrow back stripe: embroider a line of black running stitch down the center of the shell and tack the larger spots on either side, leaving a central seam line visible as in photo
Info :
Arrange spots before stitching: place larger spots near the middle and smaller near the top of the dome to mimic natural ladybug pattern. Sew spots with ladder stitch for flat secure applique.
— Ladybug Antennae :
Round 1 :
With black yarn, ch6, sl st back along chain to create a flexible cord; fasten off and fold a small knot or bead at tip for eyes/antenna knobs
Info :
Sew antennae to underside of the head, anchoring securely with several stitches. Optionally, use a short piece of craft wire within the chain and wrap with yarn for poseable antennae, sealing ends safely inside the head.
— Connector Motifs & Joining Strategy :
Info :
Layout plan: The photographed runner uses repeating groups: large daisy + pair of small daisies per group, with leaves arranged in scalloped clusters beneath each group. Plan your runner length and count how many groups you need before making large motif counts. Example layout: 5 large daisies, 8 small daisies, 25 leaves, 3 ladybugs.
Round 1 :
Arrange motifs on work surface to test placement, paying attention to where petal edges meet leaf points. Pin motifs with T-pins to hold positions while sewing.
Round 2 :
Begin joining with whip stitch or mattress stitch: align two motifs so edges sit snugly; sew through both motifs underside and over edge, leaving top surface neat. Use matching color yarn to hide stitches.
Info :
Join motifs from the underside where possible to keep the top decorative surface free from visible sewing. Work slowly checking alignment after every 4-6 stitches to avoid twisting pieces.
Round 3 :
Where multiple leaf points meet, overlap slightly and add a few hidden stitches to secure cluster. The leaves form the scalloped edge; ensure repeated pattern alternates points for even scallops.
Round 4 :
Sew ladybug bases to the top of petals: position the ladybug so the small sewn underside disc contacts three or four petal stitches. Use the long tail from the dome or additional yarn to sew through underside disc and into petal base in several passes to secure the beetle without visible top-stitching.
Info :
When attaching ladybugs, slightly flatten the dome if you want a more adhered look; for a more 3D beetle, leave base slightly rounded so it sits proud of the petal.
— Runner Base & Scalloped Join Rounds :
Round 1 :
Once motifs are sewn into connected groups, work an optional connecting row in green around the underside joining points: join yarn to an underside stitch and sc in each available base stitch around the runner shape to stabilize seams (approx stitch count depends on layout)
Round 2 :
Work 1 round of sc in BLO to form a neat line along the top of each leaf cluster for a defined scallop (this gives the leafy raised ridge seen in photo)
Info :
The connecting rounds will even out gaps between motifs; add extra sc or small picots where you see small holes to prevent loose areas.
Round 3 :
Work scalloped edging round: *ch3, skip 2 sts, 1 dc in next st, ch3, sl st in next st* along exposed edges to create decorative scallops; repeat around entire outer edge and join with sl st to first scallop
Round 4 :
Fasten off and weave in all remaining ends. Block the entire runner lightly with pins to ensure scallops and petals sit flat and tidy.
Info :
Blocking is particularly helpful for leaf points and petals to open the stitches and create the long scalloped line. Use a steam iron held above the piece or wet-blocking with pins on a blocking board; let dry completely.
— Alternative Petal & Texture Options :
Round 1 :
If you prefer more depth, work petals with front post stitches for ridged texture: replace the central puff cluster with 5 fpdc grouped clusters and anchor bases with sc; this increases thickness of each petal.
Info :
For a lacy look, use ch-spaced petals: ch8 per petal and work shells of (3 dc, ch2, 3 dc) to create elongated lacy petals for a lighter runner. Adjust spacing so petal count aligns with center stitch base.
— Finishing Touches and Detailing :
Round 1 :
Securely weave in all tails on the underside of the runner by threading the tail through 8-12 stitches using a yarn needle, pull taut and trim close to fabric. This prevents tails from working out during use.
Round 2 :
If desired, lightly tack down petals with a couple of hidden stitches to prevent heavy use from shifting motifs on the runner surface. Use matching yarn colors and stitch through petal undersides only.
Round 3 :
For extra durability, consider sewing a lightweight cotton fabric backing to the underside of the runner. Cut to shape and whip stitch or use fabric glue to attach, hiding the backing beneath the scalloped edge.
Info :
Spot-check seams at the end and reinforce any that feel loose by going back and adding small stitching passes. Give the runner a final blocking and place it on a flat surface to admire your scalloped garden runner.
This cheerful daisy and ladybug runner brings a touch of garden freshness to any table—perfect for breakfast nooks or spring gatherings. Each motif is a little piece of handmade joy that stacks into a long, scalloped centerpiece you can be proud of. I hope stitching this encourages playful creativity and brightens your home with floral charm. 🧶🌼🐞