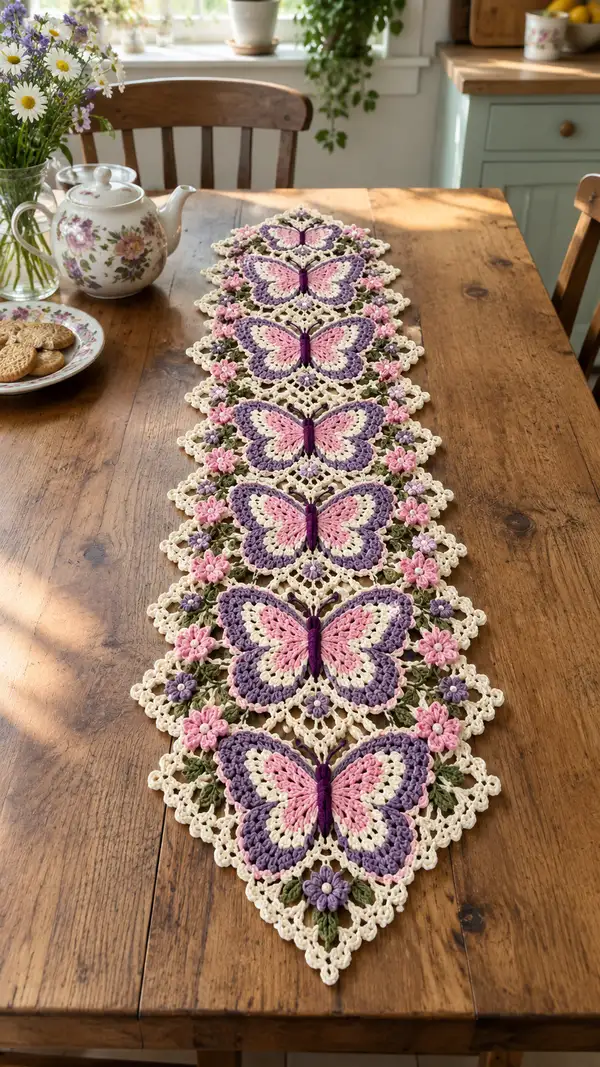
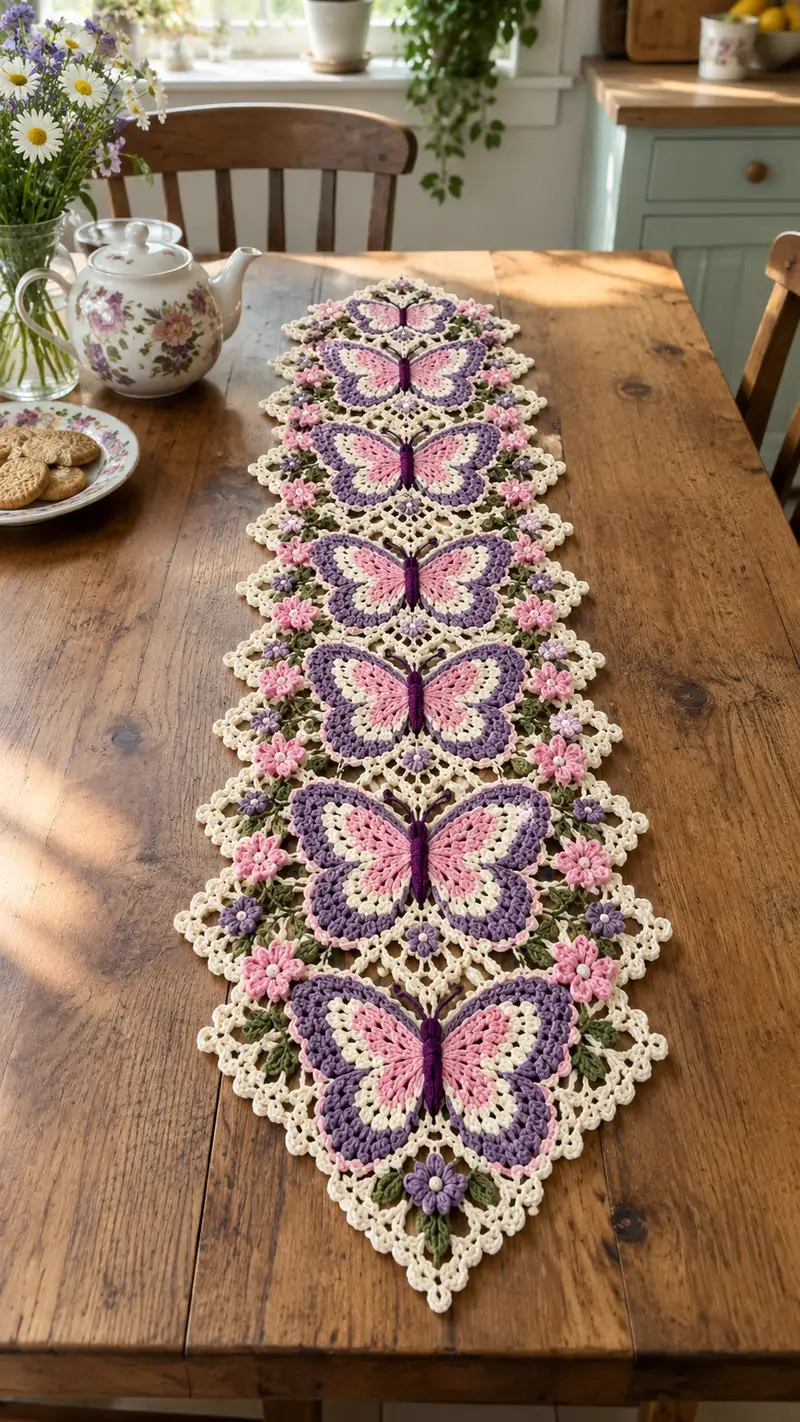
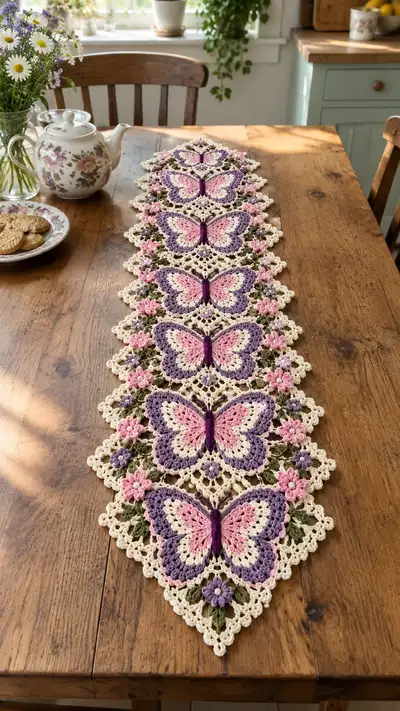
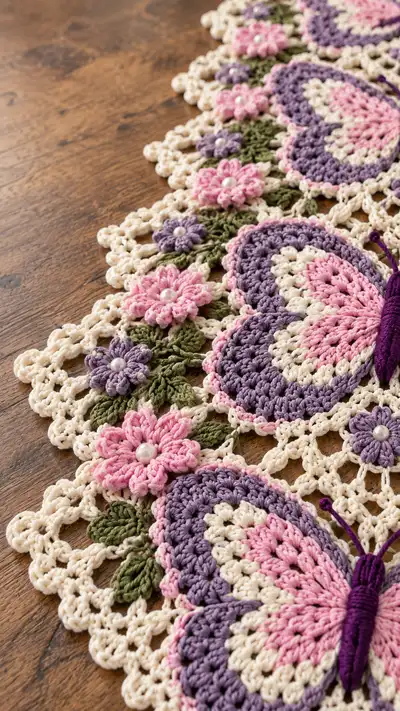
A delicate lace table runner featuring a repeating pastel butterfly motif, layered petals and leaves, and pearl-centered blooms. Made in soft cream, pinks, purples and green, this long runner combines lacy openwork with raised 3D flowers and textured butterfly wings for a classic vintage tabletop look. Perfect for a dining table, sideboard or dresser — it brings a garden-fresh, handmade touch to any room.
Progress Tracker
0% Complete
— Notes & Gauge :
Info :
Make one complete butterfly diamond motif first to check gauge. Using 3.5mm hook and DK mercerised cotton, one diamond motif should measure approximately 18cm (7in) point to point and 13cm (5in) across the wings at the widest point. Adjust hook size if needed to match measurements.
Info :
All motifs are worked flat. When a motif calls for 'both wings' you will make left and right halves mirror images and join them with the butterfly body or by surface slip-stitching. Work tightly for crisp definition; use 3.0mm hook for small flowers if you prefer tighter petals.
— Butterfly Body (make 1 per motif) :
Round 1 :
Ch 30, do not join. Work 1 sc in 2nd ch from hook and 1 sc in each ch across (29) - this creates the base chain for the body tube.
Round 2 :
Ch 1, turn, 1 sc in same st (first), 1 sc in each st across (29)
Round 3-8 :
Repeat Round 2 for 6 rounds in total to create a narrow flat strip (29)
Info :
Fold the strip lengthwise and work through both layers with sc to form a tube. Use stitch marker at the start to keep seam even.
Round 9 :
Fold strip and join by working 29 sc through both layers, slip stitch to first sc to join if you prefer a continuous seam (29)
Round 10-12 :
Work 1 sc in each st around the tube for 3 rounds to tidy edges (29)
Info :
Fasten off leaving a long tail for sewing. Wrap the tube tightly with deep plum yarn (or embroider) to create the wrapped body look: wind yarn around center 12-18 times and fasten off securely at the back. This creates the raised butterfly body as seen in photo.
— Wing Halves (make 4 per butterfly: top-left, top-right, bottom-left, bottom-right) :
Round 1 :
mr, 6 dc in magic ring, pull closed (6)
Round 2 :
Ch 3 (counts as dc), 2 dc in each st around (18)
Round 3 :
(2 dc, 1 dc in next st) x 6 (24)
Round 4 :
(3 dc, 1 dc in next st) x 6 (30)
Info :
Switch color for wing inner shade here if working a tri-color wing. The image shows center pale pink, middle lavender and outer deeper mauve. Change at the end of Round 4 to inner shade (pale pink).
Round 5 :
1 dc in each st around (30)
Round 6 :
(3 dc, 1 inc) x 6 (36)
Round 7 :
1 dc in each st around (36)
Round 8 :
(4 dc, 1 inc) x 6 (42)
Info :
Change to middle wing color (lavender) before Round 9. Work next rounds to build the scalloped outer edge using larger clusters and chain spaces.
Round 9 :
Ch 2, *skip next st, 7 dc cluster in next st, skip next st, ch 2, sl st in next st* rep across to create lobed scallops (42 lobes counted as group placements across)
Round 10 :
Work 1 sc into each dc and into chains to tidy (42)
Round 11 :
Change to outer color (mauve). Around each scallop work: *(sl st into center dc of scallop, ch 3, (3 dc, ch 3, 3 dc) in same space, sl st in next sl st)* to form a pronounced scalloped edge. Count remains visually 14 scallop points per half wing but total stitches vary.
Info :
After Round 11 fasten off leaving long tail for sewing. Mirror the stitches when making right and left halves: make the same sequence but when placing scallops, mirror the direction so both halves sit symmetrically.
Round 12 :
Block wing halves flat matching measurements. Measure distance from wing base to outer scallop and adjust if needed so top wings are slightly larger than bottom wings (as pictured).
— Wing Join & Surface Detail :
Round 1 :
Lay top and bottom halves together on the work surface aligning inner edges. Using pale pink yarn tail and mattress stitch, sew inner seams together across the wing base; stitch counts approx 20 mattress stitches to join inner curve.
Info :
When sewing wings together leave space in center for the butterfly body tube to be placed and sewn on top. The two wings per side should form a continuous silhouette with a slight scalloped ridge between top and bottom wings.
Round 2 :
Using deep plum or contrasting color, embroider a thin outline following outer scallops with surface slip-stitch or small sc to define wing edges. Work around all four wing edges evenly.
Round 3 :
Block wings together and press lightly with steam blocking (cotton safe). Fasten off and weave in tails.
— Lace Diamond Motif (background square worked as a diamond) :
Round 1 :
mr, ch 3 (counts as dc), 11 dc in ring, pull closed (12)
Round 2 :
Ch 4 (counts as dc+ch1), *skip next st, dc in next, ch1* around to form mesh (12 dc, 12 ch-1 sps)
Round 3 :
Join into each ch-1 sp: *(sc, ch5, sc) in each ch-1 sp* creating 12 picot arches (12 arches)
Round 4 :
Into each ch-5 arch: work (sc, ch3, 3 dc, ch3, sc) to begin the diamond openwork (visual count 12 petalled arches)
Info :
This diamond is the central connector behind the butterfly wings. Make its openwork fairly loose to allow the wings and flowers to be stitched on top—do not block too tightly or it will pull wings inward.
Round 5 :
Between arches work chains to build corner points: ch 6, sl st into next joining point to make elongated diamond points (12 chains)
Round 6 :
Work a round of 1 sc in each st and into chain spaces to tidy and compress lace to approximately 18cm diagonal (total counted stitches variable by tension)
Round 7 :
Edging round: *ch3, sl st into 2nd ch from hook to form small picot, ch3, sl st into next sc* repeat around to create a continuous scalloped edge (measured scallop count approx 48)
Info :
Leave long tails to stitch butterfly wings and decorative flowers onto the diamond. For each diamond you will add 3 small flowers on two opposite corners and one larger flower near the wing base as in the photo.
— Small 6-Petal Flower (make 6 per diamond as pictured) :
Round 1 :
mr, ch1, 6 sc in ring, pull closed (6)
Round 2 :
*ch4, in same st sl st into next st* repeat to make 6 ch-4 loops; sl st to join (6 loops)
Round 3 :
Into each ch-4 loop work (sl st, ch1, 5 dc, ch1, sl st) to form petals; fasten off leaving tail for sewing (6 petals)
Info :
Sew a small pearl bead into the center of each flower using beading needle and thread. Place flowers on diamond corners as in the reference photo, spacing approximately 6-8 sts apart.
— Large 8-Petal Flower (make 2 per diamond) :
Round 1 :
mr, ch1, 8 sc in ring, pull closed (8)
Round 2 :
*ch5, sl st in next st* around to make 8 loops, sl st to join (8 loops)
Round 3 :
Into each ch-5 loop work: sl st, ch1, (7 dc) ch1, sl st to form larger petals, fasten off leaving a long tail to attach to motif (8 petals)
Round 4 :
Sew pearl centers to these larger flowers and position them near wing bases on either side of the diamond as in the photo. Add extra backstitches to secure pearl centers.
Info :
For a more dimensional flower, after sewing petals down, push the petal centers slightly up and stitch around the base of each petal with matching yarn to lift them.
— Leaf (make 6 per diamond) :
Round 1 :
Ch 7, sc in 2nd ch from hook, hdc in next, dc in next 2, hdc next, sc next, sl st to last ch to form a tapered leaf (6 sts)
Round 2 :
Work back along opposite side of chain: sc, hdc, dc, dc, hdc, sc to mirror and finish; fasten off leaving tail for sewing
Info :
Attach leaves grouped in threes by stitching at their bases between flower clusters. Slightly rotate and pin before sewing to match the angled leaf clusters in the photo.
— Small Pom-Petal Flower (tiny accent flowers) :
Round 1 :
mr, ch1, 6 sc in ring, pull closed (6)
Round 2 :
*ch3, 3 dc in same st, sl st in next st* around to make 6 tiny pouf petals. Fasten off and attach tiny pearl or french knot center.
Info :
These tiny flowers in lavender fill the spaces between larger blooms. Sew them onto the diamond with a few secure passes.
— Outer Joining Edging (per motif) :
Round 1 :
With cream yarn and working around diamond edge, ch3, *skip next sc, 3 dc in next sp, ch3, sl st in next sc* repeat around to create decorative lacy looped border (count approx 48 points)
Round 2 :
Into each ch-3 loop work: (sc, ch3, sc) to make small lattice points; adjust counts to keep diamond edges straight (approx 48)
Info :
This outer edging is what will be used to join diamonds together with slip-stitches or by whip stitch later. Leave long tails at four corner points for stronger join if desired.
— Final Scalloped Border (after joining motifs) :
Round 1 :
Once motifs are joined into runner length, work one continuous edging round around the entire runner with cream yarn: *sc along joined seams, every 6th st work (ch4, sl st into base) to create lifted picot arches* repeat for a consistent outer frame.
Round 2 :
Work one final finishing round: into each ch4 arch work (sl st, ch3, 3 dc, ch3, sl st) to echo the wing scallops and give a cohesive look across the whole runner.
Info :
Block the whole runner to final measurements using rustproof pins and spray-starch if you want a firmer tabletop lace. Allow to dry fully before use to preserve shape and pearls.
— Suggested Stitch Counts & Totals for One 8-Butterfly Runner :
Info :
For an 8-butterfly runner (as photographed) you will make: 8 lace diamonds, 8 complete butterflies (32 wing halves), 8 butterfly bodies, 48 large flowers, 64 small flowers, 48 leaves, plus border. Total rounds across all motifs approximate 148-165 depending on how many small decorative rounds you add. This allows a richly textured, layered runner.
Info :
Always block each motif and check measurement against first motif. Consistent blocking is essential for even joins and a straight runner edge.
— Color Change & Carrying Tips :
Info :
Change colors at the end of a round by finishing last st with new color to create clean joins. Avoid carrying multiple strands across open lace areas; instead weave in ends behind solid wing areas or darn tails neatly at the back of diamonds.
Info :
When working petals and tiny flowers use a smaller hook (3.0mm) for tighter petals that hold shape and make sewing easier. For outer scalloped edges, a slightly looser tension (use 3.5mm) gives a pretty drape.
— Troubleshooting & Variations :
Info :
If a wing appears too large, block it slightly smaller or add a tidy round of sc to compress it. To make the runner longer add more diamond motifs in the same sequence; to make shorter reduce number of repeats. For a stiffer runner use cotton size a little heavier or apply fabric starch when blocking.
Info :
For a baby-friendly version omit pearls and sew flower centers with embroidered French knots or small yarn loops instead.
This lace butterfly runner is a beautiful way to bring handmade charm to any table — the layered butterflies and pearl-centered flowers create a delicate, vintage feel that's perfect for tea, gifts, or seasonal décor. Each motif joins to form a flowing, elegant runner that's as fun to make as it is to admire. Enjoy the calming rhythm of the stitches and the satisfaction of watching each butterfly come to life. 🦋🌸🧶