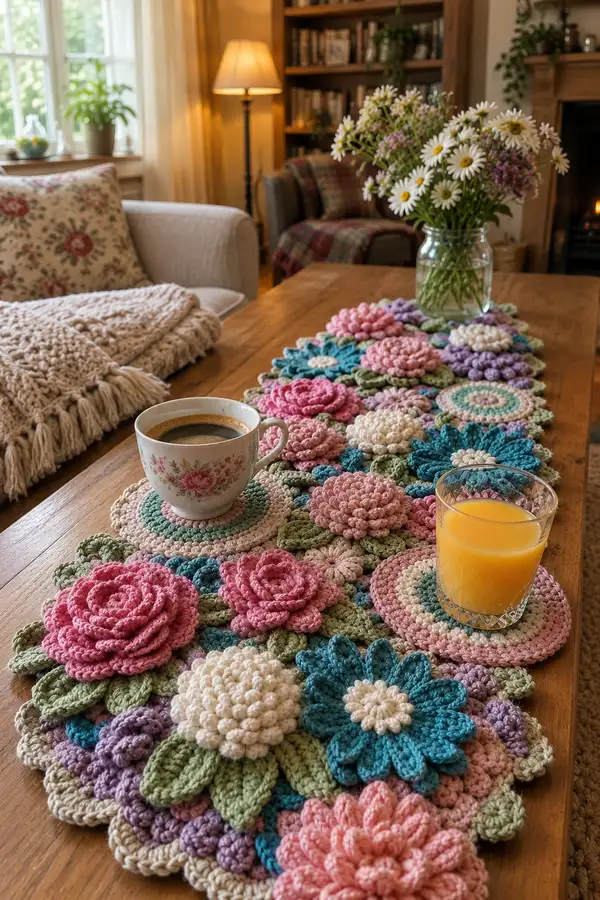
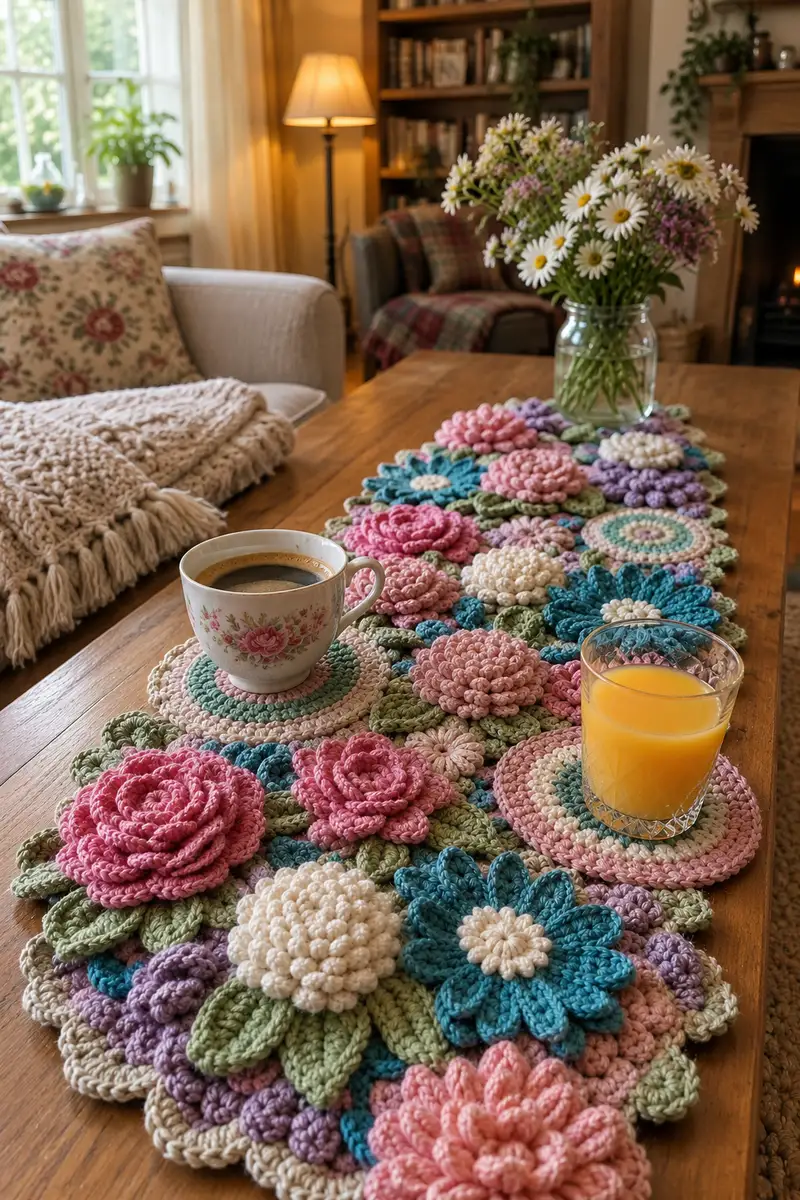
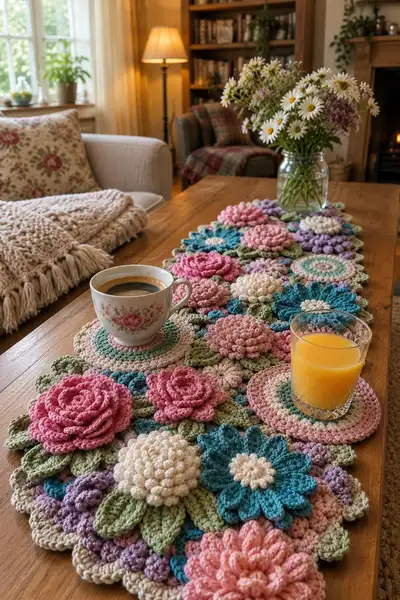
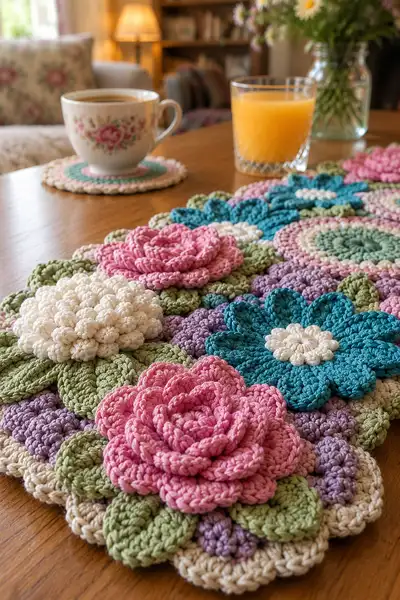
A lush, romantic table runner made from layered floral motifs and circular coasters. This pattern uses pastel roses, puff clusters, daisies and leafy motifs joined into a long runner with a delicate scalloped edge. Perfect for centerpieces, afternoon tea displays, or gifting to someone special. The finished runner showcases raised layered petals, dense puff blooms and interlocking leaves for a textured, dimensional look.
Progress Tracker
0% Complete
— Materials & General Notes :
Info :
Use worsted-weight cotton for a crisp stitch definition and good table protection. Work tightly enough for textured stitches to show, but not so tight that petals curl. Gauge is not strict for motif size, but adjust hook to match photo scale: each large rose should finish approx 10-12 cm across with specified yarn and 4.0mm hook.
Info :
Throughout the pattern we use magic ring starts for round motifs. When working petals or puff stitches, change to 3.5mm hook if you prefer tighter, fuller bobbles; switch back to 4.0mm for joining and base rounds.
— Large Layered Rose (Make 4) :
Round 1 :
6 sc in magic ring (6)
Round 3 :
(1 sc, 1 inc) x 6 (18)
Round 4 :
(2 sc, 1 inc) x 6 (24)
Round 5 :
(3 sc, 1 inc) x 6 (30)
Info :
These initial increases create a flat, dense disc as the base for the rose. Keep tension even and do not turn work between rounds; work in continuous rounds for smoother fabric.
Round 6 :
(4 sc, 1 inc) x 6 (36)
Round 7 :
(5 sc, 1 inc) x 6 (42)
Round 8 :
(6 sc, 1 inc) x 6 (48)
Round 9-10 :
1 sc in each st (48)
Info :
Change to 3.5mm hook now if making tighter petal loops. Mark the first stitch of round 11 as a reference for petal placement; we will create 12 petal anchors evenly spaced (48 sts / 12 = 4).
Round 11 :
*(3 sc, ch 2) x 12 (48) - leave ch2 loops as anchors for first petal row
Info :
Petals will be worked into the ch-2 space created every 4 stitches. Keep each petal symmetrical by stretching the ch-2 slightly before placing clusters.
Round 12 :
In each ch-2 space: (sc, hdc, dc, hdc, sc) — repeat x12 (48 petals anchored, stitch count stays 48)
Round 13 :
1 sc in each st (48) working behind petal bases to hold them flat
Round 14 :
*(2 sc, into next 4 sts work petal cluster: (ch 2, 3 dc cluster, ch 2) ) x 12 — finishing 48 stitches anchored (48)
Info :
Round 14 forms larger outer petals seated between inner petals. Use fpdc around petal bases on this round if you want more lift: work fpdc around cluster post to pull petals forward.
Round 15 :
1 sc in each st BLO to create a ridge at petal base (48)
Round 16 :
*(1 sc, ch 3, sl st in same st) x 48 across the top to create small chain loops for roll-up petals (48)
Round 17 :
Working into each chain-3 loop: (sc, hdc, dc, hdc, sc) x 48 loops — this yields 48 small rolled petals; maintain stitch count by working back to the base with a joining sl st between loops (48)
Info :
This round creates many tiny petals to give the rose its dense curled centre. Work more loosely in these loops to allow the petals to curl outward; altering tension changes bloom fullness.
Round 18 :
Fold the motif so the centre petals overlap and sc across every 3 stitches to hold rollover petals partially closed (16 sc) - (adjust fold points to preference)
Info :
Round 18 is shaping rather than maintaining circumference. You are creating a layered 3D rose by stitching through petal bases; count final attachment points rather than flat stitch total.
Round 19 :
From folded center, form a spiral by working a sl st through petal base every 2-3 petals until center is tightly closed; fasten off and weave tail through the back to secure
Round 20 :
Attach a second round of larger petals around the base by sl st into the outer sc: *(ch 2, 5 dc into same anchor, sl st in next 3 sc) x 12 (12 large petals; base remains 48 anchors)
Round 21 :
Reverse work and sc around petal bases to secure petals: 1 sc in each st across anchors (48)
Round 22 :
*(2 sc, inc) x 12 (60)
Info :
Round 22 expands the base slightly so the rose sits plump on the runner. If you prefer a flatter rose, omit this increase and finish at Round 21.
Round 23 :
1 sc in each st (60)
Round 24 :
Working behind last petal row, crochet 12 scallop petals: *(sc, ch2, 3 dc, ch2, sc) in every fifth stitch approx — 12 scallops (60 anchors retained)
Round 25 :
1 sc in each st BLO to anchor scallops (60)
Round 26 :
Fasten off leaving long tail for sewing to coaster/base. Weave in ends toward the back and shape petals by hand; if needed add a small dab of fabric glue to secure layered petals.
Info :
Block each rose lightly on a foam mat if petals need shaping. Pin petal tips outward to achieve the look in the photo and steam lightly — cotton responds well to gentle steam blocking.
— Medium Layered Rose (Make 3) :
Round 1 :
6 sc in magic ring (6)
Round 3 :
(1 sc, 1 inc) x 6 (18)
Round 4 :
(2 sc, 1 inc) x 6 (24)
Round 5 :
(3 sc, 1 inc) x 6 (30)
Info :
Medium roses are less layered than large ones. We will make 10-12 outer petals for a neat mid-sized bloom.
Round 6 :
1 sc in each st (30)
Round 7 :
*(2 sc, ch 2) x 10 (30)
Round 8 :
In each ch2 space: (sc, hdc, 3 dc, hdc, sc) x 10 (10 petals anchored; base remains 30)
Round 9 :
1 sc in each st around petal bases (30)
Round 10 :
Create an outer petal row: *(sc, ch 3, 5 dc in loop, ch 3, sc) x 10 (30 anchors)
Round 11 :
1 sc in each st BLO (30)
Round 12 :
Fasten off leaving a tail for sewing. Shape petals and block lightly as needed.
Info :
Make 3 medium roses to intersperse between larger roses to create visual rhythm. Use slightly different pink shades for depth.
— Small Spiral Rose (Make 6) :
Round 1 :
6 sc in magic ring (6)
Round 3 :
(1 sc, inc) x 6 (18)
Round 4 :
1 sc in each st (18)
Round 5 :
Fold the circle and sc across every 2-3 sts to create a rolled center (6-9 sc depending on fold)
Round 6 :
Continue rolling and secure with sl st to the back every 2 stitches until tightly coiled; fasten off leaving yarn tail for sewing (final small coil)
Info :
Small spiral roses are quick to make and add layered texture between larger blooms. Use a 3.5mm hook for tighter coiling.
— Puffy Cluster Flower (Make 8) :
Round 1 :
6 sc in magic ring (6)
Round 3 :
(1 sc, inc) x 6 (18)
Round 4 :
1 sc in each st (18)
Round 5 :
Switch to 3.5mm hook. *Make puff stitch in next st: yo, insert hook, pull up loop 5 times, yarn over and pull through all loops, ch1 to close puff*; repeat across (18 puffs)
Round 6 :
Sl st around back of puff bases to hold them: 1 sl st in back loop behind each puff (18)
Info :
If you want more domed puff clusters (as seen in the cream motif), make the puff stitch with 6 loops instead of 5 and use a slightly smaller hook for denser bobbles. Optionally tuck a tiny bit of fiberfill into the center before closing the puff for extra roundness.
Round 7 :
Fasten off leaving tail for sewing. Trim tails to the back and weave in securely.
— Daisy / Blue Petal Flower (Make 6) :
Round 1 :
6 sc in magic ring (6)
Round 3 :
(1 sc, inc) x 6 (18)
Round 4 :
Switch color to accent (cream) for center: 1 sc in each st (18)
Round 5 :
Change back to petal color. *Ch 6, sl st into same st to form long chain loop for petal* repeat around forming 9 loops (9 long loops)
Round 6 :
Into each loop: (sc, hdc, 3 dc, hdc, sc) x 9 petals — anchor petals into base (18 anchors retained)
Round 7 :
1 sc in each st across base to secure petals (18)
Info :
Create daisies with elongated loops (ch 6) for the style seen in teal-blue flowers. Use FLO on Round 7 to make a subtle ridge behind petals.
— Round Coaster Base (Make 4) :
Round 1 :
6 sc in magic ring (6)
Round 3 :
(1 sc, inc) x 6 (18)
Round 4 :
(2 sc, inc) x 6 (24)
Round 5 :
(3 sc, inc) x 6 (30)
Round 6 :
1 sc in each st (30)
Round 7 :
Switch to contrasting ring color: 1 sc in each st BLO to create subtle texture (30)
Round 8 :
*(2 sc, sc in next st, sc in next) adjust for 30 to create smooth edge – 1 sc in each st (30)
Round 9 :
Create a scallop edge: *(sc, ch3, 3 dc, ch3, sc) every 5th stitch approx across to form 6 scallops (30 anchors)
Round 10 :
Fasten off and weave tails. Optionally center with a small spiral rose or puff cluster using sewing tail to attach.
Info :
Coasters can be made in the same palette as the runner to act as anchors for cups as pictured. Make 4 coasters and sew them into the runner layout or leave detachable.
— Small Rounded Filler Motif (Make 16) :
Round 1 :
6 sc in magic ring (6)
Round 3 :
(1 sc, inc) x 6 (18)
Round 4 :
Switch to puff or bobble: *(puff in next st) x 6 then sl st between puffs to secure — final shape 6 puffs
Round 5 :
Fasten off; these little mounds tuck into gaps between larger motifs to give a pebble effect as in the photo
Info :
Make multiple size variations: for a larger filler make Round 4 into 12 puffs by working into half the stitches and increasing in the next round.
— Leaves (Make 20) :
Round 1 :
ch 8, sc in 2nd ch from hook, hdc in next, dc in next 2, hdc in next, sc in next, sl st in last ch (leaf base) — work on flat chain for 7 stitches across
Round 2 :
Turn and work along opposite edge: sc, hdc, dc, dc, hdc, sc back into base chain to make a closed leaf (approx 14 sts forming leaf)
Round 3 :
Working in BLO along the center of the leaf, fpdc around center stitch for a raised vein: *fpdc across center 3 stitches* — fasten off (leaf finished)
Info :
Leaves are worked flat and sewn beneath roses. Adjust chain length to create small and large leaves — longer leaf chains for the larger rose backings.
— Joining Motifs into Runner (As-You-Go Method or Sew-After) :
Info :
Layout your motifs on a flat surface to match the photo: large roses spaced evenly lengthwise, medium roses and daisies alternating, puff clusters and filler motifs tucked between, leaves placed as backing. Pin everything before joining.
Round 1 :
Starting at one end, pick a central motif (large rose). With right sides up, place adjacent motif overlapping edges by 8-12 mm. Using yarn tail from motif A or a joining color, whip stitch through back loops of the outermost anchor round (Round 21-25 area on roses) and through the nearest stitch on motif B; make 6-10 evenly spaced mattress/whip stitches to secure each seam.
Round 2 :
For a stronger join, go back along the seam and work a slip stitch seam on the front loops from the top side: insert hook through both motifs front loop at spaced points and sl st to create a narrow braid of joining (this keeps the runner flat).
Info :
When joining a curved petal edge to a flat coaster, ease the curve by adding tiny gathering sl st (sew every other stitch) to avoid puckering. Pin and adjust tension as you go.
Round 3 :
Continue attaching motifs in rows: attach medium roses next to large roses, tuck daisies and puff clusters into gaps and sew them to neighboring petals and leaves at 6-8 attachment points each. Ensure leaves are stitched partially under petals so seams are hidden (use mattress stitch through petal base/back of leaf).
Round 4 :
After the central strip is joined, add side filler motifs and coasters: attach coasters into the runner by sewing them to multiple motif anchors so they lie flat and can support cups.
Info :
Keep seams subtle: use the same color yarn as the motif backing for invisible joins. Always hide knots in the back of motifs and weave ends around several stitches before trimming.
— Patching & Reinforcement Rounds (Edge Integration) :
Round 1 :
With 4.0mm hook and neutral edge color (beige cream), join at any seam point and work 1 rnd sc around the outer perimeter of the entire runner, working through both motif loops and joining yarn where motifs touch (use sc for a narrow seam) — count will vary depending on final runner size
Round 2 :
1 sc in each st across entire outer edge (this evens out jagged joins) — make sure to work into gaps by placing 2 sc where holes appear
Round 3 :
Work a decorative scallop: *(ch 3, 4 dc in next st, ch 3, sl st in next) repeat across entire edge to create soft scallops — adjust spacing to fit perimeter
Info :
Measure your runner as you add edge rows. The scallop row should fall evenly; if scallops bunch, add an extra sc between scallops on the previous round. If scallops are too far apart, omit an sc between scallops.
Round 4 :
Finalize edge by working 1 rnd sl st around scallop tips to flatten and secure points; fasten off and weave in ends thoroughly.
— Optional Back Stabilizer & Blocking :
Info :
If the runner will be used on a very smooth surface, add thin felt backing or stitch a lightweight muslin backing by hand to protect table finish and steady the motifs. Use fabric glue or slip stitch to attach backing only after all yarn ends are securely woven in.
Info :
Block the fully assembled runner by pinning to shape on a flat surface and using light steam. Allow to dry completely before removing pins so petal shape sets.
— Color & Styling Tips :
Info :
Use gradient shades of pink for roses to create depth: a darker rose for large outer petals, lighter blush for inner layers. Use complementary teal and purple for medium flowers to mimic the image's painterly palette. Keep leaves in two shades of green for variety.
Info :
Mix plain and textured yarns carefully — textured or slubby yarns can hide puff stitch definition. Stick with smooth cotton or cotton blends for crisp petals and sturdy structure.
This Rose and Coaster Fancy Crochet Table Runner brings a handcrafted garden to your table — each layered rose, puffy bobble and delicate daisy creates a textured, inviting centerpiece. Assembly is meditative and the finished piece looks like a bouquet laid flat across your table. It’s a lovely project to show off your color sense and crochet shaping skills. Enjoy every petal you make and delight in how they come together into a beautiful, functional work of art! 🧶🌸