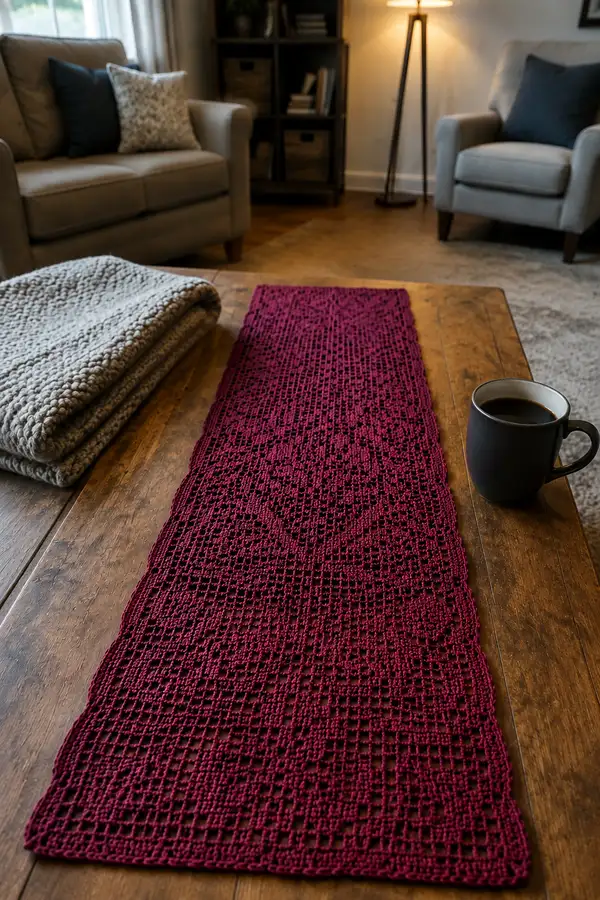
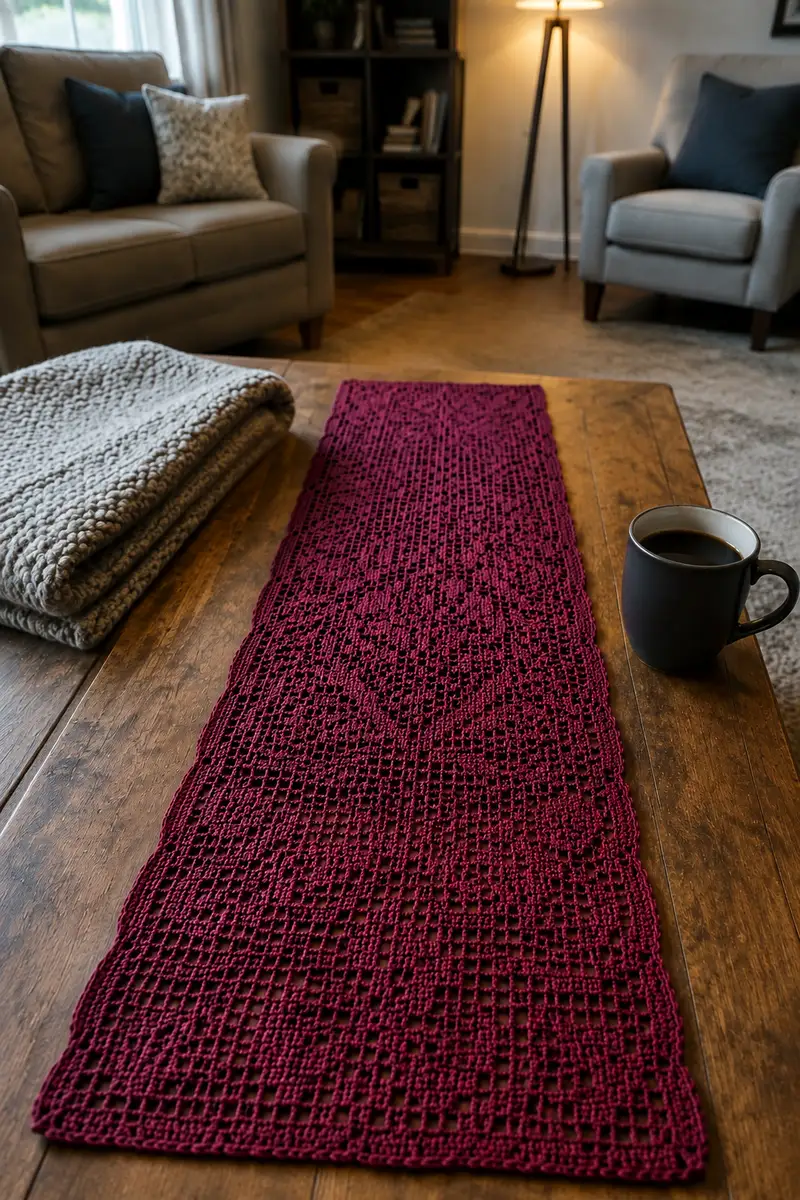
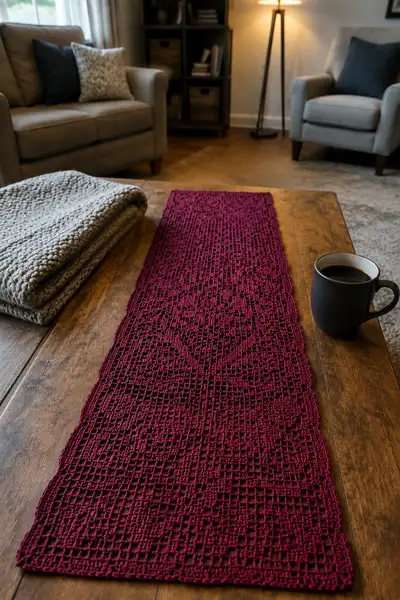
Create an elegant burgundy Royal Damask table runner worked in classic filet crochet. This long, narrow runner features a repeating damask-inspired motif, delicate open mesh, and a subtle scalloped border — perfect for a coffee table or dining table centerpiece. The pattern uses double crochet filet techniques, clear row-by-row charts, and blocking/finishing directions so you can achieve a professional, flat finish. Ideal for intermediate crocheters who enjoy charted motifs and repetitive, meditative stitching.
Progress Tracker
0% Complete
— Notes & Technique :
Info :
This runner is worked flat in rows using classic double crochet filet technique. Each 'mesh' equals one mesh unit across the width of the runner. Open mesh (OM) = dc, ch2, skip 2 (the open effect). Filled mesh (FM) = 3 dc worked across the same three positions to create the solid square. The pattern is 40 meshes wide and is charted in a 40-row motif that is repeated to achieve the total length shown. Foundation chain uses the formula: ch (4 x number of meshes) + 3. For a 40-mesh width: ch (4x40)+3 = ch163.
Info :
Turning chain: ch3 counts as first dc on each RS row. Always work the final dc into the top of the ch3 at the end of the previous row unless noted otherwise. Use a stitch marker to mark the center mesh if you want symmetrical placement. Work with consistent tension and block to obtain the clean damask silhouette.
— Gauge & Size :
Info :
Gauge: 10 meshes (open squares) across = approximately 4 inches (measured before blocking) when using worsted cotton and 4.0mm hook. The sample runner with motif repeated 4 times (160 rows) measures approximately 12" wide x 52" long after blocking. You may adjust length by repeating or reducing motif repeats; width can be adjusted by changing the number of meshes (must maintain multiple of 40 for this pattern layout) or using a different yarn/hook.
— Foundation Chain :
Round 1 :
Chain 163 (this is 4 x 40 meshes + 3). This provides 40 full mesh units across (163 ch).
Info :
Count your chains carefully. If you need a longer or shorter runner, increase or decrease in multiples of 40 meshes (each additional 40 meshes adds approximately 4" of width with the shown yarn/hook). For an edge finishing that matches pattern placement, you must work with the foundation chain multiple intact.
— Main Panel (Filet Mesh) :
Round 2 (RS) :
Dc in 4th ch from hook (counts as first dc). *Ch2, skip next 2 ch, dc in next ch*; repeat from * to * across until you reach the final ch; you will have worked 40 open meshes across and ended with a dc in the last chain (Row total: 41 dc, 40 ch2 spaces). Turn.
Info :
Terminology: An 'open mesh (OM)' is worked as 'ch2, skip 2, dc in next dc/top of ch3'. A 'filled mesh (FM)' is worked as '3 dc worked in succession across the same 3 positions' — typically dc in the top of the dc below, dc in the ch2 space, dc in the next dc. When working FM, be mindful to distribute the three dc evenly to maintain alignment with previous row.
Round 3 :
Ch3, turn (counts as first dc). Work OM across: *ch2, sk next dc, dc in top of next dc* repeat across to end (maintains pattern of all open meshes). (Result: 41 dc and 40 ch2 spaces). Turn.
Round 4 :
Ch3, turn. Work OM across as in Round 3. (41 dc, 40 ch2). Turn.
Round 5 :
Ch3, turn. Work OM across as in Round 3. (41 dc, 40 ch2). Turn.
Info :
Rows 2-5 set a base of open mesh so the damask motif can be built gradually. Keep tension even and use stitch markers to mark the center two meshes if you plan to center the runner on a table.
Round 6 :
Ch3, turn. Work: OM x8, FM x1, OM x22, FM x1, OM x8. Explanation: Work 8 open mesh units (each: ch2, sk, dc), then work a filled mesh (3 dc across the next mesh), then 22 open meshes, another filled mesh, and finish with 8 open meshes. (Total meshes = 40). Turn.
Info :
How to work a FM here: After completing the preceding OM, work dc into top of next dc, then dc into the ch2 space, then dc into the next dc — that sequence fills one mesh width with 3 dc. This keeps the mesh alignment and creates the visible filled square.
Round 7 :
Ch3, turn. Work: OM x7, FM x3, OM x20, FM x3, OM x7. (7+3+20+3+7 = 40 meshes). Turn.
Round 8 :
Ch3, turn. Work: OM x6, FM x5, OM x18, FM x5, OM x6. (6+5+18+5+6 = 40). Turn.
Info :
When working consecutive FM units, treat them as adjacent filled meshes: for two filled meshes in a row, you will work 3 dc across the first, then directly into the next mesh work 3 dc without extra chains between. When shifting from FM back to OM, ensure your last dc of the FM is placed into the top of the appropriate stitch from the previous row so the next OM ch2 has the correct foundation to occupy.
Round 9 :
Ch3, turn. Work: OM x5, FM x7, OM x16, FM x7, OM x5. (5+7+16+7+5 = 40). Turn.
Round 10 :
Ch3, turn. Work: OM x4, FM x9, OM x14, FM x9, OM x4. (4+9+14+9+4 = 40). Turn.
Round 11 :
Ch3, turn. Work: OM x3, FM x11, OM x12, FM x11, OM x3. (3+11+12+11+3 = 40). Turn.
Info :
Take care to maintain vertical alignment of FM stacks so the motif reads clearly. Use a contrasting lifeline (a scrap of thread woven through a row) if you want a safe point to rip back to in case of counting error — especially useful when forming complex filled clusters.
Round 12 :
Ch3, turn. Work: OM x2, FM x13, OM x10, FM x13, OM x2. (2+13+10+13+2 = 40). Turn.
Round 13 :
Ch3, turn. Work: OM x1, FM x15, OM x8, FM x15, OM x1. (1+15+8+15+1 = 40). Turn.
Round 14 :
Ch3, turn. Work: FM x17, OM x6, FM x17. (17+6+17 = 40). Turn.
Info :
Rows 12-14 create the widest solid portion of the damask motif. If your yarn tends to pull, consider working the FM dc slightly looser for these rows to keep texture even and avoid puckering. Always check that the total mesh count equals 40 per row.
Round 15 :
Ch3, turn. Work: FM x16, OM x8, FM x16. (16+8+16=40). Turn.
Round 16 :
Ch3, turn. Work: FM x15, OM x10, FM x15. (15+10+15=40). Turn.
Round 17 :
Ch3, turn. Work: FM x14, OM x12, FM x14. (14+12+14=40). Turn.
Round 18 :
Ch3, turn. Work: FM x13, OM x14, FM x13. (13+14+13=40). Turn.
Info :
As the motif begins to taper, you will transition more frequently between FM and OM. Keep counting meshes after each major block (left, center, right) to ensure symmetry. Mark the center if helpful and count outward from the center to both edges.
Round 19 :
Ch3, turn. Work: FM x12, OM x16, FM x12. (12+16+12=40). Turn.
Round 20 :
Ch3, turn. Work: FM x11, OM x18, FM x11. (11+18+11=40). Turn.
Round 21 :
Ch3, turn. Work: FM x10, OM x20, FM x10. (10+20+10=40). Turn.
Round 22 :
Ch3, turn. Work: FM x9, OM x22, FM x9. (9+22+9=40). Turn.
Info :
At rows with long runs of OM, maintain consistent ch2 spacing. When working across many open meshes in a row, keep dc placement aligned onto the top of the dc two rows below for a tidy appearance.
Round 23 :
Ch3, turn. Work: FM x8, OM x24, FM x8. (8+24+8=40). Turn.
Round 24 :
Ch3, turn. Work: FM x7, OM x26, FM x7. (7+26+7=40). Turn.
Round 25 :
Ch3, turn. Work: FM x6, OM x28, FM x6. (6+28+6=40). Turn.
Round 26 :
Ch3, turn. Work: FM x5, OM x30, FM x5. (5+30+5=40). Turn.
Info :
These center taper rows reduce the width of the filled area to transition back toward the open lace at the lower portion of the damask motif. Keep an eye on the boundaries of the FM clusters to maintain smooth curves in the design.
Round 27 :
Ch3, turn. Work: FM x4, OM x32, FM x4. (4+32+4=40). Turn.
Round 28 :
Ch3, turn. Work: FM x3, OM x34, FM x3. (3+34+3=40). Turn.
Round 29 :
Ch3, turn. Work: FM x2, OM x36, FM x2. (2+36+2=40). Turn.
Round 30 :
Ch3, turn. Work: FM x1, OM x38, FM x1. (1+38+1=40). Turn.
Info :
Row 31 begins the return to open mesh-only before the small decorative shaping and mid-motif repeat. Confirm center alignment and count meshes from left to right if pattern symmetry is important for your placement.
Round 31 :
Ch3, turn. Work: OM x40 (all open meshes across). (40 meshes total). Turn.
Round 32 :
Ch3, turn. Work: OM x2, FM x1, OM x34, FM x1, OM x2. (2+1+34+1+2 = 40). Turn.
Round 33 :
Ch3, turn. Work: OM x4, FM x1, OM x30, FM x1, OM x4. (4+1+30+1+4 = 40). Turn.
Info :
These rows create subtle secondary motifs that frame the larger central damask. When counting, treat each FM as exactly one mesh wide even though it uses three dc — it occupies one mesh position in the 40-mesh chart.
Round 34 :
Ch3, turn. Work: OM x6, FM x1, OM x26, FM x1, OM x6. (6+1+26+1+6 = 40). Turn.
Round 35 :
Ch3, turn. Work: OM x8, FM x1, OM x22, FM x1, OM x8. (8+1+22+1+8 = 40). Turn.
Round 36 :
Ch3, turn. Work: OM x10, FM x1, OM x18, FM x1, OM x10. (10+1+18+1+10 = 40). Turn.
Info :
Be mindful at the edges: the first and last mesh often require special attention as the turning chain and final dc interplay creates the last point of anchoring. Keep the tension at the first and last dc consistent so the edges sit flat.
Round 37 :
Ch3, turn. Work: OM x12, FM x1, OM x14, FM x1, OM x12. (12+1+14+1+12 = 40). Turn.
Round 38 :
Ch3, turn. Work: OM x14, FM x1, OM x10, FM x1, OM x14. (14+1+10+1+14 = 40). Turn.
Round 39 :
Ch3, turn. Work: OM x16, FM x1, OM x6, FM x1, OM x16. (16+1+6+1+16 = 40). Turn.
Round 40 :
Ch3, turn. Work: OM x18, FM x1, OM x2, FM x1, OM x18. (18+1+2+1+18 = 40). Turn.
Info :
Rows 1-40 complete one full motif repeat (the damask motif and surrounding framing). Count your rows to ensure accuracy. If you want a runner similar to the sample length, repeat these 40 rows a total of 4 times for 160 rows; alternately repeat fewer or more times to adjust overall length. Be sure to maintain border rows at the beginning and end for a clean finish.
Round 41-80 :
Repeat Rounds 1-40 once (complete second motif repeat). Follow exactly the same mesh placement and FM/OM sequence. Maintain even tension and verify counts at the end of each 40-row set. (After completion you will have 80 rows total if repeated once.)
Info :
If you prefer to lengthen the runner gradually, pause and measure after each 40-row repeat. You can also swap to a slightly larger gauge for the last repeats to create a subtly tapered look, though for a flat professional finish maintain the same hook size throughout and block firmly at the end.
Round 81-120 :
Repeat Rounds 1-40 again for the third and fourth motif repeats. Work exactly as written, checking mesh counts and alignment. You will reach 120 rows after repeating twice more. Continue in the same manner until you reach desired length. For the sample runner we complete Rounds 1-40 repeated 4 times to a total of 160 rows.
Round 121-160 :
Repeat Rounds 1-40 for final motif repeats until you reach 160 rows total (4 full motif repeats). At the end of the final RS row, fasten off leaving tail for border work. Weave in ends for a clean join before proceeding to border if desired.
Info :
When repeating the motif, check the alignment of FM columns across repeats — they should stack vertically to create continuous damask shapes. If you notice a drift, rip back to the previous motif boundary and realign by checking the mesh count in the center section.
— Border & Scalloped Edge :
Round 161 (Border Round 1) :
With RS facing, join with slip stitch to any side stitch along the short edge (end of last row) and work 1 round of single crochet evenly around the entire runner: sc in each dc and 2 sc in each ch2 space around the open mesh rows, placing 3 sc in each corner to keep it from pulling. (This round evens the edges and prepares for the scalloped finish.)
Info :
Work sc with a slightly looser tension than filet rows so the border does not pucker. Place extra sc at corners or where the runner curves to ensure flat edges. Pin the runner flat before the next round if desired to maintain shape.
Round 162 (Border Round 2 - Scallop Base) :
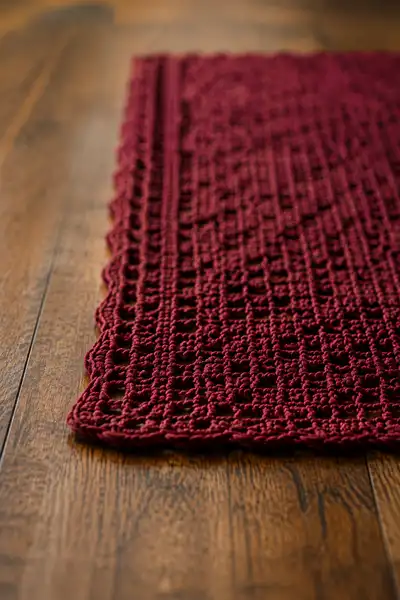
Ch1, *skip next 2 sc, 5 dc in next sc, skip next 2 sc, sl st in next sc*; repeat around to form scallops. Adjust spacing so scallops are evenly distributed, working an extra sl st or skipping one sc as needed to end neatly. Join with sl st to first sc of scallop. Fasten off and weave in ends.
Info :
For a tighter scallop, use 4 dc instead of 5 dc; for a fuller scallop use 6 dc. Keep scallops consistent by counting sc stitches between scallops. If your runner is very long, you may stagger the scallop repetitions slightly so corners remain flat.
Round 163 (Optional Decorative Ridge) :
If you prefer a narrow raised ridge rather than scallops, with RS facing join and work 1 round in back loops only (BLO): sc in each st BLO around; join and fasten off. This creates a defined ridge just inside the outer sc round.
Info :
Choose edging that fits your decor: scallops for a romantic look or a neat sc/BLO ridge for a more modern finish. Both options block well and present a neat perimeter when pinned and steamed lightly.
— Finishing & Blocking :
Info :
Weave in all ends with a tapestry needle, burying yarn tails at least 2 inches into the fabric to secure. Gently wash or steam the runner and pin it flat on a blocking board or towel. Stretch edges evenly to create straight sides and to open the mesh. Allow to dry fully (24 hours) before removing pins. If using cotton, hot steam from an iron held an inch above the fabric works well; avoid pressing directly to prevent crushing the mesh.
Info :
After blocking, inspect the runner for any inconsistencies and correct by unpicking a small area if necessary. Store flat or rolled to avoid creases; for display on a table consider placing a non-slip pad under the runner to keep it centered and protected.
— Customization & Length Adjustment :
Info :
To make the runner shorter or longer, alter the number of motif repeats (each motif = 40 rows). For a small table runner use 2 repeats (80 rows). For a long table runner add repeats until desired length is achieved. To make the runner wider change the number of meshes (in multiples of 40) and substitute a longer foundation chain using the formula ch (4 x desired mesh count) + 3, then follow the same motif mapping adjusted to center within the new width.
Info :
If changing yarn weight, adjust hook size and consider swatching a 40-mesh section to confirm width and gauge. Cotton or cotton blends provide crisp stitch definition for filet; acrylic will drape differently and may require blocking to achieve similar appearance.
Finishing this Royal Damask runner feels incredibly satisfying — watching the deep burgundy damask emerge row by row is so rewarding. The filet technique creates a piece that is lace-like yet durable, perfect for everyday elegance or a special table setting. Block carefully and the motifs will sing; this is a project that will become a treasured accent in your home. 🧶✨🍷