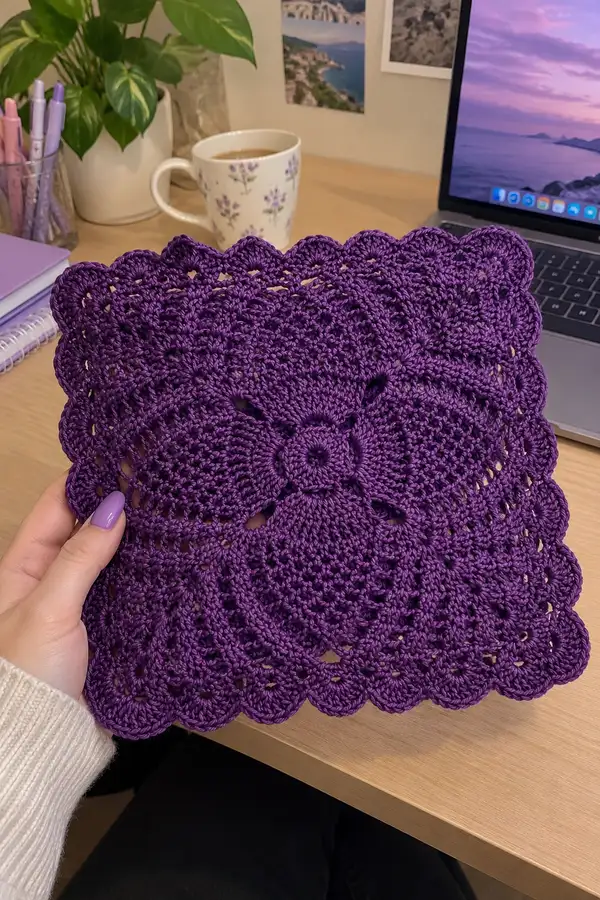
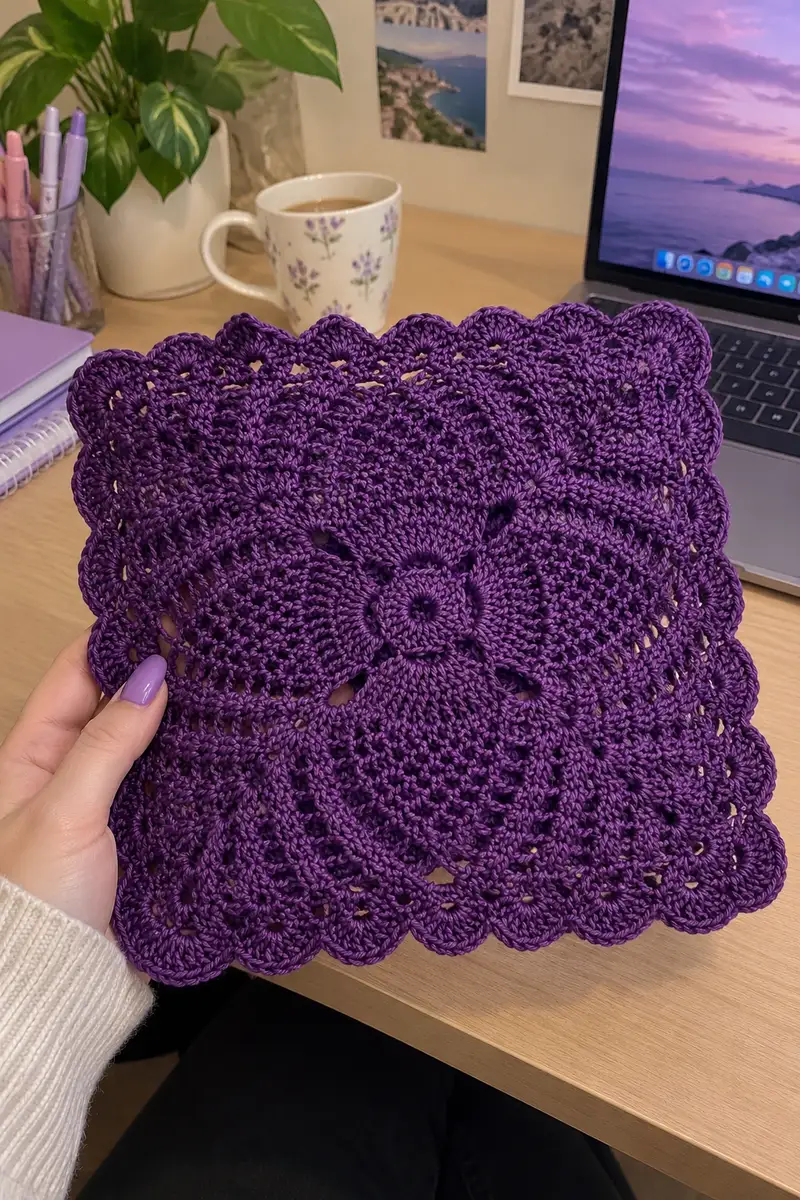
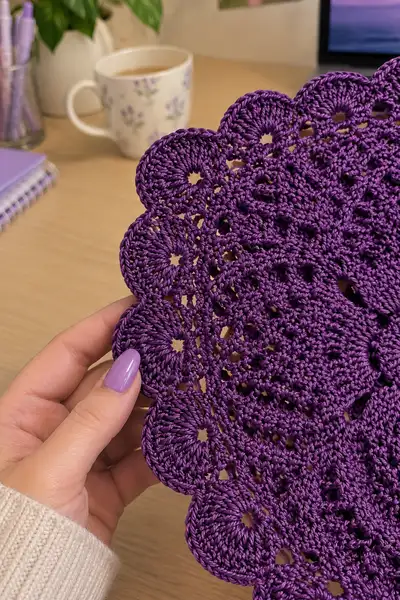
A luxurious pineapple lace blanket in a rich royal purple (deep eggplant) tone, featuring large square motifs joined into an elegant bedspread with scalloped edges. This pattern breaks down each lace square, joining technique, and finishing border in detailed steps so you can recreate the dramatic textured look. Perfect for a statement bedspread, table runner, or decorative throw.
Progress Tracker
0% Complete
— Gauge & Notes :
Info :
Gauge is not critical for lace motifs but affects finished size and yarn requirement. The sample motifs measured approximately 17cm (6.75in) square after blocking when worked with worsted weight cotton and 4.0mm hook. To match texture closely work with cotton or cotton blend yarn and keep tension firm. Blocking each square to the same dimensions before joining is essential for an even blanket.
— Motif (Make as many as required) :
Round 1 :
8 sc in magic ring (8)
Round 3 :
(1 sc, 1 inc) x 8 (24)
Round 4 :
(2 sc, 1 inc) x 8 (32)
Round 5 :
(3 sc, 1 inc) x 8 (40)
Info :
Keep these rounds tight and even. Use a stitch marker to mark the first stitch of each round so you keep track as the lace rounds begin.
Round 6 :
(4 sc, 1 inc) x 8 (48)
Round 7 :
1 sc in each st (48)
Round 8 :
Change to double crochet rounds: *ch2, sk 1, dc in next st* around (24 dc, 24 ch2 sp) - treat each dc as one worked unit (48 action points)
Info :
Round 8 prepares small open spaces that become the base for petal shaping. Maintain consistent tension on ch2 spaces for even arches.
Round 9 :
*Into each dc from previous round work (ch3, 4 dc) into the dc, ch1, sl st into next ch2 space* repeat around - this builds 24 small clusters (counts as 24 shell clusters plus 24 ch1 joins)
Round 10 :
1 sc in each stitch and join spaces to stabilize clusters (48)
Info :
From here we begin the first subtle pineapple arches: work clusters and multiple chain arches; follow counts exactly and use the stitch marker to count repeat sets (we will work in sets of 8 repeats to keep symmetry).
Round 12 :
*ch5, sk 3, (3 dc, ch1, 3 dc) in next st (shell), ch5, sk 3, sl st in next st* repeat 8 times. This forms 8 large arch points which will become a base for pineapple arches (there are 8 shells and 8 sl st joins)
Round 13 :
1 sc into each visible stitch around into shells and sl sts for stabilization; where there are long ch5 spaces work 5 sc evenly across each ch5 to anchor the arch (Approx total calculation: 8 shells x 6 sc anchors + remaining sc across = about 64 anchors) - count to ensure anchors are even.
Info :
If your round stitch count is slightly higher due to anchoring chains, don’t worry; consistency between motifs is most important. Keep notes of final stitch count for each round to match other squares.
Round 14 :
*Into each shell from R12 work (ch3, 5 dc, ch3) to make an elevated petal; sl st into base between shells* repeat 8 times (this results in 8 tall petals)
Round 15 :
1 sc across petals and into chain-spaces: evenly distribute sc so the round is balanced - aim for approx 80 worked points around (counting each dc and sc anchor individually)
Info :
Use this round to neaten the circle and prepare for the first pineapple arches. Keep the petals rounded by placing sc evenly along the curved edges—pin the work flat if necessary while you stitch.
Round 16 :
*Pineapple arch foundation: ch7, sk next 8-10 stitches across petal, sl st into the base between petals* repeat 8 times to form 8 large arches (these ch7 spaces will be filled over next rounds)
Round 17 :
Work a row of dc inside each ch7 arch: into each ch7 space work (3 dc, ch2, 3 dc) then sl st into base; this turns the arch into a small filled fan (8 fans total)
Round 18 :
1 sc around to stabilize new fans and prepare for pineapple decreases - sc evenly through fans and base joins (approx 96 stabilization points)
Info :
The pineapple shaping comes from alternating rows of dense stitches and chain spaces; read ahead before each round so you can place markers at the center of each repeat to avoid miscounting.
Round 19 :
*In each fan work: (ch3, 1 tr, ch3, 1 tr, ch1)* which forms small central vertical posts that begin the textured pineapple shape. Repeat across 8 fans.
Round 20 :
1 sc evenly around to even out density and anchor tr posts into the body (approx 96-100 stitches, depending on anchoring)
Round 21 :
*Begin inner pineapple expansion: in the spaces between fans work (ch4, 5 dc cluster, ch4), sl st into next base* repeat 8 times to broaden the pineapple body (8 clusters total)
Round 22 :
1 sc around to secure clusters and keep the motif flat; where there are long chains work 3 sc across each chain to keep shape (approx 112)
Round 23 :
*Shell-row working into cluster bases: (2 dc, ch2, 2 dc) into each cluster top then ch3 between shells* repeat 8 times, forming 8 scalloped shell-lobes
Round 24 :
1 sc in each st across shell-lobes and chain spaces to level (approx 120)
Info :
At this stage the motif resembles concentric fans and shells. If a motif is doming, block to flatten before proceeding. Continue to use markers to denote the center of each of the 8 repeats.
Round 25 :
*Form second tier pineapples: into each shell-lobe work (ch6, 7 dc fan, ch6) then sl st into next st* repeat 8 times which forms tall open fans (8 fans)
Round 26 :
1 sc around the tall fans; where ch6 spaces appear work 5 sc evenly across to anchor (approx 140 anchors)
Round 27 :
*Work a textured cluster row: in each fan work 4 clusters of (dc3 cluster) separated by ch2; this creates a mesh that suggests the pineapple body* repeat 8 times
Round 28 :
1 sc stabilizing round in each stitch and ch-space (count will vary; aim for evenly distributed anchors). Ensure motif still measures consistent with earlier motifs after blocking.
Info :
From rounds 29-34 we convert the round motif into a square by making corner fans and working side shells—this shapes the motif into the square block used in the sample blanket.
Round 29 :
*For each of the 8 repeats choose 4 of them which will become corner points. Into those corner repeat positions work (ch8, 9 dc fan, ch8) to extend the motif outward; sl st into next base* repeat 4 times (4 corner extensions)
Round 30 :
In the remaining 4 side repeats work (ch6, 7 dc fan, ch6) to form flatter side panels (4 side fans). After this round you have 4 corners and 4 sides spaced evenly.
Round 31 :
1 sc round across all fans and base to level the stitch height; where there are long chains work 5 sc across to anchor. This begins the square shaping (approx 160).
Round 32 :
*Corner fill: into each corner fan work (2 dc, ch3, 2 dc) to create a shell corner, then ch5 between shells across the side fans* repeat to form four corner shells and side ch5 spaces
Round 33 :
1 sc across shells and ch5 spaces to convert them into worked stitches; where ch5 appear make 5 sc across each ch5 to avoid large holes (approx 180)
Info :
At this stage block the motif to a square: measure corner-to-corner and side-to-side, pin to size (for sample goal 17cm square) and spray-block lightly. Allow to dry before joining.
Round 34 :
*Edge shell foundation: around the motif work alternating shell and ch-spaces creating 16 shell points: (ch3, 7 dc, ch3) in each shell position then ch3 between each shell* repeat 16 times
Round 35 :
1 sc around to anchor edge shells; work 3 sc across large chains to create consistent anchor points (approx 200)
Round 36 :
*Scallop finishing: into each shell work (sl st, ch1, 9 dc, ch1, sl st) to create bold scalloped lobes around the square edge, spacing evenly with sl st between lobes* repeat 16 times
Round 37 :
Fasten off and weave ends. Block final motif square to exact measurement. Each motif should present 8 inner pineapples radiating and a scalloped square edge (final measurement after blocking target 17cm square).
Info :
Make as many motifs as needed for your blanket. The sample bedspread in the top photo appears to be composed of many such squares joined in rows to cover a bed. For reference: a throw of 5x5 motifs makes approximately 85cm x 85cm depending on blocking.
— Joining Motifs (Join-As-You-Go or Sew Join) :
Info :
Two recommended methods: Join-as-you-go (JAYG) for a seamless lace look, or sew join using mattress stitch for stability. JAYG is shown here in detailed steps for a clean, open join that preserves scalloped edges.
Round 1 (Join setup) :
Work the motif to Round 35 (stop before scalloped finishing), then prepare to join on final rounds. Arrange motifs in the layout desired and pick a starting motif in a corner.
Round 2 (First join row) :
With right sides facing, join last motif to an adjacent completed motif by working sl st through edge anchors: *sl st in shell edge of motif A, sl st in corresponding anchor of motif B* repeat around the side to join fully (approx 20-30 sl st along one side depending on anchors)
Round 3 :
Continue joining additional motifs row by row, always matching shell points to shell points and using sl st or invisible mattress stitch for a flatter seam. For corner junctions work an extra small sl st cluster to nest shells together and avoid gaps.
Info :
Pin motifs before joining to ensure shells align. When using JAYG, attach new motif by slip-stitching into prepared chain-spaces of finished motifs; this integrates the motifs seamlessly and hides tails.
Round 4 (Seam reinforcement) :
After initial joining, reinforce joins by working a narrow sc round across both motifs' edges: *through both motifs work sc evenly across join (approx 1 sc per dc anchor)*; this strengthens the blanket and reduces stretch.
Round 5 :
Fasten off and weave ends securely. Weave ends back into seams and trim close to work to prevent fraying of individual joins.
— Blanket Assembly Layout & Tips :
Info :
Plan your layout flat on a large table or floor, ensuring symmetric distribution of motifs and matching orientation of pineapples. For a bedspread create an odd number of motifs per side for a centered look (eg 7x7 or 9x9). Keep a photo or diagram to track joining order to avoid twisted rows.
— Outer Border & Scalloped Edging :
Round 1 :
After joining all motifs, work 1 sc round around entire blanket through both motif edges to create a continuous border (work 1 sc in each anchor point along joined edges; count across full blanket to estimate anchor points).
Round 2 :
*Work a shell round along the outer edge: (ch3, 7 dc, ch3) in each outside shell position around; sl st into next anchor between shells* Continue evenly around corners by working extra shells (approx number of outer shells depends on blanket size)
Round 3 :
1 sc across shells to anchor them firmly; where corner rounding is required work (sc, ch2, sc) in corner spots to allow turning without puckering.
Round 4 :
*Final scallop: Into each outside shell work (sl st, ch1, 11 dc, ch1, sl st) for large scallops or (sl st, ch1, 9 dc, ch1, sl st) for smaller scallops depending on desired prominence. Repeat around entire outer border to form a bold scalloped finish.
Info :
For very large spreads you may choose to repeat the decorative border a second time to frame the blanket. Block final blanket carefully, pinning scallops to identical spacing so the edge appears even.
— Pillow/Sham (Make 2 for a pair) :
Round 1 :
Make motif following rounds 1-36 as for blanket square; create 2 identical motifs for the front of a sham or work 4 motifs and join into a larger square for a pillow front.
Round 2 :
For a single-square sham: After blocking work 1 sc round across back of motif to create a uniform edge, then join a solid fabric piece (woven or crocheted base) to back with sc through both layers to create a pillowcase. For an envelope sham add two backing panels with overlap instead of a zipper.
Round 3 :
For a fully crocheted backing: Work a granny-style insert 20-30 rounds in sc to create a square slightly smaller than the motif, leaving a slit for insertion. Join to motif with sc through both layers, then insert pillow form.
Info :
Consider a hidden zipper or buttons if you want a removable cover. If you prefer a finished look, line the back with fabric to prevent wear and to stabilize the lace motif when used as a pillow cover.
— Finishing & Blocking :
Info :
Weave in all tails with yarn needle, hiding them within shell stitches. Lightly steam-block or wet-block each motif and the joined blanket to even the shape; pin scallops and corners to equal measurements, allow to dry fully for best results. Final pressing with a cool iron on top of a damp cloth can further flatten and set the lace.
Info :
Starch or fabric stiffener can be used sparingly to keep the scallops crisp if the blanket is decorative. For a softer drape avoid stiffening agents.
Working this Royal Pineapple Lace Blanket is a beautiful journey from small, meditative squares to a dramatic finished spread. Each repeated pineapple motif is a little triumph, and everything comes together with careful blocking and a bold scalloped edge. The deep purple color gives an elegant, cozy statement to any room. I hope this pattern brings you hours of peaceful stitching and a blanket you will treasure! 🧶💜