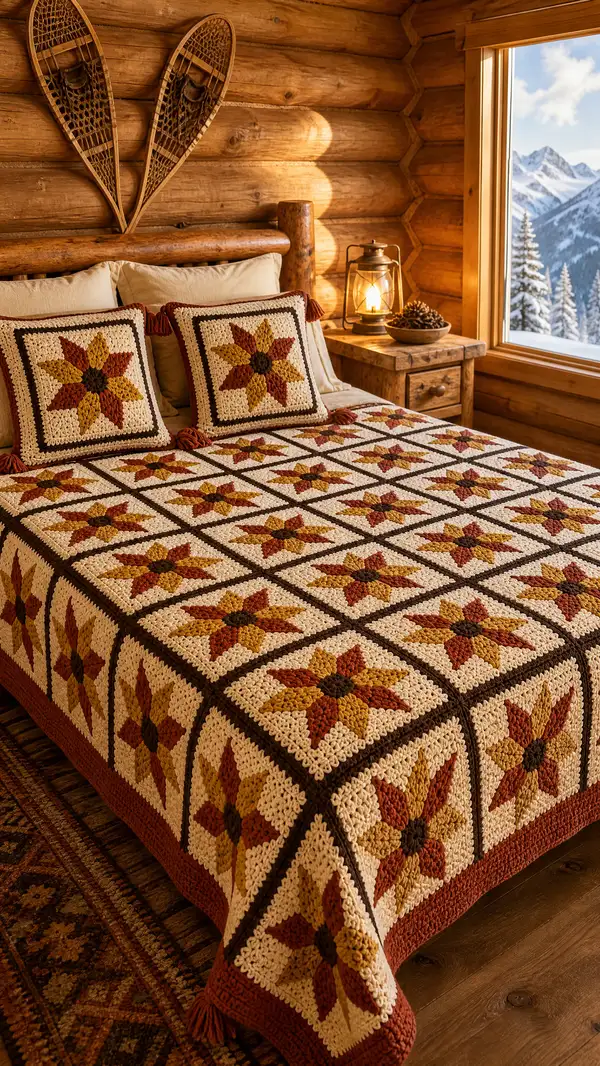
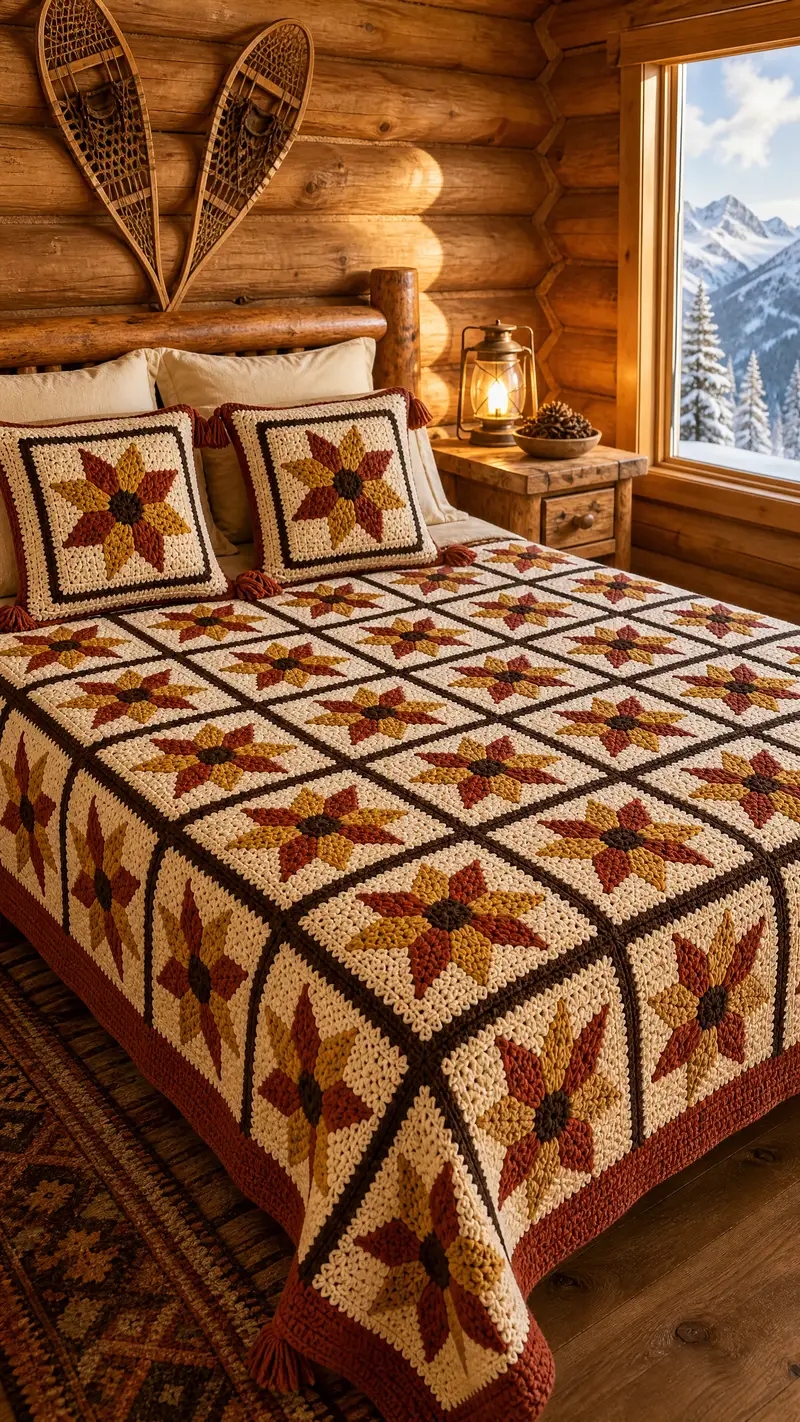
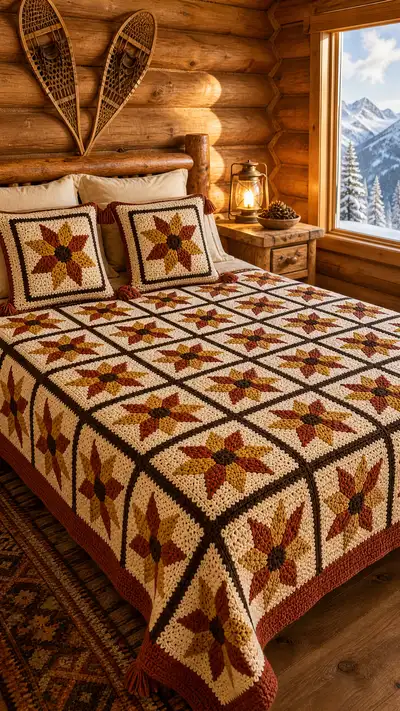
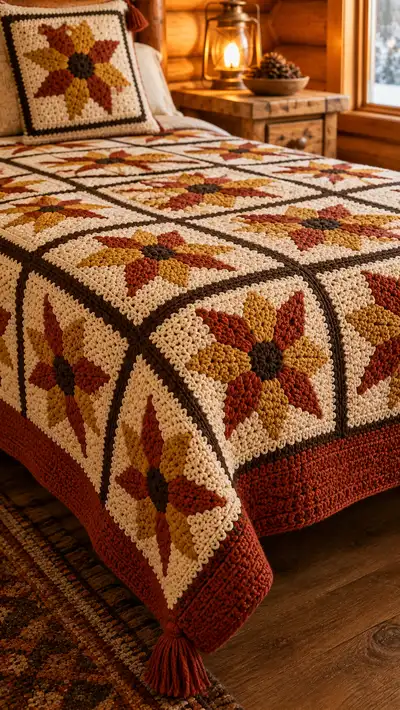
A warm, vintage-inspired bedspread made from textured star granny squares in rust, mustard, cream and deep brown. This bedspread features raised puff-star motifs, clean chocolate join lines, and a chunky border with tassels for a cozy cabin-ready finish. Clear step-by-step instructions guide you through making squares, joining them, and adding the finishing border and pillow covers.
Progress Tracker
0% Complete
— Overview :
Info :
This pattern makes a bedspread assembled from 36 star granny squares (6 squares wide x 6 squares long) to cover a queen-size bed approximately 86" x 92" including border; adjust number of squares for other sizes. Each square finishes approximately 14" square before blocking. Make samples to adjust for your gauge and desired drape.
Info :
Gauge (after blocking): One completed square = 14" x 14" using 5.5mm hook. Puff clusters are worked tight to form raised petals. If your squares are larger or smaller, change hook size or number of squares to match bed dimensions.
— Motif (Make 36) :
Round 1 :
With Deep Brown, mr, ch1, 8 sc in ring. Pull ring closed. (8)
Round 2 :
Inc in each stitch around (work 2 sc in each st). (16)
Round 3 :
(1 sc, inc) x 8. (24)
Round 4 :
(2 sc, inc) x 8. (32)
Info :
Fasten off Deep Brown. This small round forms the star center. Keep tail for sewing if attaching centers separately; otherwise weave in later.
Round 5 :
Join Rust in any st with a sl st, ch2 (counts as first dc), *[dc2tog over next 2 sc?]* - note: we will form 8 petal foundation zones: ch1, 3 sc in next 3 sts, ch1, skip 1 st; rep from * 7 more times to complete circle making eight petal foundation zones (48 total small stitches and ch-spaces). For clarity: Working evenly around, create 8 petal bases each consisting of 5 worked stitches (5 x 8 = 40) plus 8 ch-1 spaces = 48 total placement points for next round.
Info :
Change to Puff technique for Round 6. Puff stitch (standard for this pattern): Yarn over, insert hook into designated stitch, yarn over and pull up a long loop, repeat yarn over/pull up loop 3 times total (you now have 7 loops on hook), yarn over and pull through all loops, ch1 to close puff. Each puff counts as one stitch for stitch counting.
Round 6 :
Switch to Rust if not already. Into each petal base work: sc, sc, puff, sc, sc (each petal zone = 5 stitches; puff counts as 1). Repeat for 8 petal zones. (48)
Info :
Gently shape each puff so petals sit upright — use your fingers to align puffs while the stitch is still fresh. Maintain even tension so all puffs are approximately same height.
Round 7 :
Change to Mustard. Working in the spaces between petals, ch2, puff in space, ch2, sl st into top of next petal to anchor; repeat to create 8 outer puff accents that form the secondary petals. This round maintains stitch appearance but keeps numeric count at 48 effective stitches (eight puff accents + filler scs as needed to keep 48 total placement points).
Round 8 :
Change to Cream. Work 1 sc in each st and each ch-space around, working evenly across petals and spaces so that round finishes with 48 sc. (48)
Info :
At the end of Round 8 the motif is still circular; we now begin squaring up the motif by introducing corner increases grouped to form right-angle corners. Keep tension slightly looser for corner groups to allow square shaping.
Round 9 :
Work as follows to shape square: *Work 10 sc along side (this will be an even number of stitches dictated by spacing), then (2 sc, ch2, 2 sc) in next st to form corner; repeat from * three more times to form four corners. After completing four sides you should have 56 total stitches and four ch-2 corners. (56)
Info :
Technique Tip :
Counting side stitches: If your sides do not match exactly as you complete the round, adjust by adding or subtracting 1 sc evenly across sides to reach the required 56 sts. The corners are what square the motif; keep them symmetrical.
Round 10 :
1 sc in each st and ch-space around working into ch-2 corners as (2 sc, ch2, 2 sc). (56)
Round 11 :
Work 1 sc in each st BLO (back loops only) around to create a slight ridge and frame the star (56)
Info :
The BLO round gives texture that helps the star sit visually on a framed cream background. If you prefer a flatter square skip BLO and work regular sc.
Round 12 :
Change to Deep Brown. Work a narrow frame round: *3 sc in each side spacing evenly until corner, (3 sc, ch2, 3 sc) in corner; rep around. This will widen the square to approximately 64 stitches total after working each side and corner cluster. (64)
Info :
This brown frame becomes the join line between squares later; keeping this border neat is important for clean seams. Fasten off and weave in ends or leave tails for join-as-you-go method.
Info :
Make 36 identical squares. Block each square to 14" x 14" by dampening and pinning to measurements; allow to dry. Consistent blocking ensures straight seams and flat bedspread.
— Join-as-you-go Grid Assembly (6 x 6) :
Info :
You can join squares by whipstitch, mattress stitch, or join-as-you-go (JAYG). The following instructions use JAYG with Deep Brown to create the same raised join line as the photographed bedspread. Work horizontally across rows and then join rows vertically.
Row 1 - Prepare :
Arrange six blocked squares for Row 1 in desired order with right sides up. Join first two squares: lay Square A (left) and Square B (right) with right sides up; with Deep Brown and right side of Square B facing you, insert hook into corner ch-2 space of Square B and sl st to join to corresponding stitch on Square A; continue along side seam working sl st through last brown frame round of both squares, placing 1 sl st through corresponding stitch pairs. Maintain a consistent tension so join is flat. Continue joining the next squares to complete Row 1 (joining 5 seams to make 6 squares joined). Repeat for remaining rows so you have 6 completed rows of 6 joined squares across (6 row strips).
Info :
When joining, always align brown frame rounds so the corners meet squarely. Use pins or tapestry needles to secure edges during joining for even results.
Row 2-6 - Join horizontally :
Repeat the same JAYG process for Rows 2 through 6 so all individual squares are joined into six strips each 6 squares wide. After joining, you will have six long strips: S1, S2, S3, S4, S5, S6 (each a horizontal band).
Info :
Press seams flat by pinning and lightly steaming if your yarn allows. This helps keep the bedspread square during vertical joins.
Vertical Joining - Assemble strips :
Place Row 1 (top) and Row 2 beneath it. Hold squares so seams match. Using Deep Brown and working along the vertical seam (through the brown frame round of each square), join with sl st or crab stitch (reverse sc) for a decorative raised seam. Work from top to bottom of strip pairing corresponding brown frame stitches. Repeat to join Row 1 to Row 2, then Row 2 to Row 3, continuing until all six strips are joined into the full 6 x 6 panel.
Info :
For a visible raised seam as in the photo, use crab stitch (reverse single crochet) instead of sl st. Crab stitch gives a rope-like border line that reads as the dark cross lines between squares.
Vertical Join - Crab Stitch Method :
With RS facing, join Deep Brown by inserting hook into first corresponding stitch on left square, sc in reverse direction (insert hook into next st to the left), working sc along both edges as if crocheting in reverse. Adjust tension to create a tight, well-defined seam. Work full length of each vertical seam. Repeat for all vertical seams.
Info :
Check alignment after every second square; if seam starts to pull in or flare out, unpick a few stitches and adjust tension before continuing. Seams are permanent once the bedspread is complete.
— Inner Border and Field Stabilizing Rounds :
Round 1 :
With Cream and RS facing, attach yarn to any brown join seam at the outermost edge of the 6x6 panel. Ch1, sc evenly into each brown frame stitch along the full outer edge; work 3 sc into each corner ch-2 to turn. This evens the edge and creates a base for border rounds. Count the stitches as you go — total stitch count will vary depending on your overall panel size but remains consistent once counted. Fasten off and weave in ends. (st count dependent on panel circumference)
Info :
Work evenly — if you end up short or long by a few sts, distribute increases evenly along the sides (not corners) to maintain square shape.
Round 2 :
With Cream, 1 sc in each st around working into corners as (2 sc, ch2, 2 sc). (same as previous numeric count)
Round 3 :
Change to Deep Brown. Work 1 sc in each st around in BLO to create a clean framed line. (same st count)
Info :
The brown frame here visually continues the cross seams and helps anchor the outer chunky border to the panel.
— Main Chunky Border (Rust) :
Round 1 :
Join Rust with sl st at any point. Ch2, dc in same st, 2 dc in each st around to create a deep, chunky texture. For corners, work (3 dc, ch2, 3 dc) to keep corners square. This rapid expansion will create a thick bedspread skirt; adjust number of rounds to desired overhang. (st count roughly double panel perimeter)
Info :
Work evenly; if border ripples, adjust by adding or skipping 1 dc every so often distributed evenly. The border in the photo consists of 10-12 dense rounds to reach the desired depth.
Round 2-10 :
1 dc in each st around, working (3 dc, ch2, 3 dc) in corners. (repeat for 8 more rounds or until border measures approximately 6-8" from panel edge). Count the number of rounds used to make both sides even. Fasten off and weave in ends.
Info :
If you want a heavier drape, add 2-4 more rounds of dc. For a lighter throw, reduce rounds. The pictured bedspread used 10 rounds of rust border after the brown stabilization round.
— Lower Edge Ribbing Finish :
Round 1 :
With Rust, work 1 sc in each st around for 2 rounds to create a sturdy base. (st count consistent with last dc round)
Round 2 :
Change to Rust and work 1 hdc in each st around for 2 rounds to add density. Fasten off and weave in ends.
Info :
The lower edge on the bedspread in the photograph shows a ribbed finish made with alternating sc/hdc to add weight and neat edges. Use the same color as the border to keep the look cohesive.
— Tassels (Make 4) :
Info :
Tassels are made in Rust and attached to the corners of the bedspread. Each tassel measures approximately 4" when trimmed. Use cardboard of desired tassel length to wind yarn around 40-50 times for full tassels.
Round 1 :
Cut 10-12 lengths of waste yarn about 8" longer than tassel length to use as tie. Fold gathered yarn bundle in half, tie with waste yarn tightly at fold, then wrap with additional yarn for the head of the tassel. Trim ends evenly. Sew or tie tassel head securely to each corner through the border rounds, using the tied tails to secure and weave ends. Repeat for remaining corners.
Info :
Comb tassel strands gently with a wide-tooth comb or pet brush for a soft finished look. Trim to uniform length and trim extra tails neatly after stitching to corner.
— Decorative Pillow Covers (Make 2) :
Info :
Pillow covers are constructed as single star granny squares with matching brown frame and cream field, then bordered with rust and finished with tassels at the four corners. Each cover uses one star square finished to 18" and stuffed with an 18" pillow form or folded to fit an insert.
Square :
Follow Motif Rounds 1-12 but increase the side shaping rounds to reach 18" final size before brown frame. Use additional rounds of 1 sc in each st in Cream until square measures 18" blocked. After achieving 18", work Deep Brown frame round as in Motif Round 12 then add 3 rounds of Rust for a pillow skirt. Fasten off leaving long tails for sewing pillow back.
Finishing :
Make a simple back panel with 2 pieces of Rustic Rust cloth or crochet a rectangle of dc rows to match the pillow size, leaving an envelope opening. Sew the square front to the backing using whipstitch through brown frame with Deep Brown yarn. Add tassels at corners as desired.
Info :
Pillow cover assembly can be made removable by adding a buttoned envelope back or zipper. For a quick finish, stitch pillow front to a ready-made pillow cover insert using matching thread.
— Care and Finishing :
Info :
Hand wash or gentle machine wash in cool water on delicate cycle using mild detergent. Lay flat to dry to maintain shape and prevent tassel tangling. Light steam blocking can refresh the bedspread as needed. Store folded in a breathable bag away from direct sunlight to preserve colors.
Info :
Weave in all ends into the brown join lines where they’re least visible. For extra security on seams, use a small dab of fabric glue at the knot ends before weaving in (not necessary for acrylic yarns but helpful for cotton blends).
Finishing this bedspread is so rewarding — every star granny square you complete brings the panel to life with warm, textural charm. The deep brown joins and rust border frame the stars beautifully and the tassels add a playful, homey touch. Whether you give it as a gift or keep it for cozy nights in, this project is full of satisfying, meditative crochet time. 🧶✨ The finished spread makes any bedroom feel like a snug cabin retreat. Happy stitching! 🍂