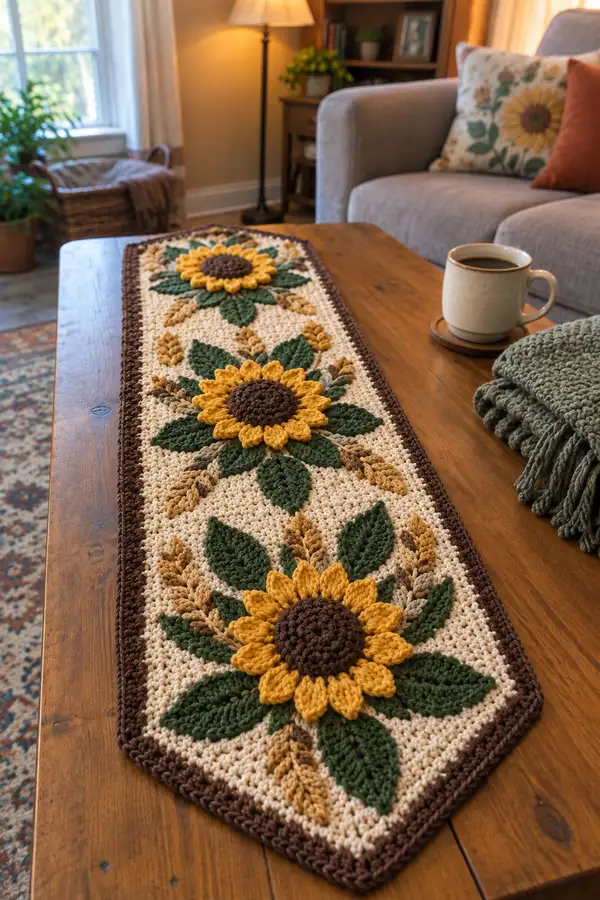
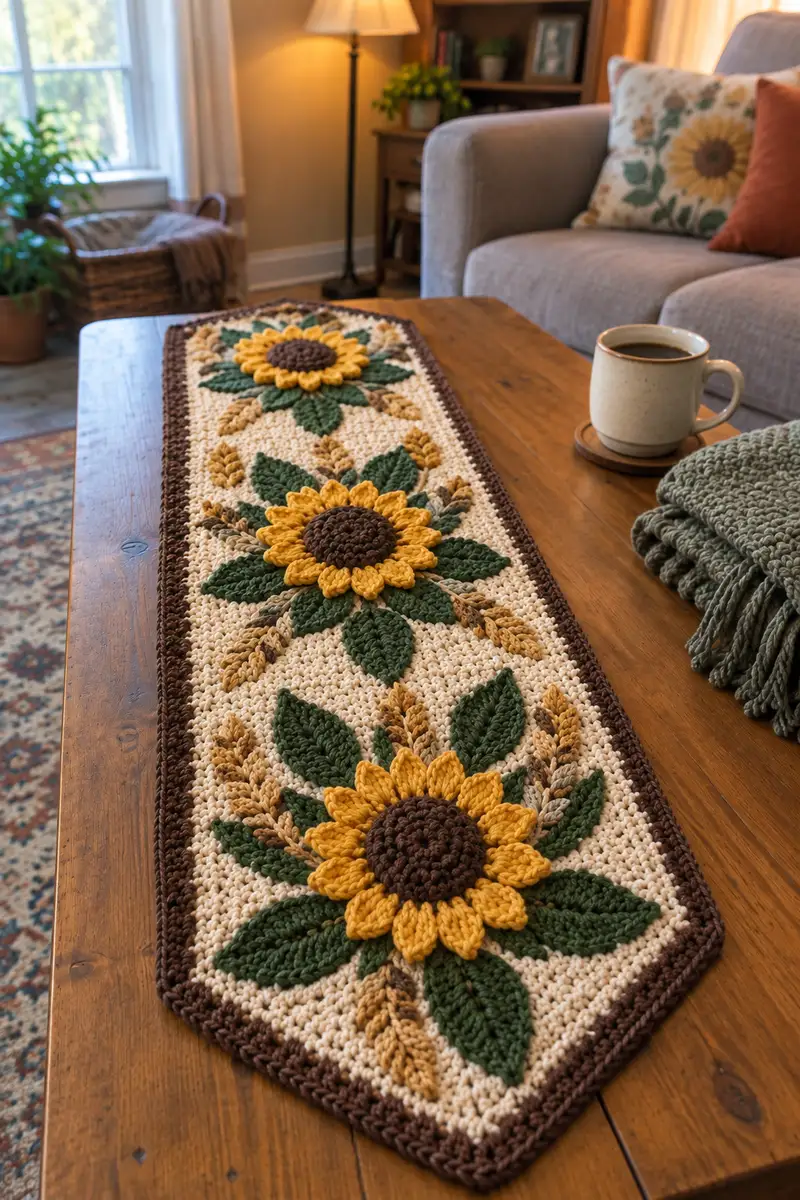
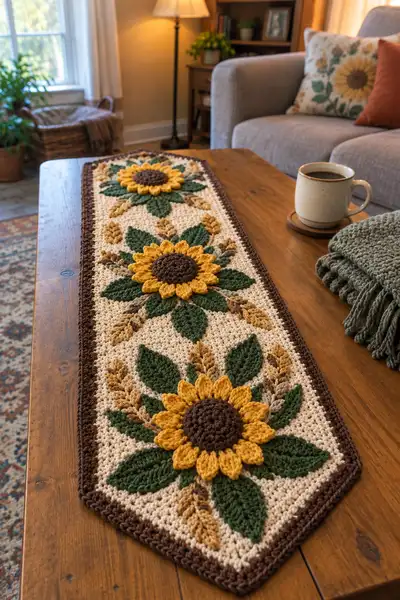
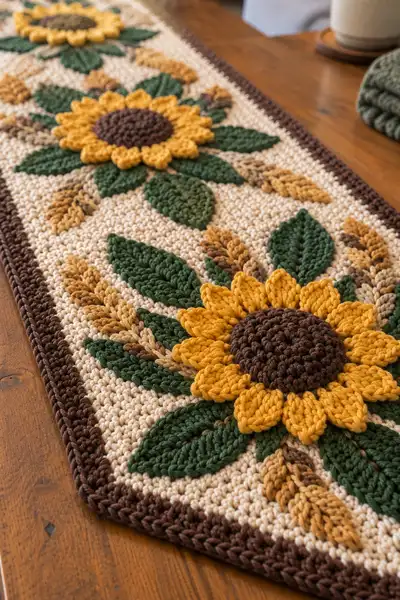
A warm, farmhouse-style table runner featuring three raised sunflowers, layered green leaves, and golden wheat sheaves set on a creamy textured background. This pattern uses surface-appliqued motifs and a sturdy textured base to create a dimensional centerpiece perfect for autumn decor. Includes detailed instructions for the base panel, sunflower centers, petals, leaves, wheat ears, and finishing border.
Progress Tracker
0% Complete
— Base Panel :
Info :
This runner is worked flat in joined rounds (continuous rounds) or rows worked in the round for a sturdy edge. The finished dimensions for the written gauge should be approximately 36" long x 9.5" wide. Gauge: 14 sc x 16 rows = 4" in worsted weight using 5.5mm hook in sc. If you need a different finished size, adjust foundation chain accordingly in multiples of the stitch pattern repeat indicated
Round 1 :
Using Cream yarn, ch 110 (foundation chain to measure approximately 9" wide before edge). If you prefer, make a longer or shorter foundation to suit your table.
Round 2 :
Turn, 1 sc in second ch from hook and in each ch across (109). Ch 1, join with sl st to first sc to work in joined rounds if you prefer continuous round edge.
Round 3 :
Ch 1, 1 sc in BLO in each st around (109). Sl st to first sc to join. This BLO round creates a subtle ridge for the appliques to sit nicely.
Info :
Place stitch marker in first stitch at the beginning of each round to track rounds. Working in joined rounds will keep the panel edge neat; working in rows (turning) is also acceptable for a flatter edge.
Round 4-12 :
Ch 1, 1 sc in each st around (109) (work 9 rounds total). Maintain even tension. After Round 12 the base should measure approximately 10-11" long from one short end; continue to expand length to accommodate three flower placements.
Info :
We are creating a long rectangular panel. You will work additional rounds to reach the full runner length. Keep straight edges by slip-stitching into the turning chain or joining each round with sl st and ch 1 for a clean seam.
Round 13-40 :
Ch 1, 1 sc in each st around (109) (work 28 rounds). This section builds the central canvas where motifs will be attached. Check length frequently against desired finished measurement — you may work 35-45 rounds in this section depending on gauge.
Info :
After completing the central panel rounds, leave the working yarn attached; we will use the same edge treatment later. Lightly steam block or pin the panel flat to remove slight curling before attaching motifs.
Round 41-48 :
Ch 1, 1 sc in each st around (109) (work 8 rounds). These final base rounds will provide extra cushion under the motifs and tie into the border rounds.
Info :
If you prefer a more textured background, substitute alternate rounds with hdc or work 1 sc, 1 hdc across every 6th round to add subtle texture. Keep stitch counts identical to avoid distortion.
Round 49 :
Ch 1, 1 sc in each st BLO (109). This back-loop ridge creates a visual boundary for the applique placement.
Info :
Mark the center of the panel lengthwise and across the width with contrasting yarn scraps or pins. Use these marks to position three evenly spaced sunflower motifs (top, middle, bottom). Measure the distance between centers to be roughly equal depending on your length; in a 36" runner the centers are approximately 9.5" apart.
— Sunflower Center (Make 3) :
Round 1 :
Using Dark Chocolate Brown, work 6 sc in magic ring (6)
Round 3 :
(1 sc, inc) x 6 (18)
Round 4 :
(2 sc, inc) x 6 (24)
Round 5 :
(3 sc, inc) x 6 (30)
Info :
These rounds form the domed seed head. Work in tightly so the center sits proud on the runner. After Round 5 the disc should measure approximately 1.5" across.
Round 6 :
1 sc in each st around (30)
Round 7 :
1 sc in each st around (30)
Round 8 :
(3 sc, sc2tog) x 6 (24)
Round 9 :
1 sc in each st around (24)
Round 10 :
(2 sc, sc2tog) x 6 (18)
Info :
Begin a very light stuffing inside the disk if you want a slightly raised center. Use small bits of fiberfill to keep the dome soft but not puffy—this keeps the appliqued petals shaping correctly around the center.
Round 11 :
(1 sc, sc2tog) x 6 (12)
Round 12 :
6 sc2tog (6). Fasten off leaving 6-8" tail for sewing. Finish stuffing to desired firmness and close remaining hole with yarn needle sewing.
Info :
Make three of these centers. You may optionally add a spiral surface texture by working sl st in each st around with the wrong side facing to create a subtle seed-head spiral.
— Sunflower Petals (Make 3 sets of 12 petals each) :
Info :
Petals are worked in Mustard yarn. Each sunflower uses 12 petals spaced evenly around the center. Petals are worked as short raised leaves with elongated dc and hdc to create the petal shape.
Round 1 :
Ch 9, sc in second ch from hook, hdc in next, dc in next 4 ch, hdc in next, sc in last; turn to work along other side of chain: sc in next, hdc, dc4, hdc, sc (16 sts including ends). Sl st to join; do not fasten off.
Round 2 :
Ch 1, in BLO of the petal row work (sc, hdc, dc3, hdc, sc) following the same shaping to create a slightly fuller petal (16). Fasten off leaving 6" tail for sewing.
Info :
Make 12 petals per sunflower. Block petals flat with pins if needed to make them uniform. For a softer petal you may work one row only; the two-row petal gives more body and a raised look.
Round 3 :
Optional: For extra definition, with Mustard yarn and 4.5mm hook, work a surface slip-stitch along the petal ridge (center spine) by inserting needle from RS to WS at petal base, then working sl st along the petal center to the tip and back to base.
Info :
Before sewing petals to center, arrange them evenly around the brown disk. Space petals so that 12 petals cover the circumference with slight overlap at their bases. Pin each petal in place on the cream panel to check final placement.
— Leaf (Make 12 per runner) :
Round 1 :
Using Forest Green, ch 11, sc in 2nd ch from hook, hdc, dc, dc, hdc, sc, continue working on opposite side of chain: sc, hdc, dc, dc, hdc, sl st to join (approx 22 sts). Fasten off leaving a 6" tail for sewing.
Round 2 :
Optional: With green, use BLO on the first round and then work one row of FLO to create a raised central vein. To do this, join at base and work 1 sc in each st BLO around, then return with FLO slip-stitch for vein effect.
Info :
Make 12 larger leaves (4 under each sunflower) and 6 smaller leaves to fill gaps (total 18 visible leaves in daylight photo). Leaves are arranged radially around each sunflower forming a star-shaped foliage base. Block leaves as needed and pin in place on the base panel to confirm spacing.
— Wheat Ear (Make 12 small ears and 6 medium ears) :
Round 1 :
Using Tan yarn, ch 12. Row 1: sc in 2nd ch from hook, *work (ch 3, sl st into same ch) to create a small loop; sc in next ch* rep across chain to create 5 looped grains, ending with sc in last ch. Fasten off leaving tail to sew. Each loop becomes a wheat grain.
Round 2 :
To thicken, rejoin at the base and work 1 sc around the base and through the loops from the outside to anchor them. Fasten off and weave ends.
Info :
Wheat ears are formed by chain loops anchored on a central stem (a short ch or thin cord). Make small ears with 5 grains and medium ears with 8 grains. These are worked flat and sewn onto the panel in clusters between leaves and petals.
— Motif Assembly and Placement :
Info :
Layout all prepared elements on the blocked base panel. Place the three sunflower centers along the lengthline at equal intervals (top, center, bottom). Under each center arrange 4 large green leaves spaced at 90-degree increments and 2 medium wheat ears between leaf pairs. Add smaller leaves and wheat ears to balance gaps. Use pins or T-pins to hold motifs in place while sewing.
Round 1 :
Sew sunflower center to the base: using the long tail from the center, whip-stitch through the center back into the base panel in a spiral. Secure with 6-8 secure stitches around the perimeter and weave end to the back. The center should sit slightly raised above the panel.
Round 2 :
Sew petals: starting at one petal, tack only at the base with matching Mustard yarn using small invisible stitches so the petal tips remain free and slightly raised. Repeat for each petal, ensuring even spacing.
Info :
Use small anchor stitches at the petal base only. Do not stitch through petal tips—this keeps the petals dimensional and crisp. If you wish for flatter appliques, sew through the petal midline as well.
Round 3 :
Sew leaves: place each leaf under the set of petals and sew along the central vein using an invisible whip stitch. Anchor leaves with two vertical stitches at the base and one or two tiny stitches at the midline if you want slightly tacked leaves.
Round 4 :
Sew wheat ears: position wheat ears between leaves and petals and attach by sewing the stem base into the body of the runner using tan yarn. Use short, regular stitches to keep the ears secure but slightly fanned outward.
Info :
Check motif symmetry by stepping back and visually inspecting each flower cluster. Slightly rotate petals or leaves before final stitching if necessary. The center sunflower cluster should measure about 6-7" across including petals and leaves.
— Surface Embroidery and Detail Work :
Round 1 :
Use a length of darker tan yarn to add subtle shading lines on the wheat ears using a simple straight stitch; insert the needle from WS to RS at the wheat base and bring it back down at the tip to mimic the grain line. Repeat for each ear.
Round 2 :
Use dark green to embroider a central vein on each leaf with a backstitch or surface slip-stitch for added definition. Work a central spine and two short angled veins on each side if desired.
Info :
These subtle embroidered lines increase realism and help motifs read from a distance. Keep embroidery minimal to maintain rustic style.
— Border and Edge Finishing :
Info :
We will create a two-row border in Chocolate Brown for a finished look: one row of sc around the perimeter and a final row of reverse single crochet (crab stitch) for a rope-like finish.
Round 1 :
Join Dark Chocolate Brown at any corner. Ch 1, 1 sc in each st and 3 sc in each corner turning chain around the entire runner (approx 113-117 sc depending on corner increases). Join with sl st to starting sc.
Round 2 :
Ch 1, 1 sc in each st around, placing 3 sc in corners again for a smooth corner (same count as previous). Join with sl st and do not fasten off.
Round 3 :
Reverse single crochet (crab stitch) around: Work reverse single crochet in each st around for a rope-like textured edging. Join and fasten off. Weave ends to the back securely.
Info :
For angled pointed ends seen in the image, instead of square corners at the short ends, shape the foundation chain ends into gentle points by decreasing 2-4 sts on the last few rows before the border to create tapered points. Alternatively, create triangular end panels separately and seam them on before the border.
— Final Blocking and Finishing Touches :
Round 1 :
Lightly wet-block the runner flat on mats, pinning the edges square and shaping points so motifs sit flush. Allow to dry completely before removing pins.
Round 2 :
Trim any long tails and weave in ends on the back with a yarn needle. If desired, add a non-slip runner pad beneath to protect table finish.
Info :
For extra durability, you can lightly tack small stitches through the base of each motif into the base panel at strategic points (petal bases and leaf centers) so they remain secure through regular use and washing.
Round :
Pattern complete — enjoy styling your rustic sunflower runner on a table, dresser, or console.
You've created a stunning rustic sunflower table runner that brings warmth and texture to any room. Each layered petal, leaf, and wheat ear adds handcrafted charm and seasonal delight. The dimensional appliques are both eye-catching and durable when sewn securely. Place it down, pour a cup of tea, and admire the cozy centerpiece you've made! 🌻🧶✨