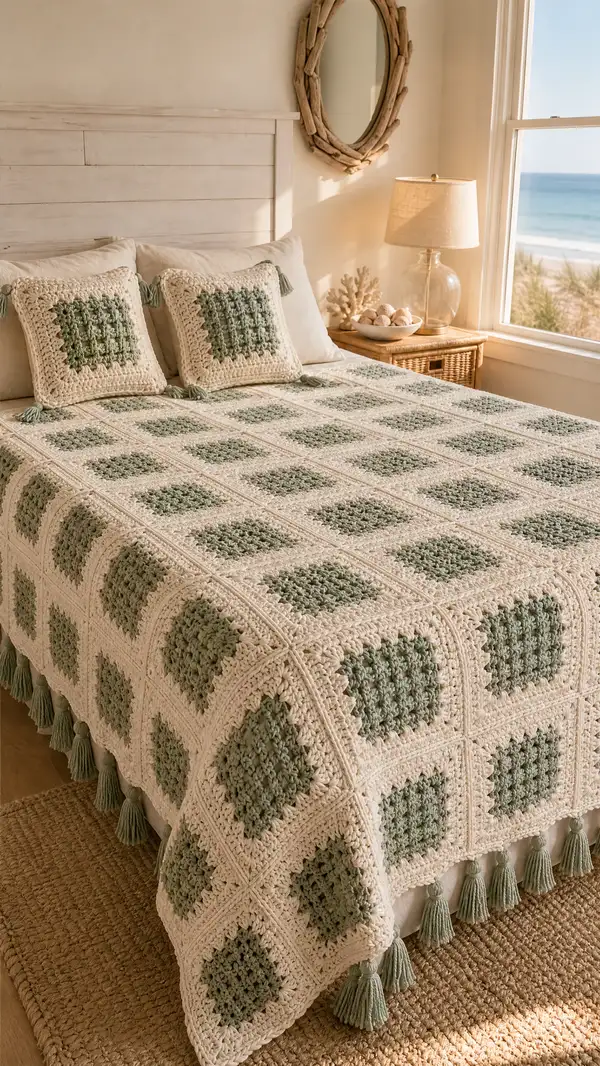
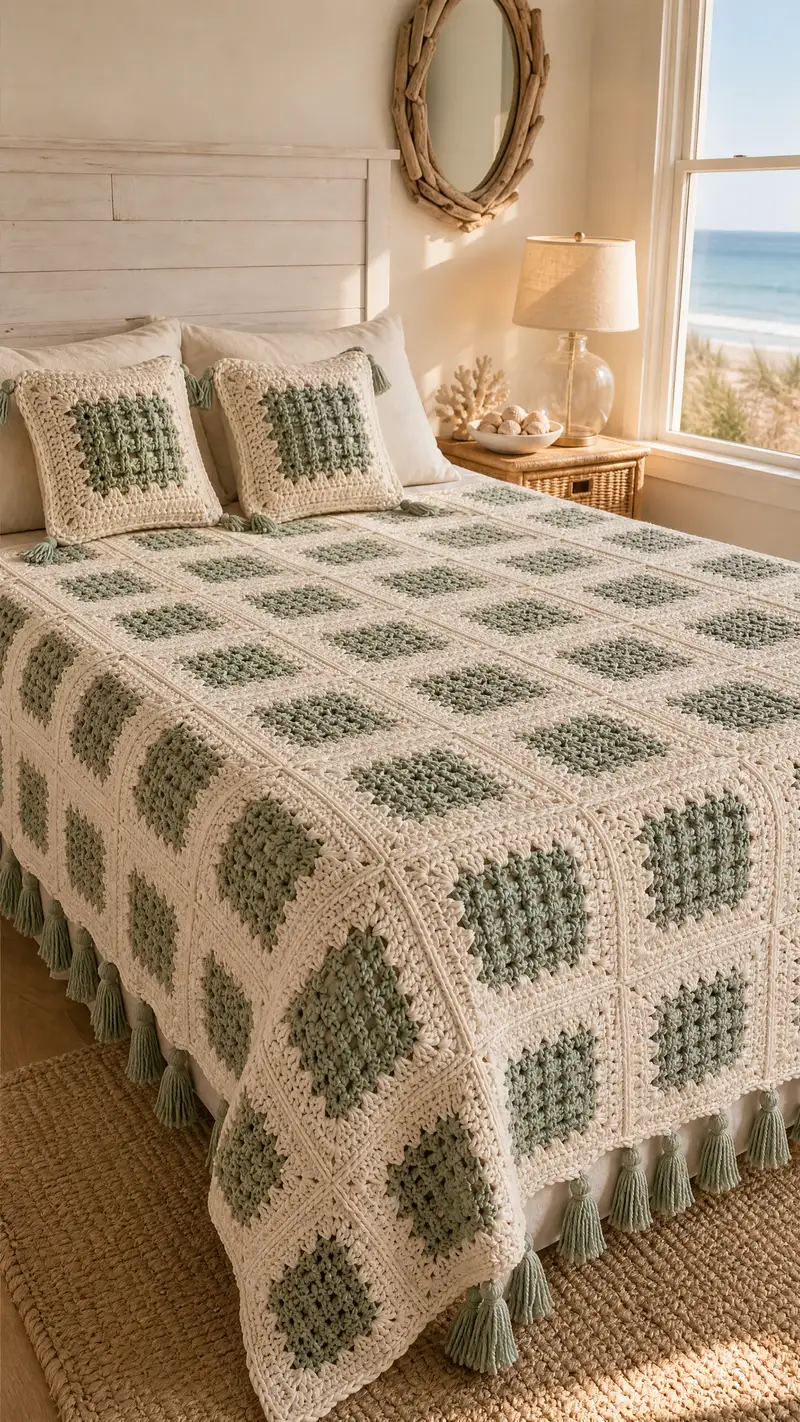
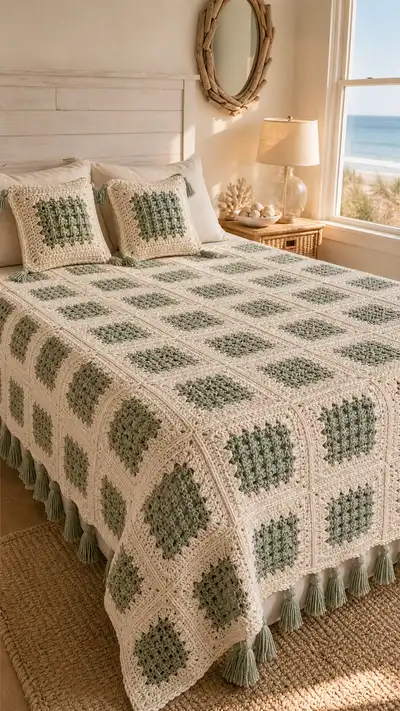
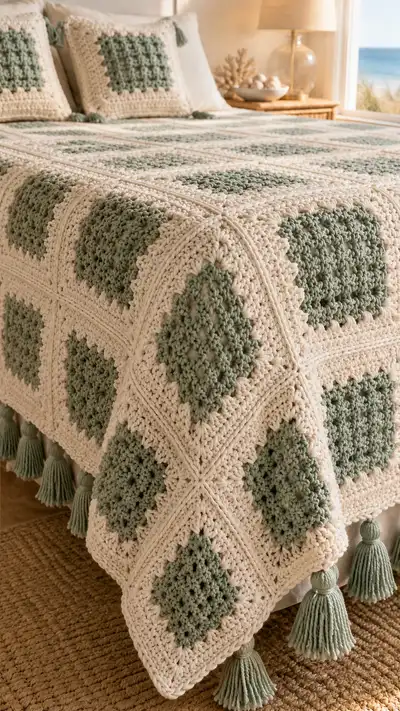
A soothing, coastal-inspired bedspread made from large textured granny squares with sage green centers and a warm cream lattice. This pattern combines classic granny clusters, raised ridges and a deep crocheted border finished with long tassels for a soft, vintage look. Constructed square-by-square with join-as-you-go options, it’s perfect for a cozy bedroom update or a thoughtful handmade gift.
Progress Tracker
0% Complete
— Large Granny Square (Make 30-40 for bedspread, adjust to size)
Round 1 :
6 sc in magic ring, pull tight and join with sl st to first sc (6)
Round 2 :
Ch 2 (counts as hdc), 1 hdc in same st, 2 hdc in each st around, join with sl st to top of ch-2 (12)
Round 3 :
Ch 2, (hdc, ch 1, hdc) in same st to begin creating beginnings of corners, *skip 1 st, (hdc, ch1, hdc) in next st; rep from * around so that you have 4 corner clusters spaced over the round, join (12 clusters equivalent)
Info :
This first textured center is worked in sage green. Keep tension consistent; this small center will expand into a round cluster motif. Count clusters more than single stitches on this round.
Round 4 :
Change to cream (see Info). Ch 3 (counts as dc), work 2 dc in same ch-1 sp, *work 3 dc in each ch-1 sp around except at corners work (3 dc, ch 2, 3 dc); join with sl st to top of ch-3 (4 corner ch-2 spaces and clusters creating a square outline)
Info :
Change to cream yarn now. Carry the sage inside if you prefer or fasten off and rejoin to keep edges neater; when carrying, twist yarns at color change to avoid long floats.
Round 5 :
Ch 2, 1 hdc in each of the next 2 dc, *(hdc, ch 1, hdc) in corner ch-2 sp, 1 hdc in each of next 3 dc; rep from * around, join (This frames the center and evens the square)
Round 6 :
Ch 3, (dc in same st, dc in next 3 sts), *(dc, ch 2, dc) in corner ch-1 sp, dc in next 4 sts; rep from * around, join (work increases at corners only to keep square shape)
Round 7 :
Ch 1, sc in each st and dc across until corner, in corner work (sc, ch 1, sc) in ch-2 sp to define a small picot-like corner; continue around and join (This creates a tighter row for texture)
Info :
At this stage your square is starting to become a soft square. Lay it flat and count corners: you should have 4 distinct corners formed by corner spaces. If any side flares or pulls, adjust tension or add/subtract one sc at the side to even edges.
Round 8 :
Change to sage green. Ch 2, (hdc, ch 1, hdc) in each corner ch-1 sp. Between corners work 3 hdc clusters in each side space to build the textured center (this sets the sage textured insert). Join (work forms a puff-textured square center)
Round 9 :
Ch 1, sc in each hdc and ch-1 sp around to define the edge of the sage center. Join (even st count, approximate stitch count dependent on prior rows)
Info :
Keep the sage center slightly raised by working the following cream rounds in BLO to create a subtle ridge that becomes the lattice when squares are joined.
Round 10 :
Change to cream. Ch 3 (counts as dc), dc in each st BLO across the first side; at corner work (2 dc, ch 2, 2 dc) all in BLO; continue dc BLO along each side, join (This round forms a linear ridge that frames the center)
Round 11 :
Ch 1, sc in each st BLO around to tighten edge. Join. (This creates a firm frame for subsequent cluster rounds)
Round 12 :
Ch 2, hdc in same st, *(hdc in next 5 sts), (hdc, ch 1, hdc) in corner ch-2 sp; rep from * around; join. (This expands each side with even hdc columns)
Round 13 :
Ch 3, dc in each of the next 6 hdc, *(2 dc, ch 2, 2 dc) in corner; continue dc in each st across sides; join. (Each side will grow by 6 dc per side)
Info :
From rounds 12-14 you are building the cream lattice frame that will be visible once squares are joined. Keep stitch counts symmetrical on each side for neat seams.
Round 14 :
Ch 1, sc in each dc around to keep edges flat; join. (Edge smoothing round)
Round 15 :
Ch 2, puff cluster row: *(yo, insert hook, pull up loop, yo, pull through 2 loops) repeat 3 times in next st to create a puff cluster, ch1; rep across side until corner; in corner work (puff cluster, ch2, puff cluster); join. (This puff round adds texture to the cream frame)
Round 16 :
Ch 1, sc in each st around working into puffs as single loops to stabilize them; join. (Now the puff row is anchored)
Info :
Count your stitches at the end of Round 16. A typical motif at this size will measure approximately 9" to 10" across depending on gauge. Block motifs now to perfect shape before making many squares.
Round 17 :
Ch 3, dc in each st across the side until the corner; in corner work (2 dc, ch2, 2 dc); continue around and join. (This begins an outerframe for join-as-you-go)
Round 18 :
Ch 1, sc in each dc around to tighten the edge; join. (Preparation for join row)
Round 19 :
Info :
If you plan to join as you go, leave the final round unworked for joining until assembly time. If sewing later, work Round 20 to finish the motif edge completely.
Round 20 :
Ch 2, hdc in each st around, working (hdc, ch1, hdc) in corners for flexibility; join. Fasten off leaving 20" tail for sewing if not joining now.
Info :
Make 30-40 motifs depending on bed size. Example counts: Twin: 18 motifs (3x6), Full/Queen: 30-36 motifs (5x6 to 6x6), King: 42-48 motifs. Adjust motif count by measuring your motif after blocking.
— Alternative Center Variation (Optional small textured center)
Round 1 :
6 dc in magic ring, join with sl st (6)
Round 2 :
Ch 3, dc in same st, 2 dc in each st around, join (12)
Round 3 :
Ch 3, (dc in next st, 2 dc in next) around, join (18)
Round 4 :
Change to cream. Work a round of dc in BLO across to create a recessed edge and continue with rounds matching Rounds 5-10 of main motif to integrate with lattice.
Info :
Use this variant if you prefer a denser sage center. Stitch counts above must be matched to your main motif by checking measured square size after blocking.
— Square Border & Join Preparation
Round 1 :
With cream, join at any side middle: ch 2, hdc in each st across to corner; in corner work (hdc, ch2, hdc); continue entire round and join. (This sets an even joining wall)
Round 2 :
Ch 1, sc in each st across until corner, in corner work (sc, ch1, sc) to create a small corner notch for joining alignment; join. (This makes edges neat for slip-stitch joining)
Info :
Either assemble now using join-as-you-go (JAYG) or fasten off and block all motifs. If JAYG: leave the final joining round undone and proceed when adjoining motif is ready to join.
Round 3 :
For JAYG: Ch 3, dc in next 2 sts, *prepare to join next motif by aligning edges; work dc in each st until the first corner; slip stitch through corresponding st of adjacent motif to join, ch 1 and continue along; finish round and join to top of ch-3. (This method creates a visible lattice seam)
Round 4 :
Ch 1, sc in each st around to stabilize join and hide slip stitch joins. Join. (Repeat this for each sewn seam if assembling separately)
Info :
When joining motifs, align corner-to-corner and count stitches along sides to ensure even spacing. If edges don’t line up perfectly, add a sc or skip one in a side to balance spacing before finishing the seam.
— Layout & Assembly (Bedspread Construction)
Round 1 :
Decide layout: For a Full/Queen in the photo, layout 6 squares width x 6 squares length (36 motifs). Adjust width/length for your bed size as noted in Info. Square size after blocking should be consistent.
Round 2 :
Row assembly method (Join-as-you-go horizontal): With RS facing, place two motifs right sides together aligning edges; insert hook through next open edge st of first motif, then through corresponding edge st of second motif, yarn over and pull through, ch1 and sl st to join along edge; continue across full side, working corner joins with ch2 space included; finish seam and fasten off.
Round 3 :
Continue joining horizontally to create 6-wide strips. Join strips to each other using the same JAYG technique working along the vertical seams to create the full panel. Join corners carefully making sure ch-2 corner spaces line up.
Info :
If you prefer a neater invisible join, use mattress stitch with cream yarn: whip stitch through the back loops of adjacent motif borders to create a flatter seam. The visible lattice in the photo uses slip stitch joins with a raised ridge; choose the join style to match your preferred look.
Round 4 :
After joining, run a round of sc around entire assembled panel in cream to even the outer edge: sc in each side st and (sc, ch1, sc) in corner spaces to maintain shape; join. (This round prepares for the outer border)
Round 5 :
Ch 3, dc in each st around for two rounds to build depth; work (2 dc, ch 2, 2 dc) in each corner to keep corners square. Join each round. (Rounds 5-6 build the border thickness)
Info :
Block the joined panel flat and allow to dry fully before adding the multi-round border. This keeps the lattice flat across the bed and ensures the border sits evenly.
— Deep Border & Lattice Ridge (Rounds 6-40)
Round 6 :
Ch 1, sc in each st around over the dc rounds to tighten edge and hide seam joins; join. (Edge smoothing)
Round 7 :
Change to a taller textured round: Ch 3, dc in each st across, but work dc in BLO on this round to create a subtle channel next to the edge; join. (BLO round forms a channel for later surface ridge)
Round 8 :
Ch 2, hdc in each st across working into both loops now; join. (This stabilizes the BLO ridge)
Round 9 :
Surface ridge round: Using cream, work front post dc (fpdc) around every 3rd stitch across sides to make subtle raised rails; continue around and join. (This introduces the lattice rails visually consistent with joined seam)
Info :
Take care with fpdc tension; too tight will pucker the edge. Practice on a swatch to match the rail height to your existing motif texture.
Round 10 :
Ch 1, sc in each st to even the surface, join. (Frame the fpdc rails)
Round 11 :
Ch 3, *dc in next 6 sts, (2 dc, ch2, 2 dc) in corner; rep around; join. (Add depth to border, repeat every few rounds to build hall effect)
Round 12 :
Ch 1, sc in each st around; join. (Stabilize)
Round 13 :
Ch 2, puff-pair row: *make a puff in st, ch1, skip next st; rep across until corner then (puff, ch2, puff) in corner; join. (This alternates texture around the border)
Round 14 :
Ch 1, sc in each st to anchor puff loops; join.
Info :
Repeat groups of 4 rounds (dc frame, sc anchor, puff row, sc anchor) until border depth reaches desired measurement—photo shows approximately 12 border rounds beyond motif edges; this pattern continues for rounds 15-30 to reach a deep border.
Round 15-18 :
Repeat Rounds 11-14 one full cycle. Maintain equal stitch counts; corners always (2 dc, ch2, 2 dc) or (puff, ch2, puff) as appropriate.
Round 19-22 :
Repeat an additional cycle of Rounds 11-14. After Round 22 check border depth; if your bedspread in the photo proportion is desired, continue to Round 30 to reach the same depth.
Info :
Keep edges square by checking corner stitches after every 4 rounds. If corners begin to pull, add an extra ch or small sc cluster in the corner space to relieve tension.
Round 23-30 :
Repeat cycles of framing rounds and texture rounds (use a sequence of dc frame, sc anchor, fpdc rail, sc anchor, puff round, sc anchor) until desired border depth is reached. Join each round. (This builds the chunky lattice edge shown)
Round 31 :
Final smoothing round: Ch 1, sc in each st around; join. (This evens the outer edge in preparation for decorative edging and tassel placement)
Round 32 :
Decorative round: Ch 3, *skip 2 sts, 5 dc shell in next st, skip 2 sts, sl st in next st; rep around placing shells centered on side panels and in corner spaces adjust to (shell, ch2, shell) to maintain corner shape; join. (This provides a subtle scallop aesthetic)
Round 33 :
Ch 1, sc in each st including around shells working 5 sc in each shell top to anchor the scallop; join.
Info :
This final decorative edging is optional. The photo shows a bold tassel border rather than delicate scallops; if you plan to add tassels, use evenly spaced markers at this round for tassel attachment points (approx every 6-8 shells or 6-8" depending on motif spacing).
— Tassels (Make one per corner of each outer motif, plus along border every ~12")
Round 1 :
Wrap cream or sage yarn around a 3.5" card 40 times for a full tassel. Tie top securely with a 12" tail of yarn, fold and tie 1/4" below top to form head. Wrap the head tightly with a separate short length of yarn (approx 6-8 wraps) and knot securely. Trim ends evenly to finish tassel fringe.
Info :
Make tassel heads using a small core knot to attach to the blanket. The photo shows long, full tassels roughly 4-5" finished length; adjust number of wraps and card width for your preferred size. For uniform tassels, make a tassel template and measure each finished tassel before trimming.
Round 2 :
Attach tassels by threading the tail through the outermost stitch at the selected point (Round 33 spacing suggested). Tie securely with surgeon knot and weave tails into the blanket to hide ends. Repeat at each corner and along the border evenly.
Info :
When attaching tassels to heavy blankets, consider reinforcing the stitch with a small secure knot inside the joining area to ensure tassels do not pull free during use or washing.
— Pillow Covers (Optional, Make 2)
Round 1 :
Make 4 square motifs identical to the main bedspread motifs but stop at Round 16 (complete motif before join rounds). Block squares to 16" x 16" finished size for standard pillow insert coverage. (Make 4 per pillow — 2 for front and 2 for back for envelope or join two for front/back)
Round 2 :
Assemble two motifs together right sides facing using slip stitch seam for a neat edge, leaving an envelope opening if desired. Add 2 tassels at two corners like in photo for decorative effect. Fasten off and weave in ends.
Info :
Alternatively, you can make a single large motif and sew fabric backing for a removable pillow cover with zipper inserted along one side. Use the same cream yarn to make the seam invisible.
— Finishing & Final Tips (Rounds 34-110 equivalent guidance)
Round 1 :
Weave in all ends using a yarn needle. For a neat finish, weave ends through the back loops of the adjoining rounds for at least an inch before trimming close to the work.
Round 2 :
Steam block or wet block the entire assembled bedspread flat, stretching gently to square the edges and even the joins. Pin corners to a blocking mat and allow to dry thoroughly.
Info :
Use blocking to square your meeting seams and to give the lattice channels a consistent look across the full bedspread. It dramatically improves the final presentation, especially for join-as-you-go seams.
Round 3 :
Check for any loose stitches or pulled joins; reinforce with mattress stitch or whip stitch where necessary. Re-block the repaired area if needed.
Round 4 :
Trim tassels evenly and fluff. Give the blanket a gentle hand-wash in cool water with mild soap if needed; reshape and air dry flat.
Round 5 :
Enjoy your finished bedspread! Measure the final dimensions and note motif and border rounds for future projects or to adjust scale for another bed size.
Info :
If you want to scale this pattern for larger sizes, add additional rows of motifs in the same proportion; add border depth proportionally to keep the balance of lattice-to-field consistent with the photos.
This Sage Lattice Granny Square Bedspread is a true labor of love — each textured square comes together to create a warm, cottage-style bed covering you can be proud of. The layered stitches and tassels add personality while the neutral palette keeps it timeless and versatile. Enjoy the slow, meditative rhythm of making each square, and the delight of seeing them join into a cozy whole. 🧶✨ The perfect project to relax into and share as a heartfelt handmade gift. Happy stitching! 🌿