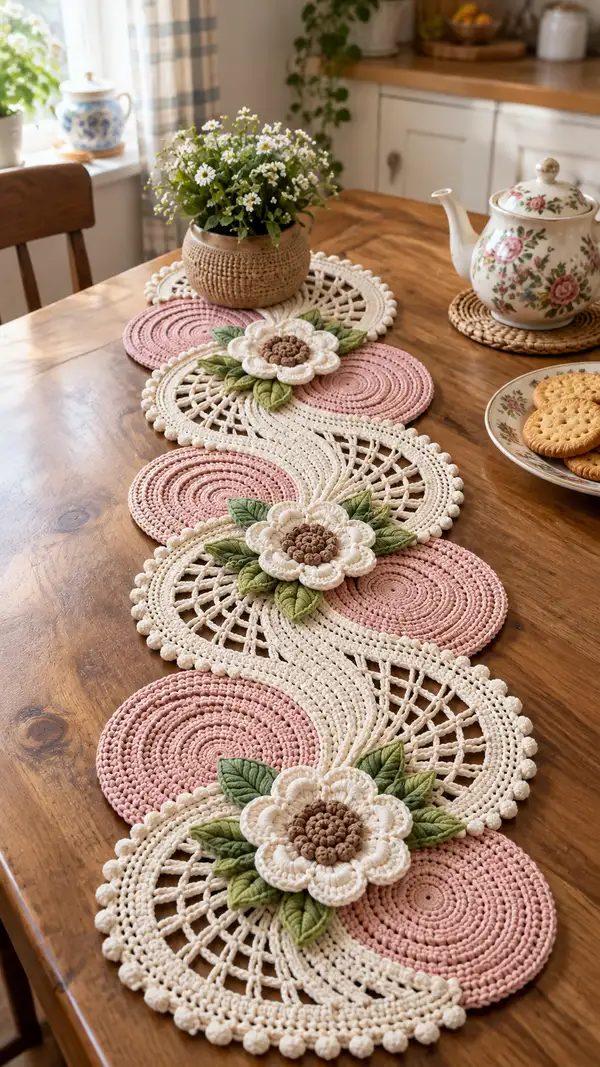
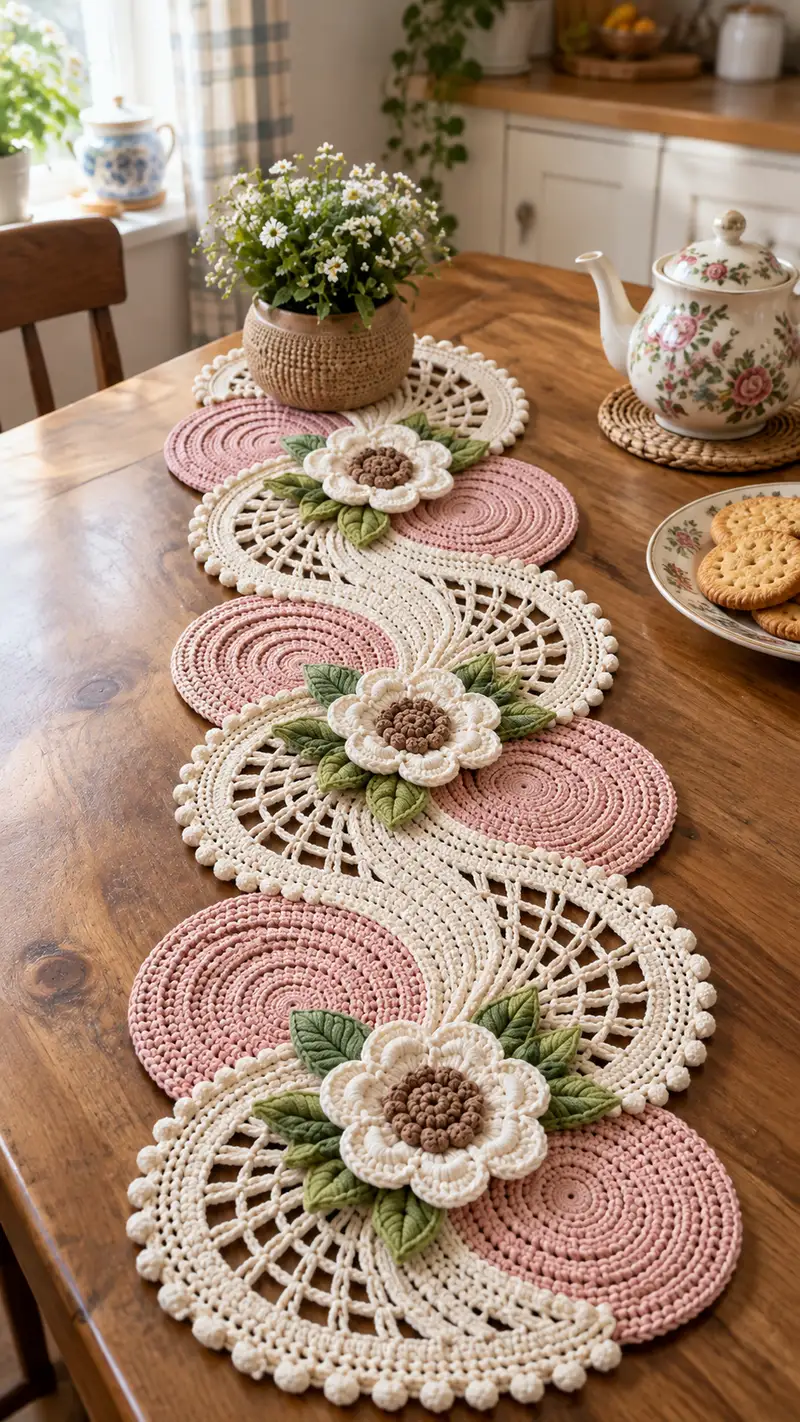
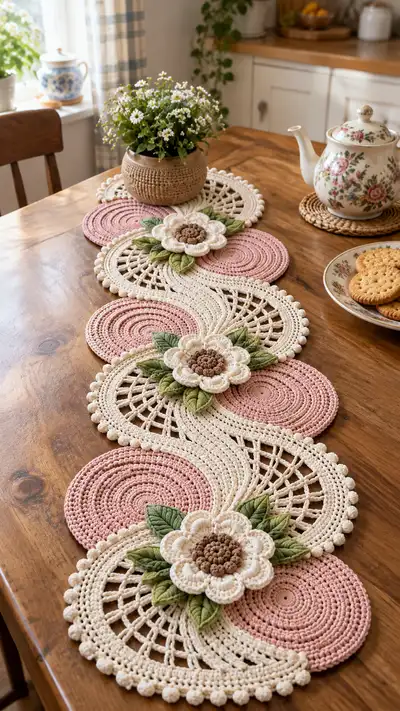
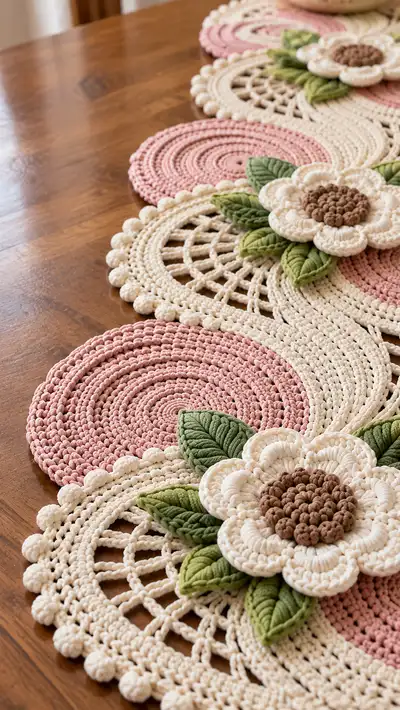
A romantic scalloped table runner featuring soft dusty-pink discs, lacy cream connectors and layered 3D flowers with sculpted green leaves. This elegant runner is worked in sturdy cotton yarn and finished with a bobble scallop edge for vintage charm. Designed to be assembled from repeating circular motifs, airy lace panels and decorative floral appliques for a table centerpiece that feels handmade and heirloom-ready.
Progress Tracker
0% Complete
— Overview :
Info :
This runner is built from repeating modules: 1 pink circle motif + 1 cream semicircle lace connector. Each module gets a layered flower and a cluster of leaves sewn to the seam. Work motifs flat, block them, then join with slip-stitch or whip stitch for a durable seam. The pattern below describes individual components: Pink Circle, Cream Lace Semicircle, Flower Center, Petal Layers, Leaves, Edging and Final Assembly. Stitch counts are given for each round and double-checked for mathematical consistency. Work in continuous rounds (spiral) unless otherwise stated; use stitch markers to mark the start of each round.
— Pink Circle Motif (make 6 or as many as needed) :
Round 3 :
(1 sc, inc) x 6 (18)
Round 4 :
(2 sc, inc) x 6 (24)
Round 5 :
(3 sc, inc) x 6 (30)
Info :
Keep your tension even and relatively firm for cotton yarn to keep the disc stable. Use a stitch marker and move it up each round if working spiral rounds.
Round 6 :
(4 sc, inc) x 6 (36)
Round 7 :
(5 sc, inc) x 6 (42)
Round 8 :
(6 sc, inc) x 6 (48)
Round 9 :
(7 sc, inc) x 6 (54)
Round 10 :
(8 sc, inc) x 6 (60)
Info :
If you prefer a slightly smaller disc, stop increasing at round 8; the counts below assume a 60-stitch full disc for the desired diameter. Keep increasing pattern regular to avoid ruffling.
Round 11-16 :
1 sc in each st (60)
Info :
These even rounds build the thickness of the disc. For the concentric ridged look visible in the pink discs, work rounds 13 and 15 in BLO to create subtle ridges: Round 13: 1 sc in each st BLO (60), Round 15: 1 sc in each st BLO (60).
Round 17 :
1 sc in each st (60)
Round 18 :
1 hdc in each st (60)
Round 19 :
Work a decorative ridge: *sc in next 2 sts, hdc in next 2 sts* rep around (60)
Round 20 :
Slip stitch evenly around to finish; fasten off leaving a 12-15cm tail for sewing (60)
Info :
Block each disc flat. If discs cup up slightly, steam-block lightly or wet-block on a flat surface with pins. Keep discs consistent in size for smooth joins later.
— Cream Lace Semicircle Connector (make 6 or matching number) :
Round 3 :
(1 sc, inc) x 6 (18)
Round 4 :
(2 sc, inc) x 6 (24)
Round 5 :
(3 sc, inc) x 6 (30)
Round 6 :
(4 sc, inc) x 6 (36)
Info :
From rounds 1–6 you are creating the base semicircle arc. For a full semicircle rather than a full circle, you will now work rows that extend only on one side to flatten into a half-disc shape: mark the mid-point stitch of the last round to identify the semicircle center.
Round 7 :
*sc in next 10 sts, turn work (work along the arc only), ch 1, work back along the same side with sc across the same 10 sts* — This round creates a short reinforcing band along the semicircle flank; repeat across both sides to maintain shape (36)
Round 8 :
1 sc in each st along the arc only (36)
Round 9 :
Begin lace mesh: *ch 4, sk 3 sts, sl st into next st* rep across arc (approx 9 meshes)
Round 10 :
Into each ch-4 space: *(sc, ch 3, dc) into same space* rep across (approx 9 times). Anchor at ends with sc (36)
Round 11 :
1 sc in each base stitch across arc to stabilize mesh (36)
Info :
The lace mesh rounds are what create the openwork shown in the photo. Keep chains even and avoid stretching; the mesh should be flexible but not floppy. Use a stitch marker at the start of the arc to maintain correct stitch counts.
Round 12 :
*(ch1, sc in next 2 sts), ch3, sl st into the top of the next mesh* rep across to create decorative arches (36)
Round 13 :
1 sc in each st across arc; prepare for bobble border (36)
Round 14 :
Edge prep: *(sc in next 3 sts, ch 2, sk 1 st)* rep around arc (approx 9 chains)
Round 15 :
Work bobble edge: *bp in next st, sc in next 3 sts* rep around. (Each bobble counts as 1 st; total stitches remain 36 but you will have approx 9 bobbles evenly spaced)
Round 16 :
1 sc in each stitch (36)
Round 17 :
Repeat decorative arch row to balance the look: *(sc, ch3, sc) into top of each mesh* rep across arc (36)
Round 18 :
Finish with a tidy round: sc along arc and sc through the base of each bobble to anchor them (36)
Info :
Fasten off leaving a long tail for joining to the pink disc; block this semicircle well as openwork tends to distort when dry. The semicircle should curve to meet two discs on either side once joined.
— Joining Band (work when assembling modules) :
Round 1 (Join prep) :
With cream yarn, join at the outermost point of semicircle. Ch 1, sc evenly along semicircle edge (36)
Round 2 :
Align and slip-stitch join to each pink disc: working through both layers, sl st into corresponding st on pink disc every second or third stitch to create a firm seam (approx 24–30 join points depending on spacing)
Info :
Pin motifs in place before joining to ensure smooth S-shaped flow. Use blocking pins and a flat surface to maintain alignment while seaming. Join with a matching cream yarn using a slip-stitch or whip-stitch for a secure hold.
— Flower Center (make 6 centers) :
Round 1 :
6 sc in mr using medium brown (6)
Round 3 :
(1 sc, inc) x 6 (18)
Round 4 :
Work bobble cluster round: *(bp, sc) x 6 around the circle (18 stitches where each bp counts as 1 st) — bobbles should be worked as: yo, insert, yo, pull up loops 5 times, yo and draw through all loops, ch 1 to close if your bp method requires it*
Info :
Use a smaller hook (3.0mm) for the bobbles if you want tighter, more pronounced bumps. Fill the center with a tiny amount of fiberfill—just enough to create a domed effect. Do not overstuff.
Round 5 :
Sc evenly around to anchor bobbles and create a neat edge: 1 sc in each st (18)
Round 6 :
Fasten off leaving long tail for sewing to petal layer (18)
— Flower Petal Layer A (larger petals, make 6 flowers x 8 petals per flower) :
Round 1 :
Join cream yarn to center edge. Ch 2, *work into next st: (sc, hdc, 3 dc, hdc, sc) — this forms one petal; sl st into next base st to anchor* Repeat around to make 8 petals (repeat 8 times)
Info :
Each petal sequence is worked into a single base stitch at the edge of the center. The count here assumes 8 base points around the center; adjust spacing slightly if your center has different counts to keep petals even.
Round 2 :
Work a second round to thicken petals: Into the head of each petal work: *sc, (hdc in each dc), sc* — this follows petal topology and provides a raised, sculpted look.
Round 3 :
Slip stitch around to tidy the base and fasten off leaving long tail for sewing (8 petals)
Info :
Block petals gently into shape, pinning outer edges to create a slightly cupped petal look. If desired, surface-slip stitch a decorative ridge around the petal edges for more definition.
— Flower Petal Layer B (inner smaller petals, repeat per flower) :
Round 1 :
Using cream (or slightly off-white for contrast), join at a base point between large petals. Ch 2, *(sc, 2 dc, sc) into next 8 points around center to create 8 smaller inner petals* (8)
Round 2 :
Work an anchoring round: 1 sc in each base stitch around inner petal circle to firm up the join (8)
Round 3 :
Fasten off leaving long tail for sewing layers together
Info :
Layer the smaller petals above the larger ones slightly offset so each larger petal shows between two inner petals; this produces the multi-row flower seen in the photo.
— Leaves (make 12–18 leaves total to decorate modules) :
Round 1 :
Ch 8, sc in 2nd ch from hook and across (7 sc) — this forms a narrow foundation row for a pointed leaf
Round 2 :
Turn and work along opposite edge of chain: sc in next 6 sts, hdc in next, dc in next, tr in last to create a tapered tip. Now work back along the foundation: tr, dc, hdc, sc across (approx 7 sts) - result forms a full leaf outline
Round 3 :
Work decorative vein rows by working FLO stitches: *ch1, sc in next st FLO across center line, ch1* to create a visible center vein. Fasten off leaving long tail for sewing.
Info :
For sculpted, plump leaves, use a slightly larger hook for the body and then come back with a smaller hook to stitch surface veins. Pin leaves to shape while damp to get the gentle curved leaf seen in photos.
— Bobble Scallop Edging for Long Runner (worked along exposed cream edges) :
Round 1 :
With cream, join to outermost edge. Work 1 sc in each st for one round to create an even base (use 60 sts over semicircle arc; counts adjust along S-curve)
Round 2 :
Edge pattern: *(sc in next 2 sts, bp in next st, sc in next 2 sts)* rep around to form regular bobbles (bobble spacing approx every 3rd stitch)
Round 3 :
Secure bobbles with sc round: 1 sc in each st around, working through the back loop only for the base to give a slight standing scallop (total stitch count remains consistent with base round)
Info :
Work the bobble using the same technique as flower centers but scaled to a single bobble: (yo, insert, pull up loop) 4–5 times to create pronounced bobbles. Consistent bobble height makes the scallop visually uniform.
— Final Assembly & Decorative Placement :
Info :
Layout your modules on a flat surface in the S-shaped sequence shown in the photo: Pink disc – Cream semicircle – Pink disc – Cream semicircle – Pink disc, repeating until runner reaches desired length. Add flower and leaves at each seam between a pink circle and adjoining semicircle to anchor the eye and hide join points.
Step :
Block all motifs flat. Pin together on the blocking board in the final running order, spacing so semicircles nest into the curves of the pink discs.
Step :
Join semicircles to discs using slip stitch through both layers or use yarn needle to sew with a whip stitch for an invisible seam. Match stitches exactly; if counts differ slightly, ease the excess with small gathering stitches rather than skipping large gaps.
Info :
Sew the flower layers together: center bobble cluster to inner small petal circle, then sew the smaller petal layer to the larger petal layer, aligning evenly. Sew the finished flower onto the seam where the semicircle meets the disc. Add 3–4 leaves around each flower, sewing them into the seam so they sit naturally beneath petals.
Step :
Weave in all ends securely, then block the entire runner again to set seam curvature. Light steam-blocking is excellent for cotton yarn to soften edges and flatten joins.
Info :
If you plan to wash the runner, test a small scrap for colorfastness first. Use gentle machine wash with mild detergent on a warm cycle or hand wash, then lay flat to dry. Reblock if necessary after washing.
— Sizing & Customizing Notes :
Info :
Each pink disc as worked to round 20 will be approximately 12–15cm (5–6") in diameter using cotton aran/ worsted yarn and 3.5mm hook. The finished runner length equals number of modules x module width (module ~24–28cm across when combined). To lengthen, add more repeats; to shorten, remove repeats or reduce stitch rounds in each disc by 2–4 rounds.
Info :
For a more vintage look swap dusty pink for soft mauve or antique rose; for a bright modern look use a coral or mustard accent. The pattern accepts color changes at any time; carry yarn neatly or use small weaving to avoid lumps at joins.
This scalloped floral runner becomes an instant heirloom with every carefully worked motif and hand-sewn flower. Each finished section layers lace, texture and 3D flowers into a cohesive, romantic table centerpiece you'll love displaying. Enjoy the slow, meditative process of crocheting and assembling each repeat—it's rewarding to see the runner grow before you. 🧶🌸 Place it on your favorite table, add a vase of fresh flowers, and take a deep, satisfied breath. Happy stitching! ✨