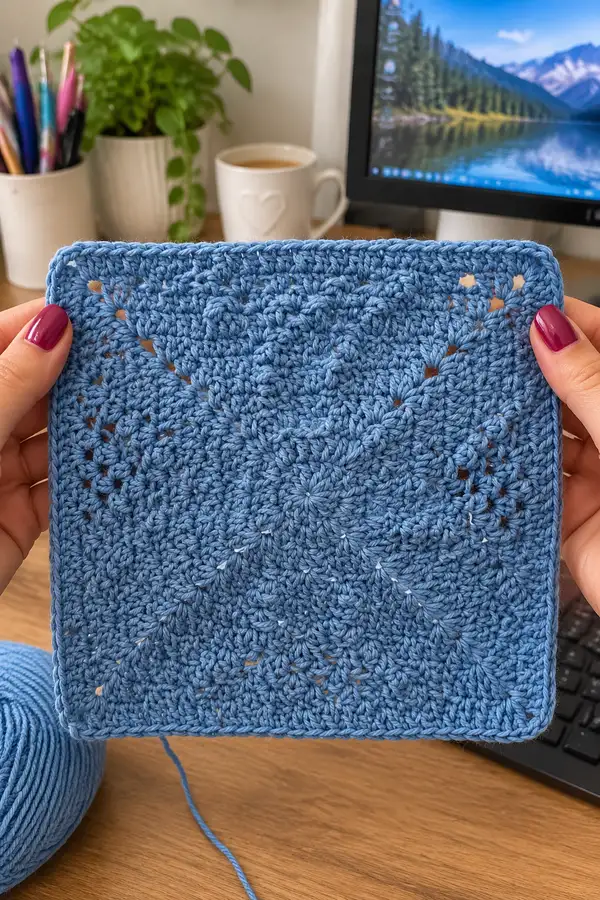
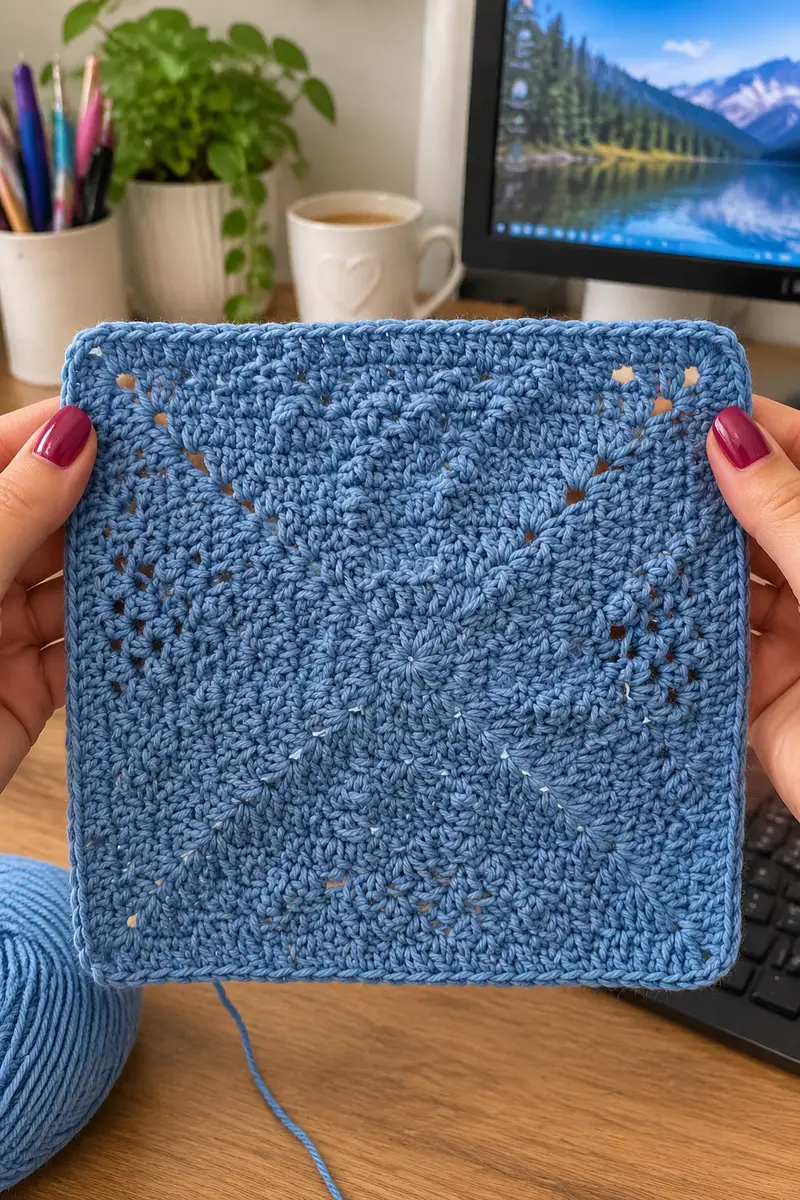
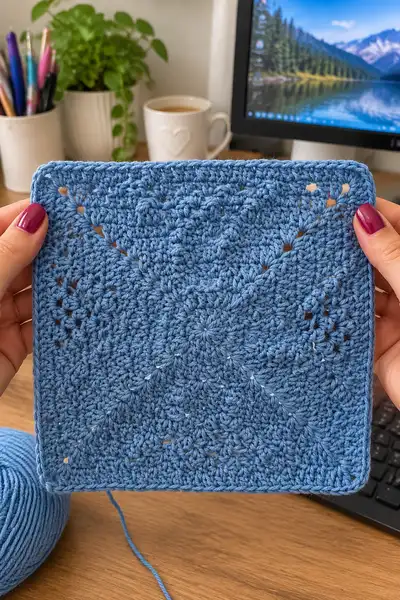
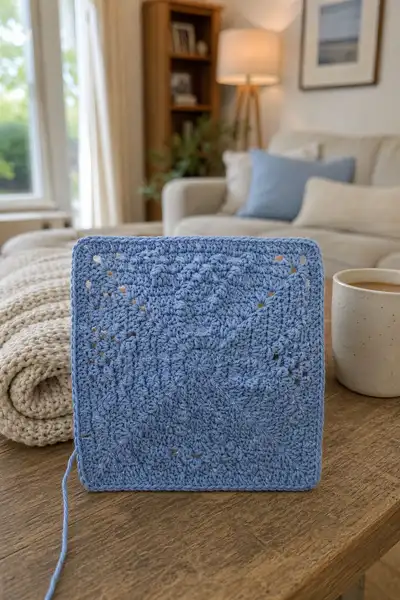
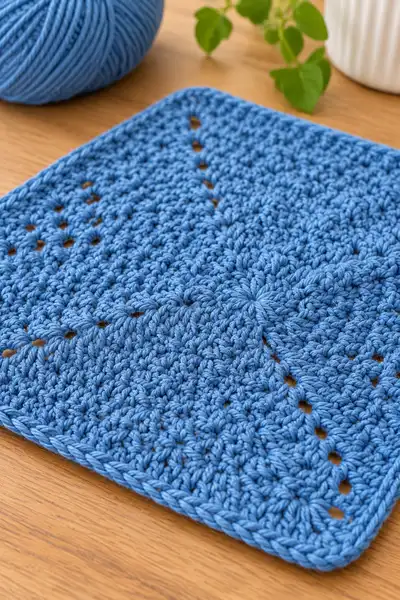
A calming, textured granny square worked in a soft denim-blue cotton—perfect as a cozy blanket block or decorative cushion panel. This square features a starburst center, radiating V-lines and delicate puff clusters for a subtle 3D texture. The pattern includes a generous, rounded single-crochet border that smooths the corners and gives a polished, modern finish.
Progress Tracker
0% Complete
— Notes & Techniques :
Info :
Gauge is not critical for a decorative square but affects final size. Using worsted cotton and 4.0mm hook the sample square measures approximately 10.5" (26.5cm) after blocking. Puff stitch used here: yo, insert hook, yo pull up loop (repeat 4 times so 9 loops on hook), yo and draw through all loops, ch1 to secure (counts as ch1 space). Use stitch markers to note corner chain spaces. Work tightly enough so stuffing (if used in other projects) will not show through.
— Center Motif :
Round 1 :
mr, ch1, 8 sc in magic ring, pull ring closed and sl st to first sc (8)
Round 2 :
ch2 (counts as hdc), 1 hdc in same st, *2 hdc in next st* around, sl st to top of ch2 (16)
Round 3 :
ch2, (1 hdc, inc) x8 -> (1 hdc, 2 hdc in next st) repeated 8 times; sl st to top of ch2 (24)
Round 4 :
ch2, (2 hdc, inc) x8; sl st to top of ch2 (32)
Round 5 :
ch2, (3 hdc, inc) x8; sl st to top of ch2 (40)
Round 6 :
ch2, (4 hdc, inc) x8; sl st to top of ch2 (48)
Info :
These first rounds build a flat, dense circle as the foundation for the starburst texture. Keep tension even. Place a marker at the beginning of each round to track repeats; counts increase by 8 each increase round.
Round 7 :
ch2, (5 hdc, inc) x8; sl st to top of ch2 (56)
Round 8 :
ch2, (6 hdc, inc) x8; sl st to top of ch2 (64)
Round 9-12 :
ch2, 1 hdc in each st around (64)
Info :
Rounds 9-12 give height and a stable base for the starburst stitches. If you prefer a deeper center, add extra even rounds here. The 64 stitches divide evenly into 8 sections for the texture repeats used next.
— Creating the Starburst (Textured Petals) :
Round 13 :
Ch1, sc in same st, *skip 3 sts, puff in next st, ch1, sc in next st* rep around to create 8 puff placements; sl st to first sc (Complex stitch groups: total stitches still counted as 64 base positions; 8 puff groups placed evenly)
Info :
To place 8 puff clusters evenly across 64 sts, place a puff every 8th stitch. Work the puff into the top of the stitch indicated — puff placement defines the rays. Use a contrasting marker thread if needed to mark placements before working.
Round 14 :
ch2, 1 hdc in each st but work 3 hdc into each ch1 space left after the puffs (these create small petals). Resulting count remains 64 hdc equivalent with grouped clusters in petal areas (64)
Round 15 :
ch2, *hdc in next 6 sts, (puff, ch1, sc) in petal center stitch* rep x8; sl st (64)
Round 16 :
ch1, sc in each st around working sc in ch1 spaces around puffs to anchor them (64)
Info :
This sequence of rounds converts the dense circle into a starburst by anchoring puff clusters and surrounding them with short petals of grouped hdc/dc. Counted stitches are preserved per round because puffs are anchored in existing stitch positions rather than increasing.
— Building Diagonal V-Lines Toward Corners :
Round 17 :
ch3 (counts as dc), *dc in next 6 sts, (dc, ch2, dc) in next st (corner start for directional V), dc in next 6 sts* rep 4 times; sl st to top of ch3 (4 corners created; total dc count 64 + 4 ch2 spaces)
Info :
The (dc, ch2, dc) placement establishes 4 angled points which will evolve into the square's corners. Place stitch markers in the beginning stitch of each corner ch2 space to keep round starts consistent. Visual lines radiating from the star are formed by strategic chain-2 spaces and worked groups along diagonal pathways.
Round 18 :
ch2, 1 hdc in each dc around working 3 hdc into each (dc, ch2, dc) corner group (this keeps corner height), sl st (count 64 hdc equivalent plus 4 corner groups)
Round 19 :
ch2, *hdc in next 8 sts, v-stitch (dc, ch1, dc) over next stitch* rep 8 times to emphasize diagonal lines; sl st (64)
Round 20 :
ch1, sc in each st around, working sc in ch1 spaces to flatten; sl st (64)
Info :
By round 20 the circular motif begins to show directional V-lines to each corner. These rounds carefully preserve overall count while creating channels and texture that will guide later increases into a square form.
— Transitioning from Round Circle to Square Form (Corner Setups) :
Round 21 :
ch3 (counts as dc), *dc in next 7 sts, (2 dc, ch2, 2 dc) in next st (corner increase)* rep 4 times; sl st to top of ch3 (stitches: 64 + 16 increase sts from corner groups = 80)
Info :
Each corner group adds 4 dc (2 dc + 2 dc) plus a chain-2 space; across 4 corners this adds 16 dc overall. Your new round total is 80 stitches, forming the first clear square geometry. Place markers in the center stitch of each corner group to help count side repeats.
Round 22 :
ch2, 1 hdc in each st around (80)
Round 23 :
ch2, *hdc in next 9 sts, (2 hdc, ch2, 2 hdc) in corner* rep 4x; sl st (adds 16 hdc from corners = 96)
Round 24 :
ch2, 1 hdc in each st around (96)
Info :
Rounds 21–24 gently expand the motif into a square by only increasing at the four corner points. Increase rounds are done every other round so the fabric remains flat and proportions stay square. Keep corners well-defined by making the chain-2 space tall enough to pivot the next round comfortably.
— Expanding Texture Panels (Sides and Diagonals) :
Round 25 :
ch3, *dc in next 11 sts, (2 dc, ch2, 2 dc) in corner ch2 space* rep 4x; sl st (total now 112)
Round 26 :
ch2, 1 hdc in each st around (112)
Round 27 :
ch3, *dc in next 5 sts, puff in next st, ch1, dc in next 5 sts, (2 dc, ch2, 2 dc) in corner* rep 4x; sl st (112)
Info :
Round 27 places puff stitches along the side panels approximately centered between corners. Work puffs into single stitches spaced evenly to keep the visual V-lines intact. Keep a consistent number of regular stitches between puffs to preserve symmetry.
Round 28 :
ch1, sc in each st around working sc into ch1 spaces around puffs to anchor them (112)
Round 29 :
ch2, *hdc in next 13 sts, (2 hdc, ch2, 2 hdc) in corner* rep 4x; sl st (adds 16 = 128)
Round 30 :
ch2, 1 hdc in each st around (128)
Info :
As the square grows, keep checking that the sides remain straight. If a side pulls in, allow an extra increase evenly along the side (insert a single increase in a mid-side position) to compensate; avoid adding extra increases near corners which will skew geometry.
— Mid-Size Texture Band (Creating Subtle Shells and Diagonals) :
Round 31 :
ch3, *dc in next 5 sts, shell (3 dc) in next st, dc in next 5 sts, corner (2 dc, ch2, 2 dc)* rep 4x; sl st (128)
Round 32 :
ch1, sc in each st around working sc into shell spaces to flatten (128)
Round 33 :
ch2, *hdc in next 15 sts, (2 hdc, ch2, 2 hdc) in corner* rep 4x; sl st (adds 16 = 144)
Round 34 :
ch2, 1 hdc in each st around (144)
Info :
The mid-size band alternates shells and solids to add visual interest without changing the square’s proportion. Shells are anchored in existing stitches to keep stitch counts consistent. Splitting edge sections into even increments per side keeps the pattern symmetrical.
Round 35 :
ch3, *dc in next 7 sts, puff in center of previous shell, ch1, dc in next 7 sts, corner group* rep 4x; sl st (144)
Round 36 :
ch1, sc in each st around working sc in ch1 spaces to anchor puffs (144)
Round 37 :
ch2, *hdc in next 17 sts, corner (2 hdc, ch2, 2 hdc)* rep 4x; sl st (adds 16 = 160)
Round 38 :
ch2, 1 hdc in each st around (160)
Info :
At this stage you can pause and measure your square. To create a cushion front, continue to the next texture band; to create a larger blanket block, repeat expansion rounds until desired dimensions are reached. For the sample square, continue to Round 46 before beginning the final border.
— Final Expansion and Squaring Rounds :
Round 39 :
ch3, *dc in next 9 sts, (2 dc, ch2, 2 dc) in corner* rep 4x; sl st (adds 16 = 176)
Round 40 :
ch2, 1 hdc in each st around (176)
Round 41 :
ch3, *dc in next 7 sts, v-st (dc, ch1, dc) over next st to create diagonal highlight, dc in next 7 sts, corner* rep 4x; sl st (176)
Round 42 :
ch1, sc in each st around working sc into ch1 spaces to flatten (176)
Round 43 :
ch2, *hdc in next 19 sts, corner (2 hdc, ch2, 2 hdc)* rep 4x; sl st (adds 16 = 192)
Round 44 :
ch2, 1 hdc in each st around (192)
Info :
Round 43 increases once more to prepare the square for the final textured rows and border. Keep corner chain-2 spaces tidy so the border can round the corners smoothly in the finishing rounds.
Round 45 :
ch3, *dc in next 11 sts, puff in next st, ch1, dc in next 11 sts, corner* rep 4x; sl st (192)
Round 46 :
ch1, sc in each st around working sc in ch1 spaces around puffs to anchor (192)
Round 47 :
ch2, *hdc in each st for 22 sts, (2 hdc, ch2, 2 hdc) in corner* rep 4x; sl st (adds 16 = 208)
Round 48 :
ch2, 1 hdc in each st around (208)
Info :
By Round 48 the square is large and detailed. If using for a pillow front, this is approximately the finished size for a 16–18" cushion front depending on your yarn. Adjust final rounds to match desired measurement before finishing with border rounds.
— Texture Polishing Rounds :
Round 49 :
ch3, *dc in next 10 sts, shell (3 dc) in next st, dc in next 10 sts, corner (2 dc, ch2, 2 dc)* rep 4x; sl st (208)
Round 50 :
ch1, sc in each st around working sc in shell spaces to anchor (208)
Round 51 :
ch2, *hdc in next 24 sts, corner (2 hdc, ch2, 2 hdc)* rep 4x; sl st (adds 16 = 224)
Round 52 :
ch2, 1 hdc in each st around (224)
Info :
These rounds emphasize grouped shells and even sides. Work deliberately to maintain an even tension; if one side sits higher, adjust by adding or reducing a single stitch mid-side on the next even round—not near the corner.
Round 53 :
ch3, *dc in next 11 sts, puff in next st, dc in next 11 sts, corner* rep 4x; sl st (224)
Round 54 :
ch1, sc in each st around (224)
Round 55 :
ch2, *hdc in next 26 sts, corner (2 hdc, ch2, 2 hdc)* rep 4x; sl st (adds 16 = 240)
Round 56 :
ch2, 1 hdc in each st around (240)
Info :
Stop here to measure. If your block is the desired size, skip additional increase rounds and proceed to border. Extra increases will add roughly 1 cm per round on each side depending on yarn. For sample square continue two more texture rounds before border.
— Final Texture & Edge Prep :
Round 57 :
ch3, *dc in next 13 sts, v-stitch (dc, ch1, dc) to make subtle diagonal accents, dc in next 13 sts, corner* rep 4x; sl st (240)
Round 58 :
ch1, sc in each st around working sc in ch1 spaces to flatten (240)
Round 59 :
ch2, *hdc in next 28 sts, corner (2 hdc, ch2, 2 hdc)* rep 4x; sl st (adds 16 = 256)
Round 60 :
ch2, 1 hdc in each st around (256)
Info :
Working multiple even rounds of hdc/sc in the last stage evens the fabric edge and prepares the square for the border which will round off corners and produce a neat finished look.
— Rounding Border (Final 8-10 Rounds) :
Round 61 :
ch1, sc in each st around working (sc, ch1, sc) into each corner ch2 space to round corners evenly; sl st (256)
Round 62 :
ch1, 1 sc in each st around in BLO (back loops only) to create a subtle ridge (256)
Info :
Working in the BLO for one round creates a neat ridge that frames the square. This is optional but recommended for a modern finish and better join behavior if these squares are to be joined later.
Round 63 :
ch1, sc in each st around (256)
Round 64 :
ch1, sc in next 4 sts, *sk next 1 st, sc2tog over next 2 sts* repeat evenly to slightly compact edge if needed (must keep total multiples consistent and keep corner increases intact) (approx 256)
Round 65 :
ch1, sc in each st around; sl st to first sc, fasten off and weave in ends on wrong side
Info :
Final rounds smooth the edges and give the square a crisp, rounded corner. Fasten off leaving a 12–15cm tail for weaving. Block gently by pinning to a square and using steam or wet blocking to open puff stitches and settle the piece.
— Optional Decorative Edge Variation :
Round 66 (Optional Picot Edge) :
Attach contrast color, sc around, *ch3, sl st in 3rd ch from hook (picot), sc in next 6 sts* repeat around; sl st, fasten off
Info :
If you prefer a delicate finishing edge, add a single round of picots in a contrast color. Alternatively a crab stitch (reverse sc) in a contrasting color gives a braid-like finished look which sits flat and modern.
This serene granny square combines a starburst center with soft diagonal texture to create a modern, tactile block you’ll love working and displaying. The rounded border gives a polished, professional look, perfect for cushions, throws, or decorative panels. Make one as a calm, meditative project or create many to build a beautiful, handmade blanket. 🧶💕 Add a cup of tea and enjoy every textured stitch! ☕️