About This Sleeping Pink Puff (Sleeping Kirby) Amigurumi Pattern
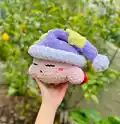
This pattern creates a soft, sleepy Kirby-style plush (Sleeping Pink Puff) complete with a floppy sleepy hat, pom pom, and decorative stars or polka dots. Youll work mostly in continuous rounds using bulky yarn to achieve a plush, cuddly texture. The pattern is customizable so you can change hat colors, star sizes, or add your own facial details.
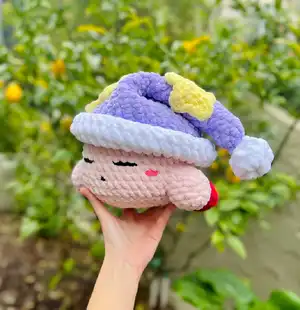
Includes full round-by-round instructions for the hat, pom pom, body, arms, and feet, plus facial embroidery guidance. Photos and styling tips help you position the hat and decorations for the cutest sleepy expression.
Why You'll Love This Sleeping Pink Puff (Sleeping Kirby) Amigurumi Pattern
I absolutely love this pattern because it transforms simple rounds into a lovable plush with lots of personality. I enjoy how quickly the bulky yarn builds a squishy, tactile toy that is both adorable and satisfying to make. The removable hat and optional star or circle decorations let me customize each Kirby to match moods or seasons. Sewing and embroidery steps let me add small, expressive details that make each finished piece feel unique and treasured.
Switch Things Up
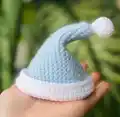
I love customizing this pattern by changing the hat colors to match seasons — try pastels for spring or deep jewel tones for winter.
I often switch the bulky yarn to a worsted weight and use a smaller hook to make a mini keychain-sized Kirby; adjust stuffing lightly for the smaller scale.
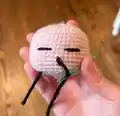
I like to add felt cheeks or embroider tiny freckles for personality instead of yarn blush; felt gives a crisp, flat look while embroidery is softer.
For a different expression, change the eye placement or stitch length for the eyes; moving eyes slightly up or down will completely alter the face.
I sometimes make the stars larger or add extra stars for a whimsical look — try mixing big and small stars for visual interest.
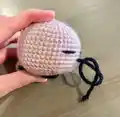
If you want posable limbs, I add thin wire inside the arms and feet when stuffing to allow slight shaping and posing.
Try swapping the pom pom color for a contrasting bright shade to make the hat pop and draw attention to the top of the design.
I also experiment with yarn texture — chenille gives a marshmallow finish while boucle or textured yarns can create a vintage look.
Consider personalizing the hat with initials or a small embroidered motif to turn the plush into a special gift with meaning.
Finally, I recommend testing different stuffing levels to find the right balance between plush softness and structural stability for display versus play.
Common Mistakes & How to Fix Them
✗ Not working in continuous rounds can cause visible seams and misaligned increases; work continuous rounds and use a stitch marker to mark the start of each round.
✗ Overstuffing the body results in a bulbous or misshapen base; stuff gradually and check the hat fit frequently to avoid overstuffing.
✗ Skipping stitch counts during increases or decreases causes uneven shaping; count your stitches after each round and mark important rounds to ensure correct shaping.
✗ Changing colors without securing ends neatly leads to loose tails and messy joins; weave in ends and sew color changes neatly, and fold the white border between rows 25-26 to create a neat raised border.
✗ Pulling embroidery knots too tight can distort the face; tighten knots gently so features sit nicely on the surface without puckering the plush.