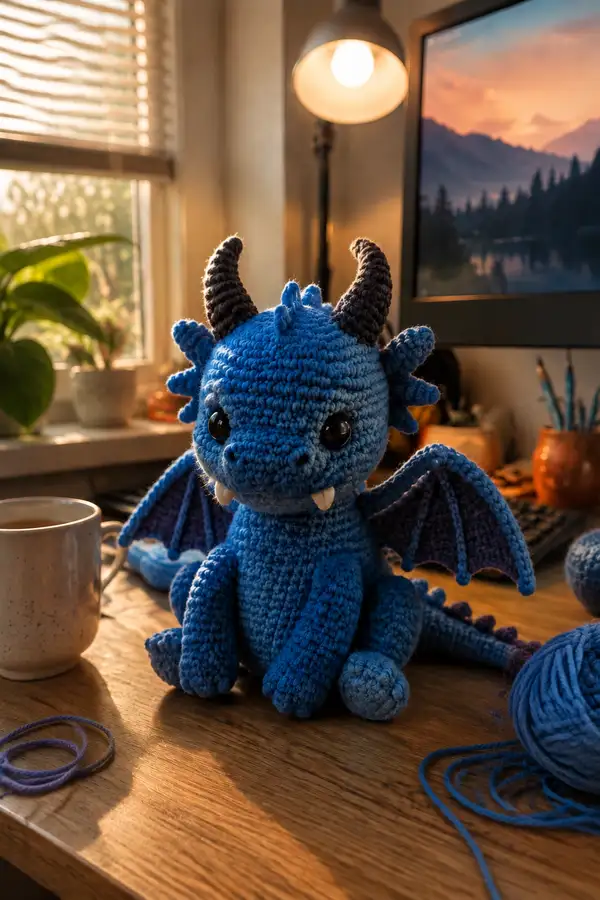
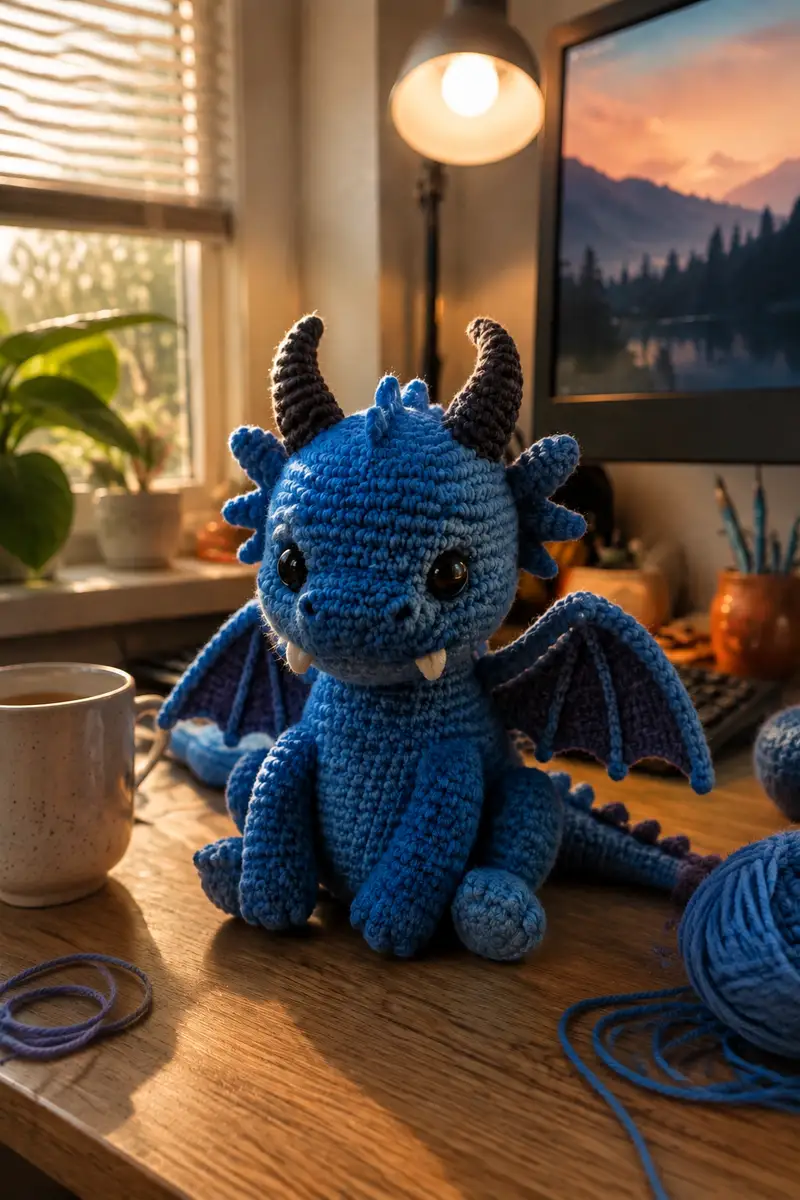
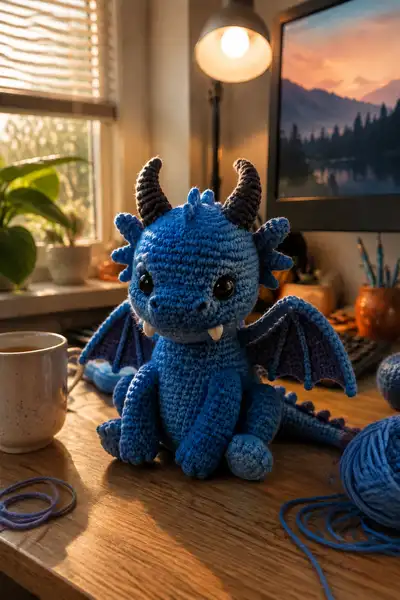
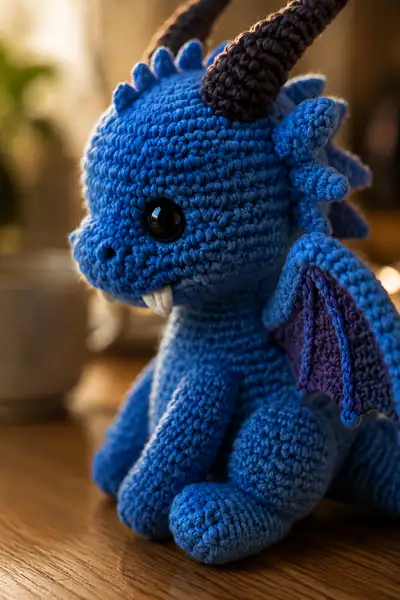
Bring this tiny, lovable blue demon dragon to life with a cozy, detailed amigurumi pattern. Features include expressive black safety eyes, tiny white baby fangs, curled dark horns, scalloped dorsal spikes and two-tone wings with a purple interior. The finished dragon sits upright with rounded limbs and a friendly, slightly mischievous face—perfect as a desk companion or a handmade gift.
Progress Tracker
0% Complete
— Head :
Round 1 :
6 sc in magic ring (6)
Round 3 :
(1 sc, 1 inc) x 6 (18)
Round 4 :
(2 sc, 1 inc) x 6 (24)
Round 5 :
(3 sc, 1 inc) x 6 (30)
Round 6 :
(4 sc, 1 inc) x 6 (36)
Round 7 :
(5 sc, 1 inc) x 6 (42)
Round 8 :
(6 sc, 1 inc) x 6 (48)
Round 9-12 :
1 sc in each st (48)
Info :
Place safety eyes between rounds 13-14, approximately 12-14 stitches apart (eye center spacing ~10-12mm depending on eye size). Pin and check expression; eyes are best positioned slightly above the midline for a cute look
Round 13-16 :
1 sc in each st (48) - build forehead and face height (keep an even tension to create smooth rows)
Info :
After round 14 check eye placement. Mark the center between eyes for nose placement. If adding embroidered nostrils, plan to embroider later after head is stuffed.
Round 17 :
(6 sc, 1 dec) x 6 (42)
Round 18 :
(5 sc, 1 dec) x 6 (36)
Round 19 :
(4 sc, 1 dec) x 6 (30)
Info :
Begin stuffing head firmly but not rock-hard. Use small pieces of fiberfill to push into eye sockets and under the forehead for a rounded face. Stuff evenly as you decrease to keep a smooth shape.
Round 20 :
(3 sc, 1 dec) x 6 (24)
Round 21 :
(2 sc, 1 dec) x 6 (18)
Round 22 :
(1 sc, 1 dec) x 6 (12)
Info :
At this point the head is forming its lower curve. Continue stuffing progressively. If using safety eyes, ensure washers are secured before continuing. Add a little extra fiber at the cheeks to keep them full.
Round 23-28 :
1 sc in each st (12) — work even to create neck opening and a short neck tube (6 rounds)
Info :
This neck tube will be sewn into the body opening. Make sure the length here matches the body’s neck area so the head sits naturally. Keep the last few stitches unstuffed until you attach the head to the body to make sewing easier.
Round 29 :
(1 sc, 1 dec) x 4 (8)
Round 30 :
(1 sc, 1 dec) x 2, 2 sc (6)
Info :
Fasten off leaving a long tail for sewing. Finish stuffing head firmly before closing and attach head to body later. Add small plastic washers and secure safety eyes if not done earlier.
— Facial Details :
Info :
Embroider nostrils: use black yarn and a yarn needle to stitch two small horizontal 'C' shapes centered between the eyes just below round 14-15. For a subtle smile, weave a short line with the same yarn under the nose area. Place two small white fang pieces (see fangs section) at the lower edge of the muzzle and sew securely from inside the head.
— Neck Join & Head Spikes :
Info :
Sew head to body by aligning neck tube (rounds 23-28 on head) to the body opening. Pin evenly and use mattress or whip stitch to create a smooth seam. Add stuffing as you attach to prevent flattening.
Spike Piece (make 9-10) Round 1 :
6 sc in magic ring (6)
Spike Round 2 :
1 sc in each st (6)
Spike Round 3 :
(1 sc, inc) x 3 (9)
Spike Round 4 :
1 sc in each st (9)
Spike Round 5 :
Fasten off leaving tail for sewing. Fold base slightly and stitch the base closed to make a teardrop shape (makes small dorsal spike)
Info :
Sew spikes along the head center and down the tail, spacing them evenly. For the head, place spikes starting just behind the forehead (approx between rounds 11-13) and angle slightly backward.
— Body :
Round 1 :
6 sc in magic ring (6)
Round 3 :
(1 sc, 1 inc) x 6 (18)
Round 4 :
(2 sc, 1 inc) x 6 (24)
Round 5 :
(3 sc, 1 inc) x 6 (30)
Round 6 :
(4 sc, 1 inc) x 6 (36)
Round 7-10 :
1 sc in each st (36) — work even to establish torso width
Info :
If you prefer a slightly chubbier body, add one or two extra even rounds here before shaping. Use stitch marker to mark the front center of the body for correct head and limb placement.
Round 11 :
(5 sc, 1 dec) x 6 (30)
Round 12 :
(4 sc, 1 dec) x 6 (24)
Round 13 :
(3 sc, 1 dec) x 6 (18)
Round 14-16 :
1 sc in each st (18) — hip shaping and body length
Info :
Begin stuffing the body moderately from the bottom up. Keep stuffing medium-firm—firmer for the base so the dragon sits upright, softer near the neck for head attachment comfort.
Round 17 :
(2 sc, 1 inc) x 6 (24) — slight flare for hip/seat
Round 18-21 :
1 sc in each st (24)
Round 22 :
(3 sc, 1 dec) x 6 (18)
Round 23 :
(2 sc, 1 dec) x 6 (12)
Round 24 :
1 sc in each st (12) — this is the neck join opening; leave opening large enough to insert head neck tube
Info :
Do not fasten off here. With head neck tube still unstitched, pin head to body to check fit. Add or remove stuffing to get desired posture—more stuffing in base for upright sitting balance.
Round 25 :
1 sc in each st (12) — work even to stabilize opening
Round 26 :
(1 sc, 1 inc) x 6 (18) — small flare to make a smoother join edge if needed
Round 27-30 :
1 sc in each st (18) — finish body and prepare to attach legs and tail
Info :
When you attach limbs, sew through the body rounds 7-12 on each leg to keep the seated stance. Pin pieces before sewing to ensure symmetry.
— Arms (Make 2) :
Round 1 :
6 sc in magic ring (6)
Round 3 :
(1 sc, 1 inc) x 6 (18)
Round 4-6 :
1 sc in each st (18) — form wrist/hand bulb
Info :
Stuff the hand firmly now for a rounded paw. Use small amounts of fill to keep the fingers short and plump. If you want a slightly longer arm, add more even rounds here.
Round 7 :
(3 sc, 1 dec) x 4 + 2 sc (14)
Round 8-12 :
1 sc in each st (14) — lower arm length
Info :
Optional: Insert thin floral wire at round 10 before stuffing to make arms poseable. Bend wire ends and cover with a small bit of extra stuffing to avoid sharp edges.
Round 13 :
(2 sc, 1 dec) x 3 + 2 sc (11)
Round 14-16 :
1 sc in each st (11)
Round 17 :
(1 sc, 1 dec) x 3 + 2 sc (8)
Round 18-20 :
1 sc in each st (8) — leave long tail for sewing to body
Info :
Stuff arms lightly—firmer stuffing can throw off balance. Sew arms to sides of the body around rounds 18-21 on the body; pin before sewing to achieve symmetrical placement.
— Legs (Make 2) :
Round 1 :
6 sc in magic ring (6)
Round 3 :
(1 sc, 1 inc) x 6 (18)
Round 4 :
(2 sc, 1 inc) x 6 (24)
Round 5-7 :
1 sc in each st (24) — shape round foot
Info :
Stuff foot firmly now to create a stable base for sitting. Use small sections of fiberfill pressed into toes and base for a rounded foot shape.
Round 8 :
(3 sc, 1 dec) x 6 (18)
Round 9-14 :
1 sc in each st (18) — lower leg length
Round 15 :
(2 sc, 1 dec) x 3 (15)
Round 16-18 :
1 sc in each st (15)
Round 19 :
(1 sc, 1 dec) x 5 (10)
Round 20-24 :
1 sc in each st (10) — leave long tail for sewing at hip
Info :
Sew legs to bottom/front of body aligning with body rounds 1-4 for a stable seated pose. Use extra stitches across the seam for stability if the toy will be handled frequently.
— Tail :
Round 1 :
6 sc in magic ring (6)
Round 3 :
(1 sc, 1 inc) x 6 (18)
Round 4-7 :
1 sc in each st (18) — tail base width
Round 8 :
(2 sc, 1 dec) x 4 + 2 sc (14)
Round 9-12 :
1 sc in each st (14)
Info :
Sew spikes onto tail by spacing the 'Spike Piece' shapes along the top of the tail before sewing the tail to the body. Pin them in place to check spacing and curvature. Add extra stuffing to the tail base for sturdiness and allow the tip to taper.
Round 13 :
(1 sc, 1 dec) x 2, 6 sc (12)
Round 14 :
(1 sc, 1 dec) x 3, 3 sc (9)
Round 15-18 :
1 sc in each st (9) — tapering; stuff tail moderately
Round 20 :
Fasten off leaving long tail for sewing to body
— Horns (Make 2, dark color) :
Round 1 :
6 sc in magic ring (6)
Round 3-4 :
1 sc in each st (12)
Round 5 :
(3 sc, 1 dec) x 3 (9)
Round 6-9 :
1 sc in each st (9) — work even to build length
Round 10 :
(2 sc, 1 dec) x 2 + 1 sc (7)
Round 11 :
(1 sc, 1 dec) x 2 + 1 sc (5)
Round 12 :
1 sc in each st (5) — leave long tail for sewing
Info :
Horns are slightly curved: when sewing, attach to head and angle them slightly inward and backward. You can insert a short length of wire to support curl but stitch carefully to conceal and secure wire ends.
— Ears/Small Side Fins (Make 2) :
Round 1 :
6 sc in magic ring (6)
Round 2 :
(1 sc, 1 inc) x 3 (9)
Round 3 :
1 sc in each st (9)
Round 4 :
(2 sc, 1 dec) x 2 + 1 sc (7)
Round 5 :
1 sc in each st (7)
Round 6 :
Fasten off leaving a tail for sewing; position on head sides around rounds 9-11 to mimic photo placement
Info :
Pin small fins slightly behind the eyes, and angle outward. These add the soft, frilled look at the side of the head.
— Wing Panels (Make 2 - inner purple panel) :
Round 1 :
Ch 10, 1 sc in 2nd ch from hook and across, turn to work on opposite side of chain, 1 sc in each ch back to first ch. Join to form oval (18)
Round 2 :
BLO 1 sc in each st around to make a subtle ridge (18)
Round 3 :
1 sc in each st (18)
Round 4 :
(3 sc, 1 inc) x 4 + 2 sc (22) — widen base for attachment
Round 5-7 :
1 sc in each st (22)
Round 8 :
(4 sc, 1 dec) x 3 + 4 sc (19) — shape outer curve
Round 9 :
1 sc in each st (19)
Round 10 :
Fasten off leaving long tail for joining to outer wing frame
Info :
Make a matching pair. These panels are the purple inner membranes visible in the photos. Pin them to the blue outer wing frames before sewing.
— Wing Frames (Make 2 - outer blue frame) :
Round 1 :
Ch 20, 1 sc in 2nd ch from hook and across (19), turn to work along opposite side of chain 1 sc in each ch back (19), sl st to join (38)
Round 2 :
1 sc in each st (38) — work in continuous oval shape to form outer ridge
Round 3 :
1 sc in each st (38)
Round 4 :
BLO 1 sc in each st (38) — this creates a defined ridge for the wing curve
Round 5 :
Attach purple inner panel: with RS together, whip stitch inner panel to inner edge of frame starting from base and working toward tip, leave top edge unstitched slightly to create natural curve
Round 6 :
1 sc around outer edge of wing frame to create a finished border (approx 40 sc — adjust to match panel seam)
Round 7 :
Optional picot edge: *ch 3, sl st in 3rd ch* every 3-4 sts for decorative points along outer edge. Fasten off leaving tail for sewing
Info :
Sew wings to the upper back at body rounds 6-9. Angle them so the membrane faces slightly forward. Use a few stitches across the base to secure the panel so it will not flop downwards.
— Wing Ribs (Decorative Raised Ridges) :
Round 1 :
Using darker blue yarn, ch 1, work short rows of sc along wing membrane: sc 6, ch 1, turn and sl st back to anchor point. Make 3-4 ribs per wing spaced evenly from base to tip
Info :
Sew ribs along the inner membrane using small stitches, then block each wing flat with steam or light pressing (if yarn allows) to set the shape. The ribs will give the wing that sculpted look seen in the photo.
— Fangs (Make 2) :
Round 1 :
4 sc in magic ring (4)
Round 2 :
1 sc in each st (4)
Round 3 :
(1 sc, 1 dec) x 2 (3)
Round 4 :
1 sc in each st (3), fasten off leaving long tail to sew into muzzle (stitch fangs so points protrude from lower lip)
Info :
Sew fangs symmetrically under the mouth area; secure from inside the head with multiple passes to ensure they don’t pull out during play.
— Finishing Touches :
Info :
Weave in all loose ends through several stitches and hide tails inside the nearest stuffed area. Add a few safety stitches between head and body for extra durability. If you like, dab a tiny bit of blush on cheeks using fabric-safe pigment for extra cuteness.
Info :
Apply plastic safety washers behind eyes if not done earlier. If you used embroidery for eyes, use tight even satin stitch to avoid gaps. Give final shaping by pinching and re-stuffing small areas to perfect silhouette.
This adorable dragon combines classic amigurumi techniques with charming, whimsical details—tiny fangs, expressive eyes, and sculpted wings—to create a truly special handmade friend. Each section comes together to form a cuddly, personality-filled creature you'll love displaying or gifting. 🧶 Add little custom colors or accessories to make it uniquely yours. Happy crocheting and enjoy the cozy crafting journey! ✨🐉