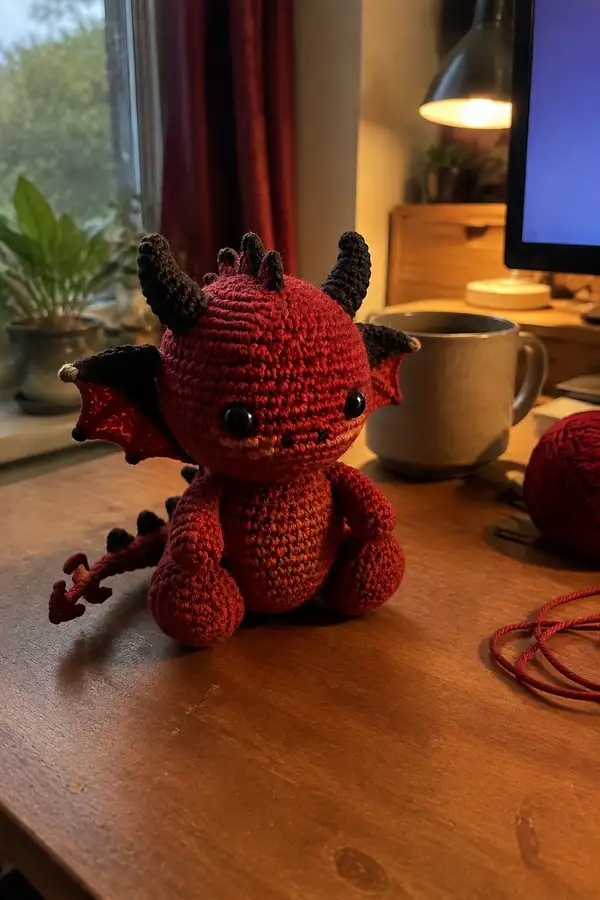
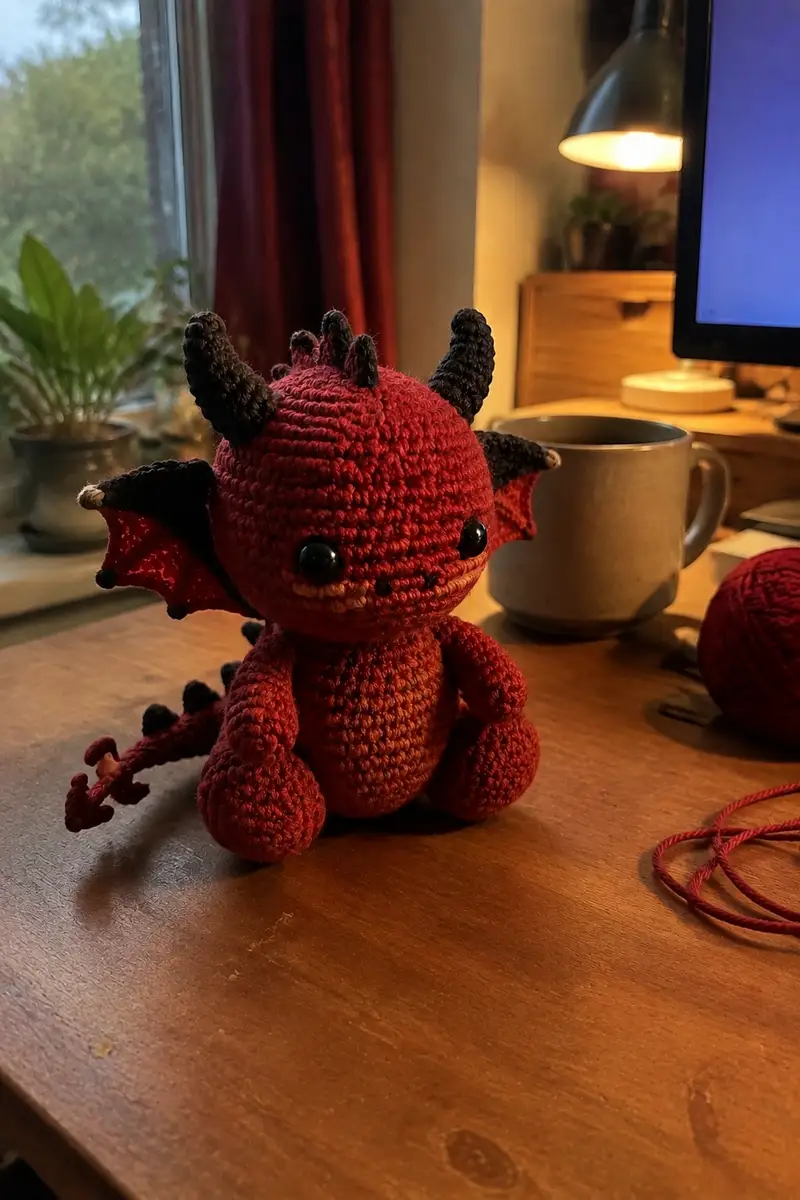
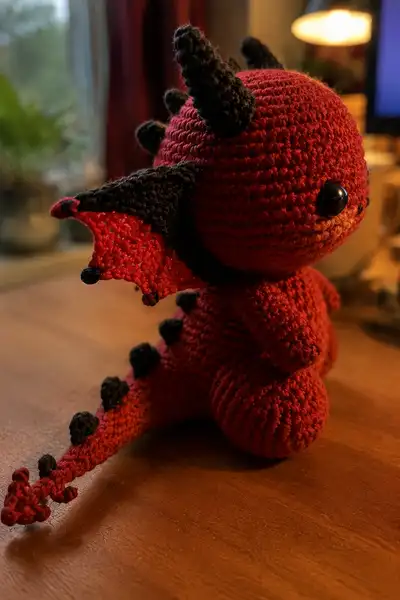
Make an adorable small crimson demon dragon with expressive black horns, scalloped bat wings, and a playful trident tail. This plush amigurumi features glossy safety eyes, layered wing membranes, and a series of tiny black spikes down its tail. The design is compact and poseable with clear shaping notes for a smooth finish.
Progress Tracker
0% Complete
— Head :
Round 1 :
6 sc in magic ring (6)
Round 3 :
(1 sc, inc) x 6 (18)
Round 4 :
(2 sc, inc) x 6 (24)
Round 5 :
(3 sc, inc) x 6 (30)
Round 6 :
(4 sc, inc) x 6 (36)
Round 7 :
(5 sc, inc) x 6 (42)
Round 8 :
(6 sc, inc) x 6 (48)
Round 9-16 :
1 sc in each st (48)
Info :
Place safety eyes between rounds 13-14, approximately 8-10 stitches apart for the wide, innocent expression seen in the photo. If using 10mm eyes, place them slightly higher, between rounds 13 and 14, leaving 8-9 sts between centers.
Round 17-20 :
1 sc in each st (48)
Round 21 :
(6 sc, dec) x 6 (42)
Round 22 :
(5 sc, dec) x 6 (36)
Info :
Begin stuffing head gently but firmly as you go — use small pieces of fiberfill to avoid lumps. Keep the face area slightly less stuffed than the crown to help the head tilt forward naturally.
Round 23 :
(4 sc, dec) x 6 (30)
Round 24 :
(3 sc, dec) x 6 (24)
Round 25 :
1 sc in each st (24)
Round 26-28 :
1 sc in each st (24)
Info :
These rounds (25-28) form the neck collar area on the head. Keep stuffing consistent and a touch firmer near the cheeks to keep the facial plane smooth for sewing the muzzle and mounting the eyes.
Round 29 :
(2 sc, dec) x 6 (18)
Round 30 :
1 sc in each st (18)
Info :
Check eye symmetry now and make any embroidery details (like a tiny eyelid or mouth stitches) before the neck is sewn to the body. If adding blush or shading, test on a scrap first.
Round 31 :
(1 sc, dec) x 6 (12)
Round 32 :
1 sc in each st (12)
Round 33 :
Fasten off leaving a long tail for sewing the head to the body; finish stuffing fully if needed (12)
Info :
Set the head aside with safety eyes secured; we will attach the horns and small spikes to the crown before final sewing if you prefer to position them first and baste them in place.
— Body :
Round 1 :
6 sc in magic ring (6)
Round 3 :
(1 sc, inc) x 6 (18)
Round 4 :
(2 sc, inc) x 6 (24)
Round 5 :
(3 sc, inc) x 6 (30)
Round 6 :
(4 sc, inc) x 6 (36)
Round 7-10 :
1 sc in each st (36)
Info :
Optional: For a slightly lighter belly, change to a dark rust or muted orange-red at the end of round 10. Carry the unused yarn inside or weave in the beginning neatly.
Round 11-14 :
1 sc in each st (36)
Round 15 :
(4 sc, dec) x 6 (30)
Round 16 :
(3 sc, dec) x 6 (24)
Info :
Begin stuffing the body moderately around round 14. Aim for a firm but squeezable body: not rock-hard. This helps the limbs stay in position when sewn on.
Round 17 :
1 sc in each st (24)
Round 18 :
(2 sc, dec) x 6 (18)
Round 19 :
(1 sc, dec) x 6 (12)
Round 20 :
1 sc in each st (12)
Info :
Leave the body top opening (rounds 21-24 area) and fasten off later with a long tail for joining the neck. Position leg & arm placement pins now while the body is still pliable — legs will be attached at the bottom front for the seated position seen in the photos.
Round 21-24 :
1 sc in each st (12) - keep these rounds available for sewing the head and attaching internal supports
Round 25 :
Fasten off leaving a long tail for sewing the neck and closing bottom if you prefer to close after attaching legs.
— Arms (Make 2) :
Round 1 :
6 sc in magic ring (6)
Round 3 :
(1 sc, inc) x 6 (18)
Round 4-6 :
1 sc in each st (18)
Info :
Stuff the hand/paw area firmly through round 5 – this small rounded paw is what gives the dragon its cuddly look. Keep the filling compact so the arm retains shape when sewn.
Round 7 :
(2 sc, dec) x 6 (12)
Round 8-13 :
1 sc in each st (12)
Round 14 :
(1 sc, inc) x 6 (18) - optional flare for shoulder
Round 15-16 :
1 sc in each st (18)
Round 17 :
(1 sc, dec) x 6 (12)
Round 18 :
Fasten off leaving long tail for sewing (12)
Info :
Arms are sewn to the body around body rounds 8-10 (count from the bottom up) to create that tucked-in, seated appearance. Position slightly forward and angle inward to hug the belly.
— Legs (Make 2) :
Round 1 :
6 sc in magic ring (6)
Round 3 :
(1 sc, inc) x 6 (18)
Round 4 :
(2 sc, inc) x 6 (24)
Round 5 :
(3 sc, inc) x 6 (30)
Round 6-9 :
1 sc in each st (30)
Info :
Stuff the foot firmly up through round 8 to create a stable base so your dragon can sit upright without toppling. A flat foot bottom helps the seated position.
Round 10 :
(3 sc, dec) x 6 (24)
Round 11 :
(2 sc, dec) x 6 (18)
Round 12-18 :
1 sc in each st (18)
Round 19 :
(1 sc, dec) x 6 (12)
Round 20-22 :
1 sc in each st (12)
Round 23 :
Fasten off leaving a long tail for sewing (12)
Info :
Attach the legs to the very bottom front of the body so the dragon sits slightly reclined. Use extra hitch stitches through the foot sole and body to secure weight-bearing joints.
— Large Horns (Make 2) :
Round 1 :
6 sc in magic ring (6) - use black yarn (6)
Round 3-6 :
1 sc in each st (12)
Round 7 :
(1 sc, dec) x 4, 1 sc x 4 (8)
Round 8-10 :
1 sc in each st (8)
Round 11 :
(1 sc, dec) x 2 (6)
Round 12-14 :
1 sc in each st (6)
Round 15 :
Fasten off leaving long tail for sewing and shaping. Lightly stuff (6)
Info :
To create the curved horn look shown, crochet the horn as a cone and then stitch it slightly curved during assembly: sew the base to the head and then add a few small gathering stitches through the outer side to create a natural bend.
— Small Spikes (Top of Head & Tail - Make 6-8) :
Round 1 :
6 sc in magic ring (6)
Round 3 :
Fasten off leaving tail for sewing; do not stuff (6)
Info :
Make three small spikes for the crown and the remainder for the tail: space them evenly along the tail ridge and sew through the base. These are small bobble-like cones and should remain firm but not stuffed.
— Wing Membranes & Edging (Make 2) :
Info :
Wings are worked flat to create a layered bat-wing: inner membrane in crimson, then a black edging/outline crocheted around for definition. The technique below uses rounds to build out a scalloped membrane with points on the bottom edge.
Round 1 (inner wing) :
Make a chain 8, sc in 2nd ch from hook and across to create a small foundation: ch8, sc 7 across, turn and continue in rows to form a triangular fan. Alternatively begin MR method: 6 sc in ring and increase to 24 in a semi-oval (6,12,18,24).
Round 2-4 (inner wing) :
If using MR: Round 2: (inc) x 6 (12), Round 3: (1 sc, inc) x 6 (18), Round 4: (2 sc, inc) x 6 (24)
Round 5-7 (inner wing) :
1 sc in each st (24) - flatten to shape a slightly triangular fan by decreasing on one side, if desired, by doing (3 sc, dec) to form scallop angles.
Info :
Block or lightly starch each wing flat if you want a firmer membrane. Pin into shape while damp and let dry. This helps the scalloped edge hold its curve.
Round 8 (attach edging) :
Join black yarn to outer edge and sc evenly around the perimeter of the inner membrane (approx 28-34 sc depending on shaping)
Round 9 :
To create scalloped points: *sc 3, picot or sl st in next st* repeat across to make three or four scallop points along the bottom edge. Fasten off leaving long tail for sewing.
Info :
Make sure the black edging covers the outermost row fully so the membrane looks layered; the black shows on the top of the wing and the crimson remains inside the scooped points.
— Tail (Long Tapered Tail with Trident Tip) :
Info :
The tail in the photos is long, tapered and worked as a flat tube that narrows to a pointed tip, with small black spikes sewn along the dorsal ridge. There is a decorative three-pronged trident curl at the very end made by small crocheted rings and short chains.
Round 1 (tail base) :
Make a chain of 34 (or more for a longer tail). Join chain into a loop being careful not to twist. Work 1 sc in each chain around both sides to form a rounded tube foundation (approx 68 sc around if working both sides).
Round 2-6 :
1 sc in each st around (68) - continue until the tail base is full and thick; stuff lightly as you progress to maintain a flexible but full tail
Round 7 :
(6 sc, dec) x 8 (56)
Round 8-12 :
1 sc in each st around, decreasing gradually every 3-4 rounds as you taper: Round 9: (5 sc, dec) x 8 (48), Round 11: (4 sc, dec)x8 (40)
Round 13-16 :
1 sc in each st around (40 then 36 then 32 depending on length), stuff lightly and add small black spikes by sewing or crocheting small bumps and attaching them to the top ridge every 6-8 sts.
Round 17 :
(3 sc, dec) x 6 (24)
Round 18 :
(2 sc, dec) x 6 (18)
Round 19 :
(1 sc, dec) x 6 (12)
Round 20 :
1 sc in each st (12)
Info :
At about round 20 form the trident tip: leave tail long and work three small decorative prongs. Do not over-stuff the tail tip - keep it slender for the small curled motif.
Trident Tip - Prong (Make 3) :
Ch 6, sl st into 2nd ch from hook and each ch across to make a small cord. Fasten off and use the tail to coil into a small curl; sew the three prongs close together at tail tip to form a trident curl. Optionally make tiny picots or bobbles at each prong end using 3 sc picots.
Info :
Sew the spikes to the top of the tail after you have stuffed and shaped the tail. Put the largest spike near the base and progressively smaller spikes toward the tip for the look seen in the photos.
— Eye Detail & Muzzle Embroidery :
Info :
Eyes used in the example are glossy 10mm safety eyes. If you prefer embroidered eyes use black and a tiny white highlight stitch with a small bit of white yarn or embroidery thread. The muzzle shows a tiny embroidered smile in contrasting dark rust.
Muzzle :
Use dark rust (or slightly lighter red) yarn to embroider a small horizontal line for the mouth between rounds 12-13, centered beneath the eyes. Use small even stitches and knot securely on the inside.
Info :
Work muzzle and mouth before final assembly of the head to maintain smooth tension and easy access to the inner surface for knotting and hiding ends.
— Small Finishing Bits :
Tail Spikes :
Use the small spike pattern above and sew them evenly spaced along the top of the tail. Make 5-7 depending on tail length.
Wing Tips & Beads :
Add tiny black picots on the wing points by making 3 sc into the same stitch and sl st to form a bead-like tip. Sew to outer wing ends for the shaped look.
Info :
Weave all loose ends into the body or head through several stitches to hide them and secure with a yarn needle. Trim close but not flush to avoid slipping through stitches.
— Assembly & Final Shaping :
Info :
Before sewing parts together, pin everything in place and take photos or mark positions so both sides are symmetrical. Use a contrasting temporary yarn to baste pieces if needed then replace with final sewing yarn.
Step 1 :
Attach head to body by inserting the neck portion into the body opening. Pin in place first, then sew securely using whip stitch all around, ensuring even attachment.
Step 2 :
Position arms on sides of body at approximately body rounds 8-10. Sew through both arm base and body using ladder stitch for invisible seam; add 6-8 secure stitches and knot inside.
Step 3 :
Attach legs to bottom front of the body, spacing them evenly so the dragon sits stable. Sew through sole and into body with extra reinforcement stitches to secure weight-bearing points.
Step 4 :
Sew larger horns to the crown of the head on either side and three smaller spikes down the midline between them. Use small gather stitches for the horns to create a slight curve.
Step 5 :
Sew the wings to the back upper sides of the body, aligning the top of the wing with the curve of the shoulder and the bottom scallops toward the tail. Reinforce with 3-4 passes of thread so wings stay attached when handled.
Step 6 :
Attach tail to the lower back central seam. Use the long tail of the body to stitch the tail base securely; make sure the tail is angled slightly downward as in the reference photo for a natural seated posture.
Step 7 :
Add black spikes to tail by sewing small cones along the top ridge. Sew them through the base into the tail body, then hide yarn tails inside.
Step 8 :
Check all seams, weave in ends well, and optionally add a tiny dab of craft glue behind safety eyes for extra security (avoid using on pieces for babies).
Info :
If adding wire for poseable tail, insert it before final stuffing and wrap the wire ends in tape then cover with extra stuffing before closing the tail to avoid poking.
This charming crimson demon dragon is a delightful mix of sweet and spiky — a perfect project to express personality with color and texture. Each part comes together to produce a sturdy, poseable little friend full of character. I hope you enjoy every stitch as the horns, wings, and trident tail bring this mini dragon to life. Happy crocheting and have fun customizing little details! 🧶❤️🖤