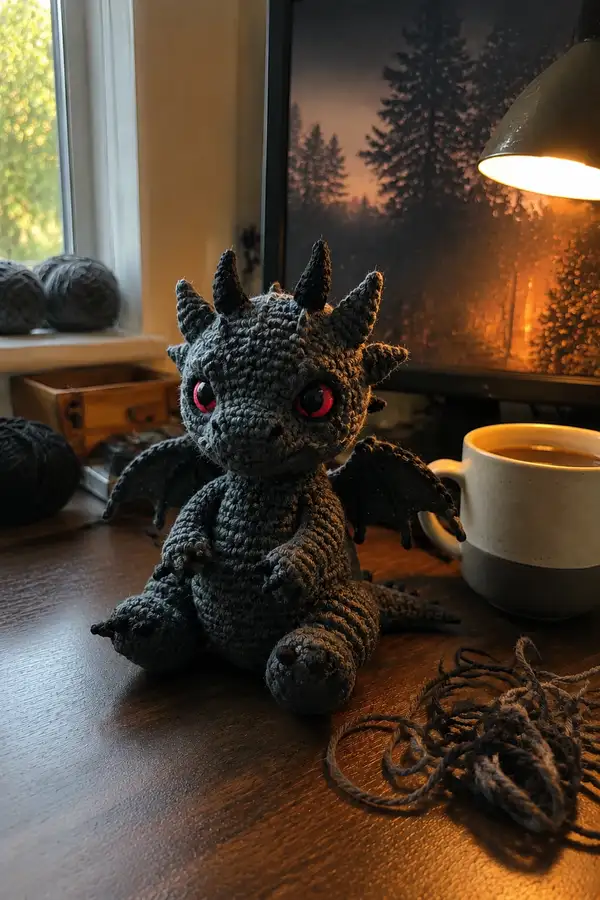
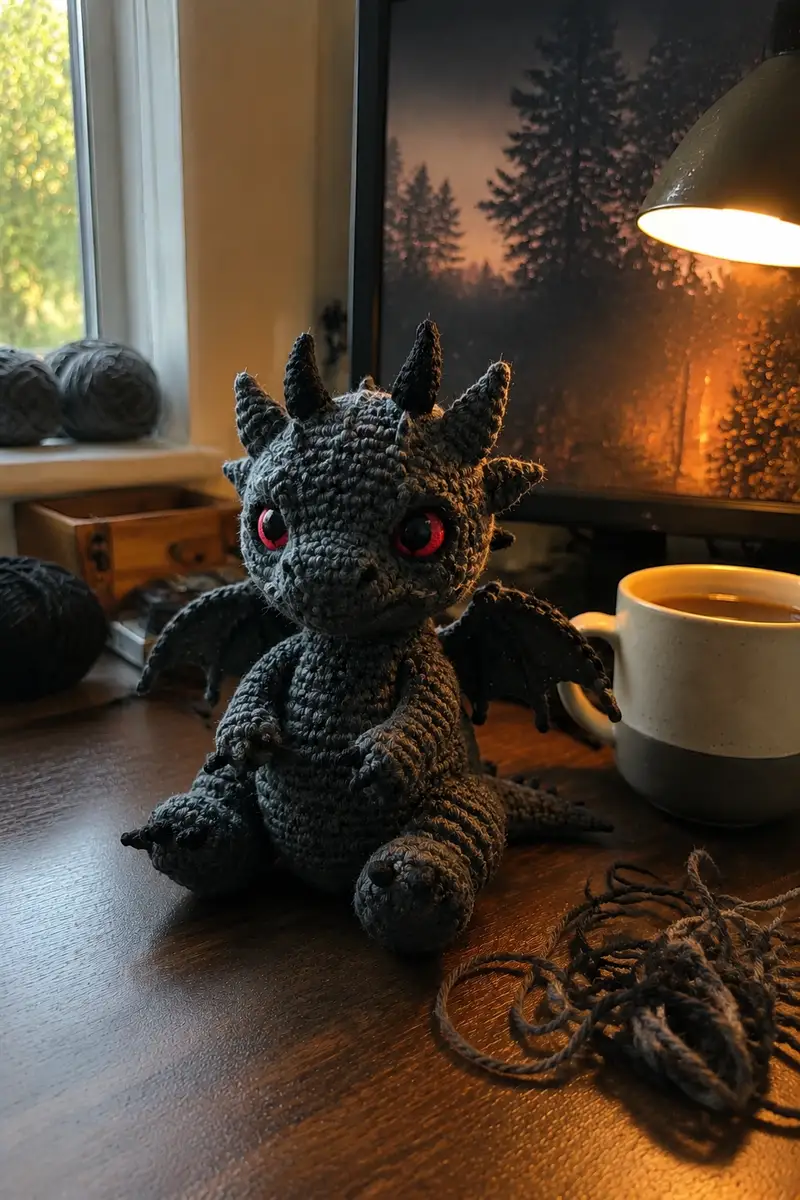
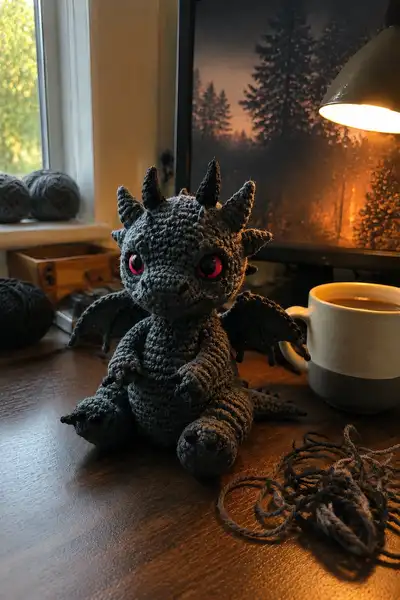
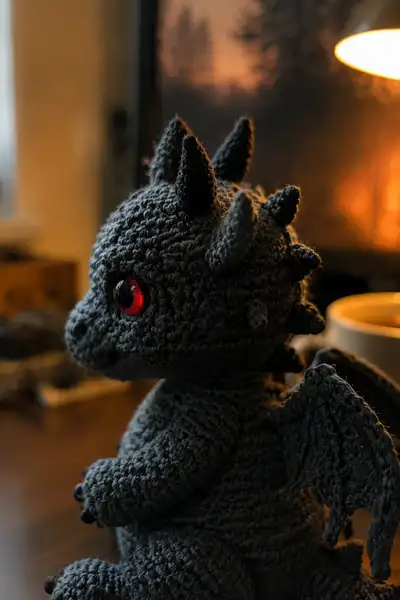
Make a charming small grey dragon with expressive red eyes, tiny horns, spiky back ridges and articulated wings. This pattern guides you through every round to recreate the cuddly yet slightly sinister companion shown in the photos. Detailed shaping, spikes and wing structure make this a delightful project for makers who love character and texture.
Progress Tracker
0% Complete
— Head :
Round 1 :
6 sc in magic ring (6)
Round 3 :
(1 sc, 1 inc) x 6 (18)
Round 4 :
(2 sc, 1 inc) x 6 (24)
Round 5 :
(3 sc, 1 inc) x 6 (30)
Round 6 :
(4 sc, 1 inc) x 6 (36)
Round 7 :
(5 sc, 1 inc) x 6 (42)
Round 8 :
(6 sc, 1 inc) x 6 (48)
Round 9-12 :
1 sc in each st around (48)
Info :
Place safety eyes between rounds 13-14 later; mark the center front stitch now if you like to keep orientation consistent
Round 13-14 :
1 sc in each st around (48)
Info :
Attach 10mm red safety eyes between rounds 13 and 14 approximately 10-12 stitches apart (adjust for expression). Insert eyes now and check placement before further stuffing.
Round 15 :
(6 sc, 1 inc) x 6 (54)
Round 16-20 :
1 sc in each st around (54)
Info :
Begin lightly stuffing the head at round 16 to start shaping cheeks. Add more stuffing as you reach round 20—head should be firm but slightly soft to the touch for a cuddly feel
Round 21 :
(6 sc, 1 dec) x 6 (48)
Round 22 :
(5 sc, 1 dec) x 6 (42)
Round 23 :
(4 sc, 1 dec) x 6 (36)
Info :
As you decrease, sculpt the face—pinch the front slightly where the snout will be and add a small extra pad of stuffing if you want a more pronounced muzzle
Round 24 :
(3 sc, 1 dec) x 6 (30)
Round 25 :
(2 sc, 1 dec) x 6 (24)
Round 26 :
(1 sc, 1 dec) x 6 (18)
Info :
Fasten off leaving a long tail for sewing the head to the body later. Finish stuffing through the neck opening and close to create a short neck tube for sewing.
Round 28 :
OPTIONAL: If you prefer a longer neck, work 6 sc around the tube for 2-4 rounds before fastening off (6)
Info :
Secure yarn and weave the tail through remaining stitches to close, but do not overstuff neck area as it will be sewn into the body opening
— Snout & Jaw :
Round 1 :
6 sc in magic ring (6)
Round 3 :
(1 sc, 1 inc) x 6 (18)
Round 4-6 :
1 sc in each st (18)
Info :
Flatten the snout slightly and fold to define mouth shaping; you will sew this to the lower front of the head between the eyes about 3-4 stitches below the eye line
Round 7 :
(1 sc, 1 dec) x 6 (12)
Info :
Stuff lightly, leave a long tail and FO. Position the snout on the head with the widest row matching the lower cheek area; hand sew in place with invisible stitch, shaping the mouth slightly upward if desired
— Head Spikes & Horns (Make 7-9 small cones plus 3 larger horns) :
Small Cone Round 1 :
4 sc in magic ring (4)
Small Cone Round 2 :
4 inc (8)
Small Cone Round 3 :
(1 sc, 1 inc) x 4 (12)
Small Cone Round 4 :
1 sc in each st (12)
Small Cone Round 5 :
(2 sc, 1 dec) x 4 (8)
Small Cone Round 6 :
4 dec (4)
Info :
Stuff small cones very lightly to keep pointy shape. Make 6-7 of these for head and back ridges. Fasten off leaving long tails for sewing.
Large Horn Round 1 :
6 sc in magic ring (6)
Large Horn Round 2 :
6 inc (12)
Large Horn Round 3 :
(1 sc, 1 inc) x 6 (18)
Large Horn Round 4 :
1 sc in each st around (18)
Large Horn Round 5 :
(2 sc, 1 dec) x 6 (12)
Large Horn Round 6 :
(1 sc, 1 dec) x 4 (8)
Large Horn Round 7 :
4 dec (4)
Info :
Stuff firmer than small cones for a sturdy horn. Make 2-3 larger horns to place along top of head. Position larger horns centrally and smaller cones to either side and along the neck ridge for the photo look.
— Body :
Round 1 :
6 sc in magic ring (6)
Round 3 :
(1 sc, 1 inc) x 6 (18)
Round 4 :
(2 sc, 1 inc) x 6 (24)
Round 5 :
(3 sc, 1 inc) x 6 (30)
Round 6-9 :
1 sc in each st around (30)
Info :
If you want a slightly wider belly, increase one more round: (4 sc, 1 inc) x 6 to reach 36. The pictured dragon has a rounded plump belly, so you can work an extra increase round if desired.
Round 10 :
(3 sc, 1 inc) x 6 (36) - optional for larger belly
Round 11-16 :
1 sc in each st around (36)
Info :
Begin stuffing the body lightly at round 12 and increase stuffing density after round 14. The body should be firm enough to sit upright but soft enough to pinch slightly.
Round 17 :
(4 sc, 1 dec) x 6 (30)
Round 18 :
(3 sc, 1 dec) x 6 (24)
Round 19 :
(2 sc, 1 dec) x 6 (18)
Info :
Stop stuffing and leave an opening wide enough to insert the head neck. You will sew the head into this opening. Ensure body is evenly stuffed but not overfilled.
Round 20 :
(1 sc, 1 dec) x 6 (12)
Round 21 :
6 dec (6) - leave a long tail for sewing the bottom closed later if you prefer to finish base after attaching limbs
Info :
Fasten off leaving long tail if you plan to join the head first; otherwise close the opening now and use a ladder stitch to attach head afterward. Sew or close base as desired for stability.
— Arms (Make 2) :
Round 1 :
6 sc in magic ring (6)
Round 3 :
(1 sc, 1 inc) x 6 (18)
Round 4-6 :
1 sc in each st around (18)
Info :
Stuff the hand portion firmly but leave the upper arm less stuffed to allow sewing to the body and to achieve a slightly floppy shoulder for natural pose.
Round 7 :
(2 sc, 1 dec) x 6 (12)
Round 8-12 :
1 sc in each st around (12)
Round 13 :
(1 sc, 1 dec) x 4 (8)
Round 14-16 :
1 sc in each st around (8)
Round 17 :
(1 sc, 1 dec) x 2 (6)
Round 18 :
6 sc in each st around (6) - FO leaving long tail for sewing to body
Info :
Sew arms to sides of body between rounds 10-13, spacing them about 6-8 stitches down from the head seam for a natural look. Use whip stitch and anchor through body loops for stability.
— Hands & Claws (Make 2 sets) :
Round 1 :
Make 3 tiny claw tips each: 3 sc in magic ring (3)
Round 2 :
Sl st in next st and FO leaving tail to sew claws to hand tips
Info :
Sew three claw tips into the front of each hand, spaced evenly. Use black accent yarn for claw tips to imitate the photo. Secure well with thread and weave tails inside.
— Legs (Make 2) :
Round 1 :
6 sc in magic ring (6)
Round 3 :
(1 sc, 1 inc) x 6 (18)
Round 4 :
(2 sc, 1 inc) x 6 (24)
Round 5-8 :
1 sc in each st around (24)
Info :
Work the foot with a slightly flattened front by decreasing 2-3 stitches in the center top of the foot after round 6 to form a toe ridge, then continue shaping the ankle.
Round 9 :
(3 sc, 1 dec) x 6 (18)
Round 10-14 :
1 sc in each st around (18)
Round 15 :
(2 sc, 1 dec) x 6 (12)
Round 16 :
1 sc in each st around (12)
Round 17 :
(1 sc, 1 dec) x 4 (8)
Round 18-20 :
1 sc in each st around (8)
Round 21 :
(1 sc, 1 dec) x 2 (6)
Round 22 :
6 sc - FO leaving long tail for sewing. Stuff the feet firmly to help the dragon sit stable.
Info :
Sew legs to the body base so the dragon can sit: attach legs at front bottom of body, spacing them about 8-10 stitches apart depending on belly width. Reinforce with extra stitches for durability.
— Tail :
Round 1 :
6 sc in magic ring (6)
Round 3 :
(1 sc, 1 inc) x 6 (18)
Round 4-6 :
1 sc in each st around (18)
Round 7 :
(3 sc, 1 dec) x 4 + 2 sc (14) - tapering begins
Round 8-10 :
1 sc in each st around (14)
Round 11 :
(2 sc, 1 dec) x 3 + 2 sc (11)
Round 12-14 :
1 sc in each st around (11)
Round 15 :
(1 sc, 1 dec) x 3 + 2 sc (8)
Round 16-18 :
1 sc in each st around (8)
Round 19 :
(1 sc, 1 dec) x 2 (6)
Round 20 :
6 sc - FO leaving long tail for sewing to back. Add back ridge spikes to tail spaced every 3-4 rounds.
Info :
For the segmented, ridged look on the tail, you can work 1-2 rounds in BLO every 3 rounds to create a subtle ridge. Sew tail to center back bottom of the body.
— Wing (Make 2) :
Round 1 :
Ch 12, sc in 2nd ch from hook and across (11)
Round 2 :
Ch 1, turn, 1 sc in each st (11)
Round 3 :
Ch 1, turn, 1 sc in next 2 sts, hdc next, dc next 3 sts, hdc next, 1 sc last 4 sts - creates slight curve (11)
Round 4 :
Ch 1, turn, 1 sc in each st BLO to create defined edge (11)
Round 5 :
Ch 1, turn, (1 sc, ch 2, skip next st) rep across to make scalloped membrane edge, finish with sl st to base (approx 6 scallops)
Info :
Work wings flat. Add optional wire armature by inserting thin floral wire along the first foundation row before sewing to the body; cover wire ends with small pieces of tape and bury inside fabric to avoid poking out.
Round 6 :
Turn wing and sc evenly around the outer edge, placing 2 sc in scallop points to smooth edge (approx 20-24 sc total)
Round 7-8 :
1 sc in each st around to firm edge (20-24)
Round 9 :
Optional: With black accent yarn, sl st in outer edge every 3rd st to create a dark outline. FO and leave long tail for sewing.
Info :
Sew wings to upper back between rounds 6-12 of the body, angling them slightly back and outward. Use small, tight stitches to hold wings in position and reinforce with extra passes at the base.
— Wing Spikes/Decorative Edge :
Round 1 :
Make 6 small cones using the Small Cone pattern (see head spikes) to line the wing top edge
Info :
Sew cones along the top edge of the wing, spacing them evenly. Use a darker yarn for tips to match claws and give contrast like in the photo.
— Back Spikes (Make 8) :
Round 1 :
Use Small Cone pattern: 4 sc in mr, 4 inc (8), (1 sc, inc) x4 (12), 1 round sc, (2 sc, dec)x4 (8), 4 dec (4). FO leaving tail to sew along spine.
Info :
Sew spikes along center back from just behind the head to the base of the tail. Place them about 6-8 stitches apart with the largest near the head and smallest near the tail for a natural taper.
— Finishing Details & Embroidery :
Info :
Use black yarn to embroider small nostrils on the snout: make two tiny satin-stitches or French knots slightly above the snout tip. For mouth, use a couple of short straight stitches to define a subtle smile or neutral line under the snout.
Info :
Use tapestry needle to weave in all ends into adjacent rounds; trim close. Add small stitches around eye edges with lighter grey to emphasize the eye socket if desired.
Info :
Position head on body and sew through neck stitches and body opening using mattress or ladder stitch to create an invisible seam. Check symmetry frequently.
Completing this dragon is such a rewarding journey — each spike and stitch brings the character to life. The deep red eyes really pop against the charcoal grey, giving it both personality and charm. Sewing the wings and placing the horns is where the magic happens; you'll feel proud as your creation takes its final pose. 🐉🧶 Keep your patience, enjoy the assembly, and show off your finished dragon with joy! ✨