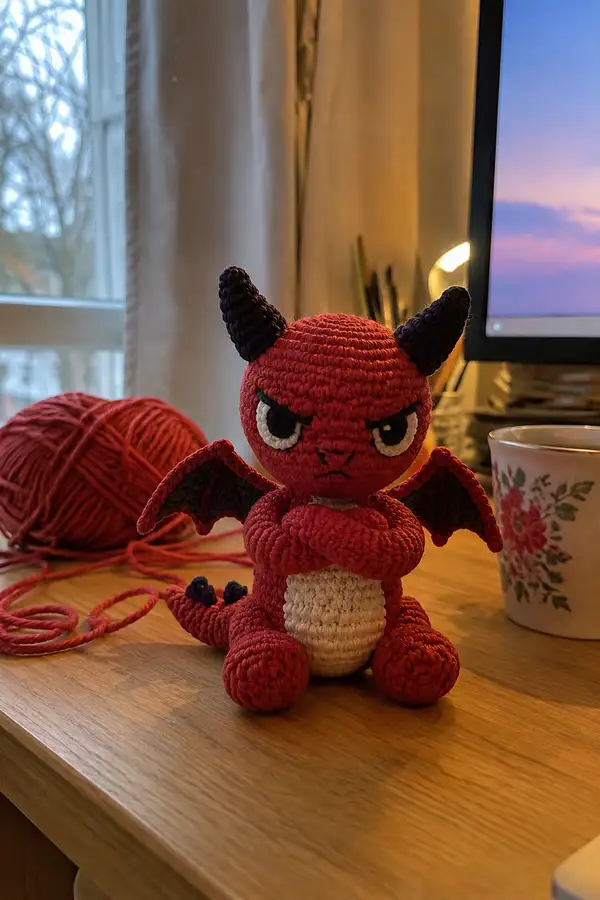
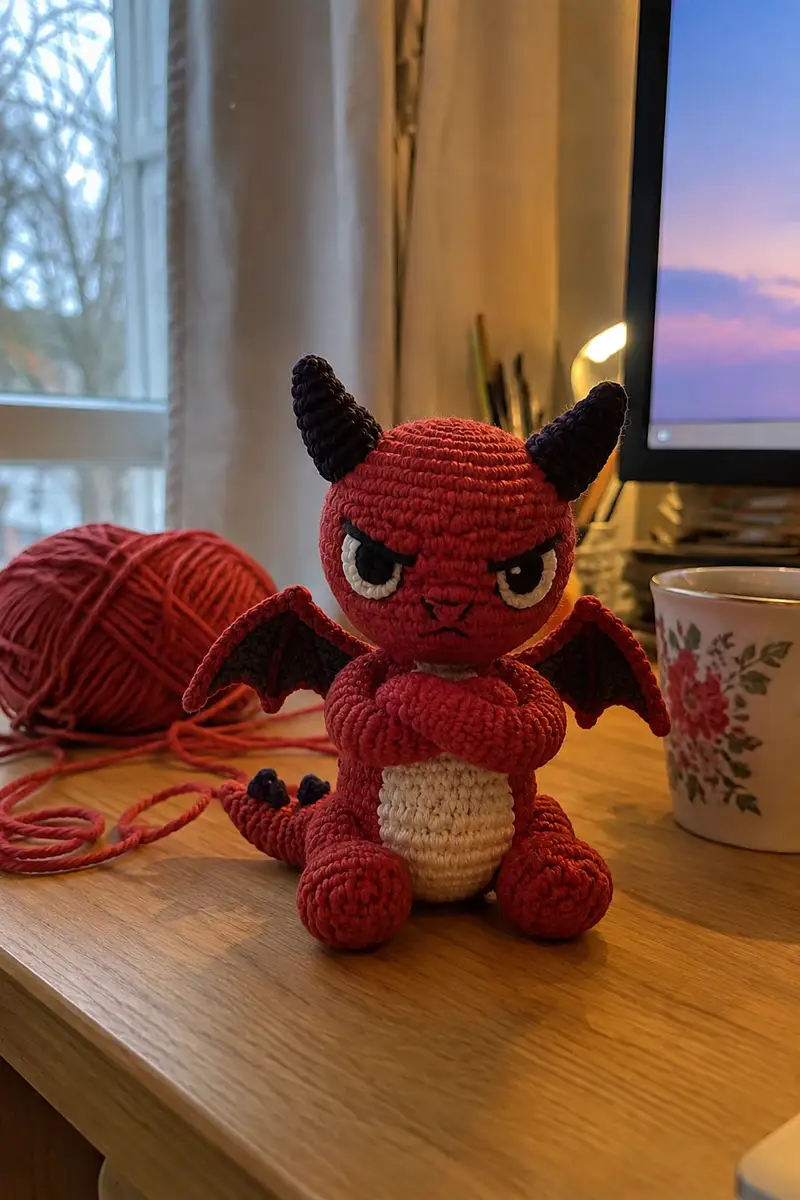
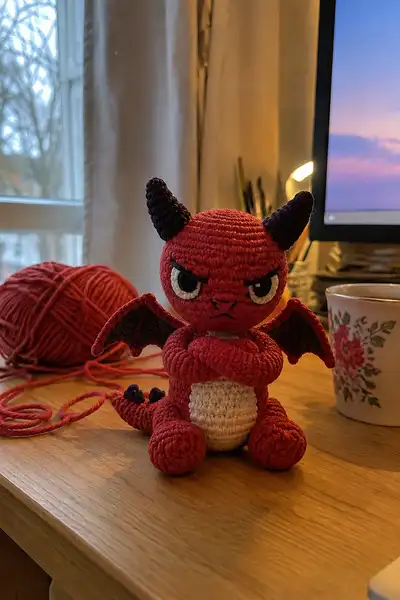
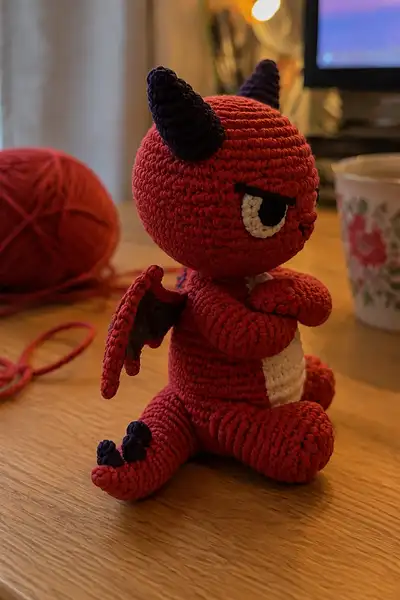
Create this small, grumpy devil dragon amigurumi with crossed arms, dramatic eyebrows, curled horns, tiny wings and a chubby belly. This pattern reproduces the sculpted head, folded arms, curled tail with spike toes, and contrasting cream belly for a compact, character-filled collectible. Works up in worsted-weight yarn to a palm-sized plush that's perfect for desks and gifts.
Progress Tracker
0% Complete
— Head :
Round 1 :
6 sc in magic ring (6)
Round 3 :
(1 sc, 1 inc) x 6 (18)
Round 4 :
(2 sc, 1 inc) x 6 (24)
Round 5 :
(3 sc, 1 inc) x 6 (30)
Round 6 :
(4 sc, 1 inc) x 6 (36)
Round 7 :
(5 sc, 1 inc) x 6 (42)
Round 8 :
(6 sc, 1 inc) x 6 (48)
Round 9-14 :
1 sc in each st (48)
Info :
Place eyes between rounds 12-13 with approximately 8-10 stitches between centers for the angry, narrowed look. If embroidering, mark placement now. Keep safety eyes slightly lower than centerline to keep brow area heavy.
Round 15-18 :
1 sc in each st (48)
Info :
Work a small raised eyebrow ridge by leaving a 2-3 row area for embroidering a half-lidded look later. Use a scrap of black to chain-stitch a thick line across the top of the eyes after assembly.
Round 19 :
(6 sc, 1 dec) x 6 (42)
Round 20 :
(5 sc, 1 dec) x 6 (36)
Info :
Begin stuffing head firmly but not rock-hard. Add stuffing in small amounts and shape lightly with your fingers to create a rounded forehead and slightly flattened front where eyes will sit.
Round 21 :
(4 sc, 1 dec) x 6 (30)
Round 22 :
(3 sc, 1 dec) x 6 (24)
Round 23 :
(2 sc, 1 dec) x 6 (18)
Info :
Check eye symmetry. If using safety eyes, lock them now and ensure they are firmly seated. If embroidering, use a needle to mark pupils and stitch before additional stuffing makes it difficult.
Round 24 :
(1 sc, 1 dec) x 6 (12)
Round 25 :
1 sc in each st (12)
Round 26 :
(1 sc, dec) x 4 (8)
Info :
At this small stage the head is narrowing toward the neck — add more stuffing if the top feels loose. For a stable neck seam, keep the last 2 rounds tidy and even.
Round 27 :
1 sc in each st (8)
Round 28 :
1 sc in each st (8)
Round 29 :
1 sc in each st (8)
Info :
Fasten off leaving a long tail for sewing the head to the body. If your design prefers the head closed then joined to the neck by crocheting through the body opening, leave the tail and use it to ladder stitch the pieces together.
— Horns (Make 2) :
Round 1 :
6 sc in magic ring with purple (6)
Round 3 :
(1 sc, 1 inc) x 6 (18)
Round 4 :
(2 sc, 1 inc) x 6 (24)
Round 5 :
1 sc in each st (24)
Info :
Screw the horn cone shape by working in continuous spiral and stuffing lightly as you go so the horn is firm but not hard. The spiral helps create that ridged stacked look visible in the photos.
Round 6 :
(3 sc, 1 dec) x 6 (18)
Round 7 :
(2 sc, 1 dec) x 6 (12)
Round 8 :
(1 sc, 1 dec) x 4 (8)
Info :
Leave a 6-8 cm tail for sewing. Arrange horns on top of the head symmetrically, angling slightly outward. Sew firmly through head center layers to secure.
— Eye Appliques (Make 2 layered appliques) :
White Round 1 :
6 sc in magic ring (6)
White Round 2 :
6 inc (12)
White Round 3 :
(1 sc, 1 inc) x 6 (18)
Info :
These white appliques create the exposed white of the eye on the inner side. Sew into place with a small overlap under the brow area so the black pupil piece can be nestled inside.
Pupil Round 1 :
6 sc in magic ring with black (6)
Pupil Round 2 :
6 inc (12)
Info :
Sew black pupil onto white applique with the white slightly showing along the inner edge to reproduce the glare. Embroider a thin black ridge along top to form the droopy angry eyelid.
— Eyebrow / Lid Embroidery :
Info :
Using black yarn and a yarn needle, couch or embroider a thick, slightly curved line above each eye to create the heavy brow. Use several back stitches to make it chunky and glue a small dot of fabric glue under stitch ends for security if desired.
— Body :
Round 1 :
6 sc in magic ring (6)
Round 3 :
(1 sc, 1 inc) x 6 (18)
Round 4 :
(2 sc, 1 inc) x 6 (24)
Round 5 :
(3 sc, 1 inc) x 6 (30)
Round 6 :
(4 sc, 1 inc) x 6 (36)
Round 7-10 :
1 sc in each st (36)
Info :
If you want a subtly squashed, squat body like the sample, keep rounds 7-10 even and use firm stuffing later. For a taller body, add 2-4 more even rounds now.
Round 11 :
(5 sc, 1 inc) x 6 (42)
Round 12-14 :
1 sc in each st (42)
Info :
At round 12 you can begin the cream belly patch attachment later. Leave a long tail from the cream piece to sew the oval belly directly to the front of the body at the end of round 14-15.
Round 15 :
(5 sc, 1 dec) x 6 (36)
Round 16 :
(4 sc, 1 dec) x 6 (30)
Info :
Now begin stuffing body moderately — aim for a firm but squeezable core. For the crossed-arm pose the body should be compact and slightly weighted at the bottom so the figure sits upright.
Round 17 :
1 sc in each st (30)
Round 18 :
1 sc in each st (30)
Round 19 :
(3 sc, 1 dec) x 6 (24)
Round 20 :
(2 sc, 1 dec) x 6 (18)
Round 21 :
(1 sc, 1 dec) x 6 (12)
Info :
Do not fasten off. Keep the body opening ready to sew the head into place. Check that the top of the body opening has enough stitches to match the neck opening (8 stitches). Use your needle to align with head tail and sew around for a neat join.
Round 22 :
1 sc in each st (12) — tidy round to create a short neck rise
Round 23 :
1 sc in each st (12)
Info :
Fasten off leaving a long tail to sew the head. Pin head to body and sew through both pieces, matching the 8-st neck of the head to the 12-st neck of the body by using mattress stitch and picking up extra stitches as needed for smooth joining.
— Belly Patch (Cream) :
Round 1 :
6 sc in magic ring with cream (6)
Round 3 :
(1 sc, 1 inc) x 6 (18)
Round 4 :
(2 sc, 1 inc) x 6 (24)
Round 5 :
(3 sc, 1 inc) x 6 (30)
Info :
Fasten off leaving a long tail. Center the oval on the front of the body between rounds 11-16 and sew along edge with mattress stitch for a flat, integrated look. Stuff slightly under the patch edge if you want a raised tummy.
— Arms (Make 2, Crossed Pose) :
Round 1 :
6 sc in magic ring (6)
Round 3 :
(1 sc, 1 inc) x 6 (18)
Round 4-5 :
1 sc in each st (18)
Info :
These first rounds form the rounded hand portion. For a full, bulbous hand that sits well across the chest, stuff firmly now. The arm will taper into a short tube for the forearm.
Round 6 :
(2 sc, 1 dec) x 6 (12)
Round 7-12 :
1 sc in each st (12)
Info :
For crossed arms, make one arm slightly shorter (1-2 rounds) so it sits on top when sewing. Optionally insert a short length of flexible wire centered down the length of the arm before final stuffing to pose the forearms crossing.
Round 13 :
(1 sc, 1 dec) x 4 (8)
Round 14 :
1 sc in each st (8)
Info :
Stuff the forearm lightly — hands should be firmer, arms softer. Fold the hands together in a crossed position to determine the exact sewing placement on the chest. Pin in place before sewing.
Round 15 :
Fasten off leaving long tail for sewing (do not close). Sew the arms to the body centered at rounds 13-15 of the body; angle slightly inward so the arms rest naturally across the belly.
— Legs (Make 2) :
Round 1 :
6 sc in magic ring (6)
Round 3 :
(1 sc, 1 inc) x 6 (18)
Round 4 :
(2 sc, 1 inc) x 6 (24)
Round 5 :
(3 sc, 1 inc) x 6 (30)
Round 6-9 :
1 sc in each st (30)
Info :
These rounds form the foot and ankle. Stuff the foot area well to create a rounded, squat base that supports the figure. The leg is worked as a short tube above the foot.
Round 10 :
(3 sc, 1 dec) x 6 (24)
Round 11-16 :
1 sc in each st (24)
Round 17 :
(2 sc, 1 dec) x 6 (18)
Round 18 :
(1 sc, 1 dec) x 6 (12)
Round 19 :
1 sc in each st (12)
Info :
Leave a long tail for sewing. Sew each leg to bottom of body at rounds 1-3, spaced so the dragon sits steadily. Make the feet face slightly outward to match the sample's seated stance.
— Tail :
Round 1 :
6 sc in magic ring (6)
Round 3-6 :
1 sc in each st (12)
Info :
We will taper the tail slowly to create the rounded chunky look. Stuff the base light to avoid a top-heavy tail that tips the figure.
Round 7 :
(2 sc, 1 dec) x 4 (8)
Round 8-20 :
1 sc in each st (8) — work even to desired tail length (approx 12 rounds for a short tail like the sample)
Info :
At the tip of the tail add three small purple spike toes (make 3 small bobbles) and sew them spaced along the top of the tail end. See Claw Rounds for spike construction.
Round 21 :
Fasten off leaving long tail for sewing. Sew tail to back of body centered at last 3-4 rounds, angling slightly to one side for a natural curve.
— Tiny Spikes / Toes (Make 6 small purple bumps: 3 for tail, 3 for toes) :
Round 1 :
6 sc in magic ring with purple (6)
Round 3 :
(1 sc, 1 inc) x 6 (18)
Info :
Stuff lightly and flatten the base slightly. Fasten off leaving short tail and sew in clusters of three along top of tail and tips of feet as shown in the sample photo.
— Wings (Make 2) :
Wing Base Round 1 :
With purple for membrane chain 10, turn and sc in 2nd chain from hook across (9)
Wing Base Round 2 :
Ch1, sc in each st across, ch1 at end, rotate and sc along opposite chain side to create a flat oval — 18 sc total (18)
Round 3 :
Switch to red yarn (Info below) and work 1 sc around edge to create outer wing edge (18)
Info :
Change to red here to create the outer edge. Work in BLO for one round on the red edge if you want a raised rim. Pin the wing into a slightly cupped shape and sew into place on the back/upper side of each shoulder.
Round 4 :
Ch3, (dc, ch2, dc) at 1/3 points to create scalloped finger shapes, sc between clusters (work 3 scallops) — this sculpts little wing fingers (18)
Round 5 :
Slip stitch into base and fasten off leaving tail for sewing. Sew wings to body at rounds 8-10 slightly back from arms, angling up and out.
— Claws/Toe Details (Optional) :
Round 1 :
6 sc in magic ring with purple (6)
Info :
Make 6 small claws and sew three on top of each foot and three along tail tip. For a more stylized appearance, tighten the bobble by using slip stitches in the last round to create a pointed bump.
— Finishing Face Details :
Info :
Use black yarn to embroider the small frown and nostrils. For the nose, stitch two short diagonal lines just above the mouth area. For the mouth, embroider a downward V with a small center stitch to create the grumpy expression.
Info :
Weave all tails through at least 6-8 stitches and clip close. Use a few reinforcing stitches at stressed joins (arms, legs, tail) to ensure longevity.
— Optional Poseable Wire Guidance :
Info :
If you want poseable arms, insert a length of 20-gauge floral wire into each arm before stuffing and bend one end into a small loop and wrap with tape before finishing stuffing so the wire end won't poke through yarn. Test bend gently to shape crossed arms and sew arms firmly to chest around the loop area.
Info :
To make slight head tilt adjustments after assembly, you can add a disc of felt inside the neck seam to change angle before final sewing, or adjust stuffing position to bias a tiny lean.
This lovable little devil dragon is a perfect mix of attitude and charm — every detail from the furrowed eyebrow to the crossed arms adds personality. The finished amigurumi is compact, sturdy, and fun to display on a desk or gift to a friend who loves quirky characters. Enjoy the focused satisfaction of assembling the parts into this expressive creature, and show off your finished dragon with pride. 🐉🧶