🧶 Beautiful ✨ Detailed 💝 Adorable

Small Pumpkin Pattern

Small Pumpkin Pattern
3.9★ Rating
1-2 Hours Time Needed
1.7K Made This
✂️

Beginner Friendly Level

Perfect for those just starting their crochet journey, with clear instructions and simple techniques

⏱️

Quick Make

Complete in under 2 hours—lightning fast fun for instant gratification and quick gifts.

🍂

Autumn Vibes

Earthy tones with cozy textures inspired by falling leaves and the rich, warm colors of harvest season.

About This Small Pumpkin Pattern

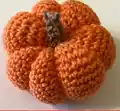
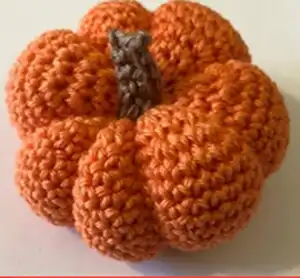
This listing is a preview page directing you to the full free Small Pumpkin crochet pattern on the Peach Unicorn Designs blog. The finished pumpkin is a compact, stuffed decoration ideal for autumn displays, table centers, or gift accents. It uses basic amigurumi-style shaping to create the classic pumpkin ribs and a small stem.

Small Pumpkin Pattern crochet pattern - detailed view of completed project

The full pattern with complete rounds and stitch counts is available on the blog linked in this PDF. You will find materials, abbreviations, step-by-step rounds, and assembly instructions there.

Why You'll Love This Small Pumpkin Pattern

I absolutely love this pattern because it is quick to make and gives such a satisfying result even with minimal materials. I enjoy how a few simple rounds and a bit of gathering create the unmistakable pumpkin shape. The pattern is forgiving for beginners yet still fun for more experienced crocheters who want a fast seasonal project. I also love that it uses small amounts of yarn, making it perfect for scrap-busting and creative color choices. Making a set of these pumpkins is one of my favorite ways to decorate for fall because they look charming grouped together.

Small Pumpkin Pattern step 1 - construction progress Small Pumpkin Pattern step 2 - assembly progress Small Pumpkin Pattern step 3 - details and accessories Small Pumpkin Pattern step 4 - final assembly and finishing

Switch Things Up

I love customizing this small pumpkin by changing yarn weight and hook size to control the finished scale.

I often use bulky yarn for a chunky pumpkin and finer yarn for a delicate mini version for garlands or keychains.

I sometimes add a little felt leaf glued or sewn at the stem to give a contrasting texture and color highlight.

I like experimenting with variegated yarn for a mottled autumn look that adds natural color variation without extra sewing.

I also make sets in different shades of orange, cream, and green to create a decorative grouping with visual interest.

I sometimes embroider a simple face or add tiny buttons to turn pumpkins into playful characters for seasonal gifts.

I recommend trying different numbers of ribs (6-8) to alter the pumpkin's shape—more ribs make a rounder pumpkin.

I also suggest using a pipe cleaner inside the stem for a sturdier, slightly poseable vine effect if you want a rustic look.

I enjoy adding a hint of metallic thread wound around the stem for a festive sparkle when making holiday decorations.

I find that mixing textures—soft yarn body with a boucle or textured stem—creates a handcrafted, boutique-style finish.

Common Mistakes & How to Fix Them

✗ Skipping stitch markers during rounds can make it hard to track the beginning of each round; place a marker at the start of every round and move it up as you go. ✗ Overstuffing the pumpkin can distort the ribbing shape and make sewing difficult; stuff gradually and test shape before adding more stuffing. ✗ Pulling the yarn too tightly when gathering the ribs can create puckered segments; pull evenly and adjust tension to form smooth, rounded ribs. ✗ Forgetting to fasten off securely leaves a loose tail that may come undone later; weave in the tail and secure with a few backstitches to lock it in place.

Small Pumpkin Pattern

Make a charming small crochet pumpkin that adds handmade autumn charm to your home. This quick project is perfect for using up scrap yarn and makes a lovely seasonal decoration or gift. The page provided here directs you to the full free pattern on the designer's blog so you can access complete step-by-step instructions. Enjoy a simple, satisfying crochet make that's friendly for makers looking for a fast seasonal project.

Beginner Friendly 1-2 Hours

Materials Needed for Small Pumpkin Pattern

— Main Fabric

  • 01
    Worsted weight yarn (#4) - Orange - approximately 20-40g (main body)
  • 02
    Worsted weight yarn (#4) - Brown - 5-10g (stem)
  • 03
    Small scrap of green or darker orange for leaf or accent - optional

— Tools Required

  • 01
    Crochet hook size 3.5mm (E) or size recommended for your yarn
  • 02
    Scissors
  • 03
    Tapestry/yarn needle for sewing and weaving ends
  • 04
    Stitch marker
  • 05
    Polyester stuffing (fiberfill)
  • 06
    Pins for placement (optional)

Progress Tracker

0% Complete

— Pattern Availability :

Info :

This PDF page is a preview notice. The full free Small Pumpkin crochet pattern is available on the Peach Unicorn Designs blog at www.PeachUnicornDesigns.com under the Crochet Blog section or by clicking the 'Click here' link on this page.

Info :

No stitch-by-stitch rounds or materials lists are printed on this PDF page; please visit the blog to access the complete pattern with rounds, stitch counts, materials, and assembly instructions.

Assembly Instructions

  • Create the pumpkin body following the full pattern on the blog, then gather the top and bottom by running a length of yarn through the center of the magic ring and pulling tight to close openings.
  • To form ribs, thread a long length of yarn through a tapestry needle and run it across the pumpkin from top to bottom, wrapping around the bottom center then back to the top, repeating for 6-8 evenly spaced ribs and pulling gently to define segments before knotting securely inside.
  • Sew the stem in place at the top center of the pumpkin using the long tail left from crocheting the stem; secure with several stitches and weave the tail inside the pumpkin to hide it.
  • If adding a leaf or curly vine, attach it to the base of the stem with small whipstitches and secure all loose ends by weaving them into the pumpkin body for a clean finish.

Important Notes

  • 💡Visit www.PeachUnicornDesigns.com Crochet Blog to get the complete free pattern including full rounds and stitch counts.
  • 💡Use consistent tension and the recommended hook size for even stitches and the intended finished size.
  • 💡Stuff the pumpkin gradually and shape ribs as you go to achieve smooth, rounded segments.

This Small Pumpkin Pattern is a cozy autumn make that fits perfectly on mantels and table centers. It is ideal for using up scraps and makes a delightful handmade gift for fall lovers. Quick to crochet and endlessly customizable—make a whole patch of pumpkins to celebrate the season! 🎃🍁

You ask,

we answer.

FAQs

Where can I get the full pattern?

The full free Small Pumpkin pattern is available on the Peach Unicorn Designs blog at www.PeachUnicornDesigns.com under the Crochet Blog section.

What size will the finished pumpkin be?

The finished pumpkin size will vary depending on yarn and hook, but using worsted weight yarn and a 3.5mm hook typically gives a small pumpkin approximately 6-8 cm across.

Is this pattern suitable for beginners?

Yes, this is a beginner-friendly pattern using basic single crochet, increases, and decreases; following the blog instructions will guide you through shaping and assembly.

Can I change the size of the pumpkin?

Yes, using a thicker yarn and larger hook will make a larger pumpkin, while thinner yarn and a smaller hook will make a mini version; adjust stuffing and number of ribs if needed.