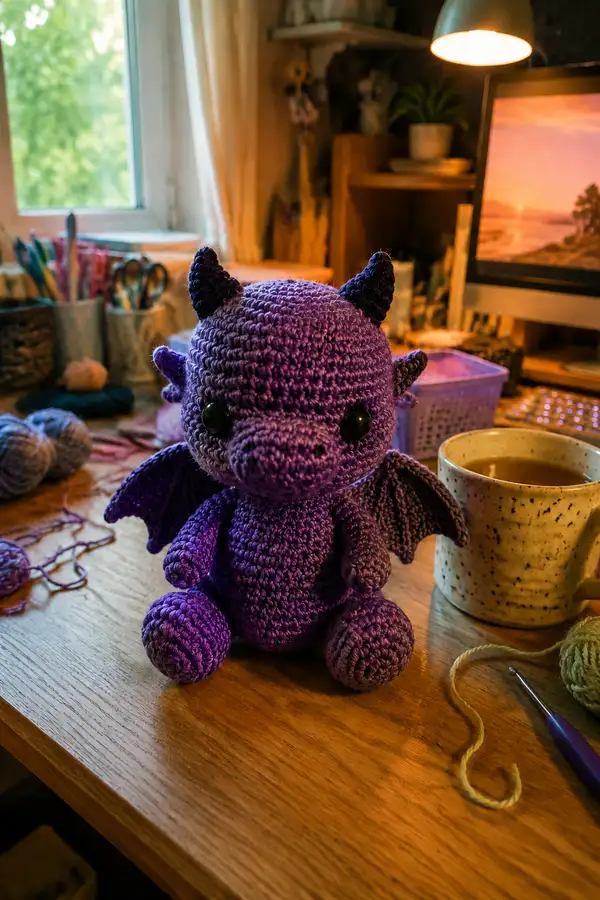
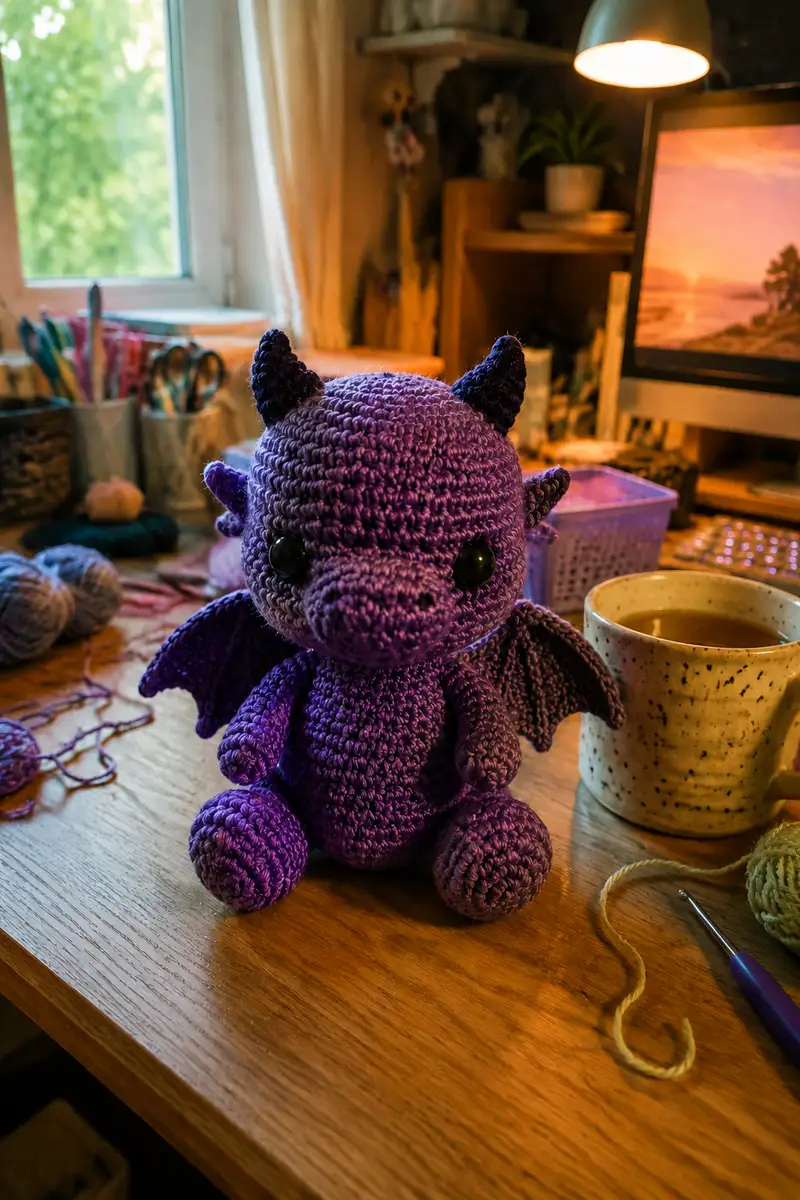
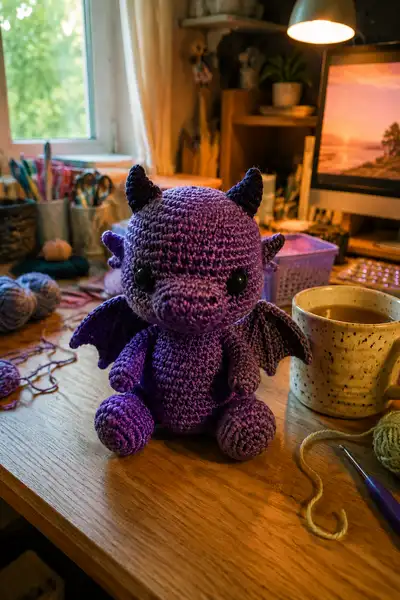
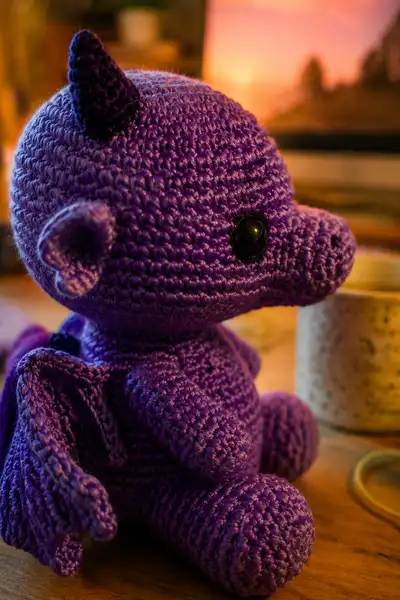
A cuddly, small purple demon dragon with tiny horns, little curled ears, stubby snout, and scalloped wings. This pattern recreates the plush character shown, including seated posture and poseable-feel limbs. Ideal for gift-making and display.
Progress Tracker
0% Complete
— Head :
Round 1 :
6 sc in magic ring (6)
Round 3 :
(1 sc, inc) x 6 (18)
Round 4 :
(2 sc, inc) x 6 (24)
Round 5 :
(3 sc, inc) x 6 (30)
Round 6 :
(4 sc, inc) x 6 (36)
Round 7 :
(5 sc, inc) x 6 (42)
Round 8 :
(6 sc, inc) x 6 (48)
Round 9-13 :
1 sc in each st (48) — work five rounds even to build forehead height (48)
Info :
Place safety eyes between rounds 13 and 14, 10-12 stitches apart depending on desired expression. For a larger look use 10mm eyes and space 12 sts; for smaller, use 8mm and space 10 sts. Mark both eye stitches before continuing.
Round 14 :
1 sc in each st (48) — after placing eyes, check balance left-to-right
Round 15-18 :
1 sc in each st (48) — build head height and allow for a nice round dome above the eyes (48)
Info :
If you prefer a slightly longer face, add 1-3 rounds even here. Keep eyes position in mind — don't place eyes too low.
Round 19 :
(6 sc, dec) x 6 (42)
Round 20 :
(5 sc, dec) x 6 (36)
Round 21 :
(4 sc, dec) x 6 (30)
Info :
Begin stuffing the head firmly but not overstuffed. Use small amounts and push stuffing towards the top first, then fill cheek area. Keep the opening for snout attachment if attaching later.
Round 22 :
(3 sc, dec) x 6 (24)
Round 23 :
(2 sc, dec) x 6 (18)
Round 24 :
(1 sc, dec) x 6 (12)
Info :
Fasten off leaving a long tail for sewing. Finish stuffing head firmly and position it on the body to check balance. If using a neck opening on the body, leave the opening slightly larger for sewing.
— Muzzle / Snout :
Round 1 :
6 sc in magic ring (6)
Round 3 :
(1 sc, inc) x 6 (18)
Round 4 :
(2 sc, inc) x 6 (24)
Round 5 :
1 sc in each st (24)
Round 6 :
1 sc in each st (24)
Info :
This snout is slightly elongated; work even two rounds to create length before beginning tapering. For a more pronounced beak look, add one or two more even rounds.
Round 7 :
(3 sc, dec) x 6 (18)
Round 8 :
(2 sc, dec) x 6 (12)
Round 9 :
(1 sc, dec) x 6 (6)
Info :
Stuff snout firmly to keep shape; small amounts of stuffing help preserve the long nose form. Flatten slightly at the base so it will sew flush to the head.
Round 10 :
Fasten off leaving a 25-30 cm tail for sewing. Sew the snout to the front of the head between rounds 12 and 16 (use previous eye placement as guide). Make sure nostril area points slightly downward like in the photo.
— Body :
Round 1 :
6 sc in magic ring (6)
Round 3 :
(1 sc, inc) x 6 (18)
Round 4 :
(2 sc, inc) x 6 (24)
Round 5 :
(3 sc, inc) x 6 (30)
Round 6 :
(4 sc, inc) x 6 (36)
Round 7-10 :
1 sc in each st (36) — work 4 rounds even to build torso width (36)
Info :
If you want a belly color, change to lighter purple now: join new color at beginning of a round and carry unused yarn inside or fasten off and rejoin. Use BLO for a waist ridge if desired.
Round 11 :
1 sc in each st BLO (36) — creates a subtle ridge for belly separation
Round 12-16 :
1 sc in each st (36) — build body length (36)
Info :
Begin stuffing the body moderately around round 14 — not fully firm. Save room for head attachment. Keep a cylindrical form but slightly oval front-to-back for seated posture.
Round 17 :
(4 sc, dec) x 6 (30)
Round 18 :
(3 sc, dec) x 6 (24)
Round 19 :
(2 sc, dec) x 6 (18)
Round 20 :
(1 sc, dec) x 6 (12)
Info :
If you're leaving a neck opening to sew the head onto, stop stuffing slightly before the final rounds and leave a 4-6 round opening. For direct sew, finish stuffing and close to prepare for attachment.
Round 21 :
6 dec (6) — if closing body for bottom stability, fasten off leaving tail for sewing legs; if leaving opening for head, stop at round 20 and reserve tail
Round 22 :
Fasten off leaving long tail for assembly. Ensure body is well-stuffed and sits stable — add a thin coin or felt disc inside base if needed for balance.
— Arm (Make 2) :
Round 1 :
6 sc in magic ring (6)
Round 3 :
(1 sc, inc) x 6 (18)
Round 4 :
1 sc in each st (18)
Info :
This first section forms the hand/paw. Stuff the hand very firmly for a nice round paw. If you want fingers, pinch a shallow indentation across the front and secure with a few small stitches.
Round 5 :
(3 sc, dec) x 3 (15)
Round 6-10 :
1 sc in each st (15) — work five rounds for lower arm length (15)
Round 11 :
(2 sc, dec) x 3 (12)
Round 12-16 :
1 sc in each st (12) — upper arm, lightly stuff; leave opening for sewing to body (12)
Round 17 :
(1 sc, dec) x 4 (8)
Round 18 :
Fasten off leaving a long tail for sewing. Add a small amount of stuffing if needed and shape the shoulder area slightly narrower so the arm will sit flush against the body.
— Leg (Make 2) :
Round 1 :
6 sc in magic ring (6)
Round 3 :
(1 sc, inc) x 6 (18)
Round 4 :
(2 sc, inc) x 6 (24)
Round 5 :
1 sc in each st (24)
Round 6 :
1 sc in each st (24)
Info :
Work two rounds even to create a round foot. Stuff the foot firmly to make it flat-bottomed for stable sitting; shape stuffing with a chopstick for even distribution.
Round 7 :
(3 sc, dec) x 6 (18)
Round 8-12 :
1 sc in each st (18) — build shin/calf length (18)
Round 13 :
(2 sc, dec) x 6 (12)
Round 14-18 :
1 sc in each st (12) — upper leg; stuff moderately and leave opening for sewing to body (12)
Round 19 :
(1 sc, dec) x 4 (8)
Round 20 :
Fasten off leaving long tail for sewing. Position legs on rounds 1-3 of body base and ensure even spacing so dragon sits centered.
— Ear (Make 2) :
Round 1 :
6 sc in magic ring (6)
Round 3 :
(1 sc, inc) x 6 (18)
Round 4 :
1 sc in each st (18)
Round 5 :
(2 sc, dec) x 4 (14)
Round 6 :
1 sc in each st (14)
Round 7 :
(1 sc, dec) x 4 (10)
Round 8-9 :
1 sc in each st (10) — curl the ear slightly by sewing a few stitches along inner edge
Round 10 :
Fasten off leaving long tail for sewing. Sew ears to the sides of the head between rounds 9-12, curving forward slightly like the model.
— Horn (Make 2) :
Round 1 :
6 sc in magic ring (6)
Round 3 :
(1 sc, inc) x 6 (18)
Round 4 :
1 sc in each st (18)
Round 5 :
(5 sc, dec) x 3 (15)
Round 6 :
(4 sc, dec) x 3 (12)
Round 7 :
(3 sc, dec) x 3 (9)
Round 8 :
(2 sc, dec) x 3 (6)
Round 9 :
1 sc in each st (6) — shape the cone top, adjust stuffing so horn point is firm but not rock-hard
Round 10 :
Fasten off leaving a long tail for sewing. Position horns symmetrically on top of head, slightly toward front and a little angled outward as in photo.
— Wing (Make 2) :
Round 1 :
6 sc in magic ring (6)
Round 3 :
(1 sc, inc) x 6 (18)
Round 4 :
(2 sc, inc) x 6 (24)
Round 5 :
1 sc in each st (24)
Round 6 :
1 sc in each st (24)
Info :
We will shape a scalloped wing with three main finger-like sections. Use stitch markers to mark division points at approx every 8 stitches to form three lobes.
Round 7 :
(7 sc, sl st) x 3 across to form ridged divisions (24)
Round 8 :
Working into first lobe: ch1, 1 sc in next 7 sts, ch1, turn (7)
Round 9 :
(1 sc, inc) x 3 then 1 sc in remaining 1 st (10) — builds outer curve of lobe
Round 10 :
1 sc in each st (10) — tighten edge with BLO on this round to create a fold if you want more structure
Info :
Repeat shaping for second and third lobes directly in sequence. If you prefer stronger structure, fold along BLO ridge and whipstitch layers together.
Round 11 :
Repeat rounds 8-10 for lobe two (10)
Round 12 :
Repeat rounds 8-10 for lobe three (10)
Round 13 :
Join lobes by 1 sc around outer edge of wing seam to smooth transitions (approx 30 sts)
Round 14 :
Work 1 sc in each st BLO around edge to create a defined outline (30)
Round 15-18 :
1 sc in each st (30) — work a few rounds even; add slight decreases at top inner curve if you want wings to curve inward when attached
Info :
Lightly stuff wing base only (not whole wing) to give lift; do not overstuff or it will look heavy and not lie like the photo. When attaching, overlap the wing base over the body seam and sew through body stitches for security.
Round 19 :
Fasten off leaving long tail for sewing. If desired, embroider wing membrane ridges with lighter color yarn across each lobe for contrast.
— Tail :
Round 1 :
6 sc in magic ring (6)
Round 3 :
1 sc in each st (12)
Round 4-8 :
1 sc in each st (12) — work five rounds even for tail length (12)
Round 9 :
(2 sc, dec) x 3 (9)
Round 10 :
1 sc in each st (9)
Round 11 :
(1 sc, dec) x 3 (6)
Round 12 :
Fasten off leaving long tail for sewing. Optionally add a small spade-shaped tip by crocheting a flat diamond and sewing to the end.
— Finishing & Assembly :
Info :
Arrange all parts before sewing. Use pins to position head, arms, legs, wings and tail on the body. Assembly order shown below helps maintain stability: legs, body closure (if left open), arms, tail, wings, head, horns, ears, facial details.
Round 1 :
Sew legs first: center them to the front bottom of body at body rounds 1-4, spacing legs approx 8-10 stitches apart; attach using whip stitch or mattress stitch.
Round 2 :
Sew arms to sides of body between rounds 16-20 of body for a natural, slightly forward placement. Check that arms rest naturally near the chest.
Round 3 :
Sew tail to back center at body round 10-12; secure with multiple passes to avoid sagging when handled.
Round 4 :
Attach wings to upper back at body rounds 8-12. Pin before sewing to ensure symmetrical placement. Sew firmly through wing base and a few body rounds to anchor.
Round 5 :
Position head over the neck opening and sew around using slip stitch or ladder stitch for an invisible join. Ensure snout is centered and eyes face forward evenly.
Round 6 :
Sew horns to top of head slightly forward of center and ears to side between rounds 9-12. Reinforce with additional stitches so small features stay secure.
Info :
Weave in all tails using a yarn needle, pass through several stitches inside the piece and trim close. Add a dab of fabric glue under safety eye pads if you want extra security for gifts (allow to dry fully).
Round 7 :
Embroider nostrils with black yarn using 6-8 short stitches on the snout tip. If desired, add a small stitched smile under the snout with a few short black stitches centered between the eyes.
Round 8 :
Optional: Add blush to cheeks with soft pastel or fabric paint applied lightly; test on scrap yarn first. Optionally sew a small collar or ribbon for personality.
Info :
Check overall balance. If the dragon leans forward, add a small coin or washer flat in the base of the body and reclose. Final shaping: pinch and shape wings and ears for personality.
This adorable demon dragon amigurumi blends playful character design with classic crochet shaping to create a tiny friend full of personality. Follow the detailed round-by-round instructions to recreate its cute snout, curled ears, and scalloped wings. The assembly tips and stuffing notes ensure a clean, professional finish. 🧶✨ Share your finished dragon with pride — it makes a perfect handmade gift or cozy shelf companion. Happy stitching! 🐉