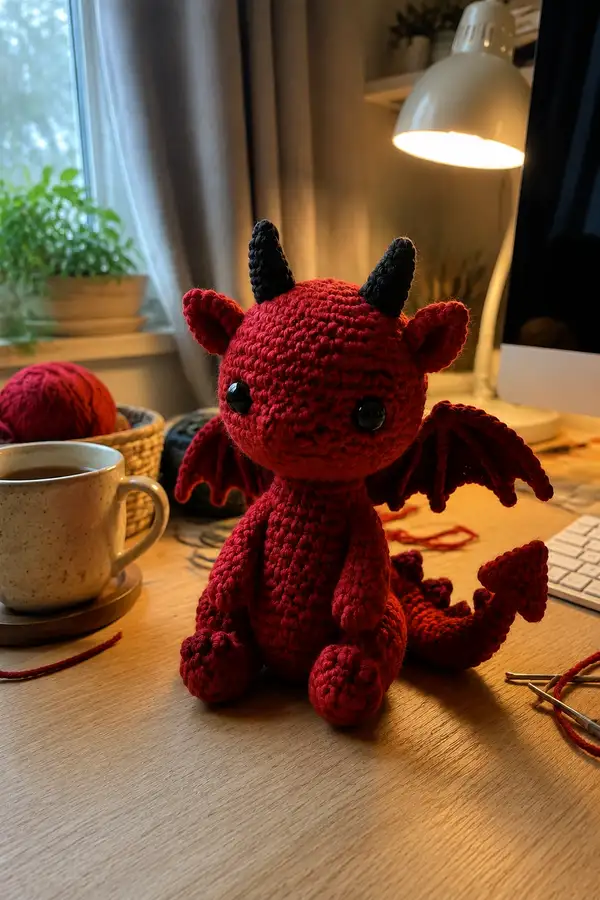
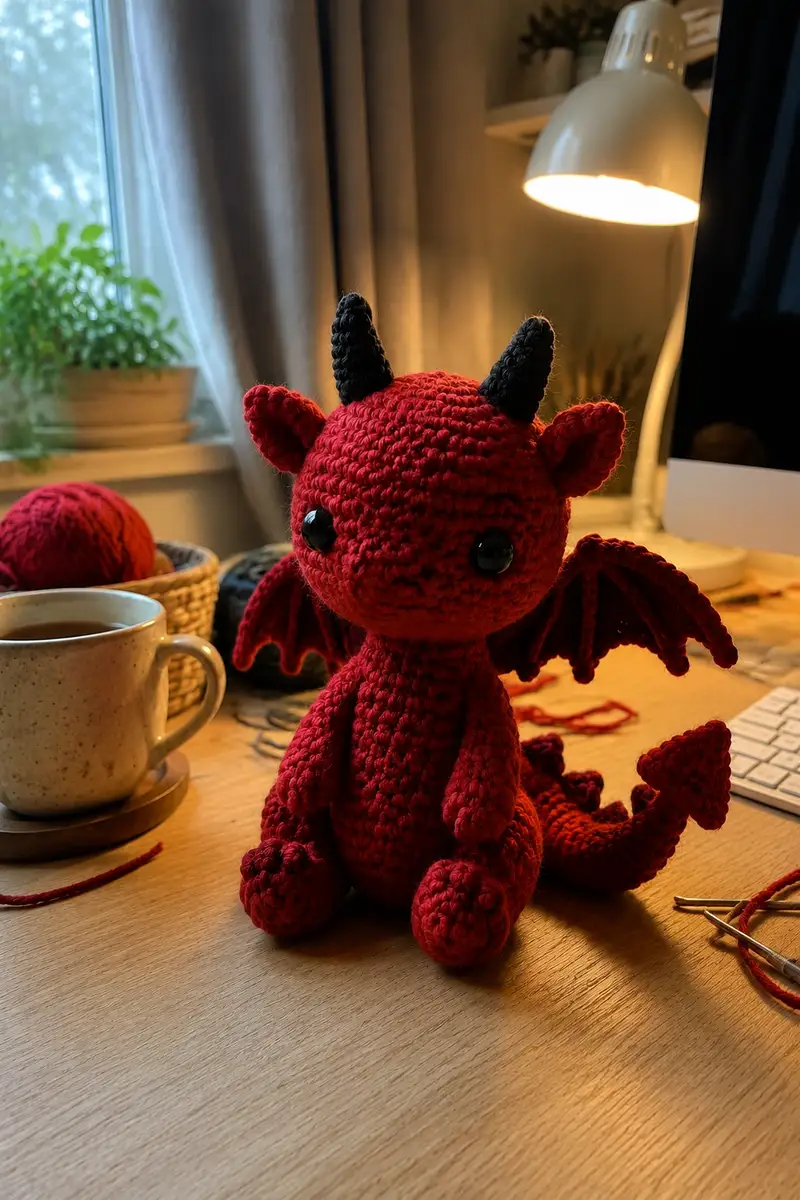
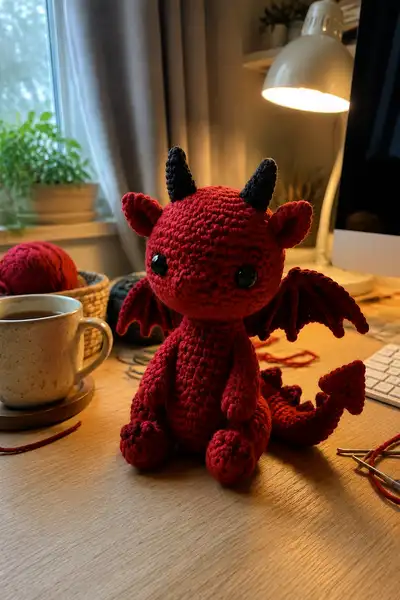
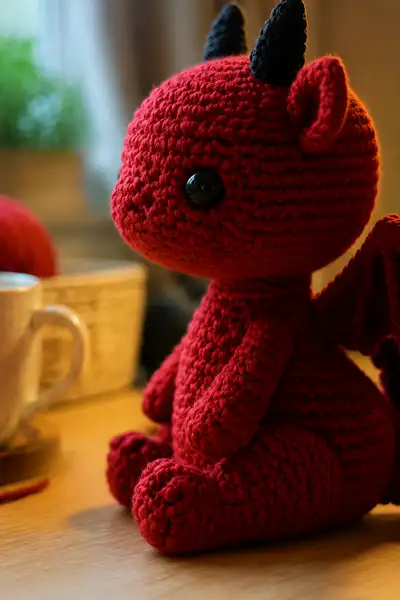
Create an adorable small red demon dragon with pointy tail, black horns, cupped ears, and scalloped bat-style wings. This pattern recreates the plush, rounded head, big shiny eyes, and chubby body seen in the photo. Perfect for a cozy handmade gift or a spooky-sweet shelf friend, the design emphasizes simple shaping, clear assembly, and charming details like wing ridges and a forked tail tip.
Progress Tracker
0% Complete
— Head :
Round 1 :
6 sc in magic ring (6)
Round 3 :
(1 sc, 1 inc) x 6 (18)
Round 4 :
(2 sc, 1 inc) x 6 (24)
Round 5 :
(3 sc, 1 inc) x 6 (30)
Round 6 :
(4 sc, 1 inc) x 6 (36)
Round 7 :
(5 sc, 1 inc) x 6 (42)
Round 8 :
(6 sc, 1 inc) x 6 (48)
Round 9-18 :
1 sc in each st (48)
Info :
Place safety eyes between rounds 12-13. In the photo they sit around round 13; space them 9-11 stitches apart depending on desired expression. Secure eyes now before the head is too stuffed.
Round 19 :
(6 sc, 1 dec) x 6 (42)
Round 20 :
(5 sc, 1 dec) x 6 (36)
Round 21 :
(4 sc, 1 dec) x 6 (30)
Info :
Begin stuffing the head firmly but not overstuffed. Use small bits of fiberfill and press them into the nose area to preserve the rounded muzzle. Continue stuffing as you decrease to keep shape even.
Round 22 :
(3 sc, 1 dec) x 6 (24)
Round 23 :
(2 sc, 1 dec) x 6 (18)
Round 24 :
(1 sc, 1 dec) x 6 (12)
Info :
Fasten off leaving a long tail for sewing. Finish stuffing through the hole; needle-woven closure is recommended to create an invisible seam. If attaching directly to the body, leave extra tail for sewing into the neck opening.
— Neck Join Collar (worked after head or when joining to body) :
Round 1 :
Attach yarn to the neck opening. Work 1 sc in each of the 6 stitches around (6)
Round 2 :
1 sc in each st (6)
Info :
This small collar helps you sew the head securely to the body. Alternatively, leave the head open and sew through head and body rounds with mattress or whip stitch for a firm join.
— Body :
Round 1 :
6 sc in magic ring (6)
Round 3 :
(1 sc, 1 inc) x 6 (18)
Round 4 :
(2 sc, 1 inc) x 6 (24)
Round 5 :
(3 sc, 1 inc) x 6 (30)
Round 6-10 :
1 sc in each st (30)
Info :
If you want a slightly longer torso like the photographed toy, add extra even rounds here. The body is worked in the round from bottom-up so keep the opening large to attach legs later if you prefer sewing them on separately.
Round 11 :
(3 sc, 1 inc) x 6 (36)
Round 12-16 :
1 sc in each st (36)
Round 17 :
(4 sc, 1 dec) x 6 (30)
Round 18 :
(3 sc, 1 dec) x 6 (24)
Info :
Begin stuffing the body through the top opening after you finish even rounds 12-16. Stuff firmly enough that the head sits stable, but leave the neck area slightly softer for sewing. Add fiberfill gradually as you decrease.
Round 19-22 :
1 sc in each st (24)
Round 23 :
(2 sc, 1 dec) x 6 (18)
Round 24 :
(1 sc, 1 dec) x 6 (12)
Info :
Stop stuffing just before you close the body completely if you plan to attach the head by sewing; leave enough opening to position head and stitch collar to body. If attaching head and then closing under it, fasten off with long tail for sewing and finish stuffing to desired firmness.
Info :
Fasten off leaving a long tail. If you left the body open to sew the head on, join head collar to the top of the body with a mattress stitch, aligning center back and front. Use pins to check symmetry before stitching.
— Arms (Make 2) :
Round 1 :
6 sc in magic ring (6)
Round 3 :
(1 sc, 1 inc) x 6 (18)
Round 4 :
(2 sc, 1 inc) x 6 (24)
Round 5-8 :
1 sc in each st (24)
Info :
These rounds form the rounded hand/top of the paw. Stuff the hand portion firmly so it keeps a rounded shape; add a small dab of stuffing because fingers are minimal in the photo.
Round 9 :
(2 sc, 1 dec) x 6 (18)
Round 10-13 :
1 sc in each st (18)
Round 14 :
(1 sc, 1 dec) x 6 (12)
Round 15-18 :
1 sc in each st (12)
Round 19 :
(1 sc, 1 dec) x 4, 1 sc in next 4 (8)
Round 20 :
1 sc in each st (8)
Info :
Leave a long tail for sewing the arms to the body. In the reference, the arms are slightly short and attach around body rounds 20-24; position them equidistant from the center front. Stuff wrists lightly and hands firmly; avoid overstuffing the upper arm.
— Legs (Make 2) :
Round 1 :
6 sc in magic ring (6)
Round 3 :
(1 sc, 1 inc) x 6 (18)
Round 4 :
(2 sc, 1 inc) x 6 (24)
Round 5 :
(3 sc, 1 inc) x 6 (30)
Round 6 :
(4 sc, 1 inc) x 6 (36)
Round 7-10 :
1 sc in each st (36)
Info :
These rounds form the foot sole and lower leg volume. Stuff the foot firmly so the toy can sit. Add extra stuffing near the toe area to create chunky feet as seen in the photo.
Round 11 :
(4 sc, 1 dec) x 6 (30)
Round 12 :
(3 sc, 1 dec) x 6 (24)
Round 13-17 :
1 sc in each st (24)
Round 18 :
(2 sc, 1 dec) x 6 (18)
Round 19 :
(1 sc, 1 dec) x 6 (12)
Round 20-22 :
1 sc in each st (12)
Info :
Leave a long tail for sewing. Attach legs to the bottom of the body so the creature can sit upright. In the reference, legs are slightly forward-facing; pin them before sewing for best balance.
— Ears (Make 2) :
Round 1 :
6 sc in magic ring (6)
Round 3 :
(1 sc, 1 inc) x 6 (18)
Round 4 :
(2 sc, 1 inc) x 6 (24)
Round 5 :
1 sc in each st (24)
Round 6 :
(2 sc, 1 dec) x 6 (18)
Round 7 :
(1 sc, 1 dec) x 6 (12)
Round 8 :
1 sc in each st (12); fold slightly and sew base for cupped ear shape
Info :
Ears are cupped and sit on the upper head sides. Pin them at head rounds 6-8 spaced approximately 10-12 stitches from center back to prevent a too-forward placement. Sew securely with the long tail.
— Horns (Make 2 in black) :
Round 1 :
6 sc in magic ring (6)
Round 3 :
(1 sc, 1 inc) x 6 (18)
Round 4 :
(2 sc, 1 inc) x 6 (24)
Round 5 :
1 sc in each st (24)
Round 6 :
(4 sc, 1 dec) x 4, 2 sc (20)
Round 7 :
1 sc in each st (20)
Round 8 :
(3 sc, 1 dec) x 4, 4 sc (16)
Round 9 :
1 sc in each st (16)
Round 10 :
(2 sc, 1 dec) x 4, 4 sc (12)
Round 11 :
1 sc in each st (12)
Round 12 :
(1 sc, 1 dec) x 4, 4 sc (8)
Info :
Horns form tapered cones. Do not overstuff; a small amount of fiberfill helps maintain shape. In the reference, horns tilt slightly forward—position and sew into head at round 6-7, spaced symmetrically along the crown.
— Wings (Make 2 - flat wing panels then edge ridges) :
Wing Panel Round 1 :
6 sc in magic ring (6)
Wing Panel Round 2 :
6 inc (12)
Wing Panel Round 3 :
(1 sc, 1 inc) x 6 (18)
Wing Panel Round 4 :
(2 sc, 1 inc) x 6 (24)
Wing Panel Round 5 :
(3 sc, 1 inc) x 6 (30)
Wing Panel Round 6 :
1 sc in each st (30)
Wing Panel Round 7 :
Change to BLO: 1 sc in each st BLO (30)
Info :
Working some rounds in BLO creates a ridge that becomes the wing rib when folded. After forming the panel, you will work scalloped ridges to form bat wing membranes.
Wing Panel Round 8 :
(4 sc, 1 inc) x 6 (36)
Wing Panel Round 9 :
1 sc in each st (36)
Wing Panel Round 10 :
(5 sc, 1 inc) x 6 (42)
Wing Panel Round 11-12 :
1 sc in each st (42)
Wing Membrane Rounds 13 :
Switch to ridge pattern: *skip 1 st, 5 dc in next st, skip 1 st, sl st in next st* around to create scallops (approximately 14 scallops). Adjust spacing to end evenly.
Wing Membrane Round 14 :
Sl st around and fasten off leaving long tail for sewing
Info :
Fold the panel so the BLO ridge becomes the wing bone and sew along the ridge to form a 3-D wing. In the reference the wings are moderately sized, with three distinct scallops per edge; you can make them larger by adding more increases before scalloping.
— Tail (Main Tail Cone and Forked Tip) :
Tail Cone Round 1 :
6 sc in magic ring (6)
Round 3 :
(1 sc, 1 inc) x 6 (18)
Round 4 :
(2 sc, 1 inc) x 6 (24)
Round 5 :
(3 sc, 1 inc) x 6 (30)
Round 6-10 :
1 sc in each st (30)
Info :
Tail is worked in a gentle cone. Stuff lightly as you work; if you want the tail to be poseable, insert a length of floral wire or thin pipe cleaner before it is completely stuffed and closed.
Round 11 :
(3 sc, 1 dec) x 6 (24)
Round 12 :
(2 sc, 1 dec) x 6 (18)
Round 13 :
(1 sc, 1 dec) x 6 (12)
Info :
For forked or triangular tail tip like the pictured arrowhead, crochet two small identical triangular spikes and sew them to the end of the tail. Leave a tail of yarn to anchor each spike securely.
Tail Spike (Make 2) Round 1 :
4 sc in magic ring (4)
Round 3 :
(1 sc, 1 inc) x 4 (12)
Round 4 :
1 sc in each st (12)
Round 5 :
(1 sc, 1 dec) x 4 (8)
Info :
Stuff lightly, flatten spike, and shape into triangular arrowhead. Sew two spikes side-by-side at the tail end to recreate the pointed tail tip in the photo.
— Tail Spines / Back Scales (Make 6-8 small scales) :
Scale Round 1 :
6 sc in magic ring (6)
Scale Round 2 :
6 inc (12)
Scale Round 3 :
1 sc in each st (12)
Scale Round 4 :
(1 sc, 1 dec) x 4 (8)
Info :
Sew scales along the tail and lower back, spacing evenly. In the reference the scales are small and triangular; flatten each scale slightly when sewing so they stand away from the tail.
— Wing Detail Ridges (Optional - Make 3 small ribs per wing) :
Ridge Round 1 :
6 sc in magic ring (6)
Ridge Round 2 :
6 inc (12)
Ridge Round 3 :
1 sc in each st (12)
Info :
Sew these to the wing panel running from the base toward the scalloped edge to mimic the ribbing seen in bat wings. Work them into the BLO ridge you created for a natural fold.
— Foot Toe Details (Optional small bumps, 3 per foot) :
Toe Bump Round 1 :
6 sc in magic ring (6)
Toe Bump Round 2 :
6 inc (12)
Info :
Sew three small bumps near the top of the foot to mimic toes; in the reference these are subtle and formed by small circular motifs sewn on the foot.
— Finishing and Assembly Notes :
Info :
Before sewing anything: block any flat pieces like wings lightly (pin to shape and steam lightly or set with a damp cloth) so they hold their scalloped edge. Use pins to position head, arms, legs, ears, horns and wings. Refer to the photos for relative placement — head centered on top of body, wings attached at upper back, tail at center back low enough the toy can sit without toppling.
Info :
Sew pieces with a yarn needle and matching yarn. Use a ladder stitch or mattress stitch for an invisible join on the head and body. For the wings and tail, use back-and-forth whip stitches and anchor multiple times for stability.
Info :
Weave in all ends securely. If you used safety eyes, ensure the washers are fully seated. Optional embroidery: a small stitched smile or nostrils can be added with black embroidery thread. Blush the cheeks lightly with diluted fabric paint if desired.
This lovable little demon dragon brings together classic amigurumi shaping and delightful devilish details, making a perfect handmade companion. The process of assembling the wings, horns, and tail is satisfying and allows for sweet customization. Every stitch contributes to its personality, and it's a wonderful gift or shelf friend to keep or share. 🧶💖🦴