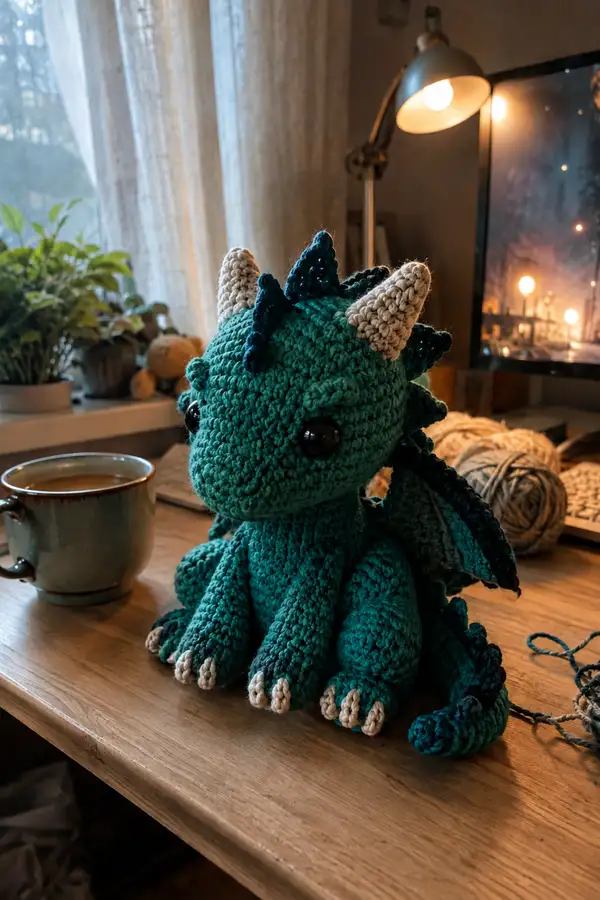
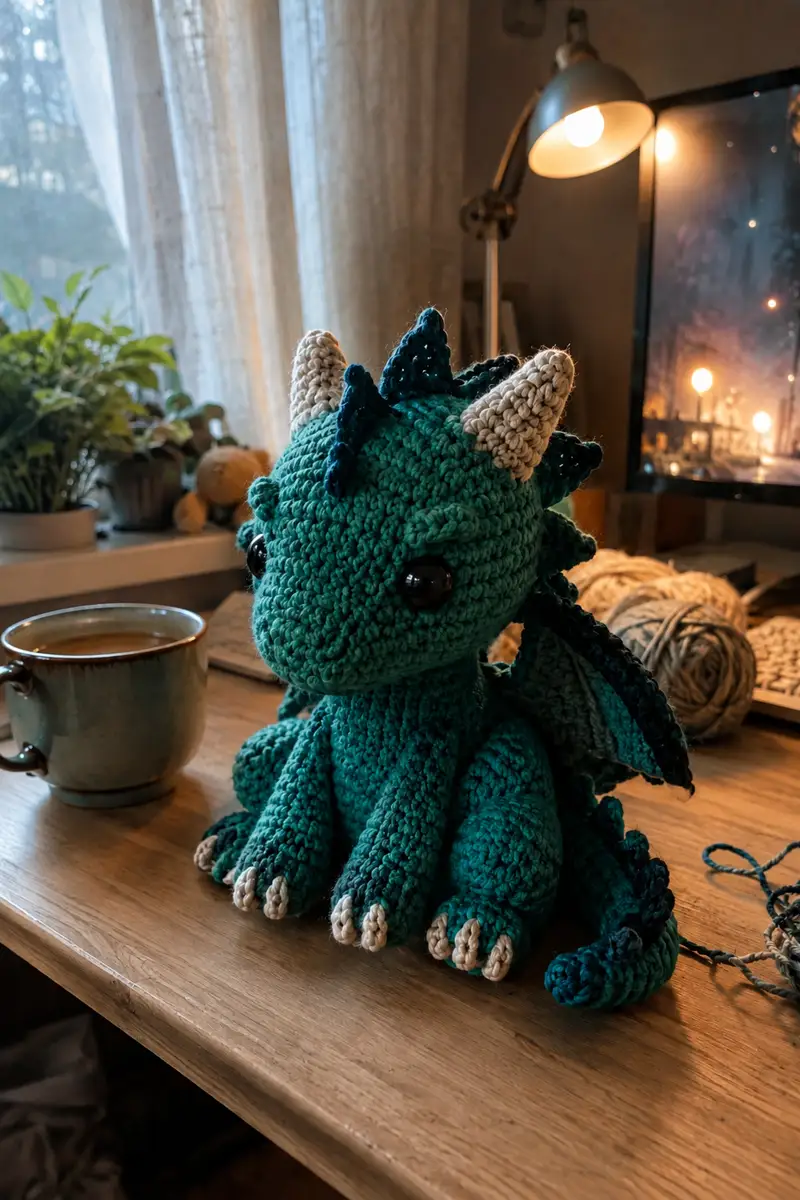
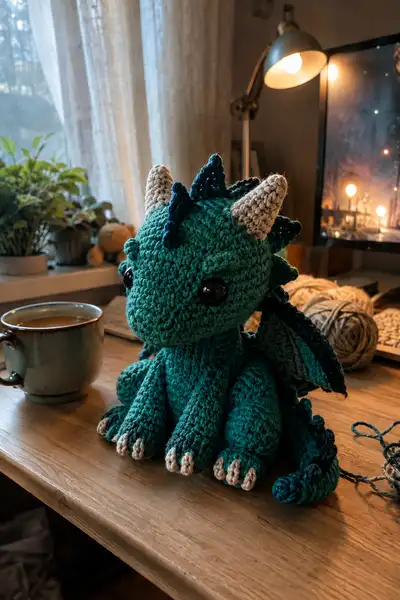
A cuddly small teal demon dragon with a rounded head, expressive safety eyes, layered wing membranes and a row of dramatic spines down the back. This pattern captures the plush, seated pose and tiny beige claws and horns seen in the photos. Designed for an experienced beginner to intermediate crocheter, it includes step-by-step round counts, color-change tips, and assembly instructions to recreate the textured, ridged look of the finished dragon.
Progress Tracker
0% Complete
— Head :
Round 1 :
6 sc in magic ring (6)
Round 3 :
(1 sc, 1 inc) x 6 (18)
Round 4 :
(2 sc, 1 inc) x 6 (24)
Round 5 :
(3 sc, 1 inc) x 6 (30)
Round 6 :
(4 sc, 1 inc) x 6 (36)
Round 7 :
(5 sc, 1 inc) x 6 (42)
Round 8 :
(6 sc, 1 inc) x 6 (48)
Round 9-18 :
1 sc in each st (48)
Info :
Place safety eyes between rounds 13-14, approximately 8-10 sts apart for the large expressive look. If using 10mm eyes, aim for 9 stitches apart; for 8mm, 7-8 stitches apart. Mark the first stitch of round with marker.
Round 19 :
(6 sc, 1 dec) x 6 (42)
Round 20 :
(5 sc, 1 dec) x 6 (36)
Round 21 :
(4 sc, 1 dec) x 6 (30)
Info :
Begin stuffing the head firmly now, pushing fill into the forehead and cheeks to create roundness. Use small pellets of stuffing and a stuffing tool or blunt pencil to reach small areas.
Round 22 :
(3 sc, 1 dec) x 6 (24)
Round 23 :
(2 sc, 1 dec) x 6 (18)
Round 24 :
(1 sc, 1 dec) x 6 (12)
Info :
At this point head is closing to a neck opening. Continue stuffing firmly but allow a slight indent where neck will form so head sits naturally on body later.
Round 25-32 :
1 sc in each st (12) (work 8 rounds to form neck tube) (12)
Round 33 :
1 sc in next 6 st, fasten off leaving long tail for sewing (6)
Info :
Do not close neck fully. Leave open and use the long tail for a neat ladder stitch attachment to the body. Make sure stuffing is firm at the base of head but not overflowing into neck tube. Weave end in after sewing.
— Face Details & Snout :
Round 1 :
From head body before closing, surface-embroider nostrils or create a small snout ridge by working 6 sc across the front of the head starting at two rounds below eyes; or use a short 6-st separate snout piece.
Info :
For photo-accurate snout, make a tiny oval: mr 6 sc, flatten and sew to the center front round 10. Make sure to center between eyes and shape by flattening before sewing.
— Body :
Round 1 :
6 sc in magic ring (6)
Round 3 :
(1 sc, 1 inc) x 6 (18)
Round 4 :
(2 sc, 1 inc) x 6 (24)
Round 5 :
(3 sc, 1 inc) x 6 (30)
Round 6-10 :
1 sc in each st (30)
Info :
If you want the body slightly wider, work one extra increase round here: (4 sc, 1 inc) x 6 = 36. The pictured dragon uses a modest wide torso (30-36). Choose 30 for more compact.
Round 11 :
(4 sc, 1 inc) x 6 (36) (optional - see Info above)
Round 12-16 :
1 sc in each st (36)
Round 17 :
(3 sc, 1 dec) x 6 (30)
Round 18 :
(2 sc, 1 dec) x 6 (24)
Info :
Begin stuffing the body moderately through the open top to create a squat shape. The body should be firm enough to support head but soft enough to sew pieces together easily.
Round 19-24 :
1 sc in each st (24)
Round 25 :
(1 sc, 1 dec) x 6 (18)
Info :
Leave top of body open for head attachment. Fasten off leaving long tail. You will sew the head neck tube to the top of the body; do not close body entirely here. If you prefer to crochet head onto body, stop here with a live loop and join head neck rounds to body in continuous spiral.
— Front & Back Legs (Make 4) :
Round 1 :
6 sc in magic ring (6)
Round 3 :
(1 sc, 1 inc) x 6 (18)
Round 4-7 :
1 sc in each st (18)
Info :
These rounds form the foot bulb. For photo-accurate shape, stuff the foot firmly with fiberfill and use a stuffing tool to press fill into the toes area so the foot splayed shape will hold when you add claws.
Round 8 :
(2 sc, 1 dec) x 4 + 2 sc (14)
Round 9-14 :
1 sc in each st (14)
Info :
Create 3-4 small claws for each foot from cream yarn (see Claws section). Arrange claws across the front of the foot and baste sew before closing leg tube to ensure correct spacing.
Round 15 :
(1 sc, 1 dec) x 4 (10)
Round 16-20 :
1 sc in each st (10) work 5 rounds for leg shaft
Round 21 :
(1 sc, 1 dec) x 3 + 1 sc (7)
Round 22 :
1 sc in each st (7) work 2 rounds (7)
Info :
Fasten off leaving long tail for sewing to body. Make 4 legs identical. Stuff feet firmly, legs lightly. Position two legs at front (round positions noted in Assembly) and two at back for stable seated pose.
— Claws/Toes (Make 16 small claws) :
Round 1 :
4 sc in magic ring (4)
Round 3 :
2 sc, inc, 2 sc (5) adjust if needed to make small cone
Round 4-6 :
1 sc in each st (5) (Work 3 rounds to make a tiny cone and then fasten off leaving tail for sewing)
Info :
Sew claws to the tips of each foot: 3 claws on each front foot, 3 claws on each back foot (12 claws), and 4 spare small claws for thumb details and tail tip if desired. Weave and secure tails tightly.
— Tail :
Round 1 :
6 sc in magic ring (6)
Round 3 :
(1 sc, 1 inc) x 6 (18)
Round 4-12 :
1 sc in each st (18) (work 9 rounds to form main tail length)
Info :
Stuff the tail lightly to keep it flexible. If you want a poseable tail, insert a length of floral wire before fully stuffing then continue stuffing around it (fold wire end back on itself to avoid poking).
Round 13 :
(2 sc, 1 dec) x 4 + 2 sc (14)
Round 14-17 :
1 sc in each st (14)
Round 18 :
(1 sc, 1 dec) x 4 + 2 sc (10)
Round 19-22 :
1 sc in each st (10)
Info :
Do not fasten off: attach tail to body by sewing the wide end across center back. Add a few ribbon or ridge spikes along the top of tail (see Spine Spikes section) and a tiny claw at the tip if desired.
— Spine Spikes (Make 8 - mix sizes) :
Spike Rounds 1 :
6 sc in magic ring (6)
Spike Rounds 3 :
(1 sc, inc) x 3 (9)
Spike Rounds 4 :
(2 sc, inc) x 3 (12)
Spike Rounds 5 :
1 sc in each st (12)
Spike Rounds 6 :
sl st through to tip and fasten off leaving long tail for sewing
Info :
Make 8 spikes total: three medium (12 sts), three small (9 sts - stop at round 3), and two large (add another inc round to reach ~18 sts if you want larger spikes). Use darker teal for all spikes to mirror the photos. Sew spikes evenly down the back from head base to tail base.
— Horns (Make 2 - cream) :
Round 1 :
6 sc in magic ring (6)
Round 3 :
(1 sc, 1 inc) x 6 (18)
Round 4-6 :
1 sc in each st (18)
Round 7 :
(4 sc, 1 dec) x 3 + 3 sc (15)
Round 8 :
(3 sc, 1 dec) x 3 + 3 sc (12)
Round 9 :
(2 sc, 1 dec) x 3 + 3 sc (9)
Round 10 :
(1 sc, 1 dec) x 3 + 3 sc (6)
Round 11 :
6 sc gently close, fasten off leaving long tail for sewing
Info :
Stuff horns lightly to retain conical shape. Position horns on top sides of head about 4-6 stitches from center crest. Sew with strong thread/yarn and weave tail through to anchor inside head before trimming.
— Wing (Make 2 mirrored wings) :
Round 1 :
With inner light green: ch 11, sc in 2nd ch from hook and across (10)
Round 2 :
Ch1, turn, sc across, inc at edges to create gentle curvature (10)
Round 3 :
Add 2 sc to first and last st of row to fan out (12)
Round 4 :
Ch1, turn, 1 sc in each st (12)
Round 5 :
Switch to main teal color (Info below). Work 1 sc in each st (12)
Info :
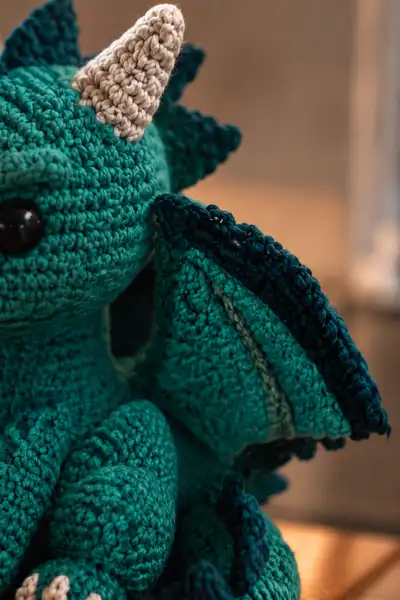
Change to main teal for the remainder of wing. Carry unused yarn or fasten off and rejoin if easier to keep tidy. The inner membrane in photos has a subtle third stripe; optionally add a thin darker line by working a row of slip stitches in a contrasting tone along the fold.
Round 6 :
1 sc in each st, then turn and work along the short edges to create scalloped outer edge: (sc, inc) across first short edge, sc across top edge, (inc, sc) across second short edge (approx 16)
Round 7 :
Work 1 sc in each st BLO to create a ridge at the wing join (16)
Round 8-12 :
1 sc in each st (16) work additional rounds to create desired wing depth (work 5 rounds)
Round 13 :
Edge with darker teal: join dark color along outer edge then (sc, hdc, sc) as a decorative ridge, continue around edge and fasten off leaving long tail for sewing
Info :
Pin the wing to shape on a flat surface before attaching to body; you may want to add a small row of slip stitches in a contrasting color for the inner fold line as seen in photo. Sew the wing base to the body between rounds 8-12 for correct siting.
— Wing Support Ridge (optional, Make 2) :
Round 1 :
ch 10, work sc back along chain to create a narrow ridge, fasten off (9)
Round 2 :
Sew this ridge to the inner curve of the wing to give a slightly raised spine effect (use darker teal)
Info :
These thin ridges add the folded look in the photo. Pin in place and baste before permanent sewing.
— Neck Join & Assembly Prep :
Info :
Before attaching head to body, pin head neck tube to body opening and check alignment with eyes centered above front legs. Use matching yarn and mattress or ladder stitch for invisible seam. Tighten stuffing at neck base if necessary.
— Back & Shoulder Spikes Placement :
Info :
Start spike placement at the top of the skull a few stitches back from horns, then space spikes evenly along center back. For the pictured dragon use 8 spikes: 3 near head (smaller), 3 mid-back (medium), 2 near tail (larger). Sew securely through body and into tail stuffing for stability.
— Finishing Touches & Texture Ridges :
Info :
Create texture on brow area with short surface single crochet ridges across round 10-11 of head. Work small sc bumps between eyes to mimic the sculpted ridge seen in the photo. Use narrow slip-stitch rows along wing edges to define contrasts.
— Assembly Sequence :
Info :
1) Sew legs to body at bottom rounds (see Assembly). 2) Attach tail centrally at lower back. 3) Sew head to body aligning neck tube to body top. 4) Add horns and spikes. 5) Sew wings to body sides and reinforce seams. 6) Add claws and weave ends.
— Extra Decorative Options :
Info :
Embroider nostrils and smile lines with darker yarn if desired. Add small felt blush or fabric paint to cheeks. Use a matte varnish on safety eyes to reduce shine if you prefer a softer look.
This adorable small teal demon dragon is a joy to make and even more delightful to own. Each stitch builds personality — from the rounded snout and big eyes to the contrasting cream horns and layered wing membranes. The detailed assembly gives a sturdy, display-ready finished piece full of charm and texture. 🐉🧶 Share your creation and enjoy every quirky little detail you added!