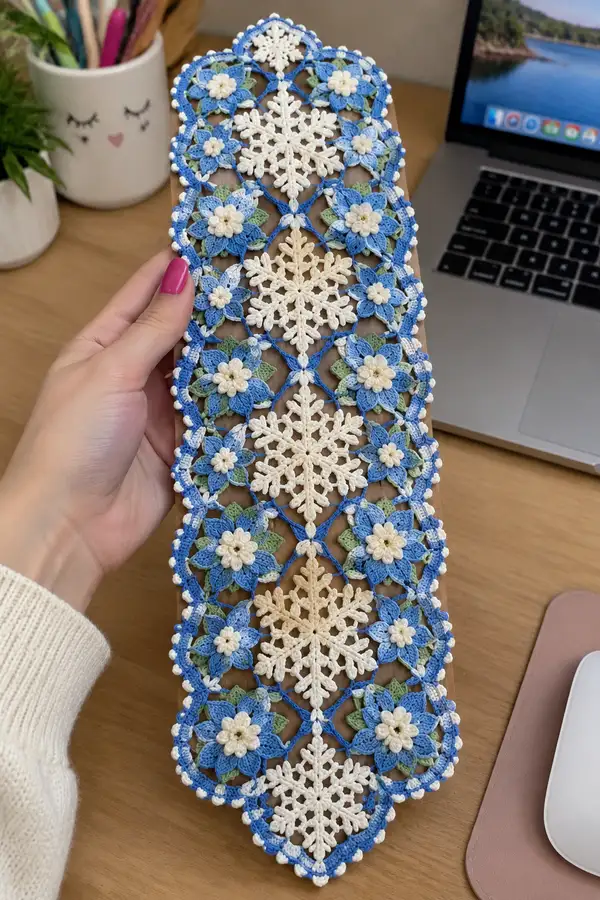
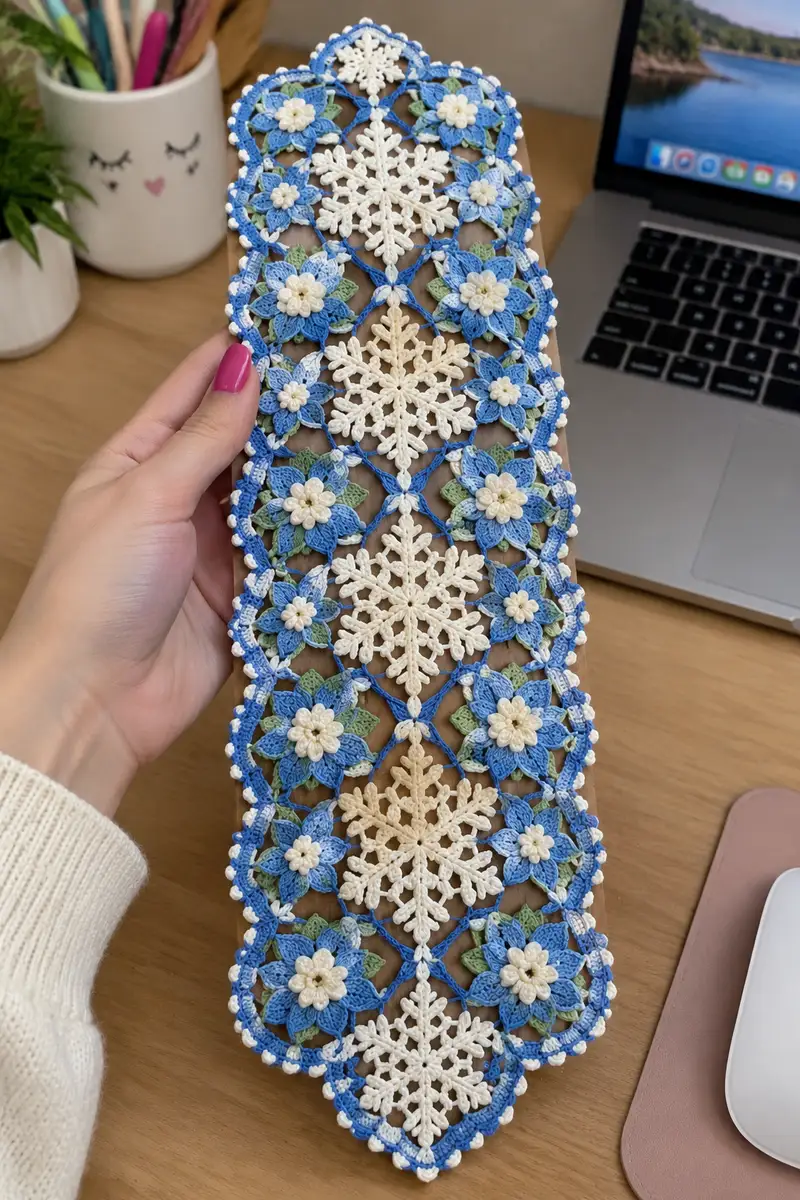
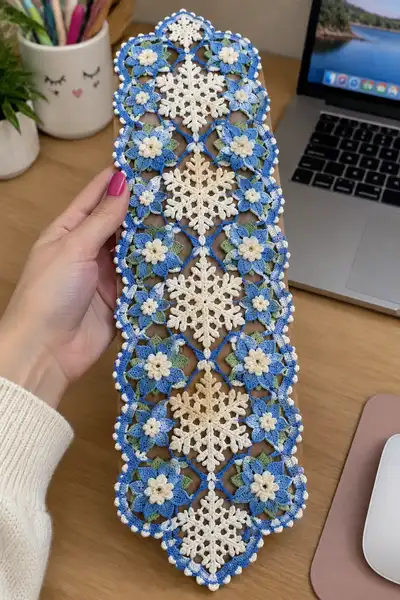
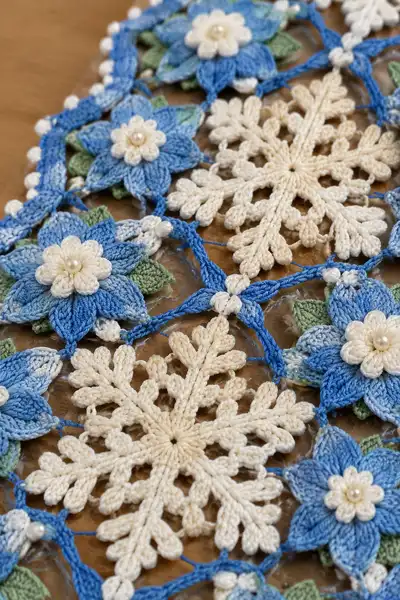
A delicate joined-motif table runner combining lacy snowflake motifs with layered winter-bloom flowers in cool blues, soft cream and sage green. This elegant runner features dimensional petals, embroidered pearl centers, and a scalloped beaded edge — perfect for a festive table or year-round accent. The pattern uses cotton thread for crisp stitch definition and includes step-by-step motif instructions and a full joining and edging guide.
Progress Tracker
0% Complete
— Snowflake Motif :
Round 1 :
Using cream thread. Make mr, ch1, work 12 sc into ring. Pull tight and join with sl st to first sc (12)
Round 2 :
Ch4 (counts as tr), *sk next st, tr in next; ch1; rep from * around to create 6 tr pairs total, join with sl st to top of ch4 (12 tr clusters, 6 ch-1 gaps)
Round 3 :
Into each ch-1 gap: (ch3, 3 dc, ch3, sl st) to form open petal arches - work evenly around creating 6 open arches; join with sl st (visual anchors for branches)
Info :
This round builds the snowflake arms' open structure. Keep stitches loose enough for shaping but even tension for crisp blocking later
Round 4 :
Sl st into center of first arch, ch6 (counts as ch3 + tr), (2 tr, ch3, 3 tr) all into arch center to create a bulky arm base; sl st to base. Repeat into each arch (6 arms)
Round 5 :
Ch3, 2 dc into next st, ch2, 3 dc into next space (work around to start building the first branching row). At end join with sl st (count variable by petals; main visual should show 6 expanded arms)
Round 6 :
Into each arm: *(ch3, sl st into 2nd ch from base to create small loop), ch4, 2 tr cluster separated by ch2, ch4, sl st back to arm center* rep for each arm. This forms inner decorative loops
Info :
At this stage you can pin each arm outward during blocking to ensure uniform length and symmetry. Use a light mist when wet-blocking the motif later
Round 7 :
Switching to textured branch formation: ch1, sc around center circle stitches (approx 12 sc), then work 7-ch loop on each arm tip: *(ch7, sl st into tip space) x 6; join with sl st
Round 8 :
Work picot clusters along each arm: into each ch7 loop work (sc, ch3, sl st in same st) then sl st back to arm base; ensures raised little tips (count ≈7 picots per arm)
Round 9 :
Ch1, sc evenly into the backbone of each arm to make a visible stem: work approx 10 sc per arm moving from arm base to tip, join to finish (total sc ≈60 including center)
Info :
If you want a firmer snowflake, work 1 round of slip-stitch over the stems to compress them slightly; take care not to narrow the arms too much
Round 10 :
Make outer decorative points: at tip of each arm work (ch5, 3 dc, ch5) anchored into tip sc, sl st to next arm to create small bridge between arms; repeat around (creates a 6-point outer ring)
Round 11 :
Ch1, sc evenly around the entire motif including outer bridges and arm backs (expected total sc ≈84). This gives a uniform edge to sew/ join later
Round 12 :
Decorative scallop: *(ch3, sl st in next sc) rep around to form small looped edge; join with sl st (approx 28 loops). Fasten off and weave ends
Info :
Snowflake measures roughly 8-9 cm across when blocked. Block to shape with pins radiating from center to keep even arms. Make an even number of snowflakes to match runner layout.
— Winter Bloom Motif (Layered Flower) :
Round 1 :
Using mid-blue variegated thread. Make mr, ch1, work 10 sc into ring. Pull tight and join with sl st to first sc (10)
Round 2 :
Ch3 (counts as dc), (dc, ch2, 2 dc) into each sc around to create 10 small petal bases separated by ch2 (10 petals total); join with sl st to top of ch3
Round 3 :
Into each ch2 gap work: *(ch3, 3 tr, ch3, sl st) to form puff petal base; repeat for each petal (10 larger arches)
Round 4 :
Switch to darker mid-blue for depth. For each large arch work petal texture: (sl st into arch center, ch1, sc, hdc, dc, tr, dc, hdc, sc) to create a tapered petal with tall center. Repeat around (10 shaped petals)
Info :
Work the petals into the centers of the arches to produce an upright petal shape. Pull center stiches snug but do not flatten petals.
Round 5 :
Round of reinforcement: ch1, sc into top of each petal, sl st into base between petals to stabilize (10 sc)
Round 6 :
Create second petal layer: join variegated light blue into base between any two petals, ch4, (2 tr, ch2, 2 tr) into same base forming small pair-lobed arch; *ch3, sl st into next base* repeat to make 10 secondary lobes that sit between main petals
Round 7 :
Work textured edging on second layer: Into each small lobe work (sc, ch3, sc) to create tiny pointed shapes; join end. Fasten off color if switching to cream center next
Info :
Petal shaping: pinch the petal bases slightly while wet-blocking to get a cup-shaped bloom. Use a bit of starch if you want petals very stiff.
Round 8 :
Switch to sage green. Add leaf layer: attach in space behind each main petal and work (mr or ch6 closed into loop, sc 8 into loop, sl st to base) to make 10 flat leaves. Flatten and shape leaves using BLO for a rib effect if desired
Round 9 :
Leaf detail: Into each leaf do BLO 1 sc in each st around (8 sc per leaf) to produce a defined ridge; join and fasten off leaves (80 sc total across leaves)
Round 10 :
Center rosette: Using cream thread, in flat area of flower make mr, ch1, 6 sc, pull closed and do 2 rounds of small popcorn-like petals. Round 1: 6 sc in ring (6). Round 2: (ch2, 3 dc in same st, ch2, sl st in next) around forming 6 tiny rosette bumps. Fasten off leaving long tail
Info :
Sew the cream rosette to the center of the flower and stitch a pearl bead at the center. Use small sewing thread and secure bead through the rosette to back with a knot and weave ends.
Round 11 :
Reinforce bloom base: with mid-blue, work sc evenly around entire bloom and leaf join points to create a circular base (approx 60 sc). This base will be used to join blooms together and to connectors
Round 12 :
Edge loop round: *(ch4, sl st in next sc) repeat around to create decorative connecting loops. Fasten off and weave ends
Info :
Each completed flower motif measures approx 6.5-7 cm across. Make the number required to alternate with snowflakes in your runner layout. Keep consistent flower orientation when joining to make the petals face the same way.
— Small Central Rosette (Optional filler) :
Round 1 :
Using cream thread. mr,ch1,6 sc into ring. Join (6)
Round 2 :
Ch2, 3 dc in same st, sl st in next; repeat around to create 6 tiny lobes. Fasten off (visual center used as small fillers between motifs)
Info :
Use these rosettes to fill small gaps where motifs form triangular voids at joins for a polished look. Sew in place with tiny whipstitches and weave ends behind motif.
— Leaf Motif (Separate, small) :
Round 1 :
Using sage green. ch8, sc in 2nd ch from hook, hdc, 2 dc, tr, 2 dc, hdc, sc, sl st to last ch to form a single leaf shape; fasten off (1 leaf). Make at least 2 leaves per flower
Round 2 :
Optional ridge: join in BLO and work sc around leaf center to create vein (7 sc). Fasten off
Info :
Tack leaves to the back of the bloom base with a few secure stitches so they peek out slightly, matching direction of neighboring leaves for a natural look.
— Connector Segment (Small Diamond Join) :
Round 1 :
Using mid-blue for connectors. ch12, sl st into first to form loop. This loop will become the small ring that sits between motifs (counts as 1 connector)
Round 2 :
Into loop: ch1, 10 sc evenly into loop, sl st to first sc (10). Leave long tail to sew when joining motifs
Round 3 :
Work 4 tiny picot beads: *(ch3,pic, sl st) spaced evenly around loop to create small decorative bumps; fasten off
Info :
These small diamond joins appear between snowflakes and blooms to create the lattice structure. Make many — roughly one small connector for each space between motifs in layout.
— Joining Motifs (Technique and Order) :
Info :
Blocking and laying out motifs is critical. Arrange motifs on blocking board following the pictured repeat: alternating snowflake and bloom motifs in vertical columns, with small connectors forming diamond-shaped joins between them. Pin motifs to size. Plan join points: each motif has 6 edge join points roughly evenly spaced around its perimeter — these will correspond to connectors or neighboring motifs.
Round 1 :
Start by placing a central column of snowflake motifs (or the center motif of your runner). Align edges and use mid-blue thread and a 1.5mm hook to join motifs by visible loops: place motif A and B face-up, insert hook through edge loop on motif A, pull mid-blue thread from motif B loop and sl st to tie them; continue across points to create a chain of sl st joins through both motif loops. Each sl st counts as a join stitch; join 6 points between adjacent motifs where they meet.
Round 2 :
Where three motifs meet (triangular gap), add the small rosette or connector loop. Slip-stitch connector to each motif's edge loop (3 sl st anchors) then secure with hand-sewn whipstitch for extra strength. Repeat across runner assembly
Info :
When joining, work from the front so sl sts show as neat loops. Keep join tension slightly looser than body stitches to avoid pulling motifs inwards. If you prefer invisible join, use sewing needle and mattress stitch on motif bases.
Round 3 :
For corner and scalloped edges, leave edges unjoined where the border will be attached. Use temporary pins to hold motifs in final position before permanent joining.
— Scalloped Outer Border and Bead Loops :
Round 1 :
Using mid-blue, with motifs joined and laid flat, work along outer edge of runner: join yarn in any outer edge stitch, ch1, sc 3 into same st, *skip 2 sts, 5 dc shell into next st, skip 2 sts, sc into next st* repeat to create scallops around entire perimeter. The number of scallops equals number of outer edge segments (approx 24 scallops on pictured runner)
Info :
Keep shells evenly spaced. If your runner has more or fewer edge segments, adjust skip counts slightly to maintain even spacing and symmetric ends.
Round 2 :
Edge picot row: In each shell's center work (ch3, sl st into base) to form shallow picots around the scallop points; fasten off mid-blue
Round 3 :
Switch to cream for bead loops: join cream at base of each scallop point and ch6, sl st 3rd ch from hook to create a small loop then sc into base to tack. Repeat for every scallop point (approx 24 cream loops)
Round 4 :
Optional bead sewing: using fine sewing thread, sew small pearl bead into the outermost point of each cream loop or onto the center rosette of each flower. This adds a polished, beaded look
Info :
Bead placement: Sew beads with 2-3 passes of fine thread and secure with a knot buried into motif back. Add a drop of fabric glue if you want extra security, but allow to dry before pressing.
— Edge Reinforcement and Final Decorative Round :
Round 1 :
With mid-blue, work one final round of sc evenly around the entire outer edge catching the scallop bases and cream picot anchors; expected total sc approx 120 depending on runner length
Round 2 :
Final bead scallop: into every 5th sc work (ch3, picot, sl st) to create tiny beaded points. Fasten off and weave ends through the back; trim flush
Info :
This final round ensures the edge is neat and consistent. Take care to count stitches and keep even spacing for a professional finish.
— Blocking, Pressing and Finishing Touches :
Info :
Wet-block the entire runner after all joins and bead attachments. Pin carefully to the blocking board to accentuate scallops and snowflake arms. Allow to dry completely. Use low heat steam pressing (through a pressing cloth) for final setting if desired. Weave in and secure any remaining ends at the back of the runner, and trim excess threads close to fabric to avoid visibility through lace spaces.
Info :
Optional sheen: a light mist of diluted fabric stiffener can be used to make snowflakes and petals crisper if the runner will be used flat and not for frequent handling. Test on scrap first.
This elegant snowflake and winter bloom runner blends lacy snowflake motifs with layered, petaled flowers for a classic, handcrafted accent. Each motif is designed to showcase threadwork and dimensional texture, culminating in a scalloped, beaded edge that gleams with tiny pearls. The step-by-step joining and blocking guidance ensures a flat, professional finish worthy of display. 🧶❄️ Add a cup of tea and a quiet afternoon, and enjoy bringing this runner to life stitch by stitch. 🌿✨