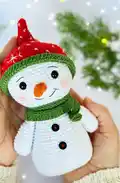
About This Snowman Amigurumi Pattern
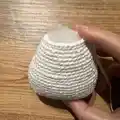
This pattern creates a delightful little snowman amigurumi complete with hat, scarf, carrot nose, and button details. You will crochet the entire body in rounds and add simple sewn-on accessories for personality. The pattern uses basic stitches with a few shaping rounds for a sweet, rounded shape.
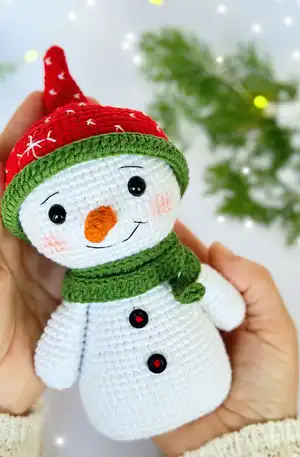
Perfect as a handmade gift or holiday decoration, the finished doll measures approximately 15 cm using the recommended yarn and hook. The instructions include placement notes for eyes, nose, and assembly tips.
Why You'll Love This Snowman Amigurumi Pattern
I absolutely love this pattern because it combines classic amigurumi shaping with playful holiday details that bring the snowman to life. I enjoy how quickly the body takes shape and how satisfying it is to add the hat and scarf for instant personality. The embroidered face seam makes each expression unique and charming, and the pattern is forgiving enough to customize. Making several in different color combinations is one of my favorite holiday projects.
Switch Things Up
I love to customize this snowman by changing the hat and scarf colors to match my holiday decor. Using pastel shades gives it a soft, whimsical look while bright reds and greens make it festive.
I sometimes substitute a thicker yarn and larger hook to make a chunky, cuddly version; switch to thinner yarn and a smaller hook for miniature keychain-sized snowmen.
I often add embroidered eyelashes or freckles for a different facial expression; experiment with placement of the eyes and smile before securing them permanently.
I like to replace the safety eyes with French-knotted eyes or embroidered eyes for a handmade, child-safe toy suitable for small children.
For a rustic look I add a tiny bell or wooden button to the scarf or body; you can sew on tiny beads or sequins for sparkly accents.
Try making a family set in graduated sizes by adjusting yarn weight and hook size so they can be displayed together as a seasonal scene.
I sometimes make removable outfits — a tiny crocheted coat or mittens — to add play value and variety to the design.
If you want posable arms, consider inserting a small wire armature inside the arm before stuffing, then finish the ends so the wire is enclosed safely.
I recommend trying simple surface embroidery on the hat to create stars or snowflakes as shown; white sewing yarn works well for crisp contrast on a colored hat.
Finally, I often gift them with a small loop at the hat top so they can double as tree ornaments — just reduce the stuffing a bit to keep them lightweight.
Common Mistakes & How to Fix Them
✗ Skipping stuffing as you go will cause difficulty closing the piece neatly; stuff a little at a time during shaping so you maintain the correct form and avoid lumps.
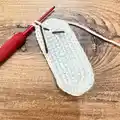
✗ Forgetting to change color exactly at the instructed round in the hat will make the brim uneven; switch to green yarn at the end of round 21-30 as shown and work the next rounds carefully.
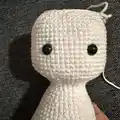
✗ Placing safety eyes too high or too low alters the face proportion; attach the eyes to the 43rd and 44th rows, 9 stitches apart for correct placement.
✗ Not crocheting the arm edges together will create an open seam; follow the instruction to crochet the two edges together at the same time before sewing the arms to the body.