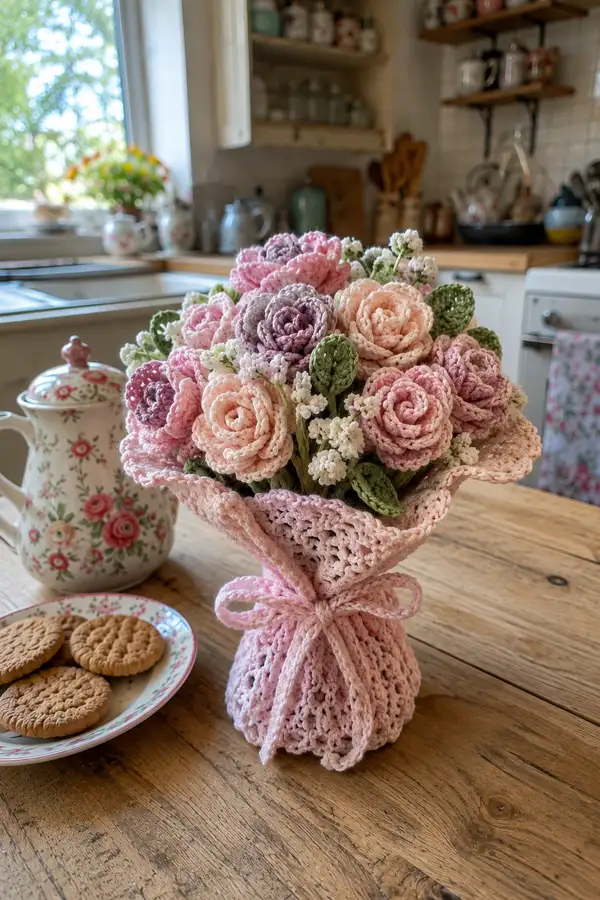
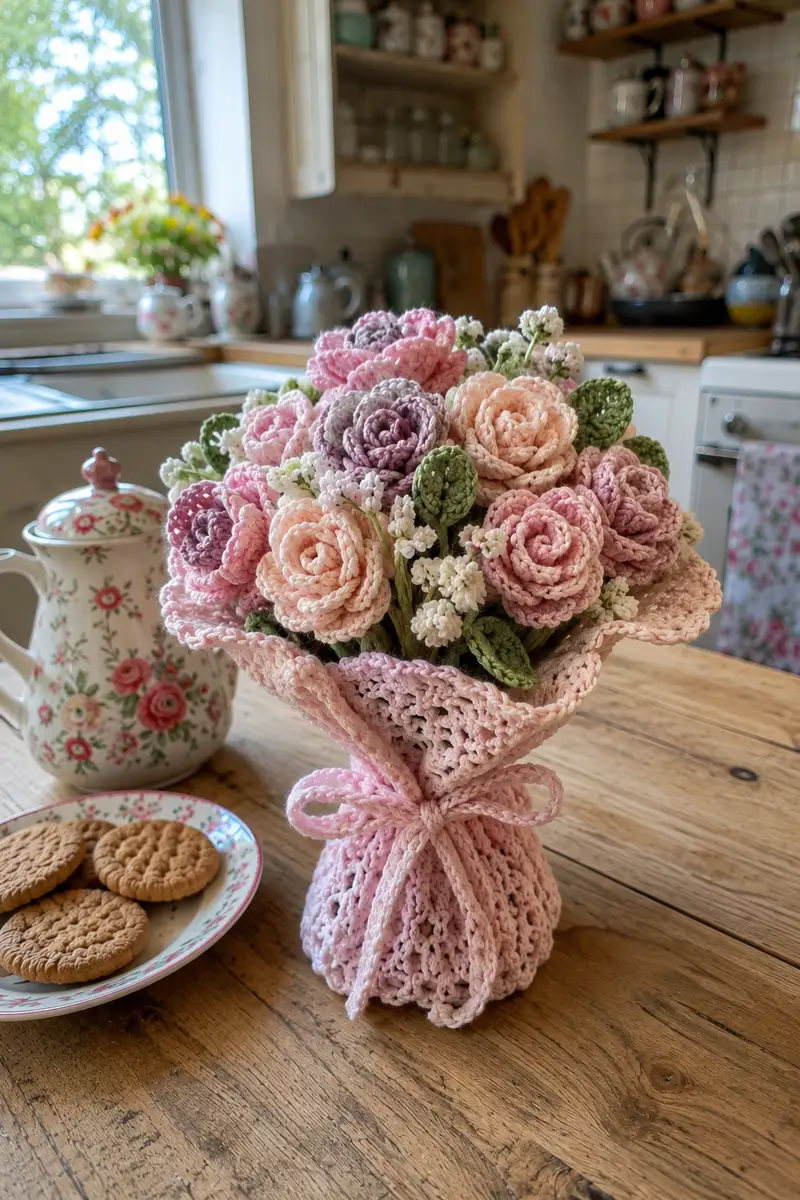
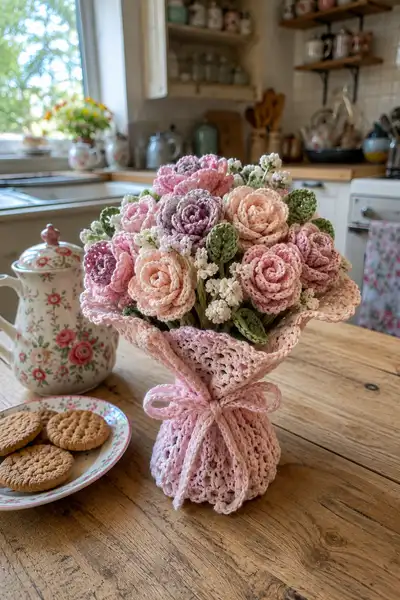
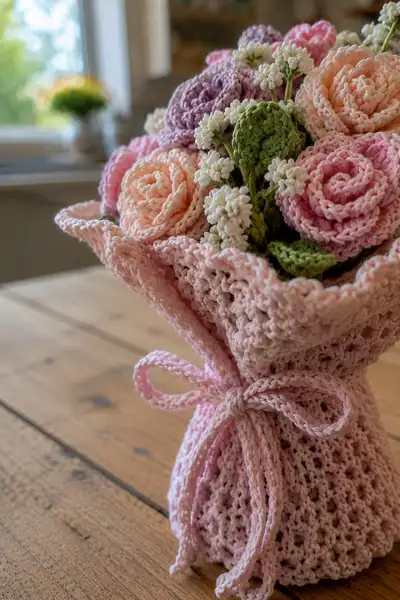
Create a soft pastel bouquet of crochet roses, delicate filler blooms and leaves, all gathered into a lacy crochet wrap. This pattern recreates the layered rosettes, textured green leaves, tiny white filler clusters and a pretty pink lacy wrapper shown in the photos. Perfect for gifts, home decor, or everlasting arrangements.
Progress Tracker
0% Complete
— Rose Bloom (Make 10–12 roses in assorted colors) :
Info :
Each rose is worked as a layered circular bloom with a small center disk followed by successive petal rounds. The result is a compact rosette that is then lightly coiled and sewn to hold the rose shape. Make 10–12 blooms in mixed pastel colors to match the photo composition.
Round 1 :
6 sc in magic ring (6)
Round 3 :
(1 sc, 1 inc) x 6 (18)
Round 4 :
(2 sc, 1 inc) x 6 (24)
Info :
These first rounds form a small central disk. Keep tension even and do not over-tighten the magic ring so the center lays flat.
Round 5 :
(3 sc, 1 inc) x 6 (30)
Round 6 :
(4 sc, 1 inc) x 6 (36)
Round 7 :
(5 sc, 1 inc) x 6 (42)
Info :
Now you have a nice circular disk with 42 stitches; these will act as anchor stitches for the first petal layer. Use a stitch marker to mark round starts and keep placement consistent for each petal group.
Round 8 :
1 sc in each st (42)
Round 9 :
Work petal anchors: *sc in next 3 sts, skip 1; rep from * around (approx 32 sc anchors remaining but maintain even spacing) (42)
Info :
This round prepares anchor points for 12 evenly spaced petals. For a neat result divide 42 sts into 12 groups (3 or 4 sts per group) and mark the beginning of each group with a safety pin or marker.
Round 10 :
Petal round 1: *(ch3, 3 dc in next anchor st, ch2, sl st into next marked anchor) x 12 (keeps 42 base anchors)
Info :
Petals are formed on top of the base disk and do not alter the base stitch count. Make sure each shell (3 dc) sits centered over its anchor stitch so petals radiate evenly.
Round 11 :
Petal shaping round: Working behind the petals, sl st to base behind the first shell, *(ch4, dc3 in the top of the next shell, ch3, sl st into base behind next shell) x 12
Round 12 :
Edge finish: *sl st along base to between petals, (picot, sl st) into valley between shells x 12 — fasten off color if changing (petal edge finished)
Info :
At this point you have a single layer of petals. For deeper, fuller roses repeat the petal sequence to add additional petal rows which will overlap slightly. Change colors between layers if desired by fastening off and joining a new color at the next petal anchor.
Round 13 :
Join a new pastel shade at back of work for second petal layer; sl st to between first-layer petals then *(ch3, 4 dc in the valley behind a first-row shell, ch2, sl st into next valley) x 12
Round 14 :
Continue shaping second layer petals: *sl st to back, (ch5, dc5 in center of second-layer petal, ch3, sl st) x 12 — fasten off color or continue
Info :
Add a third petal layer if you want very full roses. The photo shows several roses with 2–3 petal layers. When adding layers, offset the petals so they nestle between the previous layer's petals to create a natural spiral.
Round 15 :
Optional third layer (join new color): sl st to placement behind second-row shells then *(ch4, tr3 around the post of a second-row shell, ch3, sl st) x 12
Round 16 :
Finish petal edges: *working in front loops of last petal layer, sc evenly around the outer edge, placing 2 sc in each shell top where needed to create a scalloped outer edge (approx 72 sc)
Info :
Fasten off and leave a long tail (20–30 cm) for stitching the bloom into a spiral. If you prefer, you can instead work the rose as a long petal strip (alternative method described in notes) but this flower method yields small, tidy rosettes suitable for a compact bouquet.
Round 17 :
To create a slightly cupped shape, using the same color: join at the back of a petal row and work 1 rnd of BLO sc: 1 sc in each st BLO (72)
Round 18 :
Fasten off leaving long tail for coiling and sewing into bloom. Lightly steam or pin the petals to open their curve if desired.
Info :
Assembly for each rose: Lay the blossom flat with the wrong side facing up. Starting at the center, coil the blossom tightly so inner petals form the center; stitch along the base through the petal anchors using the long tail. Secure end with several backstitches and bury the tail. For larger roses, add a small circle base (6–12 sc circle) to help secure the coiled back and attach stem.
Round 19 :
Optional base disc for sewing stem: mr, 6 sc (6)
Round 21 :
(1 sc, inc) x 6 (18) — fasten off leaving long tail to sew under rose as a finishing base
Info :
Repeat the bloom sequence to make the number of roses desired (the pictured bouquet contains approximately 10–12 medium blooms and several smaller buds). Use slightly smaller blooms for corner and filler positions by stopping at Round 12 and rolling more tightly.
— Leaf (Make 12–16 leaves) :
Info :
Leaves are simple crocheted motifs worked in rows to form an elongated teardrop shape. Use green yarn. Leaves are attached to stem wire or stems directly by sewing or wrapping.
Round 1 :
Ch 9, sc in 2nd ch from hook and across (8 sc)
Round 2 :
Ch1 turn, (1 sc in next 2 sts, hdc in next 2 sts, dc in next 2 sts, hdc in last st) across (8)
Round 3 :
Ch1, turn, sc across back side of foundation chain to form edge (8)
Round 4 :
Edge shaping: Sl st to first stitch, *sc, (ch3, sl st into base two sts back) across the pointed end to make little serrations, then sc back along the other side — fasten off (about 16 total edge stitches)
Info :
For a more three-dimensional leaf, work one round of HDC along one long side only and then fold slightly and tack down the center with stitches to create a vein. Leave a long tail for attaching to the stem wire.
— Stem (Make 10–12 stems) :
Info :
Each rose is mounted on a length of floral wire wrapped with yarn. Crocheting a narrow tube around wire creates a neat stem that hides the wire and provides a place to attach leaves and filler. You can also work stems by chaining and slip stitching around wire for a flatter stem. The method here makes a tubular stem using sc rounds.
Round 1 :
Wrap yarn around wire tail then mr with the wire in center: 6 sc in magic ring around wire (6)
Round 2 :
6 inc (12) — this creates a slightly larger tube to accommodate the wire comfortably
Round 3-20 :
1 sc in each st (12) — work as many rounds as needed to reach desired stem length (approx 15–25 cm); for very long stems work up to 40 rounds
Info :
After a short length (3–4 cm), wrap floral tape or work a small overlap of yarn to secure the wire while you continue crocheting. Stuffing is not necessary since the wire provides structure; if you prefer a softer stem, push a thin rope of fiberfill into the tube before continuing rounds but keep it minimal.
Round 21 :
Gradual taper for end: (2 sc, 1 dec) x 4 (9)
Round 22 :
(1 sc, 1 dec) x 3 (6)
Round 23 :
Fasten off leaving long tail to sew to underside of bloom base; secure wire end by folding it back and wrapping with extra yarn and a drop of fabric glue or a few tight stitches.
Info :
Once stems are complete, attach leaves by wrapping their long tail around the stem and stitching through the stem tube or use floral tape to secure in place. Add floral tape over the join to give a natural look.
— Small Baby-Breath Filler Clusters (Make 8–12 sprigs) :
Info :
The tiny white clusters are worked as short stems with tiny multi-loop blossoms created by chain-popcorn clusters or picot star clusters. They sit between the roses to add texture and a delicate feel.
Round 1 :
Make a short stem: work as for stem Rounds 1–6 but stop short (6 sc tube for 6–8 cm) — leave long tail for attaching to bouquet
Round 2 :
At top of stem, make cluster bases: ch2, *(5 sc in same st, sl st in next) x 3–6 along the top of stem to create tiny bobble clusters* — fasten off white yarn leaving tail
Info :
To make clusters even smaller, use 2.5mm hook and shorter loops: ch2, (3 sc in same st) for an ultra-fine baby's-breath look. Group multiple tiny clusters along one stem for a natural spray.
— Lacy Wrap (Bouquet Sleeve) :
Info :
The wrap in the photo is a lacy, scalloped cylinder worked flat or in joined rounds then gathered at the base. This pattern uses a circular shell lace worked in rounds to achieve the look. Make the wrap in a matching soft pink cotton to frame the bouquet.
Round 1 :
Foundation: ch 48, join in a ring being careful not to twist (48)
Round 2 :
Ch3 (counts as dc), dc in same st, *ch2, skip 2, (2 dc, ch2, 2 dc) in next st (shell), skip 2, dc in next st; rep from * around — join (48 shells/arches varying by spacing)
Info :
This round builds the first row of shells; adjust your initial chain length so round repeats land evenly. The pattern is tolerant; if your stitch count slightly varies you will still get a lovely lace effect.
Round 3 :
Ch1, sc in top of shell, *ch3, sc in center of next shell, ch3, sc in top of next shell; rep from * around — join (48)
Round 4 :
Ch3, dc2 in same st, *ch2, (3 dc, ch2, 3 dc) in ch-space across (creates taller shells), ch2, dc3 in next top; rep from * around — join
Round 5 :
Repeat Round 3 to keep lacy spacing even (this establishes one lace unit). Continue repeating Round 4 then Round 3 for 8–10 lace repeats total until wrap height reaches approx 12–14 cm (or desired bouquet sleeve height).
Info :
Adjust height by adding or subtracting repeats; heavier yarn or larger hooks will increase final height and width — keep proportions that will wrap comfortably around the gathered stems with the top flared.
Round 6-20 :
Repeat lace unit (Round 4 and Round 3 sequence) until wrap height is reached (approx 8–12 repeats depending on yarn) — finish with one round of sc for stable top edge
Round 21 :
Top scallop: *sl st to space, (5 dc, sl st in same space) in every other ch-space across to form a pronounced scallop at top edge; fasten off and weave ends
Info :
Make a matching drawcord: chain about 120–160 cm using the same yarn and a 3.0mm hook or make a braided cord from three lengths of chain. Use the drawcord to tie the wrap around the stems and create the bow seen in the image.
Round 22 :
Optional inner lining: If you prefer a stiffer wrap, cut a small circular base of stiff felt to fit inside and sew or glue to the bottom edge. Alternatively line with a slip of neutral cotton to help keep shape.
— Bow / Drawcord :
Round 1 :
Make cord by chaining 120 (or desired length) ch, fasten off and weave in ends — or make i-cord by working 3 sc in each ch back across to form tubular cord
Round 2 :
Alternatively braid three chains of 80 each to make a thicker romantic bow tie
Info :
Tie the cord around the wrap at the narrow point of the gathered stems and form a neat bow. Leave long tails to mimic the photo's long trailing ends.
— Assembly :
Info :
Assembly is simple but benefits from planning: lay roses, filler and leaves on a flat surface and move them until you like the composition. The photos show a loose dome of roses with filler tucked between and leaves around edges. Use floral tape to build small clusters then join clusters together and anchor in the wrap.
Round 1 :
Prepare stems: For each rose, bring the long tail from bloom base and sew the base disc or underside of the bloom to the top of the stem tube securely with several passes; knot and bury tail inside the stem tube.
Round 2 :
Cluster building: Start by making 3–4 small clusters using 3–4 roses with one or two filler sprigs and a leaf or two. Wrap the cluster stems tightly with floral tape 3–4 cm below blooms to hold fixed positions.
Round 3 :
Arrange clusters into the final bouquet: add clusters together forming a rounded dome. Adjust heights so outer roses sit slightly lower and center roses sit highest for a natural rounded bouquet.
Round 4 :
Insert additional filler clusters to fill gaps using the tiny white sprigs; secure with tape and position leaves to frame the bouquet as shown in the photos.
Round 5 :
Place the lacy wrap around the assembled stems: slide wrap over the bloom heads (if wrap has a top flared edge) or gather stems and insert upward into wrap. Gather the bottom and tie with the cord to create the narrow base and flared top.
Info :
Final adjustments: Once wrapped and tied, trim stems to even lengths at the bottom, tuck any exposed wire back into the tube or cover with floral tape, and shape petals and leaves until satisfied.
Round 6 :
Optional base: If you want the bouquet to stand, secure a small round foam piece into the wrap base and anchor stems into it for a freestanding display.
Info :
Weave in all ends at this stage and clip any stray threads. Lightly steam the bouquet from a distance if you want to open petals slightly and set the shape (test steam on a scrap first to avoid flattening).
This charming crochet bouquet turns simple stitches into a keepsake of soft pastel roses and delicate greenery. Each bloom is carefully layered and the lacy wrap ties everything together with a romantic bow. The finished bouquet is a beautiful everlasting gift and centerpiece that will brighten any room. 🌸🎀 Handcrafted with love, every stitch tells a story—enjoy the slow, satisfying process of creating your own floral arrangement. 🧶