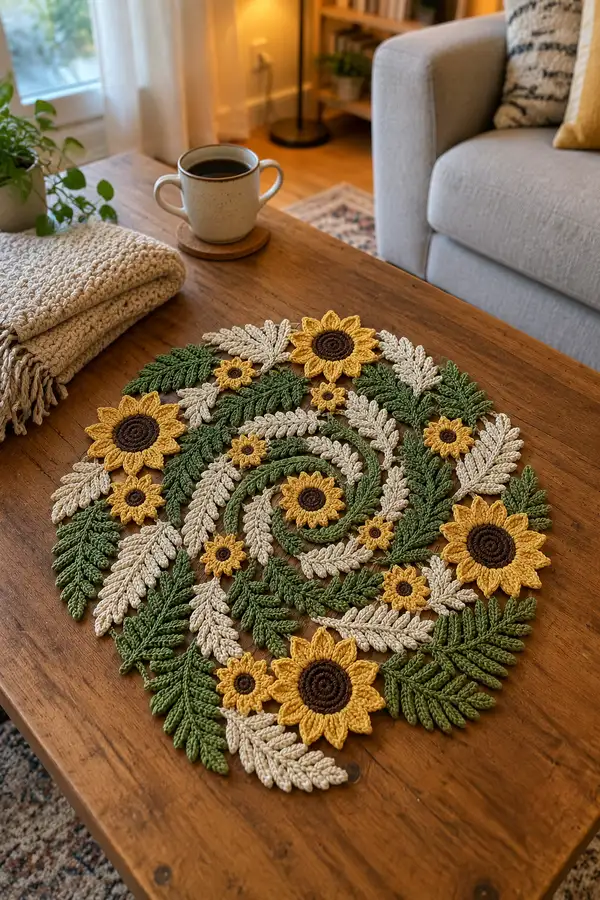
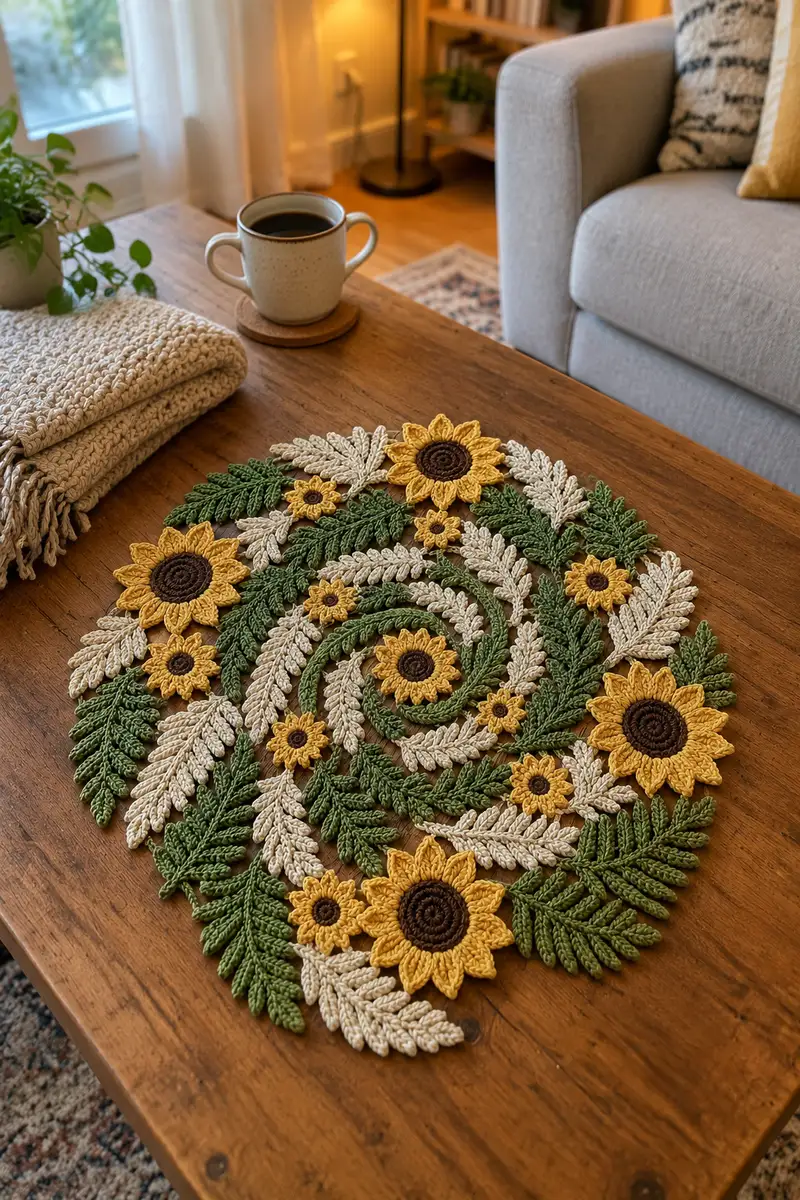
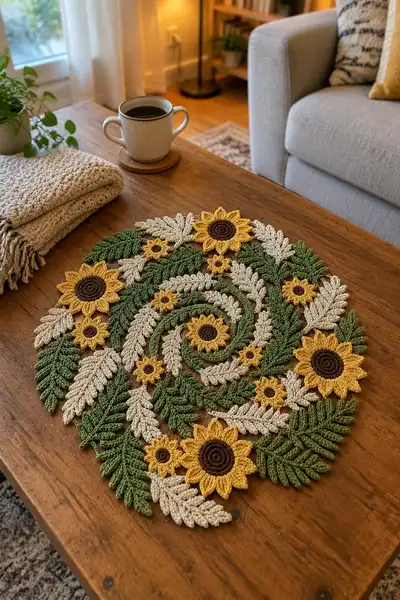
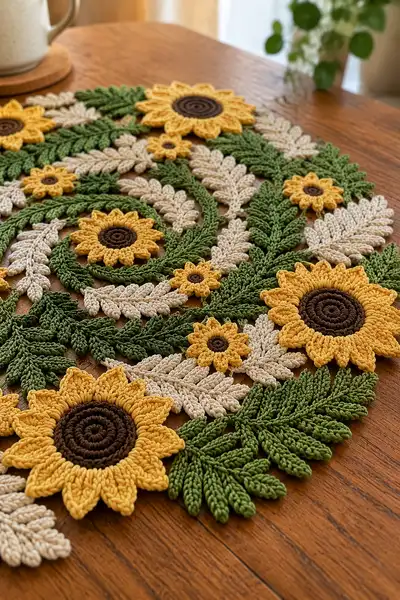
Create a stunning spiral sunflower table centerpiece featuring layered sunflower motifs, fern-like leaves and wheat-colored accents. This flat, decorative centerpiece sits beautifully on coffee tables or dining tables and showcases textured petals and raised leaf motifs in warm gold, deep brown and soft cream. The design is modular — crochet separate flowers and leaves and assemble into a flowing spiral arrangement. Detailed stitch-by-stitch instructions and assembly notes guide you through every motif and join.
Progress Tracker
0% Complete
— Spiral Base :
Round 1 :
6 sc in magic ring (6)
Round 3 :
(1 sc, 1 inc) x 6 (18)
Round 4 :
(2 sc, 1 inc) x 6 (24)
Round 5 :
(3 sc, 1 inc) x 6 (30)
Info :
The spiral base is worked in continuous rounds without joining to create a smooth curve. Use stitch marker at the first stitch of each round and move it up as you work to keep the start point consistent.
Round 6 :
(4 sc, 1 inc) x 6 (36)
Round 7 :
(5 sc, 1 inc) x 6 (42)
Round 8 :
(6 sc, 1 inc) x 6 (48)
Round 9 :
(7 sc, 1 inc) x 6 (54)
Info :
Change to olive green now if you prefer the spiral to be colored. For the pictured design, the spiral alternates olive green and cream coils. Carry the unused color inside the spiral if you plan to switch frequently, or fasten off and rejoin each color for crisp edges.
Round 10 :
(8 sc, 1 inc) x 6 (60)
Round 11 :
(9 sc, 1 inc) x 6 (66)
Round 12 :
(10 sc, 1 inc) x 6 (72)
Info :
From this size onward you can create a narrow coil look by working the next two rounds in BLO to create a slight ridge. This gives the spiral more definition when other motifs are sewn on top.
Round 13 :
1 sc in each st BLO (72)
Round 14 :
(11 sc, 1 inc) x 6 (78)
Round 15 :
(12 sc, 1 inc) x 6 (84)
Round 16 :
(13 sc, 1 inc) x 6 (90)
Info :
To form a long oval spiral rather than a perfect circle, increase slightly more on one side. For the photographed oval, I worked an extra increase every 3rd segment along rounds 16-20 to bias the circle into a gentle oval. If you want a perfect circle, continue regular increases as shown.
Round 17 :
(14 sc, 1 inc) x 6 (96)
Round 18 :
(15 sc, 1 inc) x 6 (102)
Round 19 :
(16 sc, 1 inc) x 6 (108)
Round 20 :
(17 sc, 1 inc) x 6 (114)
Info :
At this point the spiral base has plenty of surface to host motifs. If you want a tighter, more defined single-coil spiral, fasten off and create a thin cord by chaining and slip-stitching around the outer edge and sew it in a spiral pattern atop the circle. For the swirled look, continue expanding to create more surface.
Round 21 :
(18 sc, 1 inc) x 6 (120)
Round 22 :
(19 sc, 1 inc) x 6 (126)
Round 23 :
(20 sc, 1 inc) x 6 (132)
Round 24 :
(21 sc, 1 inc) x 6 (138)
Round 25 :
(22 sc, 1 inc) x 6 (144)
Info :
If following the photo exactly, stop expanding when your circle measures approximately 10-12 inches across; the finished centerpiece is formed by layering additional motifs on top so the base need not be much larger. Measure against a coaster or mug to check scale.
Round 26 :
(23 sc, 1 inc) x 6 (150)
Round 27 :
(24 sc, 1 inc) x 6 (156)
Round 28 :
(25 sc, 1 inc) x 6 (162)
Round 29 :
(26 sc, 1 inc) x 6 (168)
Round 30 :
(27 sc, 1 inc) x 6 (174)
Info :
Fasten off and weave in ends. If you prefer a thinner spiral, you can construct a separate cord and spiral it into place on top of this base. Leave the base as a foundation to pin motifs on during assembly.
— Large Sunflower Center (make 4) :
Round 1 :
6 sc in magic ring (6)
Round 3 :
(1 sc, 1 inc) x 6 (18)
Round 4 :
(2 sc, 1 inc) x 6 (24)
Info :
These centers are worked in dark brown. Keep tension slightly firm to give a compact, slightly domed look. Make 4 large centers for the main sunflowers.
Round 5 :
(3 sc, 1 inc) x 6 (30)
Round 6 :
1 sc in each st (30)
Round 7 :
1 sc in each st BLO (30)
Round 8 :
1 sc in each st (30)
Info :
If you want a slightly raised spiral texture in the center, work rounds 6-7 in BLO as shown; this creates a ridge that reads like seed texture beneath the yellow petals. Fasten off and leave a long tail for sewing petals around the edge.
— Large Petal Unit (attach 12 petals to each large center) :
Info :
Each petal is worked separately and then slip-stitched around the center's outer edge. Make 12 petals per large sunflower for the full look; you can make 10 for a slightly more open look. Petals use gold/mustard yarn.
Petal Round 1 :
Ch 8, sc in 2nd ch from hook, hdc in next, dc in next 3 sts, hdc in next, sc in last, sl st into petal base to form a teardrop petal (total: 7 sts along chain)
Petal Round 2 :
Work on the opposite side of chain: sc in first, hdc in next, dc in next 3 sts, hdc in next, sc in last, sl st to center ring to secure (petal completes)
Petal Round 3 :
Join gold at petal base space: ch1, sc around petal edge working 2 sc in the tip to give a pointed look, sl st to join (7 sc)
Info :
For fuller petals, work an extra round of sc around the petal, placing 2 sc at the tip and at the base to fan the petal outward. Pin each petal evenly spaced (12 around) then sew in place using long tail.
Petal Round 4 (optional fullness) :
1 sc in each st around petal (increase at tip and base: add 2 sc in each) (approx 12 sc)
Info :
Repeat petal process 12 times and attach around the outermost round of the brown center, spacing evenly. Make sure petals overlap slightly so no center is visible between them when assembled.
— Small Sunflower Center (make 6) :
Round 1 :
6 sc in magic ring (6)
Round 3 :
(1 sc, 1 inc) x 6 (18)
Round 4 :
1 sc in each st (18)
Info :
These small centers are the inner cores for the tiny sunflowers in the swirl. Work them tightly and fasten off leaving a long tail for attachment.
— Small Petal Unit (attach 8 petals to each small center) :
Petal Round 1 :
Ch 6, sc in 2nd ch from hook, hdc in next, dc in next 2, hdc in next, sc in last, sl st to join (5 ch-based sts)
Petal Round 2 :
Work opposite side back along chain repeating sc, hdc, dc x2, hdc, sc. Sl st into base to secure.
Info :
Make 8 small petals per small center and attach evenly. Pin the small flowers into positions inside the spiral. These fill the gaps and emphasize the swirl pattern.
— Fern Leaf (Olive Green) (make 14-18) :
Round 1 :
Ch 16, sc in 2nd ch from hook and in next 3 ch, hdc in next 2 ch, dc in next 4 ch, hdc in next 2 ch, sc in last 3 ch (total 16 sts across chain)
Round 2 :
Turn and work along opposite side of foundation chain: sc in first 3, hdc in next 2, dc in next 4, hdc in next 2, sc in next 3; sl st to join at base (16)
Round 3 :
Working along leaf edge: ch1, sc in first st, *ch2, skip next st, sc in next st* rep across to create scalloped leaflet edge, sl st to base
Info :
To get the raised ribbed look, work alternating rows of front post hdc and back post hdc along the spine on larger leaves (starting on round 4). This creates texture similar to the leaves in the photo.
Round 4 :
Working in BLO along the spine: *FLO hdc in next 2 sts, BLO hdc in next 2 sts* rep across to create gentle ribbing (16)
Round 5 :
Reduce length slightly by placing a dec at the tip: (sc2tog) at tip center, then sc around remainder to shape (15)
Round 6 :
Fasten off leaving tail for sewing. For larger leaves repeat increase chain length by 4 and follow same shaping rounds to make bigger leaves.
Info :
Make 14-18 fern leaves in olive green. Vary sizes by changing foundation chain length: 12-20 chain for small to large leaves. Block flat for a defined feathered look before assembly.
— Wheat / Cream Leaf (make 10-12) :
Round 1 :
Ch 18, sc in 2nd ch from hook, sc in next 4, hdc in next 3, dc in next 6, hdc in next 3, sc in last 1 (total 18)
Round 2 :
Turn and sc across opposite side of chain matching stitch type to create symmetrical leaf edge, sl st to join (18)
Round 3 :
Along outer edge, work *sc, ch2, sl st in next st* to create feathered veins; repeat across to tip (approx 9 ch-loops each side)
Round 4 :
Return along inner edge and work FLO hdc to create a subtle ridge down the leaf center (18)
Info :
These cream leaves read like wheat or dried foliage in the photo. Use a slightly lighter tension and a slightly smaller hook if you want more crisp, defined edges. Pin and steam-block to flatten the loops so they lie nicely when sewn down.
Round 5 :
Fasten off leaving long tail for sewing. Make 10-12 in cream to alternate with green leaves around the spiral.
— Small Filler Flower (make 10-12) :
Round 1 :
6 sc in magic ring (6)
Round 3 :
Ch3, sl st in next st around to create tiny looped petals (12 loops)
Round 4 :
Join gold and work 1 sc in each base stitch, placing 2 sc at every 3rd base stitch to make petals pop (approx 16 sc)
Info :
Make 10-12 small filler flowers in gold to tuck into small gaps in the spiral. These are worked quickly and add visual interest at a small scale.
— Petal Texturing Method (technique info) :
Info :
To make petals sit up with a 3D edge, work the petal base in a double-thickness technique: after attaching petal chain to center, work 1 round of sc around the petal, then work a second round in FLO only. This makes the petal edge turn slightly upward, adding shadow and depth.
Info :
For a crisp petal tip, use a picot: at the tip of the petal, ch3, sl st into last sc before returning. This makes a pointed finish seen in some sunflowers.
— Assembly & Joining Motifs :
Info :
Lay the spiral base on a flat table and arrange all motifs loosely on top before sewing to decide on final placement. Use the photo as a guide: larger sunflowers anchor the outer edges and inner spiral, medium leaves form layered arcs, and cream wheat leaves alternate for contrast.
Step 1 :
Position 4 large sunflowers along the outer edge of the spiral, spacing roughly evenly to create strong focal points. Pin each center and petal set to the base.
Step 2 :
Tuck small sunflower clusters and filler flowers along the inner coils of the spiral to emphasize the swirling motion. Use pins to test overlaps and spacing before sewing.
Step 3 :
Sew each motif down using a long sewn tail and a yarn needle. For petals, take small stitches through the petal base and into the spiral base so the attachment is invisible on the petal face. Secure with multiple passes if necessary.
Info :
Sew leaves with the stem overlapping slightly onto petals where desired. Sew through both leaf base and spiral base, catching 2-3 spiral loops per stitch to keep the leaf flat and secure.
Step 4 :
Where two motifs meet (leaf overlapping leaf or petal overlapping leaf), use hidden whip-stitches along the underside and additional tiny anchoring stitches on the top to flatten joins. Weave ends into the underside of the base to hide them.
Info :
When joining cream wheat leaves, angle them slightly outward to mimic dried stalks. Place them between olive leaves to break up green and add visual rhythm.
Step 5 :
Once all pieces are sewn, gently steam-block the entire assembled centerpiece while pinned flat to help seams settle and motifs lie nicely. Allow to dry completely before use.
Info :
For extra stability, you can sew a lightweight fabric or felt circle to the underside of the spiral base, catching only the base edge stitches so the top details remain clean. This also makes it easier to launder or store.
Final Touches :
Trim remaining ends and do a final pass to flatten any curls. Optionally add tiny embroidered seed detail in the brown centers using a contrasting slightly lighter brown to give a suggestion of texture.
Info :
This pattern uses many repeated motifs. Keep a small notebook where you track how many of each piece you have completed and their sizes so the final assembly matches the intended layout. Make extras of small flowers and leaves so you can tweak the layout during pinning.
This Sunflower Swirl centerpiece brings cozy, handmade cheer to any table. The warm gold petals and layered leaves create a vibrant, textured focal point that's also functional and flat for everyday use. Each motif is a small crochet victory — assembling them into the swirl is a satisfying finishing touch. I hope this pattern fills your home with light and makes a wonderful gift or seasonal accent. 🌻🧶