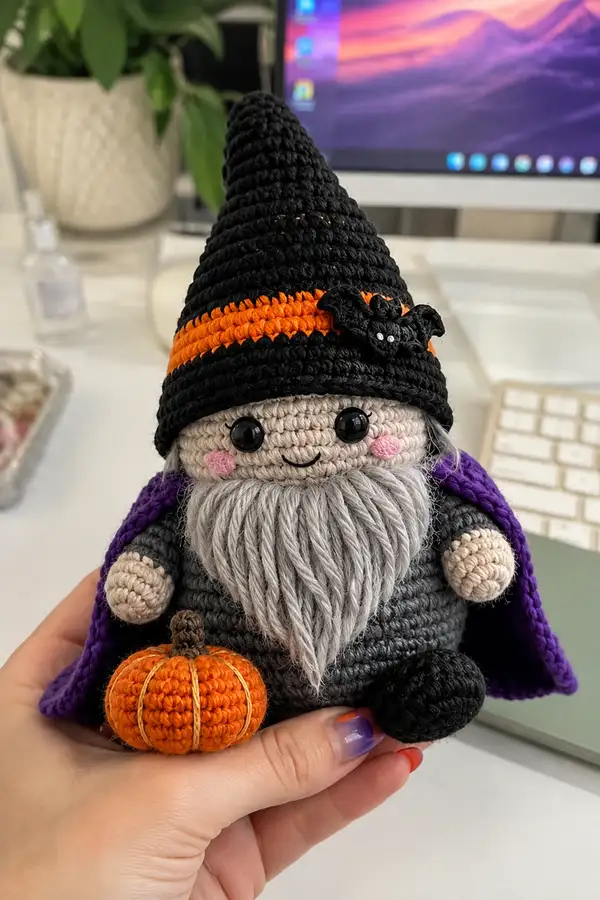
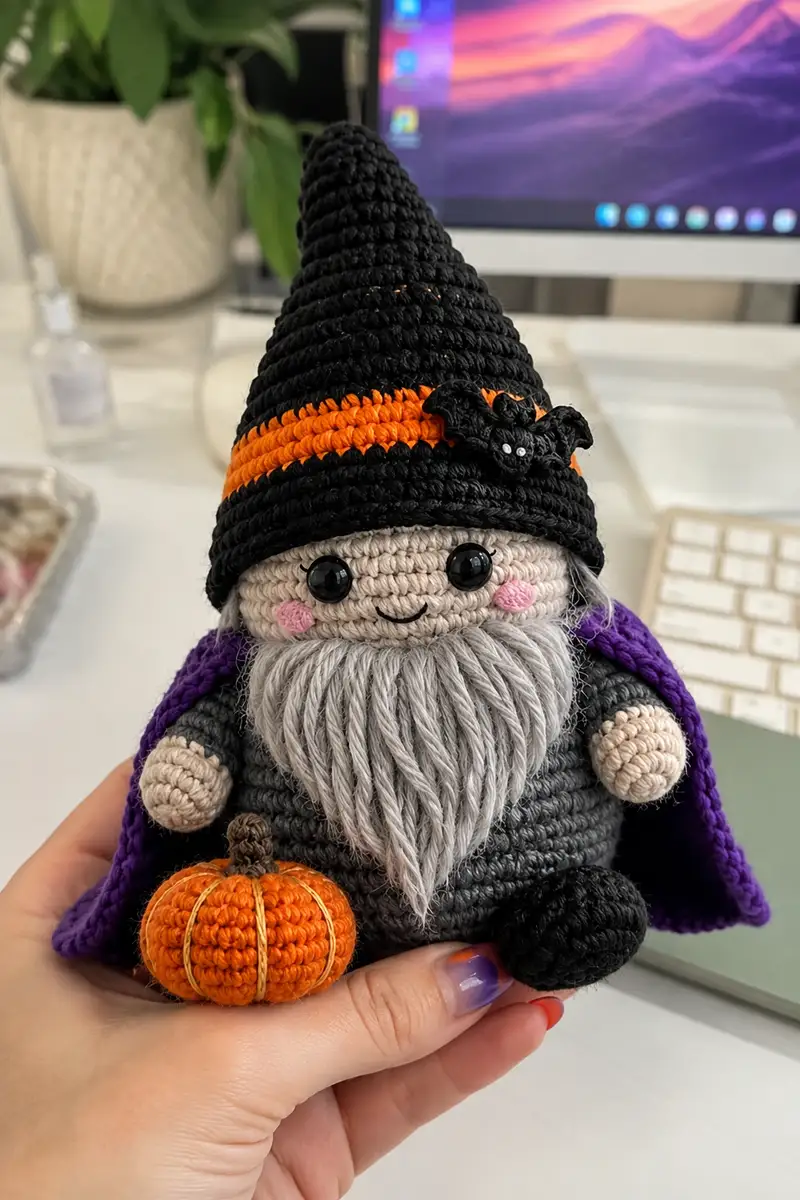
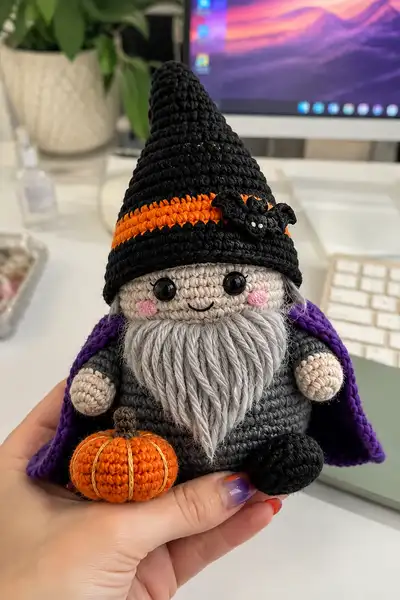
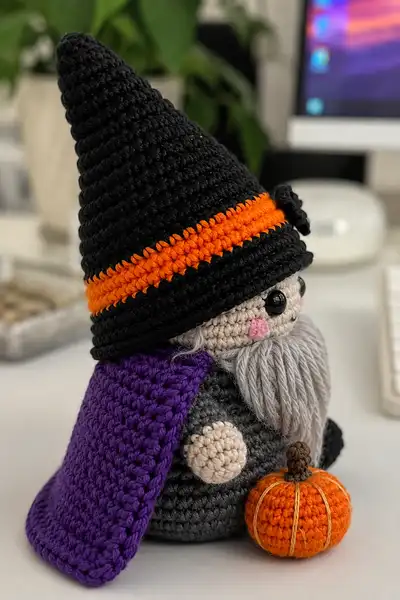
This adorable spooky Halloween gnome features a tall pointed witch hat, long grey yarn beard, a cozy purple cape, and a tiny crocheted pumpkin. The design blends classic amigurumi shaping with seasonal colors — black, orange, grey, purple and cream — and small details like rosy cheeks and a little bat embellishment on the hat. The finished gnome sits adorable on a shelf or desk and is perfect as a Halloween decor or gift.
Progress Tracker
0% Complete
— Head :
Round 1 :
6 sc in magic ring (6)
Round 3 :
(1 sc, inc) x 6 (18)
Round 4 :
(2 sc, inc) x 6 (24)
Round 5 :
(3 sc, inc) x 6 (30)
Round 6 :
(4 sc, inc) x 6 (36)
Round 7 :
(5 sc, inc) x 6 (42)
Round 8 :
(6 sc, inc) x 6 (48)
Round 9 :
1 sc in each st (48)
Round 10 :
1 sc in each st (48)
Info :
Place safety eyes between Rounds 13-14, approximately 10-12 stitches apart for the gnome's wide-eyed look. Mark the first stitch of each round with a stitch marker to keep continuous rounds tidy
Round 11 :
1 sc in each st (48)
Round 12 :
1 sc in each st (48)
Round 13 :
1 sc in each st (48)
Round 14 :
1 sc in each st (48)
Info :
Attach 10mm safety eyes centered between rounds 13 and 14. Count stitches across the row and place eyes about 10 stitches apart (adjust to preference). Embroider a single stitch mouth between rounds 11-12 using black yarn later after beard placement
Round 15 :
1 sc in each st (48)
Round 16 :
1 sc in each st (48)
Round 17 :
1 sc in each st (48)
Round 18 :
1 sc in each st (48)
Info :
If you want a slightly taller head, work rounds 19-20 even instead of starting decreases here. Keep tension slightly tighter so stuffing does not show
Round 19 :
(6 sc, dec) x 6 (42)
Round 20 :
(5 sc, dec) x 6 (36)
Round 21 :
(4 sc, dec) x 6 (30)
Info :
Begin stuffing the head firmly but not overstuffed. Use small amounts of fiberfill and distribute evenly to keep the head round. Continue stuffing as you work decreases
Round 22 :
(3 sc, dec) x 6 (24)
Round 23 :
(2 sc, dec) x 6 (18)
Round 24 :
(1 sc, dec) x 6 (12)
Info :
Fasten off leaving a long tail for sewing the head to the body later. Finish stuffing through the opening and close using a yarn needle with a ladder stitch for neat finish
— Face Details :
Info :
Before attaching beard, stitch a small curved mouth between rounds 11 and 12 using black yarn. Embroider tiny blush circles on cheeks with pink yarn or use blush powder applied lightly on both sides of the face
Round 1 :
Make nose: 6 sc in magic ring (6)
Round 3 :
1 sc in each st (12)
Info :
Fasten off leaving long tail. Lightly stuff the nose and sew centered between eyes on round 13 using the long tail. Secure tightly
— Beard Base (yarn-loop beard) :
Round 1 :
6 sc in magic ring with grey yarn (6)
Round 3 :
(1 sc, inc) x 6 (18)
Round 4 :
1 sc in each st (18)
Round 5 :
1 sc in each st (18)
Info :
Fasten off leaving long tail to sew the beard base to the lower front of the head. Attach strands of light grey yarn by folding 6-8 strands and pulling fold through stitches to create loops, then knot to secure. Trim and comb loops to create tapered beard
Round 6 :
Sew beard base to head around rounds 10-14 of head to cover mouth area; secure with whip stitch
— Body :
Round 1 :
6 sc in magic ring (6)
Round 3 :
(1 sc, inc) x 6 (18)
Round 4 :
(2 sc, inc) x 6 (24)
Round 5 :
(3 sc, inc) x 6 (30)
Round 6 :
(4 sc, inc) x 6 (36)
Round 7 :
1 sc in each st (36)
Round 8 :
1 sc in each st (36)
Info :
Switch to charcoal grey now if you used a different color for the increases; here the body is worked in charcoal for a solid torso. Work tightly to avoid stuffing showing
Round 9 :
1 sc in each st (36)
Round 10 :
1 sc in each st (36)
Round 11 :
1 sc in each st (36)
Round 12 :
1 sc in each st (36)
Info :
Begin stuffing the body moderately from round 10 onward so that the lower rounds can be shaped firmly. Keep the top opening unstuffed until head attachment
Round 13 :
1 sc in each st (36)
Round 14 :
1 sc in each st (36)
Round 15 :
(4 sc, dec) x 6 (30)
Round 16 :
(3 sc, dec) x 6 (24)
Round 17 :
(2 sc, dec) x 6 (18)
Info :
Stop decreasing when you have a comfortable neck opening to sew the head on. The neck opening should match the head's final circumference. Increase or decrease a stitch or two if needed to match
Round 18 :
(1 sc, dec) x 6 (12)
Round 20 :
Fasten off leaving long tail. Finish stuffing through the bottom opening if you worked from top down; alternatively leave the bottom open and sew a felt or crocheted base to stabilize the gnome
— Arms (Make 2) :
Round 1 :
6 sc in magic ring (6)
Round 3 :
(1 sc, inc) x 6 (18)
Round 4 :
1 sc in each st (18)
Info :
Switch to cream/skin tone for the hand at the start and later change to grey for the sleeve. Stuff the hand firmly now so it holds shape
Round 5 :
1 sc in each st (18)
Round 6 :
1 sc in each st (18)
Round 7 :
Change to charcoal grey. 1 sc in each st (18)
Round 8 :
1 sc in each st (18)
Round 9 :
1 sc in each st (18)
Info :
Stuff the arm lightly from round 7 onwards for natural drape. Keep the tip of the hand plump and the sleeve area less stuffed so it sits well against the body
Round 10 :
(2 sc, dec) x 4 + 2 sc (14)
Round 11 :
1 sc in each st (14)
Round 12 :
1 sc in each st (14)
Round 13 :
(1 sc, dec) x 4 + 2 sc (10)
Round 14 :
1 sc in each st (10)
Round 15 :
1 sc in each st (10)
Info :
Fasten off leaving a long tail for sewing. Sew arms to body between rounds 12-15 of body, spacing them so hands rest near the belly. Use pins to secure placement before stitching
— Legs (Make 2) :
Round 1 :
6 sc in magic ring with black yarn (6)
Round 3 :
(1 sc, inc) x 6 (18)
Round 4 :
1 sc in each st (18)
Round 5 :
1 sc in each st (18)
Info :
Work the foot first and stuff firmly. The leg will be worked up from the foot toward the hip and attached to the bottom front of the body so the gnome can sit
Round 6 :
(2 sc, inc) x 6 (24)
Round 7 :
1 sc in each st (24)
Round 8 :
1 sc in each st (24)
Round 9 :
(3 sc, dec) x 6 (18)
Round 10 :
1 sc in each st (18)
Round 11 :
1 sc in each st (18)
Round 12 :
(2 sc, dec) x 6 (12)
Round 13 :
1 sc in each st (12)
Round 14 :
Fasten off leaving long tail. Sew legs to base of body spaced evenly so the gnome sits stably. Add extra stitches to secure if needed
Info :
If you prefer a seated gnome with legs forward, attach legs to the front lower rounds (Rounds 1-4 of the body). For a standing gnome, reduce stuffing and attach flush to bottom
— Hat (Cone Witch Hat) :
Round 1 :
6 sc in magic ring with black yarn (6)
Round 3 :
(1 sc, inc) x 6 (18)
Round 4 :
(2 sc, inc) x 6 (24)
Round 5 :
(3 sc, inc) x 6 (30)
Round 6 :
(4 sc, inc) x 6 (36)
Round 7 :
(5 sc, inc) x 6 (42)
Round 8 :
(6 sc, inc) x 6 (48)
Round 9 :
1 sc in each st (48)
Round 10 :
1 sc in each st (48)
Info :
Work the hat slightly larger than the head circumference so it can sit snugly and brim slightly fold over the face. The hat is worked in continuous rounds to form a cone shape
Round 11 :
1 sc in each st (48)
Round 12 :
1 sc in each st (48)
Round 13 :
Change to orange yarn for band. 1 sc in each st (48)
Round 14 :
1 sc in each st (48)
Round 15 :
Change to black yarn. 1 sc in each st (48)
Round 16-20 :
1 sc in each st (48)
Info :
After the orange band, continue working black rounds to build height for a tall pointed cone. Use a stitch marker to keep track of rounds. If you prefer a floppier hat, switch to a slightly larger hook for the last 6-10 rounds
Round 21 :
(6 sc, dec) x 6 (42)
Round 22 :
(5 sc, dec) x 6 (36)
Round 23 :
(4 sc, dec) x 6 (30)
Round 24 :
(3 sc, dec) x 6 (24)
Round 25 :
(2 sc, dec) x 6 (18)
Round 26 :
(1 sc, dec) x 6 (12)
Info :
Fasten off and leave a long tail. Stuff the hat lightly if you want it to hold shape or leave unstuffed for a floppy look. Sew the base of the hat around the head opening (between rounds 9-12 of the head) so the brim furls over slightly
— Hat Bat Embellishment :
Round 1 :
6 sc in magic ring with black (6)
Round 3 :
Working in a small oval: ch1, sc in next 4 sts, turn to shape wings (see photo); fasten off (tiny decorative piece)
Info :
Sew the bat to the hat band area using black yarn. Add two tiny white embroidery French knots for eyes or attach two tiny seed beads. Secure firmly
— Cape (Worked Flat, then Seamed) :
Row 1 :
Ch 36. Turn, 1 sc in 2nd ch from hook and across (35)
Row 2 :
Ch1, turn, 1 sc in each st (35)
Row 3 :
Ch1, turn, 1 sc in each st BLO (35)
Row 4-18 :
Repeat Row 2 (35)
Info :
Make the cape in purple. The cape is a rectangular panel worked back and forth; the BLO in Row 3 gives a neat ridge for the neckline. Fold the top 6 rows and seam to form a collar that sits around the shoulders
Row 19 :
Ch1, turn, 1 sc evenly along the short ends and across to create a smooth bound edge and reduce curling. Fasten off leaving a long tail for sewing to shoulders
— Pumpkin (Small Accessory) :
Round 1 :
6 sc in magic ring with orange (6)
Round 3 :
(1 sc, inc) x 6 (18)
Round 4 :
(2 sc, inc) x 6 (24)
Round 5 :
1 sc in each st (24)
Round 6 :
1 sc in each st (24)
Round 7 :
(2 sc, dec) x 6 (18)
Round 8 :
(1 sc, dec) x 6 (12)
Info :
Leave long tail. Stuff firmly and close. Use brown yarn to make a small stem: ch4, join to form a tube, then sc around ch to form stem and sew into pumpkin top. Wrap contrasting thin yarn or embroidery floss around pumpkin to create ridges
— Hat Brim Finishing :
Round 1 :
With black yarn and the hat base in place, 1 sc evenly around the base of the hat brim where it meets the head (48)
Round 2 :
1 sc in each st BLO for 2 rounds to form a neat folded brim edge (48)
Info :
Sew hat to head by hand around the brim area. Tuck brim slightly to create that cozy look that covers the top of the forehead; secure with whip stitch
— Assembly and Final Features :
Info :
Pin head to body before sewing. Match head neck opening to the body top opening; use a whip stitch or mattress stitch to attach head evenly. Weave in yarn tails firmly
Round 1 :
Sew arms to body between Rounds 11-14 of the body so hands rest on belly area
Round 2 :
Sew legs to bottom of body (base rounds) making sure the gnome sits flat. Reinforce stitches for stability
Info :
Attach the cape by centering the collar along the shoulder rounds of the body (Rounds 10-13). Use small invisible stitches and pin before sewing. Add hat and bat embellishment last so placement is tested visually
Round 3 :
Sew pumpkin to gnome hand or place separately. Embroider small details like stitches or pumpkin ridges using contrasting thread
Info :
Add final trims: lightly brush beard strands to soften, trim evenly, and apply tiny blush to cheeks with a bit of pastel or fabric paint if desired
This spooky Halloween gnome brings seasonal charm and cozy amigurumi technique together in one delightful project. The tall witch hat, soft yarn beard, and bright pumpkin accessory make it instantly lovable and perfect for fall displays. Each stitch adds personality, and the finished gnome is a sweet handmade gift or festive home accent. 🧶🎃✨