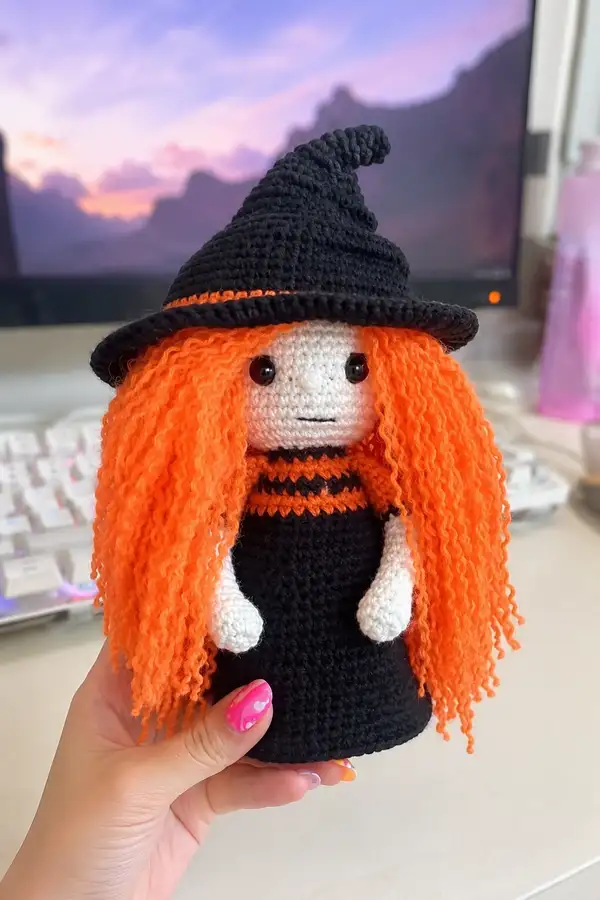
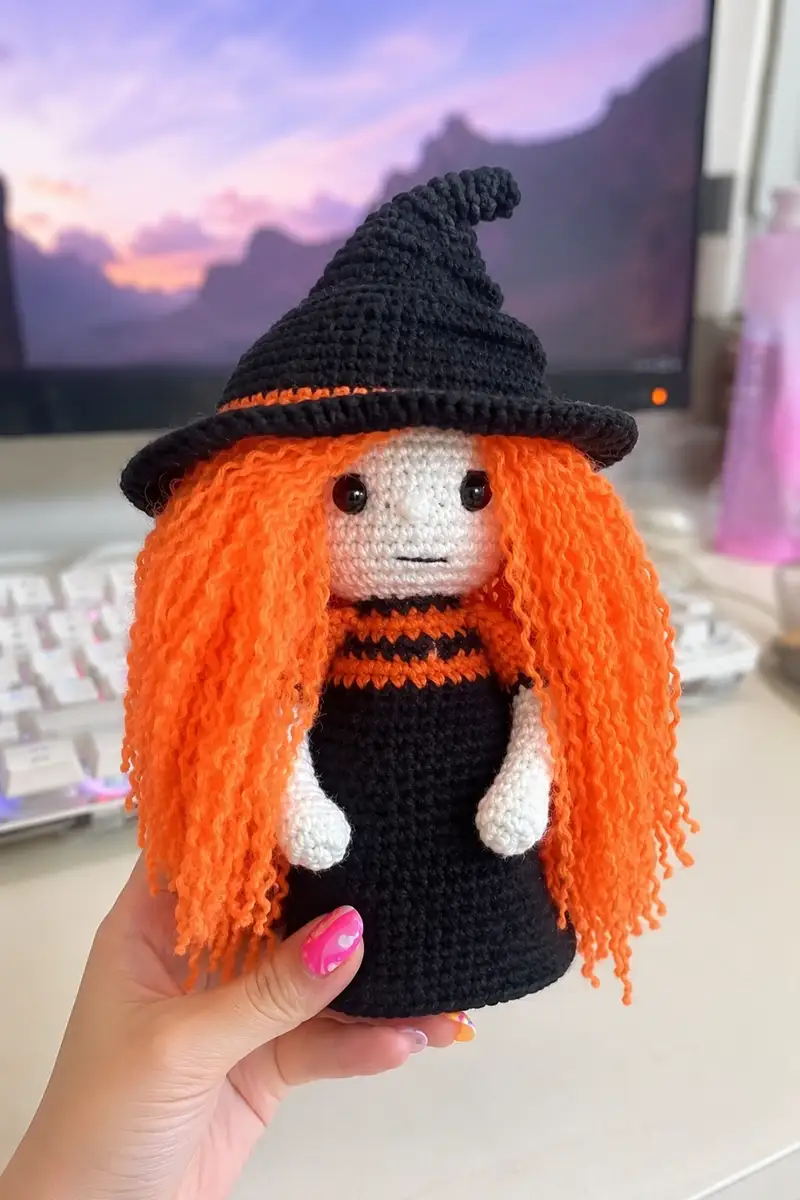
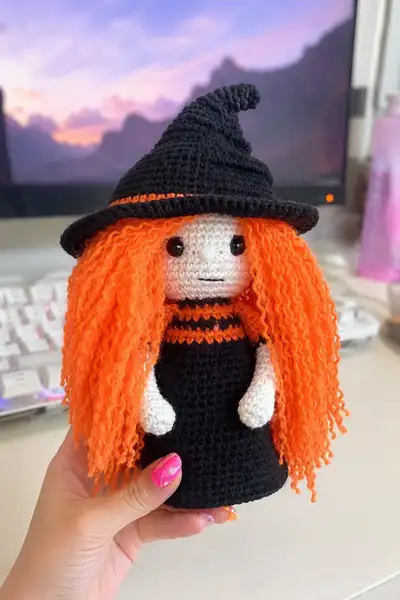
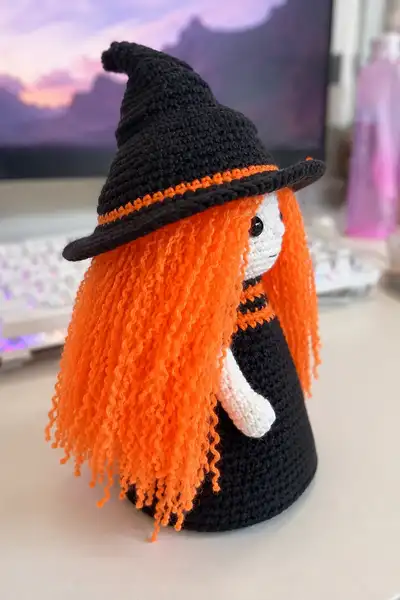
Willa is a small whimsical witch doll with long bright orange curly hair, a cone-shaped black dress with orange collar stripes, dainty white arms and a pointy floppy hat with a contrasting orange trim. This pattern recreates her tall hair, rounded head and classic witch silhouette in easy-to-follow sections. Ideal for gifting or seasonal decor, Willa stands as a charming, hand-crafted keepsake.
Progress Tracker
0% Complete
— Head :
Round 1 :
6 sc in magic ring (6)
Round 3 :
(1 sc, inc) x 6 (18)
Round 4 :
(2 sc, inc) x 6 (24)
Round 5 :
(3 sc, inc) x 6 (30)
Round 6 :
(4 sc, inc) x 6 (36)
Round 7 :
(5 sc, inc) x 6 (42)
Round 8 :
(6 sc, inc) x 6 (48)
Round 9-12 :
1 sc in each st (48)
Info :
Place safety eyes between rounds 10 and 11 approximately 8-10 stitches apart depending on desired gaze. Mark the rightmost stitch at round start with a stitch marker to keep orientation consistent.
Round 13 :
1 sc in each st (48)
Round 14 :
1 sc in each st (48)
Info :
Begin surface detail: if you plan to embroider a small nose bump, embroider now on round 12 center-down between eyes using a small amount of white yarn and pull slightly to dimples, or wait until stuffing for a subtle effect.
Round 15 :
(6 sc, dec) x 6 (42)
Round 16 :
(5 sc, dec) x 6 (36)
Round 17 :
(4 sc, dec) x 6 (30)
Info :
Begin stuffing the head firmly at this stage. Use small amounts of fiberfill tucked into the eye area first to maintain round shape. Stuff incrementally to avoid lumps.
Round 18 :
(3 sc, dec) x 6 (24)
Round 19 :
(2 sc, dec) x 6 (18)
Round 20 :
(1 sc, dec) x 6 (12)
Info :
Fasten off leaving a long tail for sewing the head to the body. Finish stuffing firmly so the face remains round and stable. Weave the tail through the remaining 6 sts and pull tight to close. Secure knot and hide tail inside head.
— Neck / Collar :
Info :
This narrow collar area will be worked directly after attaching head to the body, but we include a small neck flange to help sew. Use black for a small collar ridge and add two rounds of orange/black stripes to mirror the photo.
Round 1 (neck flange) :
Using black: join yarn to center bottom of head where neck will sit and sc evenly around the 6 base stitches to create a short flange; work 1 sc in each of 6 sts (6)
Round 2 :
1 sc in each st (6)
Info :
We will sew this flange into the body opening to anchor the head. Leave head attached while sewing for best alignment, or set aside and pin before sewing.
— Body (Dress/Cone) :
Round 1 :
6 sc in magic ring (6)
Round 3 :
(1 sc, inc) x 6 (18)
Round 4 :
(2 sc, inc) x 6 (24)
Round 5 :
(3 sc, inc) x 6 (30)
Round 6 :
(4 sc, inc) x 6 (36)
Round 7 :
(5 sc, inc) x 6 (42)
Round 8 :
(6 sc, inc) x 6 (48)
Round 9 :
(7 sc, inc) x 6 (54)
Round 10 :
(8 sc, inc) x 6 (60)
Info :
These increases form the flared skirt base. If you want a narrower skirt, stop at 48 or 54. Continue increases to reach a wide base like the pictured doll; 60 stitches provides a tall flared cone that matches the reference.
Round 11-15 :
1 sc in each st (60)
Round 16 :
Change to orange yarn. 1 sc in each st (60)
Round 17 :
Change to black yarn. 1 sc in each st (60)
Round 18 :
Change to orange yarn. 1 sc in each st (60)
Info :
This creates the two orange stripes at the neckline area. Carry unused yarn inside or fasten off and rejoin to avoid long floats. We used a two-row striping motif: orange, black, orange to mirror the photo's collar detail.
Round 19-26 :
Change back to black. 1 sc in each st (60)
Info :
Work even rounds to build the torso height that sits under the head. Aim to have about 18-20 rounds of even stitch height above the stripes before tapering for the base to ensure the proportions mirror the reference doll.
Round 27 :
(8 sc, dec) x 6 (54)
Round 28 :
1 sc in each st (54)
Round 29 :
(7 sc, dec) x 6 (48)
Round 30 :
1 sc in each st (48)
Round 31 :
(6 sc, dec) x 6 (42)
Round 32 :
1 sc in each st (42)
Info :
At this point the body is tapered towards the top. We will attach the neck flange from the head into this opening. Keep the last rounds open and do not stuff fully; only a small amount of stuffing is required inside the body if you want the cone to have slight rigidity.
Round 33 :
(5 sc, dec) x 6 (36)
Round 34 :
(4 sc, dec) x 6 (30)
Round 35 :
1 sc in each st (30)
Info :
Stuff the lower body lightly if you want the doll to have a bit of firmness. Because the doll is cone-shaped and generally free-standing in hand only, you can keep the body mostly unstuffed and rely on tight stitches for shape. If you want full standing stability, stuff the base moderately and sew a small felt circle inside.
Round 36 :
(3 sc, dec) x 6 (24)
Round 37 :
(2 sc, dec) x 6 (18)
Round 38 :
(1 sc, dec) x 6 (12)
Info :
Fasten off leaving a long tail for sewing. Align the neck flange from head with the opening at the top of the body. Use mattress or whip stitch to sew head flange to the body, making sure the stripes align to form a neat collar. Hide ends inside the body.
— Arms (Make 2) :
Round 1 :
6 sc in magic ring (6)
Round 3 :
(1 sc, inc) x 6 (18)
Round 4 :
1 sc in each st (18)
Info :
This small sphere will become the hand. The doll pictured has simple mitten-shaped hands without separate fingers, so we keep the shape rounded and smooth.
Round 5 :
(3 sc, dec) x 3 (15)
Round 6 :
1 sc in each st (15)
Round 7 :
(4 sc, inc) x 3 (18)
Round 8-12 :
1 sc in each st (18)
Info :
Work even to create arm length. Stuff the hand portion (rounds 1-6) firmly and the remainder of the arm lightly so it drapes naturally against the body when sewn. If you want a slightly longer arm, add extra even rounds here.
Round 13 :
(2 sc, dec) x 6 (12)
Round 14 :
1 sc in each st (12)
Round 15 :
(1 sc, dec) x 4 (8)
Round 16 :
1 sc in each st (8)
Round 17 :
1 sc in each st (8)
Round 18 :
Fasten off leaving long tail. Use tail to sew arm to side of body between rounds 20-24 (counting from body base) depending on desired placement. Repeat for second arm.
Info :
Pin arms in place before sewing. Aim for the midpoint between the stripe and the bottom of the head to achieve proportions similar to the reference images. Use invisible stitch for neater seams.
— Hat Crown :
Round 1 :
6 sc in magic ring (6)
Round 3 :
(1 sc, inc) x 6 (18)
Round 4 :
(2 sc, inc) x 6 (24)
Round 5 :
(3 sc, inc) x 6 (30)
Round 6 :
(4 sc, inc) x 6 (36)
Round 7 :
(5 sc, inc) x 6 (42)
Round 8 :
1 sc in each st (42)
Round 9 :
1 sc in each st (42)
Info :
The crown will be worked taller and tapered to create the pointy witch hat. Keep tension slightly loose relative to the body so brim lies flat and the crown sits over the head comfortably.
Round 10 :
(6 sc, dec) x 6 (36)
Round 11 :
1 sc in each st (36)
Round 12 :
(5 sc, dec) x 6 (30)
Round 13 :
1 sc in each st (30)
Round 14 :
(4 sc, dec) x 6 (24)
Round 15 :
1 sc in each st (24)
Round 16 :
(3 sc, dec) x 6 (18)
Round 17 :
1 sc in each st (18)
Round 18 :
(2 sc, dec) x 6 (12)
Round 19 :
Change to BLO and work 1 round 1 sc BLO each st (12)
Info :
To create a whimsical bend at the tip, insert a small piece of pipe cleaner or wire inside the crown before final shaping. Bend gently and sew closed at tip. If you prefer a floppy tip without wire, decrease to a small opening and fasten off leaving tail to sew tip closed while shaping by hand.
Round 20 :
Fasten off leaving long tail for assembly. Fold base of crown to sit against head and attach later to brim using slip stitch or whip stitch.
— Hat Brim :
Round 1 :
Join black to the base of the crown and sc evenly around the outer edge of the crown base. If crown base has 42 sts, work 1 sc in each st (42)
Round 2 :
(4 sc, inc) x 8 + extra sc to meet edge if required for even distribution. If starting from 42, work (5 sc, inc) x 7 gives 49; instead we recommend (6 sc, inc) x 6 (48) to keep the brim wide and even (48)
Round 3 :
1 sc in each st (48)
Round 4 :
(7 sc, inc) x 6 (54)
Round 5 :
1 sc in each st (54)
Round 6 :
(8 sc, inc) x 6 (60)
Round 7-8 :
1 sc in each st (60)
Info :
To create a neat contrast stripe like the reference photo, work one round in orange between rounds 6 and 7 using slip stitch or sc depending on preferred look. Use a contrasting orange yarn and work 1 round sc evenly around brim outer edge. Then continue with black for final shaping.
Round 9 (contrast) :
Change to orange: 1 sc in each st (60)
Round 10 :
Change to black: 1 sc in each st (60)
Round 11 :
(6 sc, dec) x 7 + remainder to match 54 (54)
Round 12 :
Fasten off leaving long tail. Use tail to attach brim to crown base securely. Shape brim by blocking or running a round of slip stitches along the edge to make it curl slightly upward like in the reference.
Info :
If you prefer a stiffer brim, crochet an identical brim from weft fabric or felt and slip it into the crochet brim before sewing closed. Alternatively, use starch or fabric stiffener to set shape.
— Hair (Long Curly Orange) :
Info :
The reference uses long, abundant, bright orange curly hair that falls past the doll's shoulders. The hair is likely attached by looping individual strands into rows across the head. We will provide a method for a crimped/curly effect using pre-crimped yarn or by creating ringlets with simple heatless curl technique.
Step 1 :
Cut lengths of orange yarn to twice desired final length (for folded loop method). The pictured hair falls to about the base of the body cone; for a doll about 20-25 cm tall, cut lengths around 30-36 cm and fold in half to create 15-18 cm finished strands.
Step 2 :
Work rows of single crochet across the head base where hair will attach (rows roughly at head rounds 9-13 on both sides). Attach strands by pulling fold into a head stitch and pulling tails through loop to form a knot (lark's head knot). Repeat densely to achieve full hair coverage; place rows roughly every 2-3 stitches around the head starting from crown down to hairline. For full coverage, you may attach 10-14 strands per row depending on thickness.
Step 3 :
For curly/crimped texture: if using straight worsted yarn, create small ringlets by wrapping individual strands around a toothpick or small dowel and tying with a small yarn scrap, then mist with hot water (or steam carefully) and let dry completely to set a curl. Alternatively use pre-crimped boucle yarn or a 'crinkle' yarn for instant texture.
Step 4 :
After attaching and setting curls, brush gently with a wide-tooth comb to separate fibers and create the voluminous look pictured. Trim ends for even length and layer slightly to frame the face.
Info :
Attach hair densely near the part line over the head and sparser at the sides for a natural fall. Leave a slight face-framing gap if you want the eyes and mouth visible; the reference shows hair partially covering the face so keep some long strands over the cheek area.
— Small Face Details & Finishing :
Info :
Sew on 8mm or 10mm safety eyes between rounds 10-11 of the head with approximately 8-10 stitches between centers, secure backings tightly. Embroider a small straight mouth using black embroidery yarn across one or two stitches at round 12-13 center below the eyes. The nose is left subtle; if you want a tiny nose bump, use short stitches of white/yarn to create a raised surface before final stuffing.
Step :
Weave in all loose ends, hide tails inside body or head, and trim any visible fibers carefully. Optionally add a touch of blush to cheeks using chalk blush or fabric-safe dye very lightly.
— Optional Stabilizing Base :
Info :
If you want the doll to stand upright unassisted, cut a small circle of felt slightly smaller than the base diameter and sew or glue it into the bottom of the body. Alternatively, insert a small wooden disc under stuffing near the base for stability.
— Extra Decorative Touches :
Info :
Add ribbon banding around the hat, tiny crocheted stars or a little broom accessory by crocheting small rectangles and rolling them up. Embellish the collar with bead accents if desired.
This sweet Willa doll brings a little Halloween mischief and cozy charm to your handmade collection. Each careful stitch, from the bright curls to the floppy hat brim, offers a joyful crafting moment. I hope you enjoy the rhythm of working the cone dress and attaching the dramatic hair as much as I did creating the pattern. 🧶✨ Have fun customizing and sharing your magical creation! 🎃