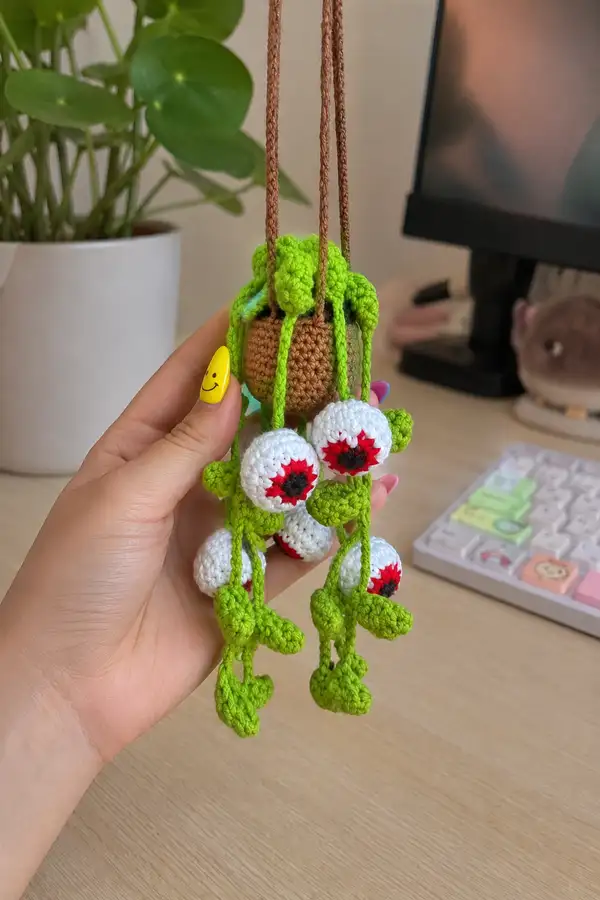
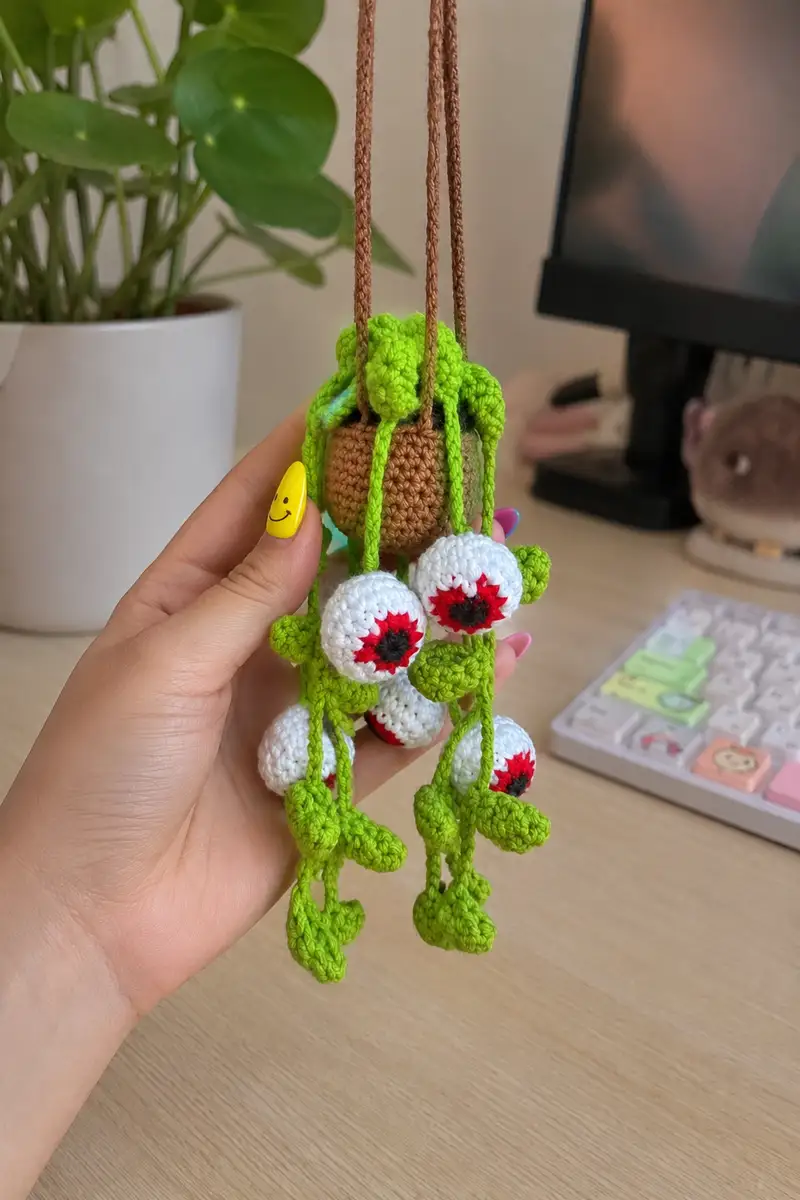
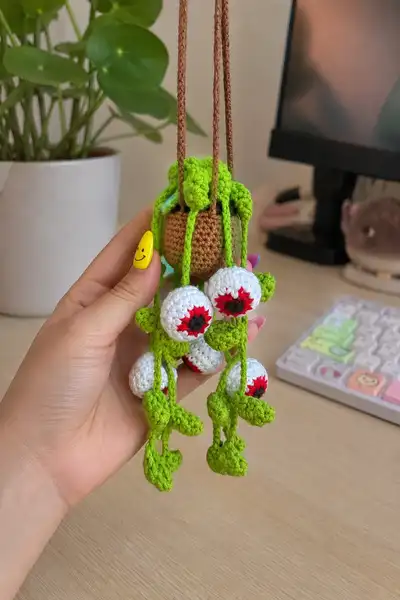
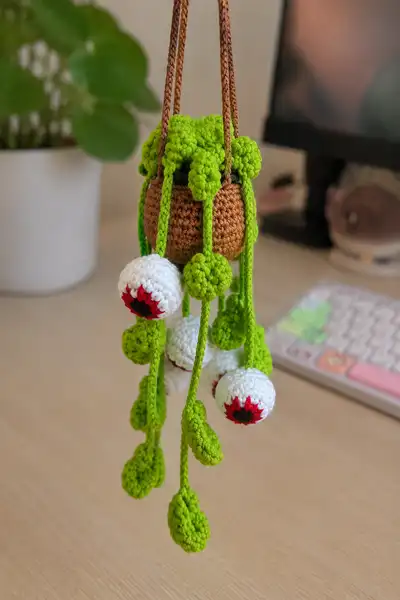
This spooky-eyes hanging planter is a playful Halloween ornament that pairs a tiny crocheted pot with trailing green vines and several dangling eyeballs. The project features a textured pot, a soft green plant top, long braided cords for hanging, and 4–6 eyeball charms with embroidered red irises and sewn-on black pupils. Perfect for a haunted shelf, a keychain, or a seasonal decoration.
Progress Tracker
0% Complete
— Materials & Gauge :
Info :
Gauge is not critical for this small ornament, but for consistent amigurumi fabric use a hook one size smaller than recommended for your yarn. Strive for tight stitches so the stuffing does not show. Finished hanging ornament (with 5 eyeballs) measures approximately 18-24 cm (7-9.5 in) from top of hanger to bottom of longest leaf.
— Eyeball (Make 5) :
Round 1 :
6 sc in magic ring (6)
Round 3 :
(1 sc, 1 inc) x 6 (18)
Round 4 :
(2 sc, 1 inc) x 6 (24)
Round 5 :
(3 sc, 1 inc) x 6 (30)
Round 6 :
(4 sc, 1 inc) x 6 (36)
Round 7 :
(5 sc, 1 inc) x 6 (42)
Round 8 :
(6 sc, 1 inc) x 6 (48)
Round 9 :
(7 sc, 1 inc) x 6 (54)
Round 10 :
(8 sc, 1 inc) x 6 (60)
Round 11-16 :
1 sc in each st (60)
Info :
At these even rounds build a smooth, round shape for the eyeball. Check your tension frequently; eyeballs look best smooth and spherical. If you want a slightly smaller eye, work two fewer even rounds here.
Round 17 :
(8 sc, 1 dec) x 6 (54)
Round 18 :
(7 sc, 1 dec) x 6 (48)
Round 19 :
(6 sc, 1 dec) x 6 (42)
Round 20 :
(5 sc, 1 dec) x 6 (36)
Info :
Begin stuffing the eyeball from the open bottom. Use small amounts of fiberfill at a time to keep the sphere even. Stuff firmly but not overstuffed; eyeballs should be firm to the touch but slightly springy.
Round 21 :
(4 sc, 1 dec) x 6 (30)
Round 22 :
(3 sc, 1 dec) x 6 (24)
Round 23 :
(2 sc, 1 dec) x 6 (18)
Round 24 :
(1 sc, 1 dec) x 6 (12)
Round 26 :
Fasten off leaving long tail for sewing (close with yarn needle and weave tail through remaining 6 sts to close). Secure and weave end inside the eyeball (6)
Info :
Create five of these white eyeballs. If you want fewer, adjust number. After finishing, set eyeballs aside for pupil and iris embellishment. You may also use a slightly smaller hook (2.75 mm) for a tighter fabric for spherical smoothness.
— Pupil Disk (Make 5) :
Round 1 :
With black yarn: 6 sc in magic ring (6)
Round 3 :
1 sc in each st (12)
Info :
Fasten off leaving a long tail for sewing. You will sew the black pupil to the front center of each eyeball. Place the pupil centered on the sphere — pin with a tapestry needle and sew through the sphere fabric deeply for a secure attachment. Weave tail into the sphere to secure.
— Iris Embroidery (Make 5) :
Info :
Use bright red yarn to create a small starburst/iris around the black pupil. Work this as surface embroidery or short slip-stitch spokes. The following method creates a tidy, even red ring:
Step 1 :
Thread red yarn through a yarn needle. Insert needle from inside the eyeball to the front just outside the pupil; pull yarn through leaving a short tail inside and knot or weave later.
Step 2 :
Make 6–8 short embroidery stitches radiating outward around the pupil (about 5–7 mm long each), creating a starburst effect. Alternate short and longer stitches for a jagged iris look; keep stitches evenly spaced.
Step 3 :
Finish by making a tight backstitch or small satin stitch ring that encircles the pupil slightly, securing the radial stitches. Weave ends into the eyeball interior securely and trim.
Info :
If you prefer, you can instead crochet a small red round (adjust to fit visually around the pupil) and stitch it in place; embroidery tends to give a sharper starburst effect as in the photos.
— Pot / Planter Body :
Round 1 :
6 sc in magic ring (6)
Round 3 :
(1 sc, 1 inc) x 6 (18)
Round 4 :
(2 sc, 1 inc) x 6 (24)
Round 5 :
(3 sc, 1 inc) x 6 (30)
Round 6 :
(4 sc, 1 inc) x 6 (36)
Round 7 :
(5 sc, 1 inc) x 6 (42)
Round 8 :
(6 sc, 1 inc) x 6 (48)
Round 9-14 :
1 sc in each st (48)
Info :
Rounds 9–14 create the main cylinder of the pot. Try the pot around your fingers to check diameter visually. If you want a deeper pot, add more even rounds here.
Round 15 :
(6 sc, 1 dec) x 6 (42)
Round 16 :
(5 sc, 1 dec) x 6 (36)
Round 17-18 :
1 sc in each st (36)
Round 19 :
(3 sc, 1 dec) x 6 (30)
Round 20 :
(2 sc, 1 dec) x 6 (24)
Round 21 :
(1 sc, 1 dec) x 6 (18)
Info :
Begin stuffing the bottom of the pot lightly so the base is stable. Leave the top opening unstuffed for now; the pot will receive the plant crown later. Stuff only enough to create a flat bottom surface.
Round 22 :
6 dec (6) — Close bottom and weave tail to create a neat flat base
Info :
Fasten off remaining tail and weave into base to secure. If you prefer a flat base that sits well, consider adding a small circle of felt inside glued or stitched to give extra stability.
— Pot Rim & Hanging Loop :
Info :
We will work the top rim and attach hanger cords. Join yarn at the top edge of the pot (the open mouth) evenly spaced around. Count the top round of the pot and mark the beginning stitch with a marker.
Round 1 (Rim) :
Join yarn to the top edge: 1 sc in each st around (36) — work in FLO for a subtle ridge if desired
Round 2 (Rim) :
1 sc in each st BLO (36) — this creates a small ridge and helps keep the rim firm
Round 3 (Rim Finish) :
1 sc in next 6 sts, ch 30 (for hanger), skip 30 sts, 1 sc in next 6 sts, ch 30, skip 30 sts, 1 sc in next 6 sts (36) — position chains to create three hanger lengths (adjust number of chains for desired drop)
Info :
The model shows three thin hanger cords braided or crocheted in a soft brown. You can instead make one long cord or a metal ring for hanging. Securely fasten the chain ends inside the rim by stitching them down so they do not slip.
— Plant Crown (Top Mossy Leaves) :
Round 1 :
With chartreuse green yarn, 6 sc in magic ring (6)
Round 3 :
(1 sc, 1 inc) x 6 (18)
Round 4 :
(2 sc, 1 inc) x 6 (24)
Round 5 :
1 sc in each st (24)
Round 6 :
Work bobble/cluster round: *sc in next st, bobble in next st* rep around (24)
Round 7 :
1 sc in each st (24)
Round 8 :
Attach crown to pot by sewing the 24-st edge into the pot mouth, allowing the bobble round to hang slightly over the rim
Info :
For the bobble/cluster stitch: (yarn over, insert, pull up a loop) x 4 then yarn over and pull through all loops, ch1 to secure — this creates the 'moss' lumps seen spilling over the rim. Position several small clusters around to mimic the photo’s textured crown.
— Vines / Hanging Tubes (Make 6–8, varying lengths) :
Info :
Make multiple vines of varying lengths. Each vine will have a narrow tubular cord with leaves and optionally an eyeball attached near the end. Sample vine construction follows; repeat for each vine, changing chain length to vary drop.
Vine Sample - Chain Tube :
Ch 40 (or desired length). Join with sl st to first ch to form a loop. Work 1 rnd sc into each ch (40) — this creates a flat loop. For a tubular look, fold loop and sc through both loops of each chain to create a narrow tube (40). Fasten off leaving long tail for sewing to crown.
Info :
Alternatively, create a tight crochet i-cord by chaining 20–50 and working sc back along the chain without joining to create a cord. Use a 2.5–3.0 mm hook for a tidy cord. Leave a long tail for sewing.
— Small Round Moss Balls (Make 6) :
Round 1 :
6 sc in magic ring (6)
Round 3 :
(1 sc, 1 inc) x 6 (18)
Round 4 :
1 sc in each st (18)
Round 5 :
(1 sc, 1 dec) x 6 (12)
Round 6 :
6 dec (6) — close, leave long tail for attaching to vines
Info :
These tiny moss balls are sewn along the vines to add visual interest and mimic the clustered shapes seen near the top. Stuff lightly before closing.
— Leaves / Heart-Shaped Tips (Make 8–12) :
Method (Flat Leaf) :
ch 6, 1 sc in 2nd ch from hook, hdc in next, dc in next, hdc in next, sc in next (work other side of foundation chain back: sc, hdc, dc, hdc, sc) Sl st to first stitch and fasten off. Join and shape leaf by working a round of slip stitches and a final round of single crochet around the outside to give thickness.
Alternative (3D Heart) :
Make 2 small circles (6 sc in mr, 6 inc second round = 12, fasten off), press together and seam to form a heart; or follow a small heart motif: ch 4, (sc, hdc, dc) in 1st ch, sl st into next ch, repeat to make two lobes and draw down to a point with a few sc.
Info :
Sew leaves to vine ends and at intervals along vine. For the heart-shaped look in the photos, flatten leaves and pinch the base slightly when sewing to create the little fold visible in the dangling tips.
— Assembly: Sewing Eyes, Moss Balls, Leaves to Vines :
Info :
Decide vine positions before attaching eyeballs so the weight distributes evenly. Typical layout: 6–8 vines evenly spaced around the crown, 4–5 vines carry eyeballs (one eyeball per vine), several small moss balls and leaves placed to balance the look.
Step 1 :
Position each vine inside the crown edge and hand-sew through the crown and top rim with the long tail. Make several stitches through the rim to secure the cord so it can support the weight of the eyeball.
Step 2 :
Sew small moss balls along vines: push the woven tail into the vine, whip stitch around several times and knot inside the moss ball. Use a few hidden stitches to anchor them firmly.
Step 3 :
Sew eyeballs to vine ends by threading the long tail (from eyeball closure) down through the vine and anchoring with several stitches. Position eyeballs so embroidered irises face outward. Add a few more stitches through the vine for security.
Info :
Stitch through several layers (vine tube + inside crown) for a very secure joint. If your vines are made with a core (wire), be sure to fold the wire ends away from the seam or cap them safely before sewing.
— Hanger / Straps :
Method :
For the hanger, use three cords made of brown yarn to match the pot in photos. Chain to desired hanging length (approx 30–40 ch each), then fold and sc through both sides to make 3 cords. Braid the three cords together for 5–10 cm then sew each cord securely into the pot rim stitches made earlier.
Info :
Alternatively you can make one long cord or attach a metal ring. Make sure all hanger anchoring is robust to prevent the ornament from falling apart when hung.
— Final Finishing Touches :
Info :
Weave in all tails, trim close to work. Use a poking tool to even out stuffing if small lumps appear. Add a few surface stitches to tuck in the crown so it appears naturally spilling over the rim. Spray a tiny dot of fabric glue if any embroidery threads seem loose (let dry completely).
Optional :
Add a tiny red embroidery or French knots at random leaf junctions to mimic berries or extra spooky details. You can also add a clear coat of textile glue to the inside of the pot to stiffen the rim.
Info :
If making as a child's toy, omit glued elements and secure everything thoroughly with stitching. Embroider pupils directly instead of attaching small parts to avoid small loose pieces.
— Customization Ideas :
Info :
Make the eyeballs in different sizes, use different iris colors, or make one large eyeball and smaller ones like berries. Try fuzzy eyelids by edging the top of the eyeball with FLO sc in a contrasting color for a sleepy or monstrous look.
This spooky hanging eyeball plant is the perfect tiny treasure to add personality to shelf corners, doorways, or your Halloween display. Each dangling eye and heart-shaped leaf adds a playful, slightly creepy charm you will love showing off. The modular construction makes it fun to customize — add more eyes, change color palettes, or scale the design up or down. Happy crocheting and enjoy your eerie creation! 🧶👁️