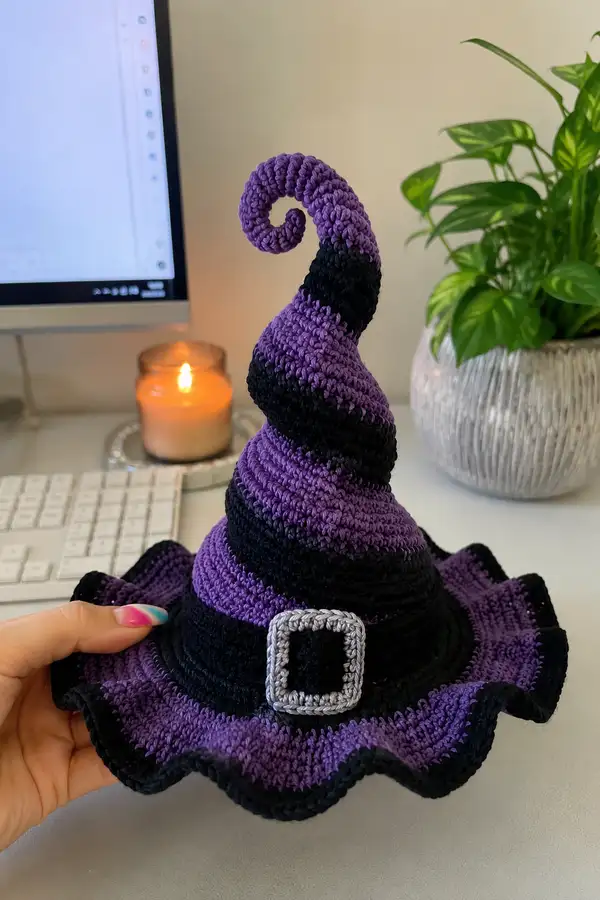
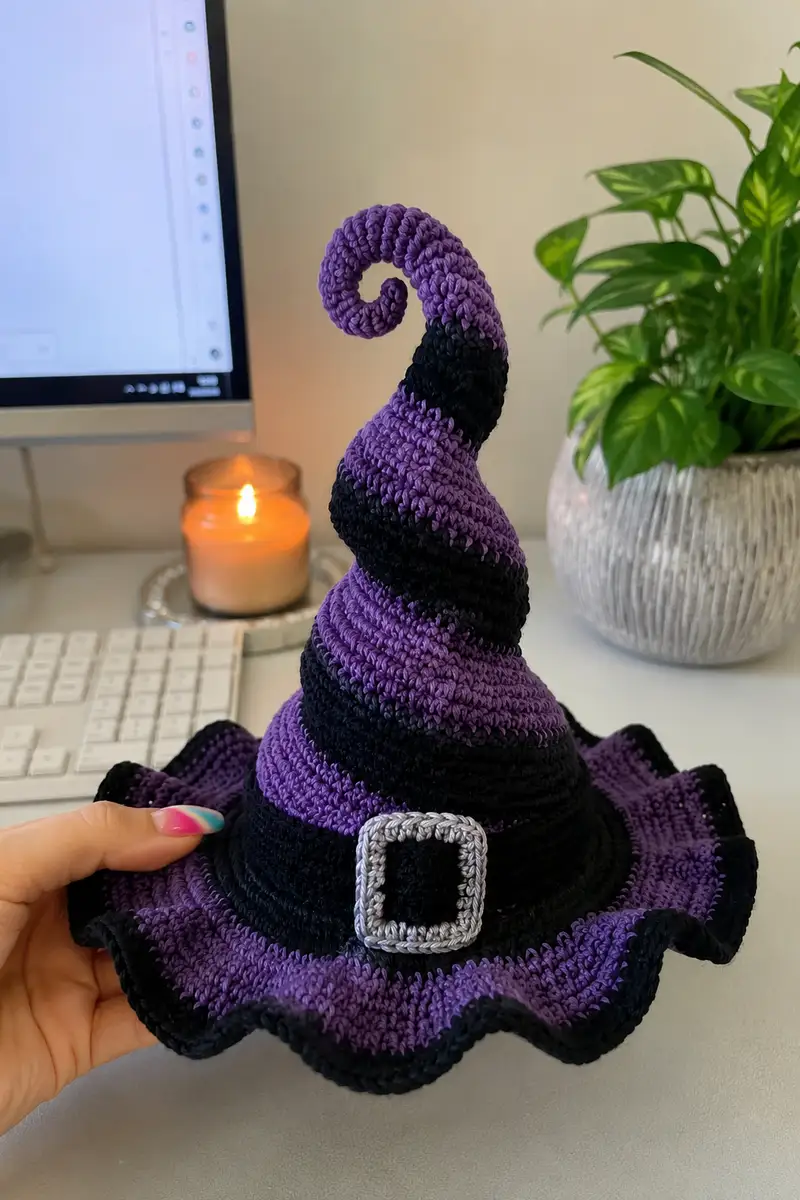
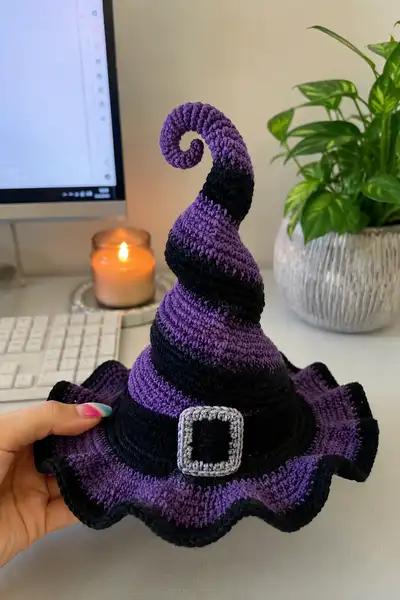
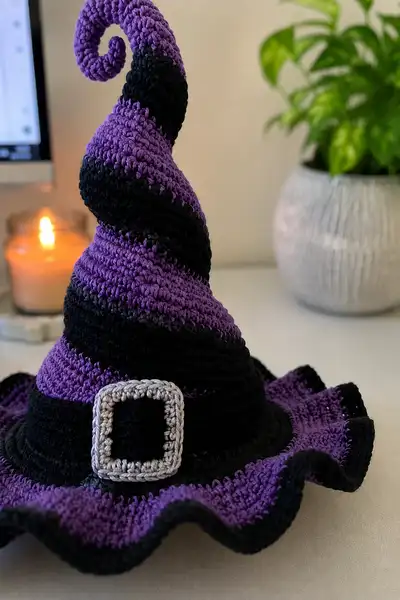
A whimsical, sculpted witch hat with a curled spiral tip, dramatic ruffled brim, and contrasting purple-and-black stripes. This decorative accessory features a neat silver buckle accent and holds its shape with optional internal support for a striking, poseable curl. Perfect for Halloween decorating, costumes, or a seasonal mantelpiece—designed with clear, step-by-step shaping and plenty of assembly tips.
Progress Tracker
0% Complete
— Crown (Base of Cone) :
Round 1 :
6 sc in magic ring (6)
Round 3 :
(1 sc, inc) x 6 (18)
Round 4 :
(2 sc, inc) x 6 (24)
Round 5 :
(3 sc, inc) x 6 (30)
Round 6 :
(4 sc, inc) x 6 (36)
Round 7 :
(5 sc, inc) x 6 (42)
Round 8 :
(6 sc, inc) x 6 (48)
Round 9 :
(7 sc, inc) x 6 (54)
Round 10 :
(8 sc, inc) x 6 (60)
Info :
Your hat crown base now measures approximate inner circumference for an average adult head depending on yarn and tension. Check your gauge: 60 sts should produce roughly 21-23cm diameter across the base. Adjust by adding or skipping increase rounds if you need a wider or narrower fit before proceeding.
Round 11-15 :
1 sc in each st (60)
Info :
Start striping sequence here. The pictured hat alternates broad bands (~3-7 rounds depending on desired stripe width) of purple and black that spiral around the cone. To make neat bands, change color at the start of the round. Carry unused yarn neatly inside the cone and twist the two colors once on the join to avoid holes.
Round 16 :
1 sc in each st (60) - change to Black at end of round if you are starting with Purple and want the first black band here
Round 17-20 :
1 sc in each st (60)
Info :
The first full-height band is worked over these rounds. Keep tension even. If you prefer narrower or wider stripes, change color earlier or later—each round shift moves the spiral one step.
Round 21 :
(8 sc, dec) x 6 (54)
Round 22 :
1 sc in each st (54)
Round 23 :
(7 sc, dec) x 6 (48)
Round 24 :
1 sc in each st (48)
Info :
Begin gentle tapering from rounds 21-24 to start lifting the cone upward. The decreases reduce circumference and start the hat's sloped profile. Keep the decrease pattern evenly spaced so the cone keeps a smooth curve.
Round 25 :
(6 sc, dec) x 6 (42)
Round 26 :
1 sc in each st (42)
Round 27 :
(5 sc, dec) x 6 (36)
Round 28 :
1 sc in each st (36)
Info :
Change stripe color now to create the alternating helix. Because we are decreasing circumference the stripe will twist naturally as you continue working—this is what creates the spiral banding effect visible in the photos.
Round 29 :
(4 sc, dec) x 6 (30)
Round 30 :
1 sc in each st (30)
Round 31 :
(3 sc, dec) x 6 (24)
Round 32 :
1 sc in each st (24)
Info :
From here the cone becomes narrower—pay attention to stripe transitions to keep the spiral appearance consistent. If your stripes seem to jump, work an extra even round between color changes to realign the diagonal.
Round 33 :
(2 sc, dec) x 6 (18)
Round 34 :
1 sc in each st (18)
Round 35 :
(1 sc, dec) x 6 (12)
Round 36 :
1 sc in each st (12)
Info :
We will now begin the slender spiral tip section which is crocheted continuing in the round while alternating increases/decreases slightly to encourage a tapered shape that can be formed into a curl. The pictured tip is quite tall, so we will work many small rounds to create a long, tapered tube.
Round 37 :
(1 sc, inc) x 6 (18)
Round 38 :
1 sc in each st (18)
Round 39 :
(2 sc, inc) x 6 (24)
Round 40 :
1 sc in each st (24)
Round 41 :
(3 sc, inc) x 6 (30)
Info :
These small increases intentionally create a slight bulb before we begin tapering again — this gives the spiral base a gentle curve rather than a hard point when coiled.
Round 42 :
1 sc in each st (30)
Round 43 :
(4 sc, inc) x 6 (36)
Round 44 :
1 sc in each st (36)
Round 45 :
(5 sc, inc) x 6 (42)
Round 46 :
1 sc in each st (42)
Info :
At this stage you will see the cone lengthen. If you want a taller or shorter final spiral, adjust the number of even rounds between shaping sets — adding more even rounds will add height without changing circumference.
Round 47 :
(6 sc, inc) x 6 (48)
Round 48-49 :
1 sc in each st (48)
Round 50 :
(6 sc, dec) x 6 (42)
Round 51 :
1 sc in each st (42)
Round 52 :
(5 sc, dec) x 6 (36)
Round 53 :
1 sc in each st (36)
Info :
We are sculpting the cone into a long tube that will be gently stuffed and wired. Keep rounds consistent; if you see the spiral leaning too sharply, add an even round to relax the slope.
Round 54 :
(4 sc, dec) x 6 (30)
Round 55 :
1 sc in each st (30)
Round 56 :
(3 sc, dec) x 6 (24)
Round 57 :
1 sc in each st (24)
Info :
Begin stuffing very lightly into the cone/tip from this point forward. Use small amounts of fiberfill — you want enough to maintain shape, but the tip needs flexibility to coil. If you plan to insert wire, leave an opening at the top long enough to push wire through later.
Round 58 :
(2 sc, dec) x 6 (18)
Round 59 :
1 sc in each st (18)
Round 60 :
(1 sc, dec) x 6 (12)
Round 61 :
1 sc in each st (12)
Info :
Fasten off if you plan to close the very tip and not insert wire. For a curled spiral like the photo, leave a 20-25cm tail, insert wire, then continue working extra rounds around the wire to cover it, maintaining the round stitch counts below to produce the coiling effect.
Round 63 :
With wire inserted through center of cone (if using), continue 1 sc in each st (6). Rotate and work in continuous spiral to extend the tube length as needed to reach final curl length (work 8-20 more rounds of 6 sc to create a long thin tube depending on how tall you want the tail). (6)
Round 64-76 :
1 sc in each st (6). Work 13 rounds of 6 to extend the slender tip. (6)
Info :
At this narrow diameter the tube is easily curleable. After covering the wire fully with these rounds, begin coiling the tip by wrapping the wire to form the spiral starting at the top and rolling downward until you reach the desired curl shown in the photos. If not using wire, you can create the spiral by crocheting partial rounds and sewing the tube in a spiral; wire gives the cleanest, lasting curl.
— Stripe Pattern Notes (Color Changes) :
Info :
The pictured hat alternates broader purple and narrow black bands giving a helical, candy-cane-like spiral. Apply color changes at the start of the round by fastening off and joining the new color or by carrying and twisting yarns. Recommended band widths (in rounds): Purple band: 6-8 rounds; Black band: 4-6 rounds. Adjust to taste. To create the spiral effect more dramatically, change colors offset by 1-2 sts on subsequent bands (this, combined with the cone taper, makes bands appear to wrap diagonally).
— Brim (Worked after joining to Crown Base) :
Info :
After completing the cone portion up to the point where the base meets the forehead region, we will join the brim. The base circumference earlier was 60 sts at round 10; ensure you return to the round corresponding to the base where you want the brim to attach (typically the wider flat base before tapering began). If your top has reduced circumference, go back to the round where circumference equals desired brim join, or add a short join round to increase to brim join count.
Round B1 :
Join yarn at base edge (where hat will sit on head). Work 1 sc in each base st around to create a stable attachment row. (60)
Round B2 :
(1 sc, inc) x 20 (80)
Info :
The brim starts with gradual increases to produce a flat disc. Work increases evenly spaced to avoid ripples at first. The B2 result gives a moderate brim flare. If you want a larger brim, repeat an increase round to expand diameter before the ruffle rows.
Round B3 :
1 sc in each st (80)
Round B4 :
(6 sc, inc) x 10 (90)
Round B5 :
1 sc in each st (90)
Info :
Now we will establish the base brim body by alternating even rounds and gentle increases for a smooth outward curve. This builds the platform for the dramatic ruffle edge.
Round B6 :
(7 sc, inc) x 10 (100)
Round B7-8 :
1 sc in each st (100)
Round B9 :
(8 sc, inc) x 10 (110)
Round B10 :
1 sc in each st (110)
Info :
If you prefer a narrower brim, stop increases earlier. If you prefer more dramatic waves at the edge, allow the brim to be larger than pictured by adding an extra increase round (for example, adding a (9 sc, inc) round for a final 120 sts).
Round B11 :
(9 sc, inc) x 10 (120)
Round B12-13 :
1 sc in each st (120)
Info :
We will now work the ruffle edge. The ruffle is formed using shell or multiple-stitch clusters in alternating colors (purple with black edging in the photo). Because the brim currently has 120 sts, each ruffle repeat will be spaced to create deep waves.
Round R1 :
Change to Purple (if not already). *Skip 2 sts, 5 dc in next st (shell), skip 2 sts, sl st in next st; rep from * around to end. (Approx 24 shells - adjust to fit counts evenly)
Round R2 :
Join Black. Working behind shells (in space between shells), sc evenly around to create contrast band behind shells. Sc around and fasten off. (120)
Info :
Alternative ruffle option: a 3dc shell and 1 sc spacer gives gentler ripples; a 5dc shell gives deep dramatic waves as pictured. If your shell count doesn't divide evenly, adjust by adding or subtracting small filler stitches in Round B12.
Round R3 :
Work a finished edge: with Black, sc around the outer edge of each shell and sl st into tip to give a crisp black ruffle edge. If desired work 2 sc in each sl st for a thicker edge. Fasten off and weave ends neatly.
Info :
Block the brim lightly on a flat surface to coax the waves to lie evenly before finishing the edge. Pin each shell peak to desired shape, then use steam (do not press directly on synthetic yarn) or wet-block to set the waves.
— Spiral Tip Covering & Curl Formation :
Info :
If you inserted wire earlier, you have completed the tube covering rounds (Rounds 63-76). Now bend the wire to form the spiral: start at the tip, curl tightly into a small coil, then continue coiling larger loops until you reach the desired spiral length. The cone should spiral back on itself several times to mimic the photo. After shaping, adjust stuffing slightly to fill gaps and smooth the fabric around the bend.
Round S1 :
To neaten the spiral look, sc around the outside of the curled tip joining close loops to keep the shape. For example, work 2 sc in each round of the outer edge where the curl overlaps to bind layers together. Work as needed until the spiral is secure. Fasten off and weave tail inside the spiral to hide the end.
Info :
If you are not using wire, form the curl by coiling the hollow tube and sewing through overlapping layers with a length of yarn to hold the coil. Slight stuffing between layers helps the coil hold a soft rounded shape.
— Decorative Band & Buckle :
Band Round 1 :
With Black, join at base where brim meets crown. Ch 1, work 1 sc in each st around for 2 rounds to create a firm band. (60 or the joining count if you adjusted)
Band Round 2 :
Work 1 sc in each st BLO for 2 rounds to create a subtle ridge for the buckle to sit on. Fasten off leaving a yarn tail for sewing. (60)
Info :
The band should lie flat around the base of the cone so the buckle sits centered. Pin it in position before sewing. If needed, reduce or increase band length by adding ch stitches before joining to fit your circumference.
Buckle - Round 1 :
With Silver/Grey, ch 11; sl st into first ch to form small loop, or work 10 sc into a magic ring to create a small square foundation. (10)
Buckle - Round 2 :
1 sc in each st around, then work 2 sc in corner sts (if you used a loop, work 2 sc in opposite sides) to begin squaring the loop. (12-14 depending on shaping)
Buckle - Round 3 :
In Silver: Work a second round of sc; for a squared buckle look, use hdc along long edges and sc on short edges. Fasten off leaving long tail for sewing. Block the buckle on a square form (small card) to flatten and square edges if needed.
Info :
To make a hollow buckle like the photo: create a small rectangle with an inner opening by crocheting a slightly larger rectangle and then placing a small black rectangle backing inside as the buckle center. Alternatively, work the silver rectangle and then insert a black crocheted rectangle and whipstitch silver around it to form a frame.
Buckle Backing :
With Black, ch 9 and join to make a small flat rectangle roughly the size of the inner buckle; sc around and fasten off. Sew this black piece to the back of the silver rectangle to create visible center. Weave all ends.
Info :
Sew or glue the buckle to the black band securing through both band and buckle backing with multiple passes to ensure it stays in place. If the hat will be worn, use extra stitches and knot securely on inside. Optional: use fabric glue for extra hold then conceal glue seam by stitching over it.
— Edge Finishing & Final Details :
Edge Finish 1 :
Work a neat edging around the brim with Black: sc in each st around outermost shell peaks (for the shell pattern above sc around each peak) and sl st at low points to give a crisp black border. If you prefer a more delicate edge, use picot edging: *ch 3, sl st in first ch, sc in next st; rep.
Edge Finish 2 :
Alternate option for crisp edge: use 1 sc, 1 hdc alternating around the shell tips to create a slightly raised scallop. Fasten off, weave ends.
Info :
After finishing the edge, lightly block the brim to set the ruffle. Pin down each wave and use steam or spritz with water then allow to dry. Synthetic yarns can be heat sensitive—use low steam and do not press iron directly on the hat.
Final Assembly :
Position the band around base and sew with matching black yarn through the band and base rows of the crown, distributing tension evenly. Sew the buckle centered at the front, securing backing stitches through the band then knot and hide tails inside the band.
Info :
Trim and hide all loose ends by weaving them into the fabric toward the cone interior. Use a small amount of glue at high-stress points (like the buckle) if the hat will be handled frequently. For a wearable hat, consider sewing a lightweight hat elastic or ribbon into the inner base to help it sit securely when worn.
This sculpted witch hat is a festive, playful addition to your Halloween decor or costume collection! The dramatic spiral and ruffled brim create so much character, and the striped colorwork makes it pop. Whether you display it on a shelf or top off a costume, this handmade hat is bound to get compliments. 🧶🎃✨