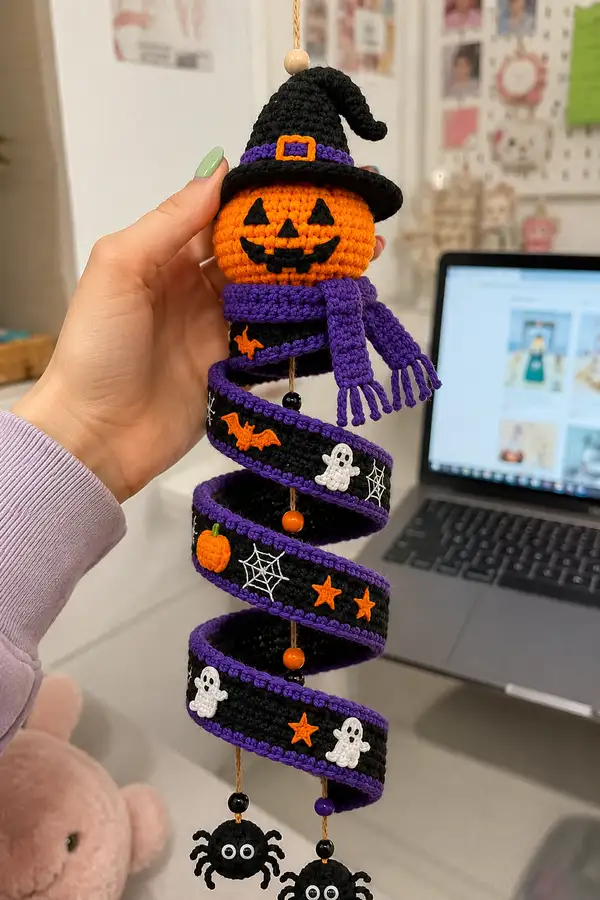
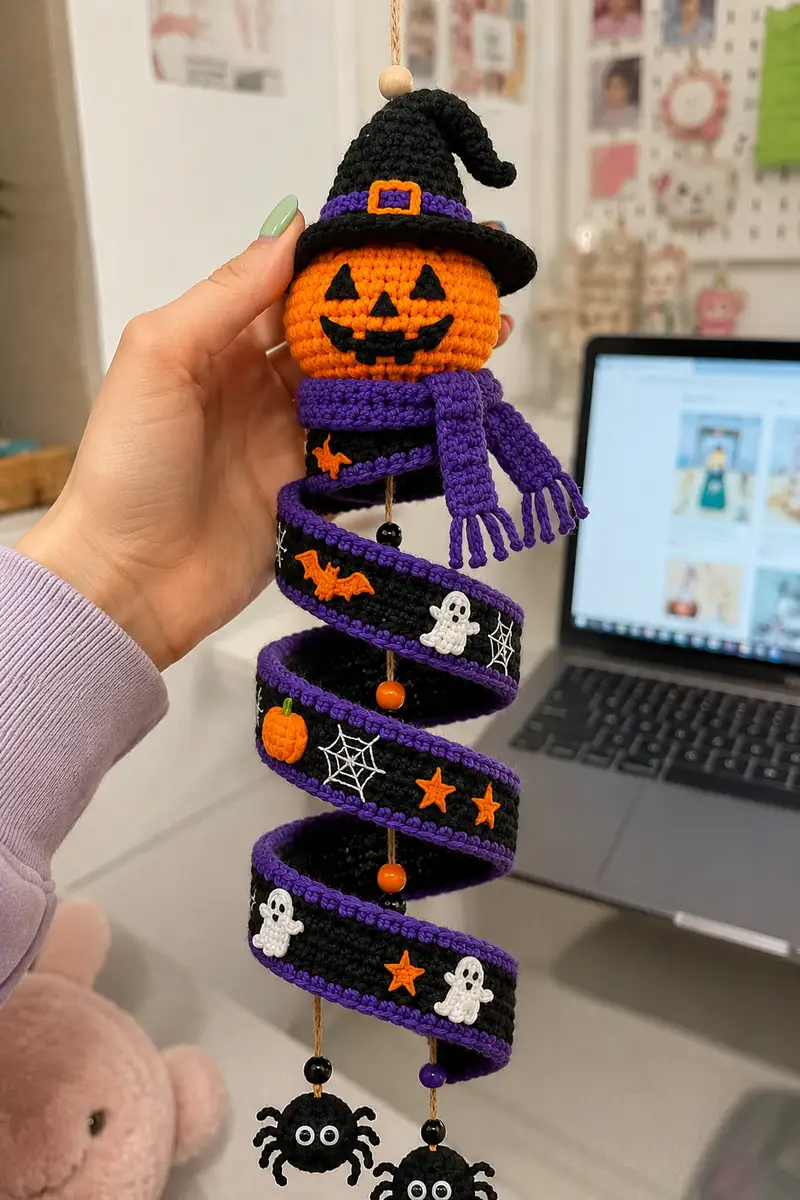
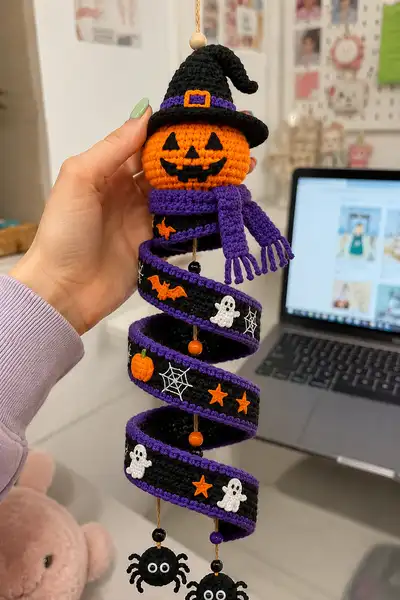
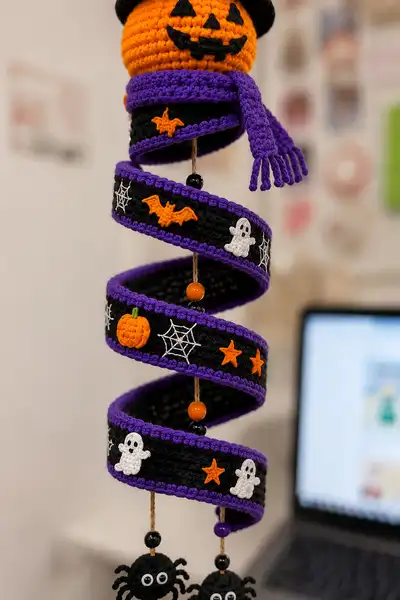
Create a charming Halloween spiral mobile featuring a smiling jack-o-lantern head wearing a witch hat, a cozy purple scarf, a long black spiral with purple trim, embroidered spiderwebs and tiny appliques, plus two dangling crocheted spiders. This pattern is richly detailed with step-by-step rounds, embroidery tips, and assembly guidance to recreate the exact festive hanging decoration shown.
Progress Tracker
0% Complete
— Head (Pumpkin) :
Round 1 :
6 sc in magic ring (6)
Round 3 :
(1 sc, inc) x 6 (18)
Round 4 :
(2 sc, inc) x 6 (24)
Round 5 :
(3 sc, inc) x 6 (30)
Round 6 :
(4 sc, inc) x 6 (36)
Round 7 :
(5 sc, inc) x 6 (42)
Round 8 :
(6 sc, inc) x 6 (48)
Round 9 :
1 sc in each st (48)
Round 10 :
1 sc in each st (48)
Round 11 :
1 sc in each st (48)
Info :
Place safety eyes or mark eye placement between rounds 12-14 about 8-10 stitches apart (measured across front), depending on desired expression. If embroidering the eyes later, place small pins to mark positions now.
Round 12 :
1 sc in each st (48)
Round 13 :
1 sc in each st (48)
Round 14 :
1 sc in each st (48)
Round 15 :
1 sc in each st (48)
Info :
Jack-o-lantern facial features will be embroidered/crocheted onto the front. Mark the center front and a vertical guideline. If using crocheted triangle appliques, leave space now to sew them on later (approx centerline between rounds 12-15).
Round 16 :
(6 sc, dec) x 6 (42)
Round 17 :
(5 sc, dec) x 6 (36)
Round 18 :
1 sc in each st (36)
Round 19 :
(4 sc, dec) x 6 (30)
Round 20 :
(3 sc, dec) x 6 (24)
Info :
Start stuffing head firmly here. Add small amounts of fiberfill at a time to avoid lumps. For a pumpkin look, stuff to a slightly firm but squeezable feel so it retains shape when hanging.
Round 21 :
(2 sc, dec) x 6 (18)
Round 22 :
(1 sc, dec) x 6 (12)
Round 23 :
12 sc in continuous round (12) — leave opening for cord insertion
Info :
Do not close completely. Leave approximately a 6-8 cm tail of yarn to sew the head to the top of the spiral or to secure the suspension cord. If you plan to thread cord through head, insert cord now and secure with a few stitches around the base before finishing stuffing.
Round 24 :
Optional: work 1 round of sc around the outside with BLO to create a subtle ridge (12) if you want a defined neck edge
Info :
Embroider or sew the jack-o-lantern face now using black yarn: two triangular eyes, a triangle nose and a smiling mouth made with small crocheted pieces or embroidered surface crochet. Use reference photo for proportions: eyes set between rounds 12-14, mouth centered on round 15-17 spanning about 14-18 stitches.
— Witch Hat :
Round 1 :
Using black, 6 sc in magic ring (6)
Round 3 :
(1 sc, inc) x 6 (18)
Round 4 :
(2 sc, inc) x 6 (24)
Round 5 :
(3 sc, inc) x 6 (30)
Round 6 :
(4 sc, inc) x 6 (36)
Round 7 :
1 sc in each st (36)
Round 8 :
1 sc in each st (36)
Round 9 :
1 sc in each st (36)
Info :
This forms the tapered top of the hat. If you want a taller pointy hat, add extra even rounds here before beginning the brim.
Round 10 :
(4 sc, dec) x 6 (30) — begin slight shaping if needed
Round 11 :
1 sc in each st (30)
Round 12 :
1 sc in each st (30)
Info :
For the hat brim, we will work an outward flared circle. Join at the base of the hat top and begin the brim increases to create a flat disk that will be slightly larger than the head circumference (aim ~56-60 sts around).
Round 13 :
Attach yarn at base and sc across to join if needed. Round of sc to create a base (30)
Round 14 :
(5 sc, inc) x 6 (36)
Round 15 :
(6 sc, inc) x 6 (42)
Round 16 :
(7 sc, inc) x 6 (48)
Round 17 :
(8 sc, inc) x 6 (54)
Round 18 :
(9 sc, inc) x 6 (60)
Info :
Work two rounds of sc around the brim (60 each) to thicken and give weight to the brim so it lays flat. If you want a firm brim, you can slip-stitch through both loops and then single crochet around again for stiffness.
Round 19 :
1 sc in each st (60)
Round 20 :
1 sc in each st (60). Fasten off leaving long tail for sewing to head.
Round 21 :
Optional: Create hat band using purple: attach purple under brim and work 1 round of sc around brim edge (60) then fasten off; add small orange buckle applique later.
Info :
To create the bent hat tip shown, insert a short length of craft wire inside the taper before stuffing the top and bend it into a whimsical curve. Wrap wire ends with yarn so it won't poke through.
— Scarf :
Info :
The scarf in the photo is a narrow flat scarf wrapped around the neck. We'll make a long flat scarf worked in rows. Chain a length of 45 (or desired length) using purple. Turn and work back and forth in rows using sc.
Row 1 :
Ch 45, sc in 2nd ch from hook and across (44)
Row 2-18 :
Turn, ch 1, sc across (44) — repeat until you have 18 rows (or desired scarf width and length)
Info :
Make fringe by cutting 6cm pieces of yarn and folding into loops, attaching fringe at one short end every 3rd stitch across. Add fringe to one or both ends for authenticity.
Row 19 :
Fasten off and weave in ends. If desired, make scarf as a tube by folding and sewing long edge together to make a round scarf for a thicker look.
— Spiral Ribbon (Main Body) :
Info :
This spiral is a long rectangular strip worked back and forth and then edged in purple. The strip is approximately 48 sts per row and 80-100 rows long to create multiple coils when suspended. Exact length can be scaled: each 10 rows will form approximately one coil depending on yarn and tension.
Foundation :
Ch 48 (or measure head circumference + 8 for overlap). This will be the width of the spiral strip (48 sts).
Row 1 :
Sc in 2nd ch from hook and each across (47)
Row 2 :
Ch 1, turn, sc across (47)
Row 3-80 :
Repeat Row 2 for a total of 80 rows (47 each) — adjust number of rows to lengthen/shorten spiral. For the sample pictured, 80 rows yields 4-5 coils. Keep consistent tension.
Info :
To make the strip slightly stiff and coil better, work the final 2 rows in BLO which will create a slight ridge. Alternatively, add a length of craft wire sewn along the inner edge to help the strip hold a spiral shape.
Edge Row 81 :
Attach purple yarn at one short end and work sc evenly around the entire rectangle edge (work 2 sc in each corner to turn the corner). Keep count consistent; expected stitches around ~2*(47+80) + corners; work firmly to create an even purple trim.
Edge Row 82 :
Work another round of sc in purple around edge to thicken border. Fasten off and weave in ends. Optional: use slip stitch border for a flatter trim.
Info :
Blocking the strip lightly by dampening and shaping over a round form can help it coil evenly. If you choose to add craft wire inside, sew it along the inner central line before edge rounds so wire sits flush.
— Spiral Appliques and Embroidery :
Info :
Make small appliques separately and sew them onto the spiral. Arrange ghosts, bats, pumpkins, stars and embroidered spiderwebs spaced evenly. Below are patterns for each applique. Use a tapestry needle to sew on securely.
— Ghost Applique (Make 6) :
Round 1 :
Using white, 6 sc in magic ring (6)
Round 3 :
(1 sc, inc) x 6 (18)
Round 4 :
1 sc in each st (18)
Round 5 :
Change to small detail shaping: Ch1, (sc2tog, ch2) around to create scalloped hem; or alternativelly create 3 small bobble feet by doing (sc, hdc, sc) spaced evenly across the final round. Fasten off leaving tail for sewing.
Info :
Embroider two small black eyes and a surprised mouth using black embroidery thread. Sew ghost onto spiral with small invisible stitches.
— Pumpkin Applique (Make 2-3) :
Round 1 :
Using orange, 6 sc in magic ring (6)
Round 3 :
(1 sc, inc) x 6 (18)
Round 4 :
1 sc in each st (18) — fasten off leaving tail
Round 5 :
Using green, embroider a tiny stem with 3-4 vertical satin stitches at top center and add surface stitches to indicate pumpkin segments with darker orange yarn.
Info :
Sew pumpkin to spiral using tail yarn, adding a couple of small stitches to anchor so it does not rotate when mobile is moved.
— Bat Applique (Make 4) :
Round 1 :
Chain 6, sc in 2nd ch from hook, sc across to create a small bar for the bat body (5). Fasten off leaving tail for sewing.
Round 2 :
Using remaining black, embroider two wings by creating triangular surface crochet pieces: working a chain of 6, attach at side of body and decrease back (sl st, hdc, sc) to create scalloped wing. Repeat on other side.
Info :
Flatten slightly and sew securely to spiral. Small orange detail can be added by stitching a tiny star or dot in center of bat.
— Star Applique (Make 8) :
Round 1 :
Using orange, ch 6, sl st into first to form a ring. (Ch4, sl st) x5 to create five points; fasten off and sew center down so star holds shape.
Info :
Stars are mostly flat — tack them to the spiral with 3-4 small stitches so they stay flush.
— Spiderweb Embroidery :
Info :
Using white embroidery thread, secure a central knot on the spiral surface, then stitch spokes radiating out (4-6 spokes) and connect them with small curved backstitches to create a web. Keep tension gentle to avoid puckering fabric.
— Crochet Spider (Make 2) :
Round 1 :
Using black, 6 sc in magic ring (6)
Round 3 :
(1 sc, inc) x 6 (18)
Round 4 :
1 sc in each st (18)
Round 5 :
(1 sc, dec) x 6 (12)
Round 6 :
1 sc in each st (12) — stuff lightly and fasten off leaving tail for sewing
Info :
Create eight legs using short chains sewn to the body. For each leg: ch 6, slip stitch back along the chain to give a firm curved leg, fasten off and sew into side of the spider body. Add safety eyes or stitch two white eye dots with black pupils.
Leg Construction (repeat 8) :
Ch 6, turn, sl st back along chain to form a firm rod-like leg (5 sl st). Fasten off and sew securely into position (4 legs on each side).
Info :
For more dimension, add a little stuffing to the spider body before closing and attach a bead above the spider where it meets the cord to act as a support and spacer in the mobile.
— Small Detail Pieces (Stars, Buckle) :
Buckle :
Chain 6, (sc across), then use orange yarn to create a tiny square by crocheting into a loop and closing with 4 sc rounds to form a 4x4 mini square. Sew onto hat band.
Info :
Arrange appliques symmetrically on the spiral. Use pins to change placement until satisfied. Sew on with small tight stitches to keep them flat and secure while the mobile moves.
— Bead & Cord Details :
Info :
Cut a length of waxed cord or twine about 40-60 cm depending on how long you want your mobile. Thread beads in the places you plan to separate coils (sample uses 6-8 beads spaced evenly). Tie knots under beads to lock them in place. In sample, beads separate each coil and anchor each spider.
Tip :
Knot a strong loop at the top of the cord for hanging. Use a wooden bead above the head to hide the loop knot and give a neat finish.
— Final Assembly :
Info :
Assemble in this order: thread cord through head, secure head to cord, attach spiral around cord by positioning coils and tacking in place with small stitches, place beads and appliques, then hang spiders at bottom. Detailed steps follow in assembly section.
Final Touches :
Check all applique attachments, reinforce any loose stitches with additional sewing, and trim excess threads. If desired, add a small dab of glue under knots to prevent slippage.
Info :
We have used a modular approach — you can shorten the spiral, increase coils, or switch motif placement. Keep tension consistent and use pins to preview final placement before sewing pieces down.
This Halloween spiral pumpkin mobile is such a joyful project — every stitch adds character and personality. I hope you enjoy assembling the head, hat, scarf and spiral and then watching your appliques dance as the mobile sways. The mix of amigurumi and embroidery lets you practice many techniques while creating a festive decoration you can treasure each October. Happy crocheting and have fun making it uniquely yours! 🎃🕷️