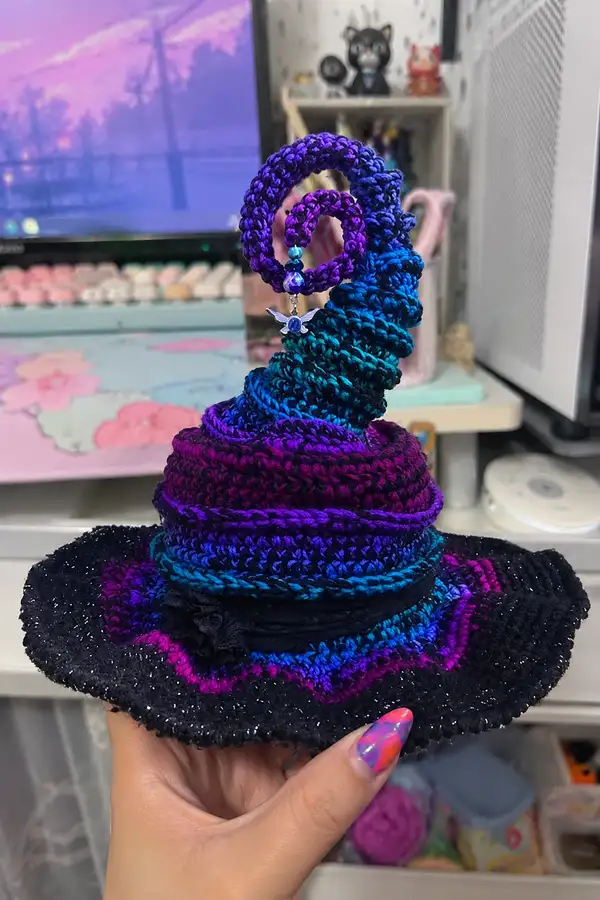
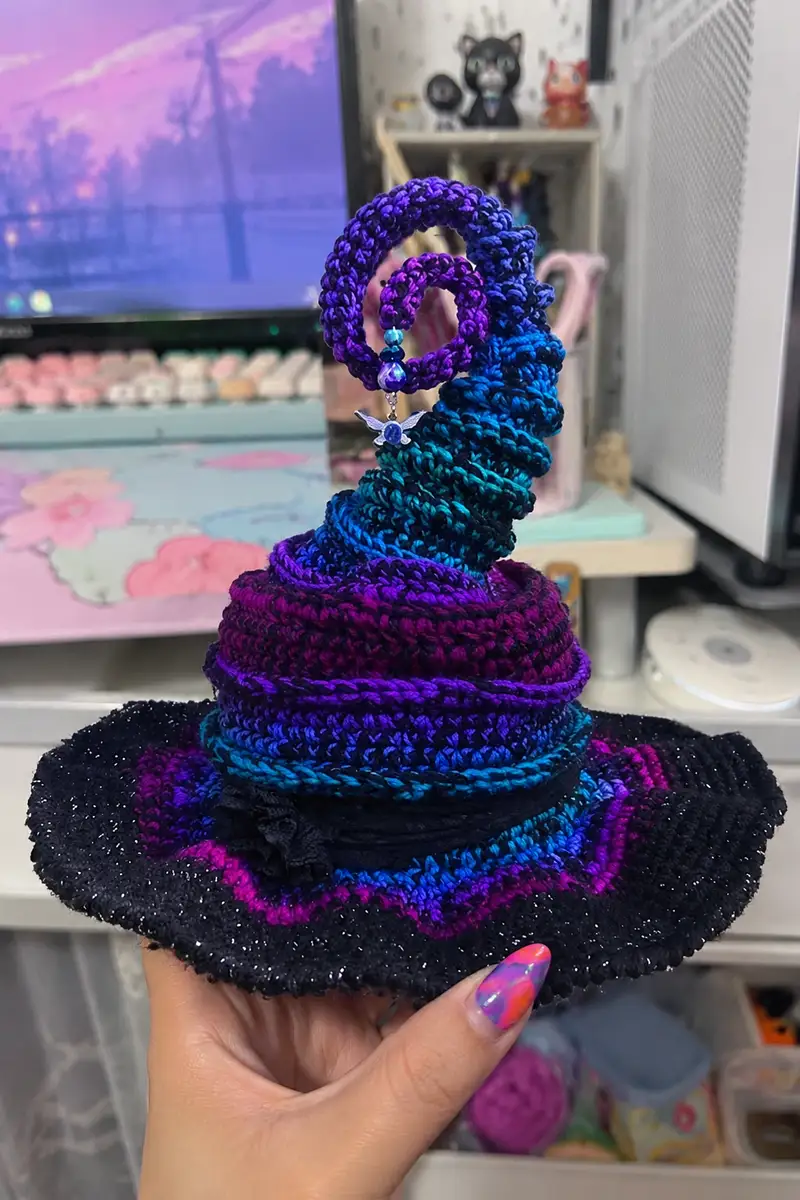
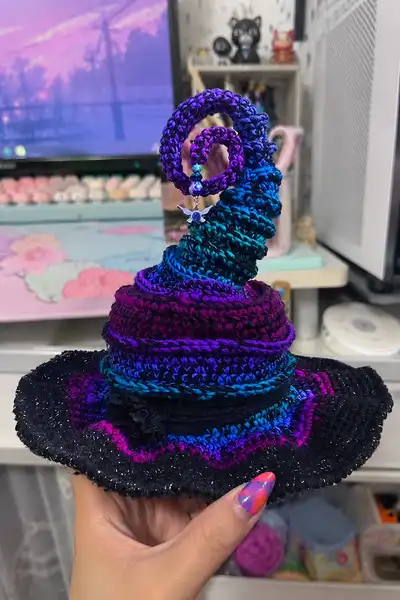
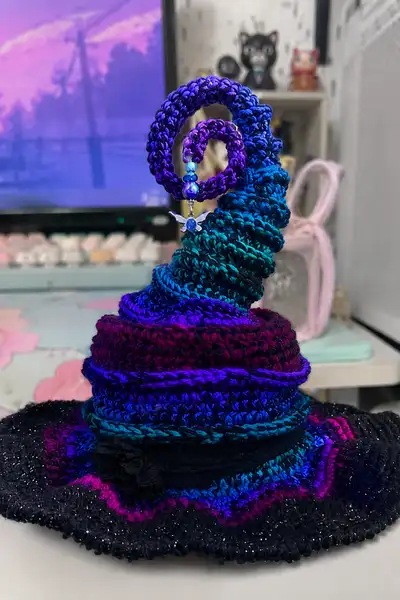
A whimsical, twisty witch hat with a high spiral point, beaded charm and layered textured brim. Worked in gradient variegated yarns for a mysterious blue, teal and purple ombre effect with glittery black accents. This pattern includes internal support for the spiral, a decorative band, and a tiny dangling charm for personality. Perfect as a display piece, desk companion, or Halloween decor.
Progress Tracker
0% Complete
— Brim :
Round 1 :
6 sc in magic ring (6)
Round 3 :
(1 sc, 1 inc) x 6 (18)
Round 4 :
(2 sc, 1 inc) x 6 (24)
Round 5 :
(3 sc, 1 inc) x 6 (30)
Info :
We are starting the hat from the center of the brim and expanding outward. Use a stitch marker for the first stitch of each round. For the pictured brim, variegated yarn is used alternating with the black sparkly yarn at later rounds for an edge highlight.
Round 6 :
(4 sc, 1 inc) x 6 (36)
Round 7 :
(5 sc, 1 inc) x 6 (42)
Round 8 :
(6 sc, 1 inc) x 6 (48)
Round 9 :
(7 sc, 1 inc) x 6 (54)
Round 10 :
(8 sc, 1 inc) x 6 (60)
Info :
Check the circle lays flat. If it starts to ruffle, reduce increases in the next round; if it cups, add a few more increases. This brim is wide, so we continue expansions to create a generous circular base.
Round 11 :
(9 sc, 1 inc) x 6 (66)
Round 12 :
(10 sc, 1 inc) x 6 (72)
Round 13 :
1 sc in each st (72)
Round 14 :
1 sc in each st BLO (72)
Info :
Work a ridge round in BLO to create a slight texture change that will help the brim sit flatter and provide contrast when you switch yarns. Change to black sparkly yarn at the beginning of Round 15 if you want the glittery edge visible in these outer rounds.
Round 15 :
Change to black sparkly yarn. 1 sc in each st (72)
Round 16 :
(7 sc, 1 inc) x 8 (80)
Round 17 :
1 sc in each st (80)
Info :
By now the brim diameter is becoming substantial — approximately 18-22 cm depending on your tension. If you prefer a slightly smaller brim, stop increases earlier (e.g., at 72 sts) and proceed to shaping.
Round 18 :
(9 sc, 1 inc) x 8 (88)
Round 19 :
1 sc in each st (88)
Round 20 :
1 sc in each st FLO (88)
Round 21 :
Switch back to variegated yarn (teal/blue/purple). 1 sc in each st (88)
Info :
Use FLO (front loops only) on certain rounds to make a subtle ruffle line you can see in the photos where color bands change. Carry yarn beneath if the color change is short, or fasten off and weave in ends for neat color transitions.
Round 22 :
(10 sc, 1 inc) x 8 (96)
Round 23 :
1 sc in each st (96)
Round 24 :
(11 sc, 1 inc) x 8 (104)
Round 25 :
1 sc in each st (104)
Info :
Create the outer scalloped line by alternating 2 rounds of sc with one round where you work groups to form a wavy edge. The pictured brim shows color banding and a glittery outer rim. If you want a sharper scallop, use dc clusters later on the brim edge.
Round 26 :
1 sc in each st BLO (104)
Round 27 :
Change to black sparkly yarn. (5 sc, 1 inc) x 13 + (1 sc) (120)
Round 28 :
1 sc in each st (120)
Round 29 :
(3 sc, 1 inc) x 24 + (2 sc) (144)
Round 30 :
1 sc in each st (144)
Info :
Fasten off leaving long tail if you plan to sew the crown in place. Block the brim flat if desired. The brim should now be wide enough to balance the tall spiral crown. Trim and weave in ends neatly.
— Crown (lower base) :
Round 31 :
With variegated yarn, join at center of brim opening. Sc evenly around opening until you have 64 sts across the circle opening (adjust by placing increases or decreases evenly). (64)
Round 32 :
1 sc in each st (64)
Round 33 :
(6 sc, 1 inc) x 8 (72)
Round 34 :
1 sc in each st (72)
Info :
The crown is worked as a short cylinder stacked above the brim. Keep stitches tight to maintain structure. If you used a larger brim, increase the base join stitches to fit the brim hole comfortably without stretching.
Round 35 :
1 sc in each st BLO (72)
Round 36 :
1 sc in each st (72)
Round 37 :
Change to a more intense purple band. 1 sc in each st (72)
Round 38 :
1 sc in each st (72)
Round 39 :
(7 sc, 1 inc) x 8 (80)
Round 40 :
1 sc in each st (80)
Info :
Alternate BLO and regular sc rounds every few rounds to produce the layered ridge effect visible on the crown. This gives the hat that stacked, wrapped look as colors change bands around the body.
Round 41 :
1 sc in each st BLO (80)
Round 42 :
1 sc in each st (80)
Round 43 :
(3 sc, 1 inc) x 20 (100)
Round 44 :
1 sc in each st (100)
Round 45 :
1 sc in each st BLO (100)
Round 46 :
Change color to teal/blue. (4 sc, 1 inc) x 16 + (4 sc) (116)
Round 47 :
1 sc in each st (116)
Info :
The crown should already feel like a separate stacked element on the brim. Measure height; aim for about 5-7 cm high before beginning spiral base to match the photos.
Round 48 :
1 sc in each st BLO (116)
Round 49 :
1 sc in each st (116)
Round 50 :
Decrease slightly to shape the crown top: (9 sc, 1 dec) x 10 + (6 sc) (104)
Round 51 :
1 sc in each st (104)
Round 52 :
1 sc in each st BLO (104)
Info :
We are preparing the small opening which will become the base for the spiral point. Keep counts accurate — the base circumference will determine how thick the spiral tube will be. Aim for about 7-9 cm circumference for a sturdy spiral start.
Round 53 :
(8 sc, 1 dec) x 10 + (4 sc) (92)
Round 54 :
1 sc in each st (92)
Round 55 :
(7 sc, 1 dec) x 10 + (2 sc) (82)
Round 56 :
1 sc in each st (82)
Round 57 :
1 sc in each st BLO (82)
Round 58 :
(6 sc, 1 dec) x 10 + (0 sc) (72)
Round 59 :
1 sc in each st (72)
Round 60 :
Finish crown base with one ridge: 1 sc in each st BLO (72)
Info :
Fasten off variegated yarn color if you prefer to change to a new gradient for the spiral. Leave a long tail if you will crochet the spiral directly joined. Secure ends neatly.
— Spiral Point (spiraled tube base) :
Info :
The spiral is worked as a textured tube that is crocheted in the round and then coiled into a spiral and supported with wire or thin tubing. You will create two nested coils: an inner small loop and the main tall spiral. Keep tension tight for tube stability. Start by joining yarn at the center opening prepared in Round 60.
Round 61 :
Join yarn at crown top opening. Ch 6, join to form a small ring (or work a mr of 6). 6 sc in ring (6) — this is the start of a tubular spiral core (if you prefer a thicker tube, use 8 sc).
Round 62 :
Inc round: 6 inc (12)
Round 63 :
(1 sc, 1 inc) x 6 (18)
Round 64 :
1 sc in each st (18)
Round 65 :
1 sc in each st BLO (18)
Info :
At this small tube stage, you can slip a piece of 18-22 gauge craft wire through the center to begin building the support. Leave at least 6-8 cm extra at the base to anchor into the crown before you fully close the tube. The wire allows the spiral to hold shape when coiled.
Round 66 :
1 sc in each st (18)
Round 67 :
(2 sc, 1 inc) x 6 (24)
Round 68 :
1 sc in each st (24)
Round 69 :
1 sc in each st BLO (24)
Round 70 :
(3 sc, 1 inc) x 6 (30)
Round 71 :
1 sc in each st (30)
Info :
Continue increasing gradually to reach the tube diameter you want for the visible spiral width. The hat in the photo has a robust spiral approximately 2.5-3 cm in diameter; adjust increases to reach similar thickness. Keep rounds short so the tube remains flexible to coil.
Round 72 :
(4 sc, 1 inc) x 6 (36)
Round 73 :
1 sc in each st (36)
Round 74 :
1 sc in each st BLO (36)
Round 75 :
(5 sc, 1 inc) x 6 (42)
Round 76 :
1 sc in each st (42)
Round 77 :
(6 sc, 1 inc) x 6 (48)
Round 78 :
1 sc in each st (48)
Info :
If you want the spiral to taper as it ascends, begin alternating rounds of decreases later. For the dramatic twist in the photo, the tube is built to full width and then textured with ridges and slightly compressed coils to produce a stacked, layered look.
Round 79 :
1 sc in each st BLO (48)
Round 80 :
Work 8 rounds of 1 sc in each st (48) to form a steady cylinder (80-87)
Round 81-88 :
1 sc in each st (48)
Info :
Now we will add texture ribs that create the stacked look; work alternating ridge rounds in BLO and raised rounds where you place more frequent front-loop pulls. These ridges are what make each coil look wrapped and layered.
Round 90 :
1 sc in each st BLO (48)
Round 91 :
(3 sc, 1 dec) x 12 (36)
Round 92 :
1 sc in each st (36)
Round 93 :
1 sc in each st BLO (36)
Round 94 :
(2 sc, 1 dec) x 9 + (1 sc) (28)
Round 95 :
1 sc in each st (28)
Info :
Begin coiling the tube now: set the tube into the desired spiral shape and with a length of wire already threaded inside, curve it to form a coil. Use pins to temporarily hold the coil and stitch the outer tube to the crown at several anchor points to secure the coil base.
Round 96 :
(1 sc, 1 inc) x 9 + (1 sc) (37)
Round 97 :
1 sc in each st (37)
Round 98 :
1 sc in each st BLO (37)
Round 99 :
(2 sc, 1 inc) x 12 + (1 sc) (49)
Round 100 :
1 sc in each st (49)
Info :
The tube has been alternately increased and decreased to create variable thickness and texture. This helps when coiling because narrow and wide sections compress differently and make the spiral visually interesting. Anchor the bottom of the coil to the crown with several stitches passing through the crown top (Rounds 52-60 area) so the spiral doesn't pull loose.
Round 101 :
Change color to deep purple variegated. 1 sc in each st BLO (49)
Round 102 :
1 sc in each st (49)
Round 103 :
(5 sc, 1 inc) x 7 + (2 sc) (56)
Round 104 :
1 sc in each st (56)
Round 105 :
1 sc in each st BLO (56)
Round 106 :
(4 sc, 1 inc) x 8 (64)
Round 107 :
1 sc in each st (64)
Info :
After stitching the tube and anchoring the base, coil the tube upward in a spiral, overlapping slightly as you go. Use the wire to maintain the coil; position the widest portions at the lower turns and narrower portions toward the tip for a tapered silhouette.
Round 108 :
(3 sc, 1 dec) x 16 (48)
Round 109 :
1 sc in each st (48)
Round 110 :
1 sc in each st BLO (48)
Round 111 :
(2 sc, 1 dec) x 12 (36)
Round 112 :
1 sc in each st (36)
Round 113 :
1 sc in each st BLO (36)
Info :
The photos show a second, smaller inner coil loop near the very top. To make that, work a short inner tube separately (see Inner Loop section below) and attach it inside the main coil for the double-loop effect.
— Inner Loop (small nested spiral) :
Round 114 :
With purple yarn, mr, 6 sc in ring (6)
Round 116 :
(1 sc, 1 inc) x 6 (18)
Round 117 :
1 sc in each st (18)
Round 118 :
1 sc in each st BLO (18)
Round 119 :
(2 sc, 1 inc) x 6 (24)
Round 120 :
1 sc in each st (24)
Info :
Thread a short length of craft wire into this tube as well and coil it into a small spiral. Anchor it to the top of the main spiral by sewing through several stitches so it hangs inside the curve as shown in the photos.
Round 121 :
1 sc in each st BLO (24)
Round 122 :
Start tapering: (3 sc, 1 dec) x 6 (18)
Round 123 :
1 sc in each st (18)
Round 124 :
(1 sc, 1 dec) x 6 (12)
Round 126 :
Fasten off leaving a long tail for sewing and shaping
Info :
Sew the inner loop into place so it dangles within the top curl. You can add small beads to the loop before closing to resemble the photographed beaded drop. Use jump rings and small seed beads to secure an accent charm.
— Decorative Band & Ruffles :
Round 127 :
Join black ribbon or black yarn around the base of the crown (Rounds 36-46 area). If using yarn: 1 sc in each st around (approx 116 sts)
Round 128 :
Work a decorative ruffle over the band: (ch 3, 3 dc in next st, sl st in next 2 sts) rep around to create a frilled look (adjust repeats to match the band length)
Round 129 :
Fasten ribbon or sew fabric strip in place at several points to keep it secure. Baste with whip stitch then secure with tight slip stitches if desired.
Info :
The photographed band appears to be a black fabric ribbon with gathered ruffle sewn onto the side. You can replicate this by gathering a short strip of lace or ruffled trim and hand-sewing it to the band area for extra texture.
Round 130 :
With accent yarn, embroider a narrow chain around the top of the band using surface slip stitch for a decorative line.
Round 131 :
Attach small fabric flower or gathered lace at the side with several secure stitches.
Info :
If you plan on adding a charm, attach a small jump ring to the bead string and sew the loop to the spiral section at the same point where the inner loop is anchored. Reinforce with a few stitches so the charm won't catch and pull the tube stitches apart.
— Beaded Charm & Dangle :
Round 132 :
String beads of your choice onto a short piece of fishing line or sturdy thread: 1 faceted bead, 2 seed beads, 1 small charm. Knot securely and hide knot inside a final bead.
Round 133 :
Attach the beaded strand to the inner loop by sewing the top loop to the tube stitches or using a small jump ring through a crocheted picot loop.
Round 134 :
Reinforce attachment with several stitches. If you prefer a permanent finish, dab a tiny amount of fabric glue at the knot to secure (optional).
Info :
The charm as seen in the photo is a small silver winged element with a blue gem; choose a charm that matches your color story. Make sure all charms are securely attached if the hat will be handled frequently.
— Finishing & Structural Support :
Round 135 :
Check all connections: crown-to-brim join, spiral anchor stitches, and inner loop. Reinforce any loose spots with additional whip stitches through multiple layers of fabric.
Round 136 :
Insert final piece of flexible wire into spiral and adjust curl. Bend wire ends so they are trapped inside the crown and cannot poke out (wrap ends with tape or small felt tab before insertion).
Round 137 :
Lightly stuff the crown base if needed with polyester fiberfill so it has some body; do not overstuff or the coil base will be too rigid to shape.
Round 138 :
Weave in all ends using yarn needle. Trim close to work and hide tails under adjacent stitches.
Info :
If the brim needs a slight floppy edge like the picture, steam block lightly or use a diluted starch spray and shape by hand. For more stiffness, slip a thin plastic disk inside the brim between layers during assembly or stitch a circle of interfacing to the underside.
Round 139 :
If desired, use a small crochet hook to make a picot or hanging loop at the underside of the spiral base to attach additional charms or hanging elements.
Round 140 :
Final trim and check: fasten off and apply any decorative touches, like a little embroidered crescent moon or painted gem on the band.
Info :
Allow fabric glue to dry fully and trim any visible stitches or stray fibers. Re-check the spiral shaping and wire position after drying — tweak as needed for the final look.
— Alternate Smaller Variations & Tips :
Round 141 :
To make a mini hat ornament, reduce overall rounds by half: stop brim increases around Round 20 and crown around Round 44; make a tiny spiral of 12-20 rounds.
Round 142 :
For a wearable headpiece, measure head circumference and increase crown foundation to match before beginning crown rounds.
Round 143 :
If you prefer a less structured spiral, omit the wire and instead stuff the tube lightly with fiberfill and shape by hand; this will be softer and more plush-like but less stable.
Round 144 :
Make color transitions smoother by blending two yarns together for 2-4 rounds when switching variegated to solid colors.
Info :
These tips let you adapt this pattern to ornaments, costume pieces or display props. The math for increases/decreases can be scaled proportionally to achieve different sizes while maintaining the spiral aesthetics.
This twisty witch hat celebrates playful construction and bold gradient colors to create a miniature magical sculpture. Every ribbed round and coiled tube comes together to form a dramatic point and a cozy, mysterious brim — perfect for mantel displays or tabletop Halloween scenes. I hope you enjoy shaping the spiral as much as I did, and adding your favorite charms and trims. 🧶✨🪄