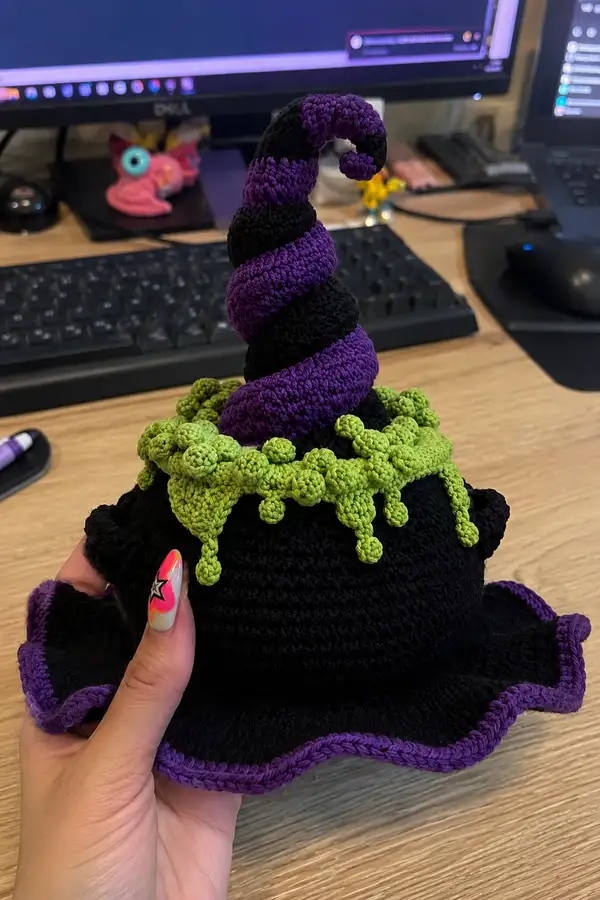
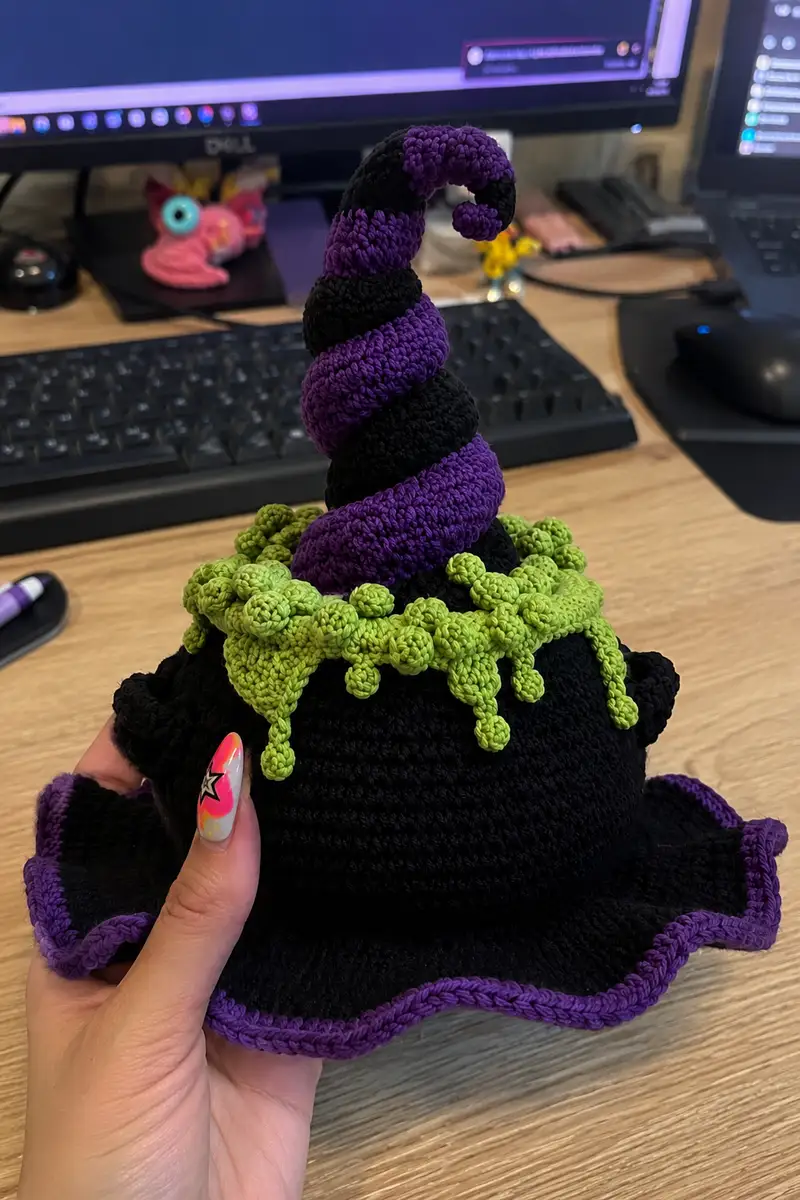
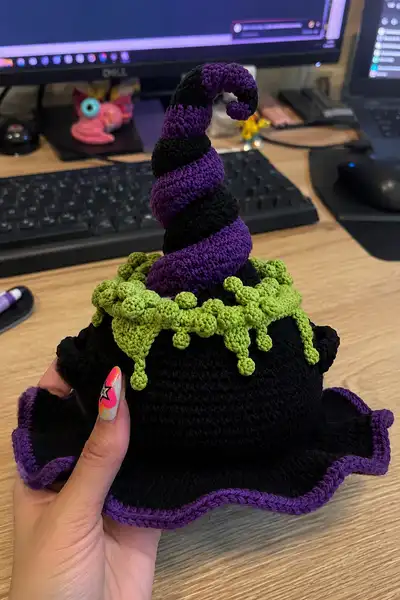
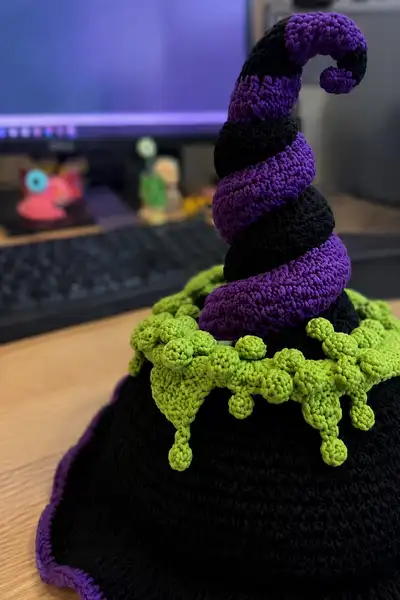
A dramatic spiral witch hat with thick black and purple spirals, a wide wavy brim edged in purple, and a bright lime-green bubbling 'cauldron brew' drip collar. This textured statement hat is richly detailed with bobbles and a curled tip to add whimsical height and personality. The pattern includes clear shaping, separate spiral tube instructions, a ruffled brim, and a decorative slime band for a show-stopping Halloween or display piece.
Progress Tracker
0% Complete
— Gauge & Measurements :
Info :
Gauge: 16 sc x 18 rows = 10 cm in single crochet using 3.25mm hook and worsted weight yarn. Finished hat (as photographed) measures approximately 35 cm tall from crown base to tip before curl and 40-45 cm including brim ripple; brim diameter approximately 38-40 cm. Adjust hook or yarn weight to change finished size.
— Notes :
Info :
This design is modular. Pieces are worked mostly in continuous rounds unless otherwise stated. Use stitch markers for round starts. Where instructions say 'attach' it means pin in place and sew by whip or mattress stitch. When changing color at the end of a round, finish last stitch with new color to create smooth join.
— Crown (fits head base) :
Round 1 :
6 sc in magic ring (6)
Round 3 :
(1 sc, inc) x 6 (18)
Round 4 :
(2 sc, inc) x 6 (24)
Round 5 :
(3 sc, inc) x 6 (30)
Round 6 :
(4 sc, inc) x 6 (36)
Round 7 :
(5 sc, inc) x 6 (42)
Round 8 :
(6 sc, inc) x 6 (48)
Round 9 :
(7 sc, inc) x 6 (54)
Round 10 :
(8 sc, inc) x 6 (60)
Round 11 :
(9 sc, inc) x 6 (66)
Round 12 :
(10 sc, inc) x 6 (72)
Round 13 :
(11 sc, inc) x 6 (78)
Round 14 :
(12 sc, inc) x 6 (84)
Info :
The crown is increased to 84 stitches which creates a head-hugging crown diameter. Try the work on your head or measure circumference; if you need larger/smaller adjust number of increase rounds or do extra even rounds before continuing.
Round 15-22 :
1 sc in each st (84)
Info :
Work even for 8 rounds to build crown height. These rounds form the base where the slime collar will attach; leave the top of this section open to sew the cone or for inserting cone base. If you prefer a taller crown, add up to 4 extra even rounds now.
— Brim (worked outward from crown base) :
Info :
Attach yarn at base row (Round 22 of crown) by slip stitching into any stitch; work the brim in continuous rounds. Brim is created to flare using regular increases then ruffle rows. For a more flexible brim use 3.5mm hook for these rounds to let the brim relax.
Round 1 :
Work 1 sc in same st, ch 1, skip 1 stitch, *1 sc in next 4 sts; repeat from * around to ease transition (84)
Round 2 :
1 sc in each st (84)
Round 3 :
(4 sc, inc) x 12 (96)
Round 4 :
1 sc in each st (96)
Round 5 :
(5 sc, inc) x 12 (108)
Round 6 :
1 sc in each st (108)
Info :
By increasing gradually you create the flare. For a more pronounced wave, use wider increases like (6 sc, inc) sets. Check that brim lays flat; if buckling, omit some increases next round.
Round 7 :
(6 sc, inc) x 12 (120)
Round 8 :
1 sc in each st (120)
Round 9 :
(7 sc, inc) x 12 (132)
Round 10 :
1 sc in each st (132)
Info :
The brim diameter is now large and will form the main wavy shape. Final edge is worked in purple for a contrasting ruffle; change color at the end of next round.
Round 11 :
Change to Purple yarn. 1 sc in each st (132)
Round 12 :
(1 sc, inc) x 66 (198)
Info :
Round 12 is a ruffle round — many increases create the wavy edge. If you want a subtler ripple, do (2 sc, inc) x 66 for a moderate increase. Fasten off and weave ends for clean edge.
— Cone (main spiral cone piece) :
Info :
Make cone separately so you can wrap the spiral tube around it. The cone is worked from a small tip increasing to a base that matches crown top opening (84 sts). This cone will be narrower toward tip then gently taper. Work in continuous rounds in Black unless changing to purple bands by switching color as indicated.
Round 1 :
6 sc in magic ring (6)
Round 3 :
(1 sc, inc) x 6 (18)
Round 4 :
(2 sc, inc) x 6 (24)
Round 5 :
(3 sc, inc) x 6 (30)
Round 6 :
(4 sc, inc) x 6 (36)
Round 7 :
(5 sc, inc) x 6 (42)
Round 8 :
(6 sc, inc) x 6 (48)
Round 9 :
(7 sc, inc) x 6 (54)
Round 10 :
(8 sc, inc) x 6 (60)
Round 11 :
(9 sc, inc) x 6 (66)
Round 12 :
(10 sc, inc) x 6 (72)
Round 13 :
(11 sc, inc) x 6 (78)
Round 14 :
(12 sc, inc) x 6 (84)
Info :
Stop increasing at 84 sts to match crown opening. Work even for several rounds to reach desired cone height before beginning shaping. Use a stitch marker to note the base round; this will be used when attaching cone to crown.
Round 15-28 :
1 sc in each st (84)
Round 29 :
(12 sc, dec) x 6 (78)
Round 30 :
1 sc in each st (78)
Round 31 :
(11 sc, dec) x 6 (72)
Round 32 :
1 sc in each st (72)
Round 33 :
(10 sc, dec) x 6 (66)
Info :
Begin gradual decreases to taper the cone. Add fiberfill sparingly every few rounds as you begin to close the cone to keep shape and avoid lumps; the cone should be lightly stuffed so the spiral wrap can be attached around it snugly.
Round 34 :
1 sc in each st (66)
Round 35 :
(9 sc, dec) x 6 (60)
Round 36 :
1 sc in each st (60)
Round 37 :
(8 sc, dec) x 6 (54)
Round 38 :
1 sc in each st (54)
Round 39 :
(7 sc, dec) x 6 (48)
Round 40 :
1 sc in each st (48)
Round 41 :
(6 sc, dec) x 6 (42)
Round 42 :
1 sc in each st (42)
Round 43 :
(5 sc, dec) x 6 (36)
Round 44 :
1 sc in each st (36)
Round 45 :
(4 sc, dec) x 6 (30)
Round 46 :
1 sc in each st (30)
Round 47 :
(3 sc, dec) x 6 (24)
Round 48 :
1 sc in each st (24)
Round 49 :
(2 sc, dec) x 6 (18)
Round 50 :
(1 sc, dec) x 6 (12)
Info :
At round 51 you have a tight tip that will curl. If you want a longer spiral curl, slow the decreases earlier (work extra even rounds) to create a longer neck before final taper. Finish off leaving long tail for sewing or attach pipe cleaner for extra hold then stuff lightly and close the tip.
— Spiral Wrap Tube (Make 1) :
Info :
This is the chunky black/purple tube that wraps around the cone to form the candy-cane spiral. Make it as a separate tube, lightly stuff, then twist around cone and sew. The tube width is intentionally thick to create the strong spiral banding; you will alternate colors in broad bands (approx 6-10 rounds per band depending on desired stripe thickness).
Round 1 :
6 sc in magic ring (6)
Round 3 :
(1 sc, inc) x 6 (18)
Round 4 :
(2 sc, inc) x 6 (24)
Round 5 :
1 sc in each st (24)
Round 6-70 :
1 sc in each st (24)
Info :
Work the tube to a length roughly equal to cone height plus overlap so you can spiral it with an offset. For the pictured model the tube length was approx 110-130 rows (counting narrow rows), but this depends on your gauge. Alternate colors: make 8-10 rounds in Purple, then switch to Black for 8-10 rounds, etc. Carry leftover yarn inside or fasten off and weave ends for color changes. Lightly stuff the tube as you go to keep it chunky but flexible.
Round 71 :
Change to Purple. 1 sc in each st (24)
Round 79 :
Change to Black. 1 sc in each st (24)
Info :
Repeat color banding until tube reaches desired length. Fasten off leaving long tail for sewing. If you prefer a firmer spiral use a slightly smaller hook to compress stitches; for looser, use larger hook.
— Tip Curl Finishing (cone tip or tube end) :
Info :
To make a small tight curl at the cone tip, after closing tip, add a short crocheted 'nubby' coil of Purple (or same color) worked as a small spiral: ch 6, join with sl st to form ring, sc around for 5-8 rounds, tighten and sew into the tip forming a curled button. Alternatively, crochet a tight small tube (6 sc circumference) and coil it around to make the decorative curl seen in the photos.
Round 1 :
ch 6, sl st to join, 12 sc in ring (12)
Round 2-6 :
1 sc in each st (12)
Info :
Stuff lightly, then run long tail through base and sew into cone tip, bending into spiral shape. You can also insert a pipe cleaner into tube before stuffing to hold the curl permanently.
— Slime Collar (Make 1) :
Info :
The slime collar is worked as a band that fits around crown base and is decorated with triangular drips and bobbles. Work in Neon Lime. It will be sewn around the crown at the seam line between crown and brim (round 22 in crown). Collar is worked flat as a slight tube or band then drips and bobbles are added in rows.
Round 1 :
ch 84, join with sl st to form band (84)
Round 2 :
ch 1, sc in each ch around (84)
Round 3 :
1 sc in each st BLO around to create a slightly raised edge (84)
Info :
Working BLO creates a ridge where drips will appear to hang over. Adjust the number of foundation chains to match your crown circumference; count stitches carefully so drips align with seam lines.
Round 4 :
*Ch 6, skip 4 sts, sl st in next st; rep from * around to create drip anchor points (approx 12 drip anchors)
Round 5 :
Return and work 1 sc in each existing st and in each ch to tidy band (84)
Info :
Decide how many drips you want; in the photo about 10-12 drips and clusters were used. Anchor points created in Round 4 determine spacing. You can make the band slightly shorter and pull it taut to create overlapping drips.
— Drip Triangle (Make multiple, spaced) :
Round 1 :
Attach lime yarn at anchor point. Ch 1, sc in same st, ch 1, turn (1)
Round 2 :
sc, ch 1 (increase tip) (2)
Round 3 :
sc in each st, ch 1 (3)
Round 4 :
sc in each st, ch 1 (4)
Round 5 :
sc2tog, sc, sc (3)
Round 7 :
sc2tog (1). Fasten off leaving tail for sewing.
Info :
These little triangular drips are sewn to the band pointing downward. Variation: make some drips taller by adding extra rows at the widest section before decreasing. Place them alternating around the band.
— Drip Bobbles (Make many, attach at tips and midpoints) :
Info :
Bobble technique: work 5 dc cluster bobble in same stitch and close to create a round pop. Alternatively use popcorn stitch: 5 dc in same st, remove hook, insert in first dc, grab loop and pull through to close, sl st to secure.
Round 1 (bobble) :
In chosen stitch: (yo, insert, draw up loop) x5, yo and pull through all loops, ch 1, sl st to secure (1 bobble made)
Round 2 :
Attach bobbles at drip tips and midpoints by sewing or crocheting directly on band; vary sizes by making 3-5 dc bobbles for smaller or larger bobbles respectively
Info :
Space bobbles in clusters to mimic photo: tiny clusters on each triangular drip and a wavy cluster around the front third of the band. Fasten off and weave in tails.
— Edging Detail (Purple Trim on Brim) :
Round 1 :
Attach Purple at brim edge. Ch 1, *sl st in next st, hdc in next st; rep around* (approx 198 sts after ruffle)
Round 2 :
1 sc in each st around to tidy edge (198)
Info :
The purple edge in the photo is a single contrasting line with a slightly raised ridge. If you want a thicker border, add another round of hdc or reverse sc border to puff edge slightly outward.
— Assembly & Attachment :
Info :
Block pieces slightly by pinning to shape if needed. Position cone so that its base matches crown opening, and spiral tube aligns in a visually pleasing twist. Use many pins to hold spiral in place before sewing. Sew with ladder stitch or whip stitch using long tail to secure invisibly.
Round 1 :
Place cone base inside crown opening; pin evenly around 84-st opening. Using a tapestry needle and long tail, whip stitch through crown base and cone base through matched stitch loops; aim for 84 evenly spaced stitches to avoid puckering.
Round 2 :
Wrap spiral tube diagonally around cone from base to tip, leaving curl end free. Use pins to hold the spiral in even diagonal bands. Sew spiral tube along several internal stitches (top and bottom edges) to anchor; avoid sewing through cone entire circumference to preserve twistiness.
Info :
Sewing notes: tension matters — pull slightly firm but not tight to maintain cone silhouette. Secure the spiral at about 6-8 anchor points spaced evenly to keep it from shifting. Use extra stitches where spiral meets cone to hide seam and create a continuous stripe look.
Round 3 :
Sew slime collar band around crown seam (where crown meets brim). Align triangular drips to hang over brim edge and stitch through band to crown at the base stitches. Reinforce bobbles by sewing through their centers to the crown so they don’t flop off.
Round 4 :
Weave in all tails. Use small running stitches around attachments for security. If using pipe cleaner inside spiral or cone, ensure ends are folded and wrapped with yarn before closing to prevent poking through fabric.
Info :
Optional: use a few extra stitches to tack the spiral to the cone only at intervals; this preserves the three-dimensional twisting look while keeping the spiral stable during wear. Check symmetry before final securing.
— Additional Decorative Options :
Info :
For added theatrics you can add small felt stars, sequins, or a bow where the slime meets the crown. If making a wearable hat, consider adding a soft cotton lining sewn into the crown to protect hair from synthetic fiber drag and stabilize sizing.
— Care & Finishing :
Info :
Hand wash gently in cool water and reshape while damp. Do not wring. For display, you can lightly starch the brim if you want a very crisp ruffle. Keep away from high heat which may melt synthetic yarn fibers.
This Big Bubbling Cauldron Brew Spiral Witch Hat is a showpiece of texture, color and shape — from the chunky spiral tube to the lime slime drips, every detail adds character. Each carefully crocheted section comes together to form a dramatic wearable or prop you'll be proud to show off. 🧶✨ Whether for Halloween, cosplay, or display, this hat makes a bold handcrafted statement. Enjoy the process and share your creation — I can't wait to see your spooky variations! 🎃