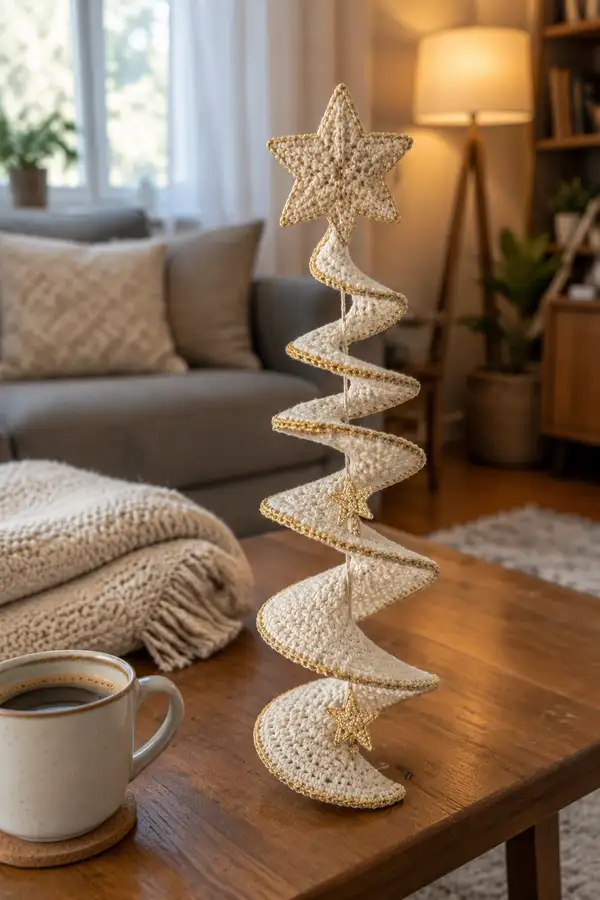
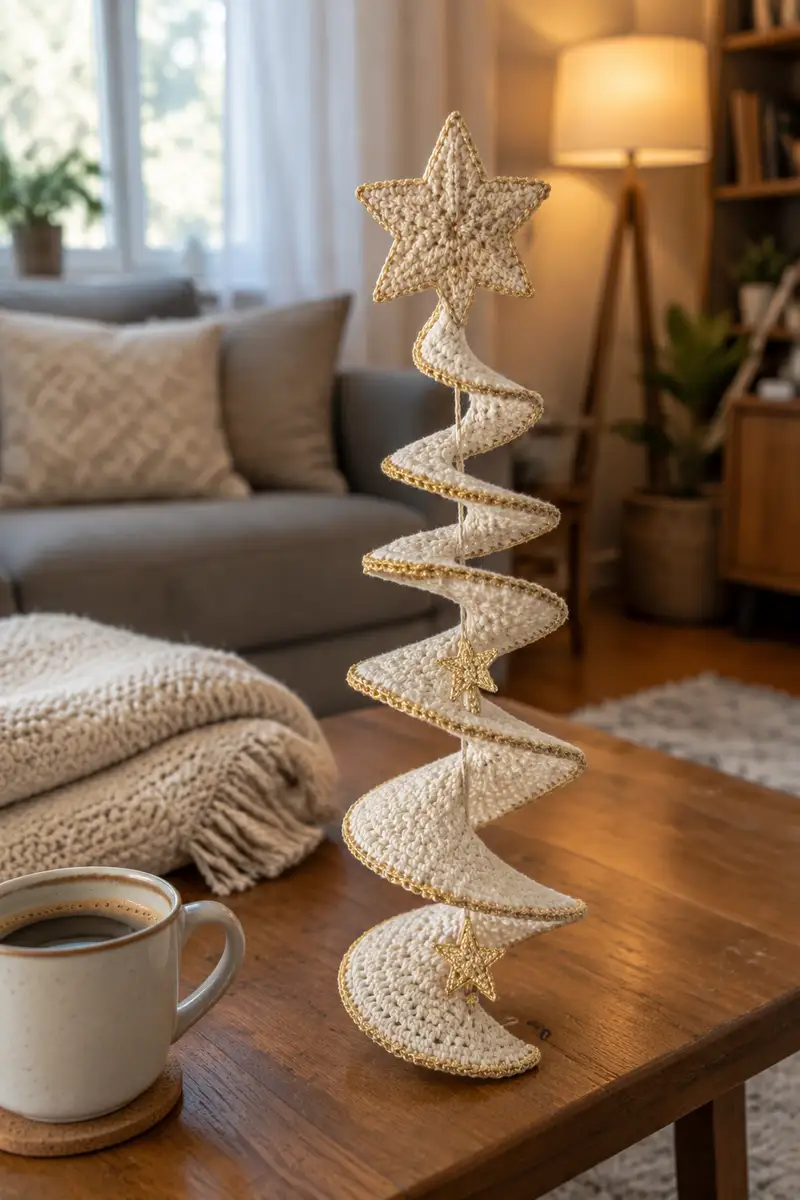
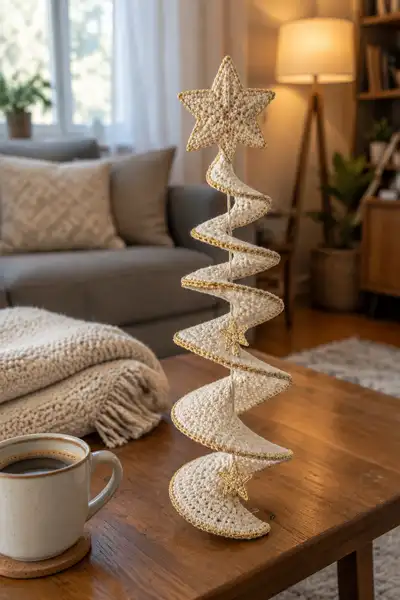
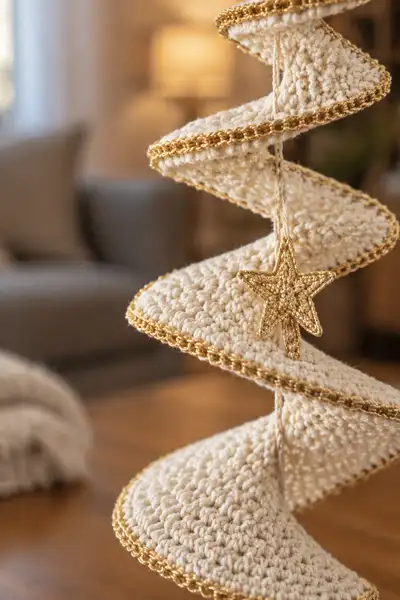
Create a delicate white spiral Christmas garland topped with a six-point star and trimmed in shimmering gold. This tabletop spiral ornament features stacked crescent panels that form a floating tree silhouette and tiny hanging stars for extra holiday sparkle. The pattern uses worsted-weight yarn and metallic trim for a luxe contrast and a wired center for structure. Perfect as a festive centerpiece or mantel accent.
Progress Tracker
0% Complete
— Star Topper (Make 1 thick star, two layered) :
Round 3 :
(1 sc, inc) x 6 (18)
Round 4 :
(2 sc, inc) x 6 (24)
Round 5 :
(3 sc, inc) x 6 (30)
Info :
These rounds create a flat circular base that will be used to form the star arms. Keep tension even; do not stuff this layer. Work the first layer slightly loose to ease shaping later.
Round 6 :
(4 sc, inc) x 6 (36)
Round 7 :
1 sc in each st (36)
Round 8 :
1 sc in each st (36)
Info :
We will begin forming point bases by creating 6 equal segments across the round. Use stitch markers to mark every 6th stitch (36/6=6) for reference points where each star arm will be formed.
Round 9 :
At marker 1: ch 3, turn and work across the next 6 sts to form first point: 1 sc in first st, hdc in next 2 sts, 3 dc in center stitch, hdc in next 2 sts, 1 sc in last st; sl st to join back to circular base; move to next marker and repeat for each of 6 points. (Construction does not change main round stitch count: 36)
Round 10 :
Work behind each point into the circular round edge: 1 sc in each st around (36). This locks point bases in place.
Round 11 :
For each point: in the ch-3 flap: 1 sc, 1 hdc, 3 dc, 1 hdc, 1 sc; then sl st to base. Work all 6 points this way to build the outer tips. (36)
Round 12 :
Rotate to back and sc into every st around the center disc and around the base of the points to tidy joins (36)
Info :
At this stage you have a single-layer star with defined points. We will now add rounds to shape and slightly curve the tips. Keep the star flat but maintain neat joins where points meet the center.
Round 13 :
Edge round: *sc into next 2 sts, (ch 1, sc) into tip of point as a picot accent*, repeat across each point and across the center join to create small decorative picots. Total base stitches remain approximately 36 with additional picot loops.
Round 14 :
1 sc in each st (36) working into picot loops where present to even out the edge
Round 15 :
Work 2 rounds of sc over entire star to add thickness: 1 sc in each st (36)
Info :
Fasten off leaving a long tail for sewing. Make a second identical star layer following Rounds 1-15 for a two-layered topper. Stuff very lightly between layers only if you want a puffed star; for a crisp topper leave unstuffed or add a thin batting layer.
Round 16 :
Using the long tail, align two star layers wrong sides together and whip stitch around outer edges, leaving the bottom center open to insert the central support. Use small blind stitches and pull threads tight so layers sit flush. Fasten off and weave tail.
Info :
Before fully closing star, insert the top of the floral wire or dowel about 1" into the star center; secure by running a few reinforcement stitches around the wire base and dab with fabric glue if desired. This anchors the topper to the spiraled body.
— Base Disc (Bottom Panel) :
Round 3 :
(1 sc, inc) x 6 (18)
Round 4 :
(2 sc, inc) x 6 (24)
Round 5 :
(3 sc, inc) x 6 (30)
Info :
This disc forms the rounded base of the spiral; larger than the other panels to give a stable footprint. Keep the disc flat by using even tension and blocking lightly if needed.
Round 6 :
(4 sc, inc) x 6 (36)
Round 7 :
(5 sc, inc) x 6 (42)
Round 8 :
(6 sc, inc) x 6 (48)
Round 9 :
1 sc in each st (48)
Info :
If you want a slightly cupped base (to help spiral stand), work Round 10 in BLO (back loops only) to create a slight ridge which helps the panel sit angled.
Round 10 :
1 sc in each st BLO (48)
Round 11 :
1 sc in each st (48)
Round 12 :
1 sc in each st (48)
Round 13 :
(6 sc, dec) x 6 (42)
Round 14 :
(5 sc, dec) x 6 (36)
Round 15 :
(4 sc, dec) x 6 (30)
Info :
Stuff the base lightly so it keeps a soft structure but remains flexible. The base will be attached to the central wire — leave a small opening at center to insert wire during assembly.
Round 16 :
(3 sc, dec) x 6 (24)
Round 17 :
(2 sc, dec) x 6 (18)
Round 18 :
(1 sc, dec) x 6 (12)
Info :
Fasten off leaving a 10" tail. Insert central support through the small opening and reinforce with a few whip stitches around the wire. If using a dowel, you can sleeve the dowel in a scrap tube to protect stitches and to wedge the dowel snugly.
— Spiral Segment 1 (Top-most panel under star) :
Round 3 :
(1 sc, inc) x 6 (18)
Round 4 :
(2 sc, inc) x 6 (24)
Round 5 :
(3 sc, inc) x 6 (30)
Info :
This segment will be a narrow crescent. We intentionally stop increases early and then work even rounds to create width and gentle curvature. Mark the stitch that will later align to center wire.
Round 6 :
1 sc in each st (30)
Round 7 :
1 sc in each st (30)
Round 8 :
(4 sc, inc) x 6 (36)
Round 9 :
1 sc in each st (36)
Round 10 :
1 sc in first 12 sts, BLO for next 12 sts, then 1 sc in final 12 sts to create a subtle ridge (36)
Info :
Working a portion in BLO creates a slight curve—this is important to make each panel tilt and form the spiral silhouette. Keep track of which stitches are worked in BLO for uniformity across all segments.
Round 11 :
1 sc in each st (36)
Round 12 :
(5 sc, dec) x 6 (30)
Round 13 :
1 sc in each st (30)
Round 14 :
(4 sc, dec) x 6 (24)
Info :
Begin stuffing this panel very sparingly along the center area to give it a little body so it keeps its crescent curve. Do not overfill; you want the edges to remain flexible when mounted to the wire.
Round 15 :
(3 sc, dec) x 6 (18)
Round 16 :
(2 sc, dec) x 6 (12)
Round 17 :
(1 sc, dec) x 6 (6)
Round 18 :
Fasten off leaving long tail for sewing to the central rod; do not close last 6 tightly — leave small opening to slip center onto wire then secure
Info :
Make 8 identical Spiral Segments total. Each will be attached stacked along the central support. Slight variation in stuffing and BLO rounds produces a gentle spiral when assembled; keep consistency by following the same stitch counts across all segments.
— Spiral Segment 2 :
Round 3 :
(1 sc, inc) x 6 (18)
Round 4 :
(2 sc, inc) x 6 (24)
Round 5 :
(3 sc, inc) x 6 (30)
Round 6 :
1 sc in each st (30)
Round 7 :
1 sc in each st (30)
Round 8 :
(4 sc, inc) x 6 (36)
Round 9 :
1 sc in each st (36)
Round 10 :
1 sc in first 12 sts, BLO for next 12 sts, then 1 sc in final 12 sts (36)
Round 11 :
1 sc in each st (36)
Round 12 :
(5 sc, dec) x 6 (30)
Round 13 :
1 sc in each st (30)
Round 14 :
(4 sc, dec) x 6 (24)
Round 15 :
(3 sc, dec) x 6 (18)
Round 16 :
(2 sc, dec) x 6 (12)
Round 17 :
(1 sc, dec) x 6 (6)
Round 18 :
Fasten off leaving long tail for sewing
Info :
Repeat this exact segment 6 more times (Segments 3-8) for a total of 8 segments. Keep all stitch counts identical to ensure even stacking and spiral balance. If you prefer a taller garland, make additional segments following the same rounds.
— Spiral Segment 3 :
Round 3 :
(1 sc, inc) x 6 (18)
Round 4 :
(2 sc, inc) x 6 (24)
Round 5 :
(3 sc, inc) x 6 (30)
Round 6 :
1 sc in each st (30)
Round 7 :
1 sc in each st (30)
Round 8 :
(4 sc, inc) x 6 (36)
Round 9 :
1 sc in each st (36)
Round 10 :
1 sc in first 12 sts, BLO for next 12 sts, then 1 sc in final 12 sts (36)
Round 11 :
1 sc in each st (36)
Round 12 :
(5 sc, dec) x 6 (30)
Round 13 :
1 sc in each st (30)
Round 14 :
(4 sc, dec) x 6 (24)
Round 15 :
(3 sc, dec) x 6 (18)
Round 16 :
(2 sc, dec) x 6 (12)
Round 17 :
(1 sc, dec) x 6 (6)
Round 18 :
Fasten off leaving long tail for sewing
— Spiral Segment 4 :
Round 3 :
(1 sc, inc) x 6 (18)
Round 4 :
(2 sc, inc) x 6 (24)
Round 5 :
(3 sc, inc) x 6 (30)
Round 6 :
1 sc in each st (30)
Round 7 :
1 sc in each st (30)
Round 8 :
(4 sc, inc) x 6 (36)
Round 9 :
1 sc in each st (36)
Round 10 :
1 sc in first 12 sts, BLO for next 12 sts, then 1 sc in final 12 sts (36)
Round 11 :
1 sc in each st (36)
Round 12 :
(5 sc, dec) x 6 (30)
Round 13 :
1 sc in each st (30)
Round 14 :
(4 sc, dec) x 6 (24)
Round 15 :
(3 sc, dec) x 6 (18)
Round 16 :
(2 sc, dec) x 6 (12)
Round 17 :
(1 sc, dec) x 6 (6)
Round 18 :
Fasten off leaving long tail for sewing
— Spiral Segment 5 :
Round 3 :
(1 sc, inc) x 6 (18)
Round 4 :
(2 sc, inc) x 6 (24)
Round 5 :
(3 sc, inc) x 6 (30)
Round 6 :
1 sc in each st (30)
Round 7 :
1 sc in each st (30)
Round 8 :
(4 sc, inc) x 6 (36)
Round 9 :
1 sc in each st (36)
Round 10 :
1 sc in first 12 sts, BLO for next 12 sts, then 1 sc in final 12 sts (36)
Round 11 :
1 sc in each st (36)
Round 12 :
(5 sc, dec) x 6 (30)
Round 13 :
1 sc in each st (30)
Round 14 :
(4 sc, dec) x 6 (24)
Round 15 :
(3 sc, dec) x 6 (18)
Round 16 :
(2 sc, dec) x 6 (12)
Round 17 :
(1 sc, dec) x 6 (6)
Round 18 :
Fasten off leaving long tail for sewing
— Spiral Segment 6 :
Round 3 :
(1 sc, inc) x 6 (18)
Round 4 :
(2 sc, inc) x 6 (24)
Round 5 :
(3 sc, inc) x 6 (30)
Round 6 :
1 sc in each st (30)
Round 7 :
1 sc in each st (30)
Round 8 :
(4 sc, inc) x 6 (36)
Round 9 :
1 sc in each st (36)
Round 10 :
1 sc in first 12 sts, BLO for next 12 sts, then 1 sc in final 12 sts (36)
Round 11 :
1 sc in each st (36)
Round 12 :
(5 sc, dec) x 6 (30)
Round 13 :
1 sc in each st (30)
Round 14 :
(4 sc, dec) x 6 (24)
Round 15 :
(3 sc, dec) x 6 (18)
Round 16 :
(2 sc, dec) x 6 (12)
Round 17 :
(1 sc, dec) x 6 (6)
Round 18 :
Fasten off leaving long tail for sewing
— Spiral Segment 7 :
Round 3 :
(1 sc, inc) x 6 (18)
Round 4 :
(2 sc, inc) x 6 (24)
Round 5 :
(3 sc, inc) x 6 (30)
Round 6 :
1 sc in each st (30)
Round 7 :
1 sc in each st (30)
Round 8 :
(4 sc, inc) x 6 (36)
Round 9 :
1 sc in each st (36)
Round 10 :
1 sc in first 12 sts, BLO for next 12 sts, then 1 sc in final 12 sts (36)
Round 11 :
1 sc in each st (36)
Round 12 :
(5 sc, dec) x 6 (30)
Round 13 :
1 sc in each st (30)
Round 14 :
(4 sc, dec) x 6 (24)
Round 15 :
(3 sc, dec) x 6 (18)
Round 16 :
(2 sc, dec) x 6 (12)
Round 17 :
(1 sc, dec) x 6 (6)
Round 18 :
Fasten off leaving long tail for sewing
— Spiral Segment 8 (Final small top disc if desired) :
Round 3 :
(1 sc, inc) x 6 (18)
Round 4 :
(2 sc, inc) x 6 (24)
Round 5 :
1 sc in each st (24)
Round 6 :
1 sc in each st (24)
Round 7 :
(3 sc, dec) x 6 (18)
Round 8 :
(2 sc, dec) x 6 (12)
Round 9 :
(1 sc, dec) x 6 (6)
Round 10 :
Fasten off leaving long tail for attaching under the star. This small disc is the first panel directly under the star topper and will sit closest to the star.
Info :
You now have a total of 8 spiral panels and one base disc. Lay them out in stacking order before assembly: from top (small disc) down to base disc. Keep long tails for sewing to the central support.
— Small Hanging Stars (Make 3) :
Round 3 :
(1 sc, inc) x 6 (18)
Round 4 :
Join to first point area: ch 3, work 5 dc into chain space to form first point; sl st into base; repeat around to create 5 points total. These small stars are simpler five-point shapes for hanging as charm ornaments.
Round 5 :
Edge round: sc evenly around star and in each point tip (approx 18 sc). Fasten off leaving 10" tail for hanging loop.
Info :
Make 3 small stars using metallic gold or white with gold edging. Attach with thin yarn or craft wire so they dangle between spiral layers. If using wire, fold ends and cover with small tape to avoid sharp points.
— Gold Edging (Work over each completed panel) :
Round 1 :
Join metallic gold thread at the outermost edging stitch of the panel using sl st. Ch1, then 1 sc in same st and in each st around to create a neat gold border. Count will match outer stitch count; for panels this is typically 36 or 48 depending on panel size.
Round 2 :
Optional decorative chain: switch to smaller hook and work *ch 3, sl st into next st* across the edge to create a scalloped chain. Fasten off and weave ends securely.
Info :
Work edging after all panels are complete and stuffed. Metallic threads can snag — handle gently and weave ends into the gold yarn rather than white to hide joins. For a plumper, raised edge, work the gold round as hdc instead of sc.
— Assembly & Support Rod Prep :
Info :
Prepare the central support: if using floral wire, straighten and form a 0.5" hook at the top to anchor into the star. Use a dowel if you prefer a rigid column; wrap dowel with white yarn or tape to avoid visible gaps. The support will run through the center of each panel; panels will be threaded and positioned with even spacing to form the spiral.
Step 1 :
Start by inserting the top of the support rod through the small opening in the Star Topper. Position star so it sits flush at top and secure by stitching several times through the star center around the wire. Add a drop of fabric glue if using smooth dowel to prevent slipping.
Step 2 :
Thread Spiral Segment 8 onto the rod so its long tail faces down; secure panel in place by sewing a few tight reinforcement stitches through the inner 6 stitches around the rod. Keep stitches small and tight.
Info :
Stack each subsequent segment slightly rotated so the curved BLO ridge faces the same rotational direction — this creates a smooth continuous spiral rather than stacked discs. Use pins to hold orientation while you sew each panel to the rod.
Step 3 :
Continue adding panels from top to bottom in descending order (Segments 7, 6, 5, 4, 3, 2, 1). Leave approximately 1" to 2" of rod between each panel (adjust spacing to get the open spiral look). Secure each panel with 4-6 whip stitches into the inner rounds and weave the yarn tail around the rod before knotting.
Step 4 :
Once all spiral segments are on and secure, thread the base disc down the rod and position it at the bottom. Fasten base disc well with multiple sewing passes and, if using a dowel, add a small washer or wooden bead at the base under the disc to prevent slipping. Trim and weave all ends.
Step 5 :
Attach small hanging stars between panels: using thin yarn or craft wire, tie or stitch small stars to hang from the edge of selected panels so they dangle inside the spiral. Space them evenly and vary lengths slightly for a playful look.
Info :
Check balance: the spiral should stand upright on its own on a flat surface. If it leans, reposition panels slightly or add a small felt pad under the base to level it. For a stable tabletop piece, consider a small wooden base glued to the disc underside.
— Final Edge Finishing :
Round 1 :
With metallic gold yarn and smaller hook, sl st into first outer loop and work 1 sc evenly around each panel edge to unify appearance. Panels should measure consistently when trimmed.
Round 2 :
Optional embroidering: using gold thread, stitch a decorative chain down the outer edge: *ch 2, sl st into next st* or use surface slip stitches for a raised chain look. Fasten off and weave all ends into the fabric securely.
Info :
For a defined trim, crochet 2 thin rows of gold: 1 sc round, then 1 sl st round into the back loops only to form a neat corded edge. Take care to keep stitches even to prevent wavy edges.
— Blocking & Final Shaping :
Info :
Lightly steam-block each panel flat (do not press directly with iron) to relax stitches and even out curves. Pin panels into the desired gently curving shape while moist and allow to dry. Blocking helps the spiral sit evenly and achieves a professional finished look.
Round 1 :
Final check: ensure no visible stuffing, metallic thread ends are woven in, and the star sits centered atop. Trim any stray fibers and add a dab of glue where threads may slip.
Info :
For storage, wrap the spiral loosely around the central support and store flat to avoid flattening the panels. When reassembling after storage, gently reshape panels and re-block briefly if needed.
This Star White Spiral Christmas Garland brings a touch of elegant handmade charm to your holiday decor. Each lovingly crocheted panel stacks into a graceful spiraled tree, crowned with a crisp star topper and dressed with sparkling gold edging. I hope you enjoyed making this cozy, refined piece — it looks lovely on a tabletop or mantel and makes a thoughtful holiday gift. 🎄✨🧶