About This Sterling the Star Amigurumi Pattern
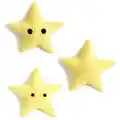
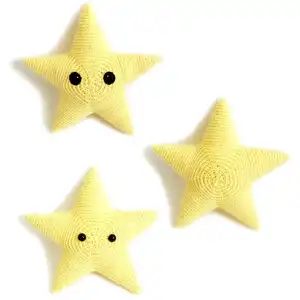
Sterling the Star is a crochet amigurumi pattern that creates a 10" point-to-point stuffed star with five sculpted points. The pattern uses simple single crochet shaping worked through the back loops only and joined points to build a plump body. You can finish the star with 15mm safety eyes or sew on felt eyes using the included tutorial.
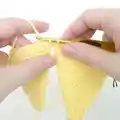
This pattern is worked in a continuous spiral and includes full round-by-round instructions for each point, joining the points, and finishing details. A step-by-step felt eye tutorial is provided so you can personalize the face.
Why You'll Love This Sterling the Star Amigurumi Pattern
I absolutely love this pattern because it transforms simple single crochet shaping into a charming, sculpted star with personality. I enjoy how the five points come together to create a three-dimensional form that is both playful and tactile. The option to use felt eyes or safety eyes makes this pattern versatile for gifts or baby-safe toys. I also appreciate that the pattern teaches useful techniques like working through the back loops and joining pieces in a round, which you can use in other amigurumi projects.
Switch Things Up
I love customizing this star by changing yarn colors to match room decor or holiday themes; try pastels for a nursery or metallic/variegated yarn for seasonal sparkle.
To make the star bigger or smaller I change yarn weight and hook size; bulky yarn with a larger hook creates a chunky pillow-like star, while fingering yarn makes a delicate mini version.
I sometimes replace safety eyes with embroidered eyes for a baby-safe version, or use felt eyes for a soft, handmade look as shown in the tutorial.
Adding blush with a little yarn or embroidery thread gives the star extra personality; try soft pink yarn or a very small satin stitch for cheeks.
I like to add a hanging loop to one point if I want to turn the star into an ornament or mobile—just crochet a short chain and sew it into the tip securely.
For a more tactile toy, I occasionally insert a small jingle bell before finishing or add a rattle insert for baby-friendly versions, taking care to make it secure.
I also enjoy stitching simple facial expressions to change the mood of the star—moving the eyes slightly or adding a tiny embroidered smile completely alters the character.
Experiment with different stuffing levels: firmer stuffing makes sharper points while softer stuffing yields a cuddly, rounded star—adjust to your preference.
Try combining yarn types for texture: a fuzzy boucle yarn for the points and smooth worsted for the body creates an interesting contrast and tactile appeal.
I often make a set in coordinating colors and sizes to display as a garland or gift set; varied sizes look charming when hung together or arranged on a shelf.
Common Mistakes & How to Fix Them
✗ Not marking the start of the round when working in continuous spiral; use a stitch marker at the beginning of each round to avoid losing your place and maintain consistent stitch counts.
✗ Working in both loops instead of back loops only; remember this pattern specifies back loops only to create the correct textured appearance and shaping.
✗ Skipping the instruction to leave a long tail on the fifth point; leave a long tail so you can join and continue to the body without rejoining yarn later.
✗ Stuffing too early or too much in the body section; stuff the points first with small amounts, then gradually fill the body to maintain the star shape and avoid lumps.
✗ Misplacing safety eyes or felt eyes too high or too low; attach safety eyes at round 7 on the front as instructed and pin felt eyes to preview placement before sewing.