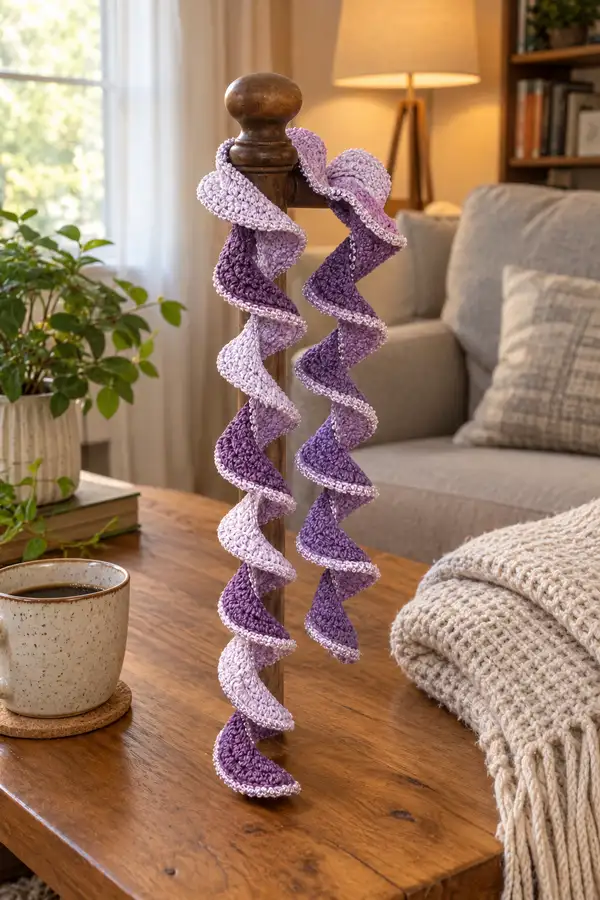
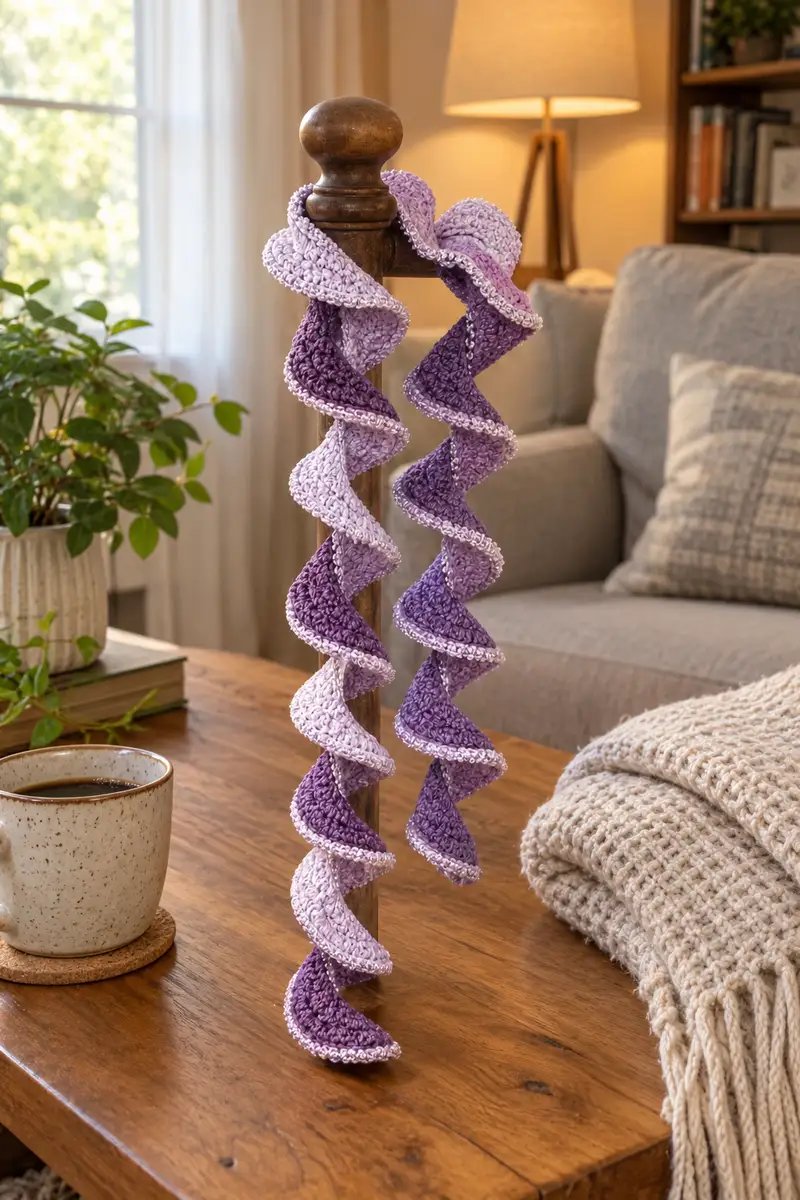
Create a whimsical, ruffled spiral garland in pretty sugarplum tones. This pattern produces a long spiraling ribbon of alternating lilac and deep plum segments finished with a soft contrast edge. The garland drapes and curls naturally for a festive stair banister, tree, or mantel accent. Written with clear modular instructions, this design is easy to customize for length and color.
Progress Tracker
0% Complete
— Pattern Overview :
Info :
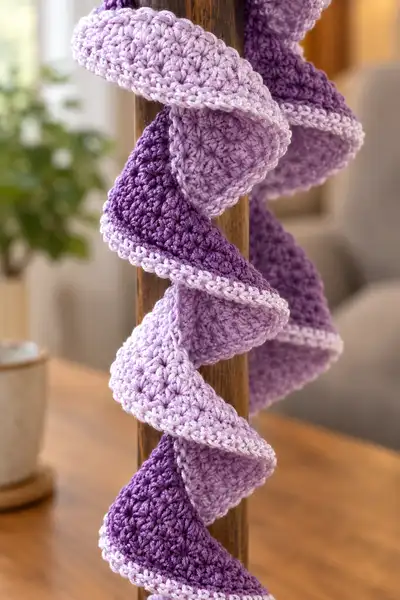
This pattern builds a long ruffled strip by working short repeating cycles of rounds that gradually increase the outer edge width. The strip naturally curls into a spiral when hung. One full sample spiral (as pictured) is made by working 22 repeat cycles (132 rounds) and finishing with a single round contrast edging. You may work fewer cycles for a shorter garland or more for a longer, fuller spiral.
Info :
Terminology: We refer to each horizontal pass as a 'Round' (this is a flat strip worked in rows but named Rounds here to match the pattern structure). Each 6-round cycle adds 4 stitches to the working width (2 increases placed at the ends of two rounds within each cycle). Beginning width is small so increases create controlled ruffling.
— Gauge & Finished Measurements :
Info :
Gauge is not critical for this decorative garland, but for reference: using 4.0mm hook and worsted-light cotton, 10 hdc rows = ~4 cm and final outer edge width after 22 cycles = ~9-10 cm across the strip; total length after 22 cycles will be approximately 150-180 cm depending on stretch and blocking. Adjust cycles to suit length preferences.
— Main Spiral Panel (work 1 per garland; make 2 for a twin set) :
Foundation :
Ch 9. (This small foundation gives a neat starting width for the first wedge unit.)
Round 1 :
Sc in 2nd ch from hook and in each ch across. Turn. (8)
Round 2 :
Ch 1, sc in each st across. Turn. (8)
Round 3 :
Ch 1, inc in first st (2 sc in first st), sc in next 6 sts, inc in last st. Turn. (10)
Round 4 :
Ch 1, sc in each st across. Turn. (10)
Round 5 :
Ch 1, inc in first st, sc in next 8 sts, inc in last st. Turn. (12)
Round 6 :
Ch 1, sc in each st across. Turn. (12)
Info :
These first 6 rounds create the base wedge. You’ll notice the outer edge (the last stitch of each row) gets slightly longer as we place increases at the ends — this contributes to the ruffle/spiral curl when the strip is long. Keep your tension even and try to stitch into the first and last stitches precisely to maintain a smooth edge.
Repeat Instructions :
Repeat Rounds 1-6 in sequence to build the spiral. Each full sequence of Rounds 1-6 is one 'cycle'. Work a total of 22 cycles (that is, Rounds 1-6 repeated 22 times) for the sample garland pictured — this gives you 132 rounds in the main panel and finishes with a working width of 96 stitches. If you prefer a shorter garland, stop after fewer cycles (see length customization in Info sections below).
Round 7-12 (Cycle 2) :
Repeat Rounds 1-6 exactly: (Round 7 = Round 1, Round 8 = Round 2, ... , Round 12 = Round 6). Stitch counts progress as 14 by Round 12. (After Cycle 2 end width: 16? -- refer to per-cycle math below.)
Info :
Stitch count progression: Each 6-round cycle adds 4 stitches to the working width (2 increases on Round 3 and 2 on Round 5 of each cycle). Starting width after Round 1 is 8 stitches. After Cycle 1 (Rounds 1-6) width = 12. After Cycle 22 width = 96 stitches. Keep notes of cycles completed so you can mirror color changes consistently.
Rounds 13-132 :
Continue repeating Rounds 1-6 for cycles 3 through 22. Monitor your stitch counts at the end of each cycle: after Cycle 3 width = 16, Cycle 4 width = 20, and so on, increasing by 4 per cycle until Cycle 22 width = 96. Fasten off at the end of Round 132 leaving a 30cm tail for joining or finishing. (If you want a longer garland, continue cycles — every additional cycle adds ~1.5-2 cm of length and 4 stitches to width.)
Info :
Color blocks: In the sample, color was changed approximately every 3 cycles to create visible bands of plum and lilac. For example: Work Cycles 1-3 in Lilac (lighter), Cycles 4-6 in Plum (darker), Cycles 7-9 in Lilac, etc. Change color at the end of the final round of a cycle by fastening off and joining the new color with a slip knot on the next round.
Color Change Technique :
When you reach the last stitch of the final round of a block, stop before the last yo; complete the last stitch by yarning over with the new color and pulling through to finish the stitch — this creates a tidy color join. Weave in ends as you go or leave tails to weave later.
Info :
If you prefer a seamless color carry (to reduce ends) you can carry the unused color along the inside of the strip when switching back and forth. Do not carry across large gaps or you will see floats — carry only for short color changes (1–3 cycles). For longer color blocks, fasten off and rejoin.
— Edge Trim (Contrast Round) :
Info :
Once the main panel is complete, we work a single contrast round along the two long edges to create a crisp border that visually separates each wave and emphasizes the spiral curve. Use the contrast color and a slightly smaller hook (3.5mm) if you want a firm edge.
Round 133 :
Join contrast color with a sl st at the short end where you finished, ch 1, sc evenly into the edge loops along the long side of the strip (work 1 sc into each row-end/selvage stitch—there should be 132 'rows' to match your round count). Count carefully to place 1 sc per row-end. When you reach the far short end, work 3 sc into the short end to turn the corner, then continue along the opposite long edge placing 1 sc into each row-end back to the start point. Sl st to join. (Total sc along each long edge will equal total rounds; final count will be roughly 132 sc per long edge depending on how you placed corner stitches.)
Round 134 :
Ch 1, sc in BLO (back loops only) around entire contrast round to create a neat raised ridge for the border. Work evenly, placing 1 sc in each sc from Round 133. Sl st to join. Fasten off and weave in ends. (This gives a tidy two-row edge that pops against the spiral body.)
Info :
If your edging looks tight and causes the spiral to flatten, you can work Round 134 in FLO instead (front loops only) or skip BLO and work standard sc — this slightly relaxes the edge tension so the spiral can curl freely.
— Alternative Textured Option (V-Stitch Rows) :
Info :
If you prefer a more open, lacy texture for a lighter spiral, substitute the sc rows in Rounds 1,2,4,6 (and their repeats) with V-stitches worked as: (dc, ch1, dc) in same st across, placing a single dc in the last stitch. Keep the increase rows the same (inc in first/last st) to keep edge growth consistent. This will create a more airy spiral that still holds shape when hung.
— Making a Pair (Optional) :
Info :
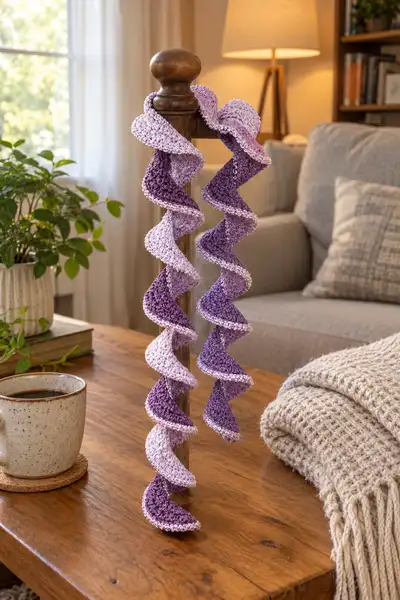
The photo shows two spiral garlands hung together for a lush look. To make a pair, simply repeat the entire main panel + edging to create a second strip. You can make the second strip in the same color sequence or invert colors for a mirrored effect.
— Assembly & Joining Long Runs :
Info :
If you prefer to make several shorter panels and join them to create a longer garland, join panels end-to-end with a neat overlap. Overlap the short end of Panel A with the short end of Panel B by 1–2 cm, pin and use mattress stitch or whip stitch through the back loops to create an invisible seam. Make sure to align the row counts so the seam lies flat.
Joining Method Option 1 (Whip Stitch) :
Place short ends together overlapping by 1cm. Using the contrast color tail, whip stitch through the back loops only along the overlap, working evenly and not pulling tight. Secure with several stitches at each end and weave in tails.
Joining Method Option 2 (Slip-Stitch Join) :
With right sides facing, hold ends together and work sl sts through both loops across the short edge to join. This creates a thicker, visible seam (useful if you want a small decorative ridge at the joins).
Info :
After joining multiple panels, rework the contrast edge along the joined length to create a consistent border across the whole garland. You may need an additional 1–2 rounds of contrast edging across joins to smooth the transition.
— Hanging Loop & Finishing :
Round 135 (Hanging Loop Preparation) :
At one short end of the garland, fold the last 2.5 cm of the short end toward the wrong side and whip stitch through both layers to form a small tunnel. Leave a 12 cm tail to use as a loop or attach a small metal ring before closing the tunnel. Fasten off and weave in tail.
Info :
You can substitute a wooden bead or button inside the loop for weight and a decorative touch. If hanging from a banister, the loop should be large enough to slip over a banister spindle or a small hook.
Final Finish :
Weave in all remaining ends securely using a yarn needle, trimming closely. Steam-block lightly to set the spiral: pin the garland in a very gentle coiled shape on a blocking mat and lightly steam from a distance. Do not press — use steam to relax fibers and set the curve. Allow to dry completely before hanging.
Info :
For extra weight and a stronger spiral, you can stitch in a narrow chain of fishing line or light jewelry wire along the center back of the strip before final edge — this is optional and should be done carefully so no sharp wire ends are exposed.
— Customization & Sizing Notes :
Info :
To shorten: work fewer cycles. Each 6-round cycle adds approx. 1.5–2 cm of length and 4 stitches to the width. To lengthen: add cycles in the same repeating pattern. To change curl tightness: add more increases per cycle for a tighter, loopier spiral (e.g., add an extra inc into the second stitch of the increase rounds) or reduce increases for a softer wave.
Info :
To create alternating block widths (for wider or narrower bands of color), change color every N cycles where N is your chosen block height — e.g., every 2 cycles for narrow stripes or every 4 cycles for broader bands.
Info :
Stitch counts: keep a notepad or row counter. At the end of each cycle, lightly measure the overall length and compare to your target. Adjust the number of cycles in real time so your final garland fits the display area.
This sugarplum spiral garland is a lovely way to add soft, festive movement to any room. The repeating wedges fold into elegant spirals that catch light and create a playful vertical accent. Make one for a stair banister or pair a set for a dramatic grouping — either way, it’s a joyful, stitch-by-stitch celebration of handmade decor. 🧶🎀