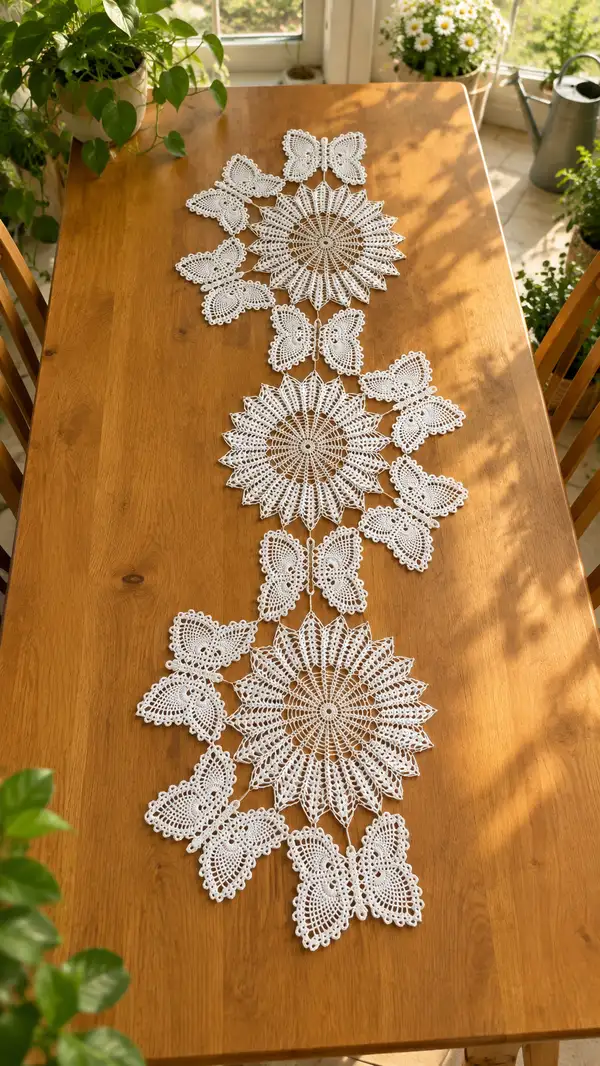
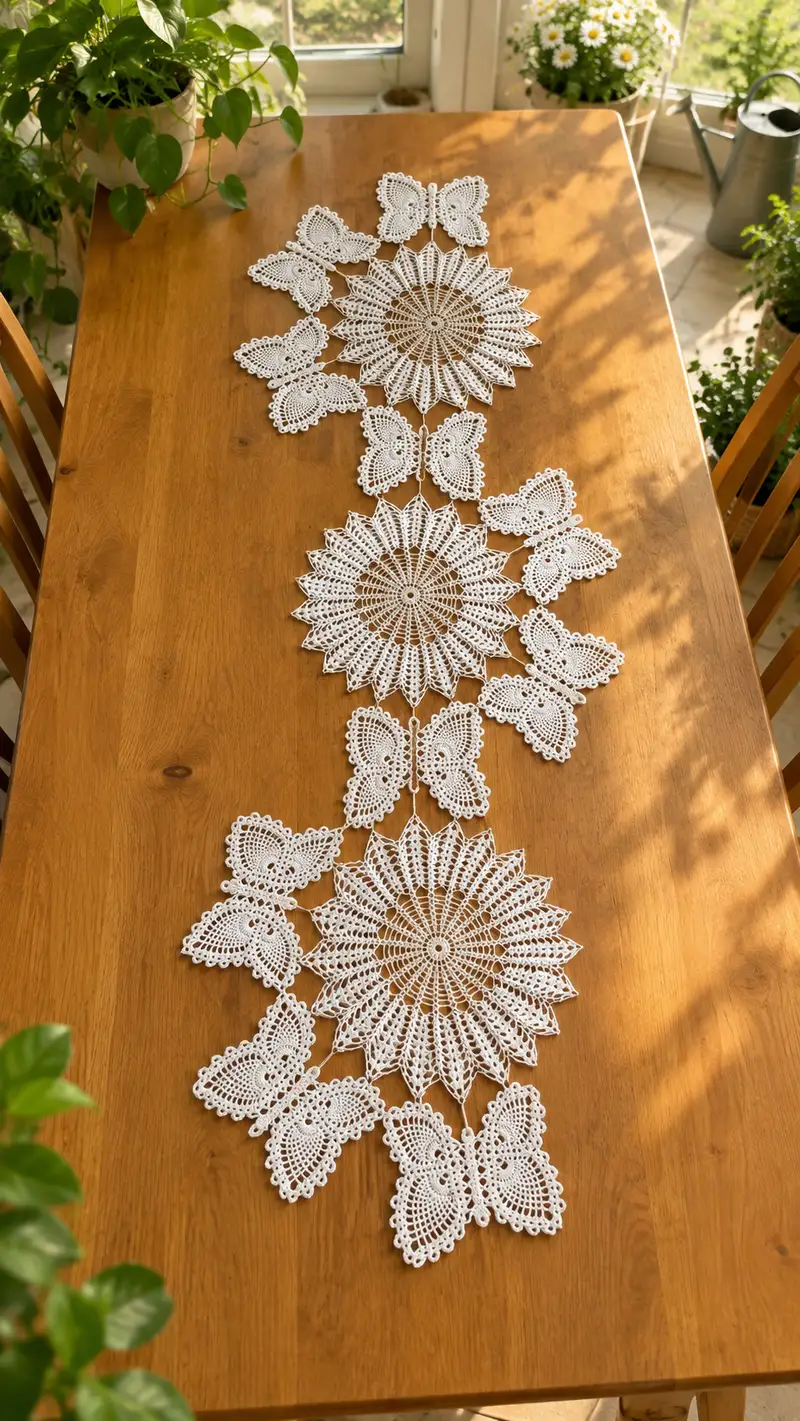
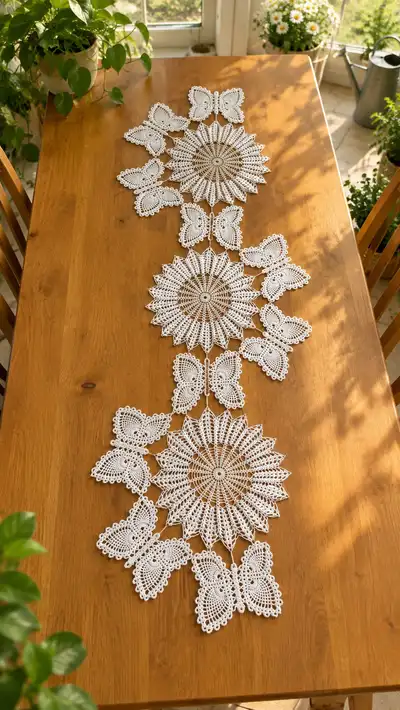
A delicate, vintage-inspired lace table runner made from crisp white crochet cotton. Three large sunburst medallions are linked by ornate butterfly motifs, creating an elegant serpentine runner perfect for dining tables or dressers. The pattern uses classic lace techniques, picot edging and chain-bridges to give a light, airy look that blocks beautifully.
Progress Tracker
0% Complete
— Notes & Gauge :
Info :
This pattern is written using US crochet terminology and assumes experience with lace techniques: chain-arcs, picots, and working many stitches into chain-spaces. Use size 10 crochet cotton and a 1.5–1.75mm steel hook to achieve an open lacy fabric similar to the photo. Gauge is not critical for motif geometry but will affect final runner length and drape. The runner shown measures approximately 160–170cm long and 30–35cm wide at the widest medallion. Block motifs flat to final measurements before joining.
Info :
Abbreviations: ch, sl st, sc, hdc, dc, tr, pic, MR. Maintain consistent tension and count stitches carefully—lace looks best when repeats are accurate. Work motifs flat and press/block each motif before joining.
— Large Sunburst Medallion (Make 3) :
Info :
Make 3 identical medallions. Each medallion is worked in the round from center out. The instructions below assume US terms. The motif builds 16 pointed petals creating the sunburst. Final count at the base of petals is 16 major segments—use that as a check when working repeats.
Round 1 :
MR, ch3 (counts as dc), work 15 dc into ring. Join with sl st to top of ch3. (16)
Round 2 :
Ch1, *sc in next dc, ch5* around, ending ch5 and sl st to first sc to form 16 ch5 loops. (16 sc, 16 loops)
Round 3 :
Into each ch5 loop: sl st, ch1, [sc, hdc, 7 dc, hdc, sc] in same loop, sl st into next sc on base. Repeat around. This forms the first petal round. (Each loop forms 11 stitches; total 16 petals)
Info :
When building petals, keep petals evenly tensioned so they lay flat. If petals begin to curl, block them flat after completing Round 6 to adjust shaping.
Round 4 :
Ch3 (counts as dc), *ch3, dc in center of next petal (work into the 7-dc group at its center), ch3, dc in base between petals (sl st into base sc to locate if needed)* repeat around to create chain arches between petals. Join with sl st to first dc. (16 dc, 16 arches)
Round 5 :
Into each ch3 arch: (sl st, ch1, sc, ch4, sc) creating picot arches bridging petals. Place sc into the dc worked at top of each petal. (16 arches)
Round 6 :
Ch4 (counts as tr), *(3 tr, ch2, 4 tr) all worked into top of each petal's central dc cluster to form a tall pointed petal cluster; sl st at base between petals to secure* Repeat around. Join. (Each petal formed by 8 tr clusters; 16 petals)
Info :
Round 6 builds height for the sunburst. Use consistent hook angle and even loops for smooth petal points. If stitches feel tight, briefly switch to 1.75mm for these tall post stitches then return to original hook for subsequent rounds.
Round 7 :
Ch1, work sc evenly across petal clusters: sc into each tr cluster top and into chain spaces between petals to create a tidy base. You should have 16 sc across main petal tops and additional scs in spaces—count around to ensure uniformity. (approx 64 sc depending on spacing)
Round 8 :
Ch2 (counts as hdc), *[hdc, ch3, hdc] into top of each petal (worked into center top st of the petal cluster made in Round 6], ch2 between petal groups* Repeat around. This introduces secondary arches for edging. (16 hdc clusters, 16 arches)
Round 9 :
Into each ch3 arch of Round 8: sl st, ch1, sc, ch5, sc, sl st to next base. This lengthens the arches and readies for picot edging. (16 long arches)
Round 10 :
Ch3, dc into each sc across the previous round, placing (dc, ch2, dc) into the peak of each arch to create small pointed peaks. Join. (count equals the number of sc plus 16 peaks)
Info :
Check layout at this point: you should see clear radial symmetry with 16 petals and open arches between them. If a petal seems missing or doubled, unpick to the previous consistent round and rework that segment.
Round 11 :
Ch1, sc evenly across the top of each dc and into chain spaces, creating a tidy round. (maintain around 96–112 sc depending on arch density)
Round 12 :
Ch4 (counts as tr), *work [2 tr, ch2, 2 tr] into each peak created in Round 10 to heighten the petal tip, sl st in small spaces between peaks* Repeat around. (16 major petal peaks)
Round 13 :
Ch1, sc into each tr and into chain spaces, then place picots at the top of each peak as: *sc, ch3, sl st into 3rd ch (pic)*, creating a finely scalloped petal top. Repeat across each of 16 petals. (16 picots)
Round 14 :
Border round: Ch2 (counts hdc), *2 hdc into each space between petal peaks, ch1 between groups to reinforce edge*. Repeat around. This begins forming the openwork foundation for the outer lace rounds. (approx 48 hdc)
Round 15 :
Into each ch1 space: work (sc, ch5, sc) to create tall chain loops between petal groups (16 loops). Join. (16 loops)
Info :
This is a convenient point to wash and lightly block each medallion. Pin the 16 petals evenly around a circular blocking mold or on a foam board to get symmetric petals before continuing to outer rounds.
Round 16 :
Work into each ch5 loop: sl st, ch1, [sc, hdc, 9 dc, hdc, sc], sl st to base. This creates elongated lace fans that will be the outer rays. (16 fans)
Round 17 :
Ch3, *[dc into next 4 dc of fan, ch2] across fan, then dc into the fan base to join* Repeat around to stitch the fans into a continuous ring of arches. (count around depends on fan density; should be divisible to form 16 repeated groups)
Round 18 :
Ch1, sc across the tops of the previous dc and ch2 arches, placing (sc, pic) at the top of each arch to emphasize lace points. (16 picots plus intervening scs; total roughly 96 stitches)
Round 19 :
Ch5 (counts as tr+ch2), *sk 3 sts, tr in next st, ch3, tr in same st, sk 3 sts, sl st to next space* to form vertical tall loops that will be turned into open petals on outermost edge. Repeat 16 times. (16 tall loops)
Round 20 :
Into each tall loop: sl st, ch1, sc, ch7, sc, sl st into same loop top to form decorative chain petals. These long chain petals are what create the starburst feel. (16 chain petals)
Info :
At this point the medallion is visually mature. If you want extra crisp points, starch lightly and pin each chain petal individually before continuing to the final perimeter rounds.
Round 21 :
Ch2, hdc across the base of each chain petal, placing (hdc, ch3, hdc) at the center top of each petal to emphasize points. (16 center ch3 loops)
Round 22 :
Into each ch3 center: sl st, ch1, sc, ch5, sc, sl st. This creates a secondary picot arching for the petal tips. (16 arches)
Round 23 :
Ch3, dc in each sc across around, placing (dc, ch2, dc, pic) at each petal tip to make a scalloped star edge. Join and fasten off, leaving a 30cm tail for assembly. (final decorative row; stitch count variable but maintain symmetry across 16 petals)
Info :
Weave in the tail temporarily to the back of the medallion. Repeat to make 3 identical medallions. Block all medallions flat with pins: stretch evenly so each petal measures the same length. Allow to dry completely before joining.
— Butterfly Wing Motif (Make 12) :
Info :
The butterflies in the photo appear as stylized symmetric wings paired together to form a single butterfly shape. Each wing is worked first and the pair joined in the center with a narrow chain stem. Make 12 wings to create six butterfly pairs and additional isolated joins depending on layout. Instructions below describe one complete butterfly pair worked in mirrored halves; for efficiency you can make two wings and join at the center with a chain join as described.
Round 1 :
Make a small MR or ch6 and join to form ring; into ring work 12 dc. Join. (12)
Round 2 :
Ch1, sc in same st, *ch5, sc in next dc* around to form 12 chain loops. (12 loops)
Round 3 :
Into each ch5 loop: [sl st, ch1, sc, hdc, 5 dc, hdc, sc, sl st] forming small wing segments. Make 6 of these loops per wing side (works best to think of the wing as 6 segments). (6 segments per wing)
Round 4 :
Ch3, dc across centers of the segments: work (dc, ch2, dc) at the top of each segment to form small scalloped peaks. Repeat across 6 segments of one wing. Join and fasten off wing. Make a mirrored wing the same way. (wing top peaks = 6)
Info :
Mirror the second wing exactly or work the second wing by crocheting into the base of the first wing in reverse order to create an already-joined butterfly. For clarity we show separate wings to be joined by the central chain stem.
Round 5 :
Join two wings with ch12 chain from the base of wing A to base of wing B: attach chain to wing A base with sl st, ch12, sl st into wing B base. This chain is the butterfly body/stem. Fasten off leaving long tail for joining into runner. (one butterfly assembled)
Round 6 :
Optional decorative edging: rejoin to wing edges and work sc evenly around both wings, placing picots at the outermost scallops for lace detail: (sc, ch3, sl st in 3rd ch) across outer edge. This creates the delicate beaded look as in the photo. (picots equal outer scallop count; typical wing has 10–12 picots)
Info :
Make 12 butterfly units (6 pairs) or as many as needed to reproduce the pictured runner layout. Block each butterfly flat, pinning wings symmetric and tightening the central chain so the butterflies read as elongated shapes rather than rounded blobs.
— Small Connecting Leaf/Corner Motifs (Make 6 or more as needed) :
Info :
The runner uses small triangular leaf motifs between medallions and butterflies to balance the layout. These triangular motifs are quick to make and add texture at junctions. Make 6–8 depending on your layout.
Round 1 :
Ch6, join to ring with sl st or MR with 8 sc in ring. (8)
Round 2 :
Ch1, sc in next 3 sts, ch5, sc in last 4 sts to form a small V-loop; turn and work into the ch5: sc, hdc, 5 dc, hdc, sc. Fasten off. These small motifs are used as decorative spacers between butterflies and the medallion edges.
Info :
Make a number of spacer leaves equal to the visible links in the photograph (about 6–8). Block and press flat. The leaf motifs are attached with single seam stitches or crocheted join-in-progress to avoid bulky seams.
— Joining & Assembly (Assemble runner as shown) :
Info :
You can either join motifs as you go (
Assembly Instructions
- Arrange the three sunburst medallions flat on your blocking board in the desired serpentine layout, leaving equal space between them for butterfly connectors. Pin each medallion at petal tips so they sit flat.
- Position butterfly motifs between the medallions as pictured: two butterflies pair between medallions, and single butterflies fill outer edges. Use tail ends to baste or yarn to sew motifs together through connecting chain loops.
- Join motifs using mattress or whip stitch through the back loops of edge rounds (round 21–23 of medallion and round 6 of butterfly) to make joins invisible from the front. Use the long tails left when fastening off to sew with small even stitches.
- Where a medallion meets a butterfly, align a medallion chain arch (for example the ch5 loop from Round 15) to the base chain of the butterfly and sew with small backstitches, catching only the back threads so seams remain neat.
- For the small leaf/corner motifs, tack them into the joins at intersections between medallion points and butterfly bases. Reinforce joins with extra stitches if the runner will see frequent handling.
- After initial joining, check runner flatness and spacing. If any motif pulls or puckers, unpin and adjust joins by adding/removing a few stitches to redistribute tension.
- Weave all loose ends through the nearest rounds, then trim. Re-block the entire runner on your blocking mat, spacing petals and wings exactly as in the photo, and allow to dry fully.
- Optional: Starch lightly or spray with fabric stiffener while pinned for a crisper finish. Allow to dry completely before transferring to table.
Important Notes
- 💡Use stitch markers consistently at the beginning of each round to avoid counting errors and maintain proper shaping
- 💡Stuff body parts gradually as you work rather than waiting until the end, especially for narrow openings like arms and legs
- 💡For safety eyes, position and secure before stuffing head fully - they cannot be repositioned once locked in place (not applicable here but relevant for mixed projects)
- 💡Maintain consistent tension throughout the project; too tight creates stiff, small pieces, too loose creates floppy, holey fabric
- 💡When sewing motifs together, use yarn slightly thinner than working yarn for neater, less visible seams
- 💡Pin all pieces in position before final sewing to ensure proper placement and symmetry
- 💡For lace runners, wash motifs gently before joining to remove oils and to pre-shrink cotton; always block after joining
- 💡Keep a row counter or notepad to track rounds, especially in long even-stitch sections
Completing this lace table runner is such a delight — each medallion and butterfly comes together to create a flowing, heirloom-quality piece. The blocking process brings the motifs to life with crisp petals and precise picot edges. Whether you use it daily or save it for special occasions, this runner will add timeless charm to your home. 🧶📐✨