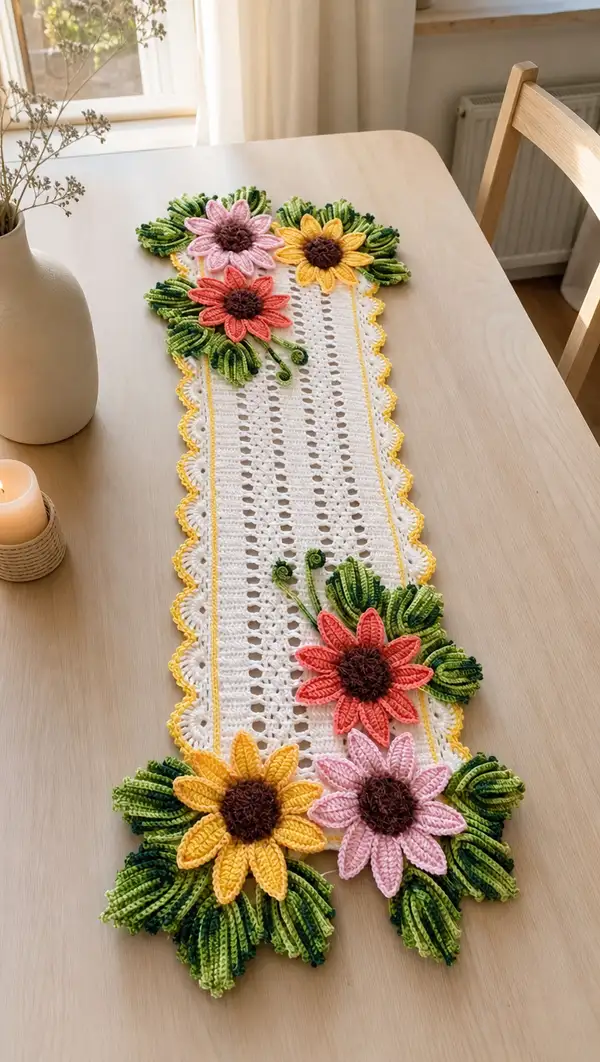
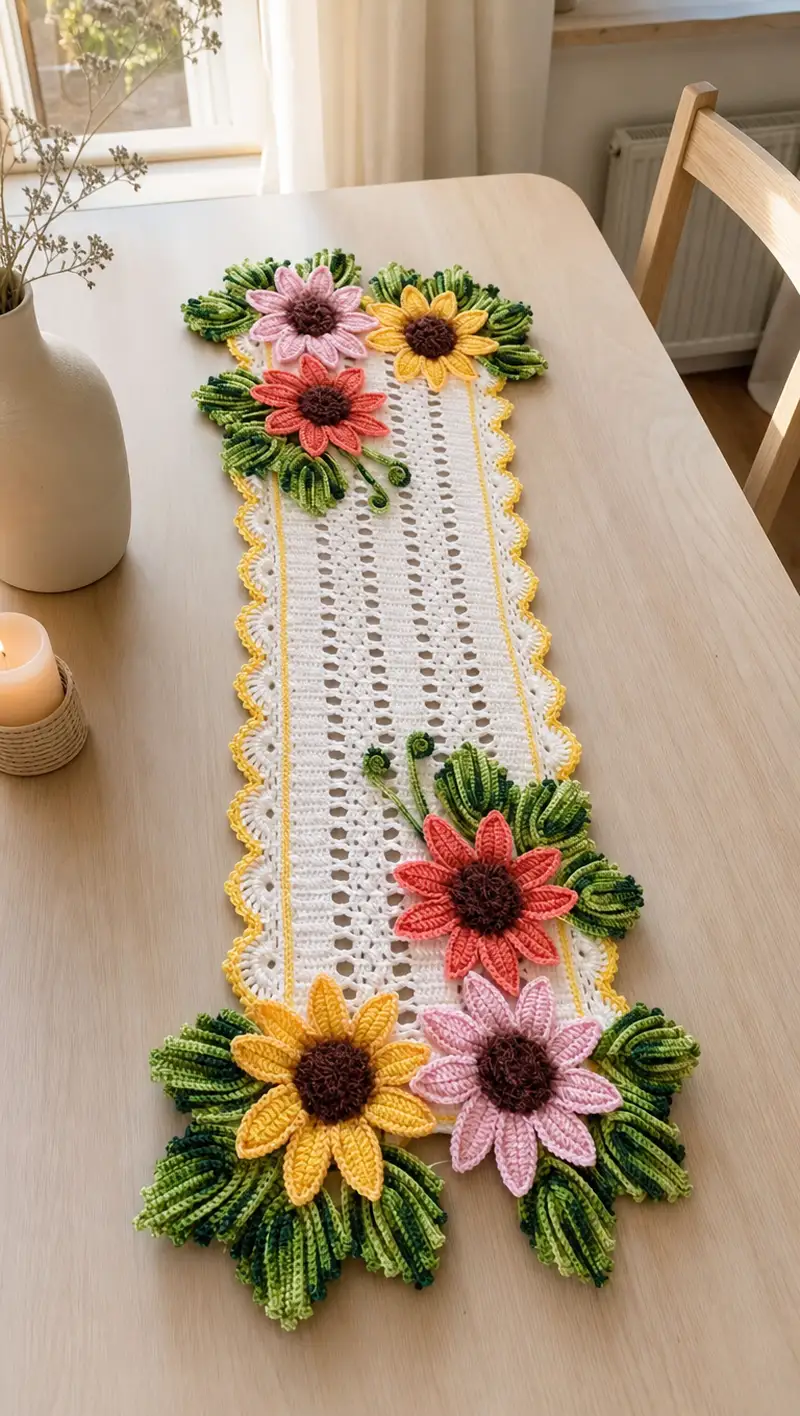
A bright, floral table runner featuring large layered sunflowers, textured variegated leaves and a delicate scalloped border. This runner combines a clean white filet-style center with colorful 3D motifs in yellow, pink and coral shades. Perfect for spring and summer tabletops, the pattern uses standard stitches and modular motifs for easy assembly.
Progress Tracker
0% Complete
— Runner Panel (Filet center) :
Round 1 :
Foundation: Chain 101 (this creates a runner approximately 90–95 cm long before motifs; adjust chain by multiples of 4 +1 to change width) (101 chains)
Round 2 :
Row 1 (RS): Dc into 4th ch from hook (counts as 1 dc and ch2), *ch2, skip 3 ch, dc into next ch* across to last 3 ch, dc into last ch. This begins the vertical lace columns; keep tension even
Info :
Filet format: Each lace block is ch2, skip 3 ch to create an open square. On the return row we'll form alternating solid and open squares to create long columns. Use a stitch marker at the first dc of each row to mark row start
Round 3 :
Row 2 (WS): Ch3 (counts as dc), turn, *dc into next dc, ch2, sk next ch2 sp, dc into next dc* repeat across, ending with dc in top of turning ch.
Round 4 :
Row 3 (RS): Ch3, turn, *ch2, skip next ch2 space, dc into next dc* repeat across, ending with dc in top turning ch.
Info :
Work Rows 2-3 (Rounds 3-4 here) as the vertical lace repeat. Keep the outermost edge stitches as solid dc to provide a stable edge for the scalloped border later. Place a marker in the edge dc each row to keep counts consistent.
Round 5-18 :
Repeat Rows 2-3 for a total of 16 repeats (this yields a centre height around 60–65 cm depending on yarn). Maintain even tension and count open squares every 4 repeats to ensure symmetry.
Round 19 :
Edge reinforcement row: Ch1, sc evenly across the long edges (work 1 sc in each dc and 3 sc in each ch2 space to maintain straight edges). At short ends, work 3 sc into the corner ch spaces to create a rounded corner block. Continue across the entire perimeter of the panel.
Info :
Make sure the total stitch count along the long edge remains even; the sc edging stabilizes the runner for attaching motifs later. If you find the edges ripple, block the panel flat before continuing.
Round 20 :
Row for inner decorative rail: With contrast color yellow (use a thin strand or smaller hook if you want a recessed line), join in with sl st at 5th st from short end, ch1, sc in that st and in each stitch along the edge creating a narrow decorative line 3–4 stitches in from the edge. Fasten off and weave ends.
Info :
Change to yellow yarn for the decorative inner rail. Carry yarn along the back if you prefer or fasten off and rejoin to avoid color carry showing through the lace.
Round 21 :
Prepare for scallop: Join yellow yarn at short end corner, ch3 (counts as dc), *sk 2 sc, 5 dc into next sc (shell), sk 2 sc, 1 sc into next sc* repeat across the short end to fashion a scalloped row. At long edges, continue to prepare round by placing 1 sc every 2 stitches to maintain spacing for scallops.
Round 22 :
Scallop refinement: In each 5-dc shell from previous round, work (sl st, ch3, 3 dc, ch3, sl st) into center dc to create a picot shell with neat points. Work 1 sc between shells along the edge. Fasten off and weave ends.
Info :
Blocking now is highly recommended: block the runner panel flat to the exact measurements you want and pin scallops to open them out. Allow to dry fully before attaching motifs.
— Sunflower Center (Make 6) :
Round 1 :
Make a magic ring with deep brown yarn: 6 sc in magic ring (6)
Round 2 :
Inc in each st around: 6 inc (12)
Round 3 :
(1 sc, inc) x6 (18)
Round 4 :
(2 sc, inc) x6 (24)
Info :
Use a smaller hook (3.0mm) for the center if you want a denser, textured look. Use surface crochet or sl st clusters to mimic the seed texture in later rounds.
Round 5 :
Working in BLO to create a textured rim: 1 sc in each st BLO around (24)
Round 6 :
Make wobble seed texture: *sl st into next st, ch1, sl st into same st* repeat around (24 distinct sl st clusters). Fasten off leaving a long tail for sewing to petal base. Flatten center and do NOT stuff; we want a flat disk for flower center.
Info :
If you wish deeper texture, after round 5, embroider small French knot-style knots with loose yarn loops by wrapping yarn around needle and pulling through to secure small bobbles across the surface.
— Petal Unit (Make 36 petals total; 6 petals per flower x 6 flowers) :
Round 1 :
Join petal color (sunflower yellow, coral, or blush pink) to an outer stitch of the flower center by sl st, ch1, 6 sc into same st to form small circular foundation (6)
Round 2 :
(sc, inc) x3 (9)
Round 3 :
(2 sc, inc) x3 (12)
Round 4 :
Switch to petal shaping: ch1, turn, 1 sc in next st, hdc in next, dc in next 3 sts, tr in next 2 sts, dc in next, hdc in next, sc in last (create elongated petal - 9 stitches long including increases)
Info :
Work petals flat so they flare nicely from the center. Use BLO on earlier rounds to make the petal base sit slightly raised, giving depth between center and petal.
Round 5 :
Edge the petal: sl st along petal edge and return to base, then sl st into next base st to anchor. Repeat to make one petal. Make 6 petals around a single center for each complete flower.
Round 6-12 :
Repeat petal shaping for remaining petals: join at next center stitch and work petals in the same order so petals sit evenly (after 6 petals a flower will be complete). For layered look, after first row of 6 petals is complete, make a second, slightly smaller inner row of 6 petals by joining to center again and making petals with one less tr in center (shorter) to create two-tier dimension (optional).
Info :
Make 6 flowers total: 2 in yellow, 2 in coral, 2 in blush pink (or use color scheme of your choice). For variety, make some petals slightly shorter or longer; the eye will see layered depth.
— Petal Finishing Detail :
Round 1 :
Optional surface ribbing: With same petal color, using slip stitch or 1 row of sc in FLO across each petal to create raised veins. Work 3 evenly spaced sl st ridges down petal length for a realistic look.
Info :
To create the stitched vein effect, insert hook into base of petal, pull up a loop and slip stitch straight to the petal tip in a shallow tension so the ridge is subtle. Secure at base and weave ends to back.
— Leaf Cluster Module (Make 12 clusters; each cluster has 3–5 leaves) :
Leaf Round 1 :
Using variegated green yarn, ch 12 for a medium-sized leaf (adjust chain for larger/smaller leaves). In 2nd ch from hook: sc, hdc, dc, dc, tr, dc, dc, hdc, sc, sl st into last ch to create a pointed leaf shape (total approx 10 sts along body).
Leaf Round 2 :
Return along the other side of the chain: sl st, sc, hdc, dc, dc, tr, dc, dc, hdc, sc. Join with sl st to the starting base. Fasten off and leave a long tail for sewing. This creates a full symmetrical leaf (approx 20 stitches around).
Info :
For a densely textured leaf like those in the photo, use the loop stitch method along the sides: before each dc, work a loop st by wrapping yarn twice around index finger and pulling a long loop up then securing with sc on return row. Trim loops optionally to create a fringe leaf effect.
Leaf Round 3 (loop fringe variant) :
Instead of standard dc at the center, work *loop st, dc* across the central top line to create long looped fibers. On the return rows secure loops by working sc in each loop base.
Info :
Create clusters by sewing 3–5 leaves together at their base using the long tail. Offset leaves so their points fan outward and create a lush base for the flowers. Use variegated yarn to achieve tonal shifts as seen in the image.
— Textured Folded Leaves (Make 18) :
Round 1 :
Chain 14. In 2nd ch from hook: sc, hdc, dc, dc, tr, dc, dc, hdc, sc across. Join to full base with sl st. (This creates a slightly longer, narrower leaf)
Round 2 :
Fold leaf along center and sew BLO edge together with 6 evenly spaced sl st to form a folded, curved leaf. Fasten off leaving long tail.
Info :
Folded leaves give the sculpted look pictured. Use a small amount of stuffing or a yarn-wrapped wire at the base to make them stand slightly off the runner when sewn.
— Curly Tendrils (Make 8–12) :
Round 1 :
Chain 20 with variegated green. In 2nd ch from hook: 2 sc in each ch across to form a spiral (40 sc total). Fasten off leaving long tail. Curl will form naturally into a spiral.
Round 2 :
Smaller tendrils: Chain 12 and 2 sc in each ch across (24 sc); fasten off. For tight little buds, chain 6 and 2 sc in each ch (12 sc).
Info :
If you prefer a less bulky spiral, work single crochets in every other chain and make the spiral looser. Use a light steam block to set shape if desired, or wrap around your finger until the tendril cools to keep curl.
— Assembly Prep :
Info :
Lay out the blocked runner on a flat surface. Place flower centers and petals in position: two clusters at each end and a central cluster near the middle of the runner. Arrange leaf clusters around each flower and place curly tendrils so they flow naturally between leaves.
Info :
Pin each element in place using rust-proof pins. Take photos of layout before sewing so you can re-create symmetrical placement on the opposite side if needed.
— Sewing Flowers to Runner :
Round 1 :
With long tail from the center, place center on runner and use whip stitch to sew through the runner base and the back loops of the center to anchor. Sew securely with 10–12 evenly spaced stitches around the center.
Round 2 :
Sew each petal at two points: the petal base to the runner and a second stitch about 1/3 up the petal to hold its curve. Use small back stitches to keep attachment invisible on the RS. Sew inner petal row first, then outer row if using layered petals.
Info :
Stitch colors using a yarn needle threaded with matching yarn. Keep tension gentle: pulling too tightly will flatten petals. Add a couple of stitches at petal tips only if you want a more fixed, upright petal.
— Attaching Leaf Clusters :
Round 1 :
Arrange leaf cluster so the sewn bases overlap the area behind the flower center. Use long tails to sew cluster base to the runner with a ladder stitch-like technique to keep seam flat. Stitch through runner and leaf base several times to secure.
Round 2 :
Sconce additional leaves around cluster by sewing only the leaf base to the runner to allow leaf tips to lift. Use a few stitches in each leaf base for flexibility.
Info :
For realistic layering, put darker green leaves behind and lighter leaf tips in front. Use pairing of variegated greens to mimic the natural tonal variation in the image.
— Attaching Tendrils and Small Details :
Round 1 :
Sew the spiral tendrils in between leaves using a single stitch at the base. Let the spiral lie loosely over leaves and petals for a whimsical effect. Tuck ends under leaf bases and secure with hidden stitches.
Round 2 :
Add small buds by coiling short chains and securing them with button-like stitches; sew these into gaps to fill negative spaces as seen in the photograph.
Info :
For a natural, organic look keep stitches sparse at tips and denser at the base. Trim stray yarn ends and use fabric glue sparingly if you need to secure tiny curls quickly.
— Final Edge Refinement :
Round 1 :
After all motifs are attached, re-check the scalloped edge and if necessary, rework shells with single crochet and picot points to even out spacing. Use yellow yarn to re-define shells if the color faded during handling.
Round 2 :
Optional decorative topstitch: With yellow, work 1 row of sc along both long edges between scallops and the inner rail to frame the lace and provide an extra bright outline.
Info :
Weave all ends to the wrong side using tapestry needle. Trim ends close after weaving through multiple stitches to avoid unraveling.
— Blocking & Finishing :
Round 1 :
Steam-block the assembled runner gently or pin it to the desired dimensions and spray with water to set the shapes. Pay particular attention to scallops and petal positions, pinning them to lie naturally.
Info :
Allow the runner to dry fully on the blocking board for 24 hours to ensure the yarn holds shape. Re-adjust any petals that shifted during drying and re-sew lightly if needed.
Round 2 :
Final check: Ensure no stuffing is visible in leaf bases; add a few reinforcing stitches if any leaf tips detach over time.
Info :
Optional: Add a thin felt backing to the underside of the center panel if you expect frequent food spills—stitch felt in place using invisible stitches for protection.
— Variations & Sizing :
Info :
To make runner longer, increase foundation chain length by multiples of 4 and make additional repeats of the filet rows. To make a placemat, shorten foundation chain and reduce repeats. Add more flower clusters for a fuller look.
Info :
Change flower color scheme for seasonal variations: autumn oranges and rusts, or pastel shades for spring. Use fingering weight yarn and smaller hook to produce a delicate, lace-like runner.
Completing this sunflower table runner will brighten any table and bring a touch of handmade sunshine into your home. The layered florals and textured leaves are so rewarding to make and assemble. I hope stitching each petal gives you as much joy as arranging them did for me—this runner makes a beautiful gift or a lasting centerpiece for gatherings. Happy stitching and enjoy the warm smiles your creation will inspire! 🌻🧶