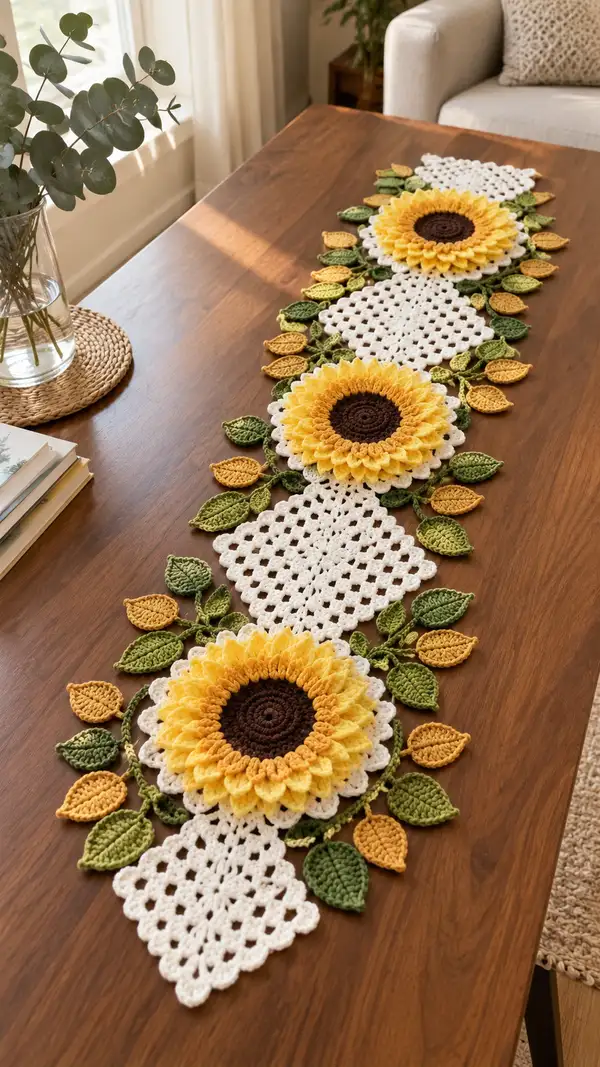
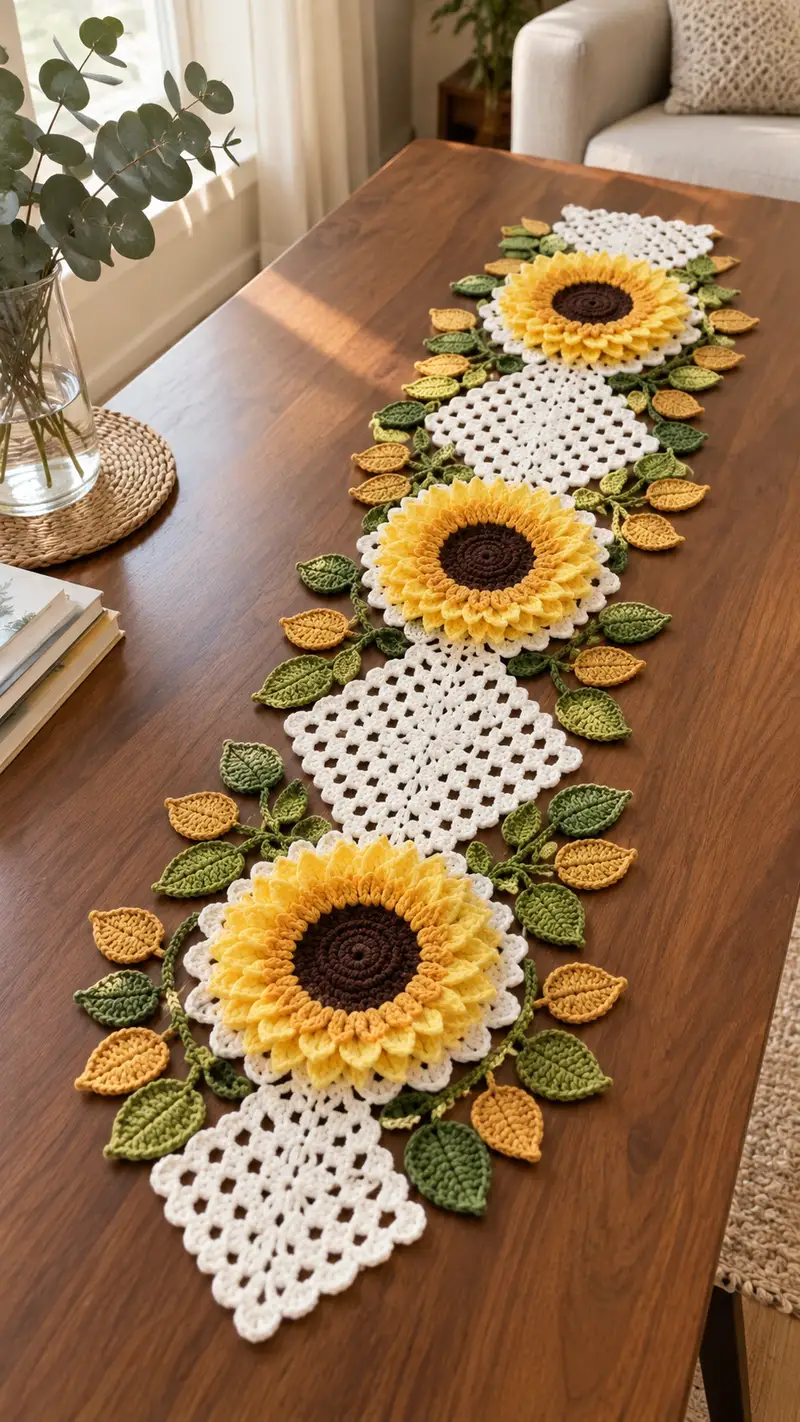
Bring bright, garden-fresh sunshine to your dining table with this detailed Sunflower Table Runner Pattern. The runner features three large layered sunflowers with rich brown centers, multi-tone golden petals, crisp white granny-square diamonds, and a lush spray of green and mustard leaves. Designed to sit flat as a decorative runner, the pattern combines textured petals, classic granny motifs and delicate leaves for an elegant, farmhouse-ready statement piece. Full step-by-step instructions guide you through every motif and assembly.
Progress Tracker
0% Complete
— Notes & Gauge :
Info :
Gauge is not critical for this decorative runner but for consistent motif size, 16 dc x 10 rows = 10 cm using worsted weight yarn and 4.0mm hook. Work tightly enough so textured petals and leaves hold shape but not so tight the fabric becomes stiff. All motifs are worked in rounds or rows as noted. Join rounds with sl st and carry color names explicitly when requested.
Info :
Terminology: Puff stitch (ps) in this pattern means: yo, insert hook in stitch, yo pull up a loop (repeat yo, insert, pull up loop 3-4 times total to have 5 loops on hook), yo and draw through all loops, ch1 to close puff unless otherwise noted. Adjust number of pulls to make consistent petal height.
— Sunflower Center (Make 3) :
Round 1 :
6 sc in magic ring (6)
Round 3 :
(1 sc, 1 inc) x 6 (18)
Round 4 :
(2 sc, 1 inc) x 6 (24)
Round 5 :
(3 sc, 1 inc) x 6 (30)
Round 6 :
(4 sc, 1 inc) x 6 (36)
Round 7 :
(5 sc, 1 inc) x 6 (42)
Round 8 :
(6 sc, 1 inc) x 6 (48)
Info :
The brown center finishes at 48 sts. If you prefer a slightly smaller center, stop at Round 7 (42 sts). Keep tension consistent for a flat disk.
Round 9 :
1 sc in each st around (48)
Round 10 :
1 sc in each st around (48)
Round 11 :
1 sc in each st around (48)
Round 12 :
1 sc in each st around (48)
Info :
Fasten off brown if your next round is golden. We recommend weaving the tail to the wrong side and starting petal base in golden color at next round. Do not stuff; keep flat.
— Petal Base & Inner Petal Rows :
Info :
Change to darker golden (mustard) for inner petal shading. Petals are created in multiple concentric rounds. This sunflower uses a two-tier petal system: inner short petals and outer larger petals. Total petals = 24 (worked into every other stitch around). The brown center (48 sts) gives two stitches per petal anchor.
Round 13 :
Join mustard with sl st to any st. *Sc in next st, ch 2, sc in next st* around to create 24 ch-2 loops (48 sts accounted as sc placements). (24 ch-2 loops, 24 sc)
Round 14 :
*Into each ch-2 loop: (ps x4, ch1) anchor with sl st into the sc that follows the loop* around to create 24 shallow puff petals. After completing last petal join with sl st to first puff's base. (24 petals)
Info :
Make sure all puff stitches are pulled to an even height. Work the final yo and pull through firmly before ch1 to close. Adjust number of pulls (3-4) depending on how lofty you want inner petals.
Round 15 :
Sc in each sc between petals and 2 sc around each puff base to secure (48 sc total). This round secures inner petals and builds platform for outer petals.
Round 16 :
1 sc in each st around (48) (work tightly to maintain platform)
Round 17 :
Change to golden yellow yarn. 1 sc in each st around (48)
Round 18 :
*Ch 2, skip 1 st, sc in next st* around to make 24 ch-2 loops as anchors for larger petals. (24 loops)
Round 19 :
*Into each ch-2 loop: (ps x5, ch1) anchor with sl st into the sc after the loop* around to form 24 larger outer petals. Finish last petal and join.
Info :
Outer petals are the prominent sunflower layer. Make sure you keep each puff closed with a ch1 and slightly pull the loops outward to create petal shape. Use a 3.5mm hook if you want slightly tighter, sculpted petals.
Round 20 :
Work 1 sc in each sc and 2 sc around each puff base to fill gaps (48 sc). This evens the edge before adding a decorative scallop.
Round 21 :
Work in BLO: 1 sc in each st BLO around (48) to create a slightly ridged inner edge that helps petals sit upright.
Round 22 :
Switch to a brighter yellow for the outermost petal rim. *(sc, ch 2, sc) into each st around* to make 48 small arches (this creates points to place final scallop). (48 arches)
Round 23 :
*Into each ch-2 arch: sc, hdc, dc, hdc, sc* to create a scalloped white or yellow edging around petals. Join and fasten off, weave ends. (48 scallops)
Info :
If you prefer a more ruffled look, work into the fronts of the puff stitches with a row of dc clusters before the scallop. Keep petals unstuffed and shape with your hands when blocking.
— Sunflower Backing Scallop / White Decorative Round :
Info :
Each sunflower sits on a white scalloped disk that visually ties to the granny diamonds. Work this piece separately in white and slip-stitch to the back of the sunflower by matching points.
Round 1 :
With white, ch 5, sl st to first ch to make ring. Ch 2 (counts as first dc), work 12 dc into ring, join (12)
Round 2 :
Ch 3 (counts as dc), dc in same st, 2 dc in each dc around, join (24)
Round 3 :
Ch 3, (2 dc, ch 1, 2 dc) in same st, *skip next st, (2 dc, ch1, 2 dc) in next st* around to form 12 shell clusters, join (12 shells)
Round 4 :
Sl st to first shell space, *sc, ch 3, sc* into each shell space around to create 12 larger loops for attaching to granny squares (24 sc placements). Join.
Round 5 :
1 sc in each st and into each ch-3 loop work (sc, hdc, sc) as small scallops to create a fuller white disk edge. Join and fasten off, leaving tail for sewing.
Info :
Make three identical sunflower assemblies total (brown center + petal layers + white backing). Keep them consistent by counting puff petals and matching scallop points to granny square edges for easier sewing.
— Granny Diamond (Make 4) :
Info :
The runner uses diamond-oriented granny motifs (worked as a square then joined on point). Each diamond fits between sunflowers and provides the white backbone for the runner. Block each to a 15-16 cm diagonal before assembly.
Round 1 :
With white, ch 4, sl st to form ring. Ch 3 (counts as dc), work 2 dc, ch 2, 3 dc into ring (first corner), *3 dc, ch 2, 3 dc* three times to make four corners, join with sl st to top of starting ch-3.
Round 2 :
Sl st to corner ch-2 sp, ch 3, (2 dc, ch 2, 3 dc) in same corner, ch 1, *(3 dc, ch 2, 3 dc) in next corner, ch 1* around to form second round of corners and side clusters. Join. (You will have ch-1 spaces along sides.)
Round 3 :
Sl st to corner, ch 3, (2 dc, ch 2, 3 dc) in corner, *ch 1, 3 dc in ch-1 sp, ch 1, (3 dc, ch 2, 3 dc) in next corner* around. Join.
Round 4 :
Repeat Round 3 to enlarge diamond to desired size; for our runner make 4 total rounds of classic granny expansion so final motif is approximately 12-14 cm across the diagonal. After Round 4 join and fasten off.
Round 5-8 :
Optional: add one round of sc in each st to even sides and create a clean edge for sewing. Work 1 sc in each st and 3 sc in corner ch-2 spaces. Fasten off and block.
Info :
Make 4 diamond grannies to sit between the three sunflowers. If you want a longer runner, add extra diamonds and repeat the sunflower spacing proportionally.
— Leaves (Make many: small and large variants) :
Info :
Leaves are worked flat in two sizes and two colors so they can be staggered around the runner. Use olive green for larger leaves and lighter grass green for smaller leaves; also make some mustard-colored accent leaves. Each leaf is worked from tip to base and finished with a small central ridge using BLO for texture.
Large Leaf — Rnd 1 :
Ch 9. In 2nd ch from hook: sc, hdc, dc, 2 dc in next, dc, hdc, sc, picot (sc, ch3, sl st in first sc) to form tip. Rotate to work down other side: sc in next, hdc, dc, 2 dc, dc, hdc, sc. Sl st to base of first sc to finish. (16-18 sts shaped)
Large Leaf — Rnd 2 :
Turn work to RS. Work 1 sc along entire edge into each stitch; in the middle 2-dc cluster work 3 sc to create a fuller belly. Work 1 sc in each st back to base. (approx 20 sc)
Large Leaf — Rnd 3 :
Work in BLO: 1 hdc in each st to create a central raised ridge. Fasten off leaving tail for sewing. Block leaf gently to shape.
Small Leaf — Rnd 1 :
Ch 7. 2nd ch from hook: sc, hdc, dc, 2 dc in next, dc, hdc, sc. Sl st to first sc. (12 sts)
Small Leaf — Rnd 2 :
Sc around edge, placing 2 sc in the center cluster to bulk the midsection. Sl st to join and finish. Work 1 BLO row of hdc to create vein texture if desired. Fasten off.
Info :
Make roughly 18-24 leaves of mixed sizes and colors to match the photograph. Vary placement and orientation and slightly block each for consistent curvature.
— Leaf Stem Connectors (Make many) :
Round 1 :
With dark green, ch 30 (or desired stem length), sl st back along chain to make a twisted stem. Fasten off leaving long tail for sewing. Make stems of varying lengths between 10-30 ch to connect leaves and motifs.
Round 2 :
Alternative: For a sturdier stem, ch 30, sc in 2nd ch from hook to end, then hdc back down chain to create a slightly thicker cord. Fasten off.
Info :
Use stems to space leaves around the sides of the runner and to connect leaf pairs. Sew stems to the granny diamonds and scalloped disks before final assembly to ensure even distribution.
— Edging & Joining Motifs :
Info :
You will join the motifs using whip stitch or mattress stitch for a near-invisible join, and then work an outer edge to tie everything together. Pin everything in final layout before sewing.
Round 1 (Joining) :
Arrange motifs in this order on a flat surface: Sunflower - Diamond - Sunflower - Diamond - Sunflower; adjust if you add more diamonds. With white yarn and right sides up, use sl st or whip stitch to join the scallop edges of sunflowers to diamond corners. Align scallop points to granny ch-2 corners and sew through the scallop base and the granny corner ch-2 space. Join at each connecting point with 4-6 secure stitches.
Round 2 (Reinforce) :
Reinforce joins by stitching through both layers in an alternating pattern (pick up 2-3 loops on one piece then 2-3 loops on the other). This reduces stretch and keeps motifs flat.
Round 3 (Outer Edge Preparation) :
Once joined, work 1 round of sc around the full perimeter picking up all raw edges: 1 sc in each outer stitch of petals, 2 sc in corners of diamonds, 1 sc in leaf bases. This levels the border for a finishing round.
Round 4 (Decorative Scallop Edge) :
With white or contrasting green, *sk 2 sc, 5 dc in next sc, sk 2 sc, sl st* repeat around to create a rounded scalloped edge. Adjust spacing to make scallops even at corners by adding or subtracting a sc between shells. Fasten off and weave ends.
Info :
If you prefer a ribbon-like finish, instead of scallops, work a reverse single crochet (crab stitch) for 2-3 rows around the edge for a neat, rope-like finish.
— Optional Decorative Extras :
Info :
Add tiny mustard-accent buds between leaf clusters by making small bobble circles: ch 2, 8 sc in ring; sl st to join and sew under a leaf cluster. Create small embroidered lines on petals with a strand of worsted yarn if you want visible veins.
Round 1 :
Optional: if you want the sunflowers more elevated, sew a small ring of crocheted chains beneath the white scallop and attach thin cardboard discs (covered with felt) before final joining to add subtle lift. Not necessary for flat runner.
Info :
Block each piece gently: dampen and pin to shape on blocking mats, letting petals curve slightly outward and diamonds lie completely flat. Allow to dry before joining to avoid warping after assembly.
— Final Finishing :
Round 1 :
Weave all ends on the wrong side. Use a tapestry needle to bury tails through multiple stitches and trim closely. Check joins and add extra stitches where pieces feel loose.
Info :
Steam-block lightly if fibers allow. If you used acrylic, blocking by pinning and spraying water works best; do not apply a hot iron directly to acrylic yarn.
Round 2 :
Optional: Add felt pads under the sunflower centers on the underside if placing on delicate furniture to prevent snagging.
Info :
Your runner is now complete. Enjoy styling it on a dining table, sideboard or bench as a seasonal statement piece.
Congratulations — you’ve created a beautiful Sunflower Table Runner that brings warmth and natural charm to any table! Each step in the pattern builds on the last, from the tight brown centers to the layered golden petals and crisp white granny diamonds. The leafy sprigs add movement and contrast that make the runner feel like a hand-gathered arrangement. I hope you enjoyed the mix of texture and structure and that this pattern inspires many more seasonal decor projects. 🌻🧶