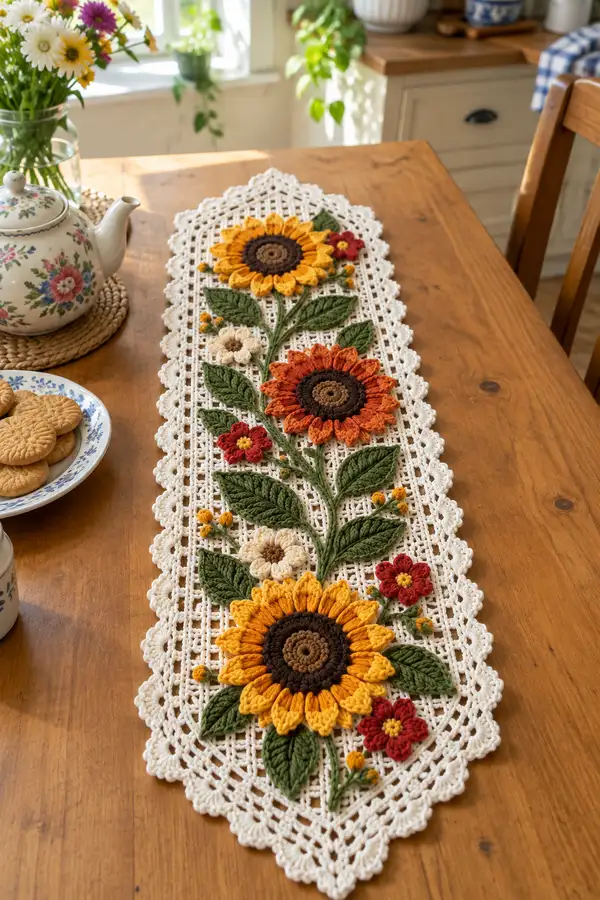
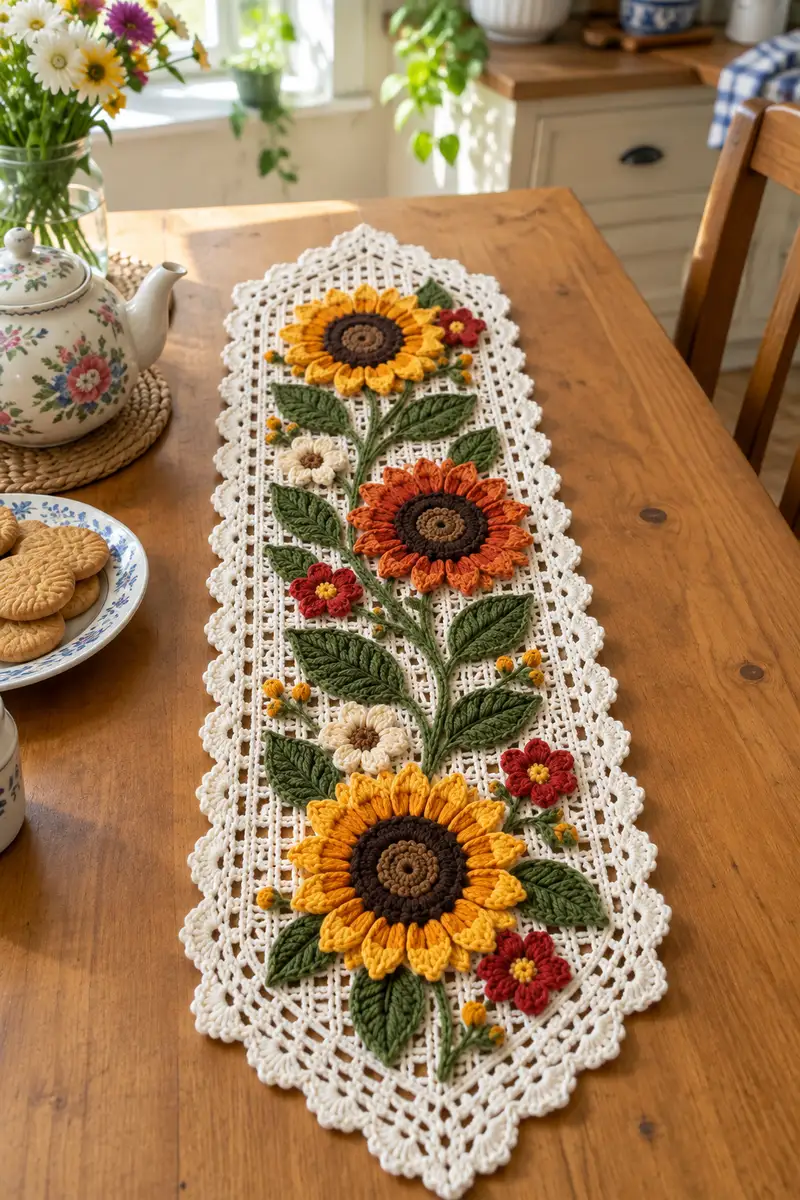
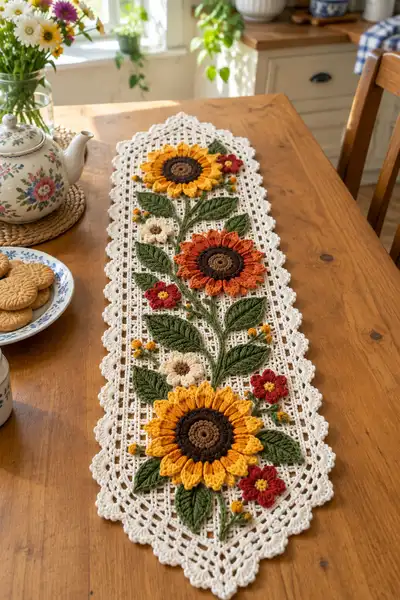
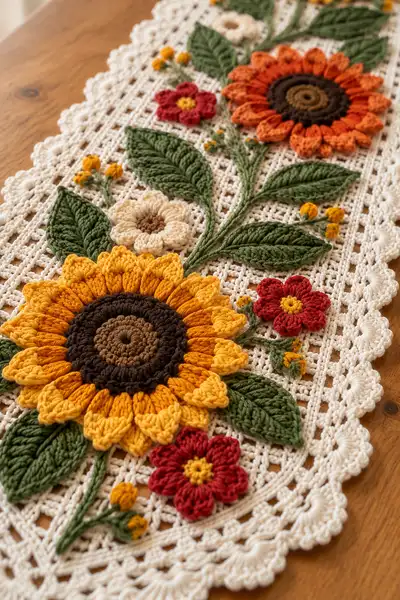
A charming sunflower table runner featuring three large layered sunflower appliques, textured leaves, tiny blossom accents, and a delicate scalloped lace border. Worked in a neutral lattice mesh background with richly colored appliques in warm golds, rust, olive and cinnamon—this runner brings farmhouse sunshine to your table. The pattern uses overlay applique, surface crochet stems, and a scalloped edging for a finished, heirloom look.
Progress Tracker
0% Complete
— Notes & Gauge :
Info :
This pattern is worked in multiple pieces: a central filet mesh base, individual appliques (sunflower centers, petals, leaves, small flowers and buds), surface slip-stitch stems and a scalloped lace border. Gauge for the mesh: 12 dc and 6 rows = 4 in (10 cm) using 3.5mm with worsted cotton; adjust for your yarn. Work tensions consistently — appliques are worked slightly tighter so the motifs sit up from the mesh.
Info :
All stitch counts in the mesh rows below are expressed as repeats and should maintain the initial multiple. The base mesh is a rectangular filet using dc and chain spaces. If you prefer to alter length, chain in multiples of 4 + 1 (foundation ch multiple of 4 + 1 turning ch).
— Base Mesh (Runner) :
Round 1 :
Foundation: ch 205 (multiple of 4 + 1). This establishes the width of the runner sample. Adjust multiple in increments of 4 for a wider or narrower runner.
Round 2 :
Row 1: dc in 5th ch from hook (counts as dc+ch2), *ch2, sk 2 ch, dc in next ch; rep from * to end. Turn. (This produces a fileted grid with dc separated by ch2 spaces.)
Round 3 :
Row 2: ch3 (counts as dc), dc in first dc, *ch2, sk next ch2 space, dc in next dc; rep across; end with dc in top of turning chain. Turn.
Round 4-12 :
Repeat Row 2-3 pattern to build a stable background mesh. Maintain even tension; work rows 4-12 straight without shaping to establish the central area (approximately 24 rows in sample to create central area before applying motifs).
Info :
Place stitch markers at 1/4 and 3/4 width to help position applique stems later. Block the mesh lightly after reaching row 12 to stabilize the fabric before attaching motifs.
Round 13-20 :
Continue mesh rows repeating Row 2-3 until piece measures approximately 40-45 cm from beginning, or until you have space to place the first sunflower motif. In the sample the mesh before the first motif is 20 rows tall; measure to fit your table length and motif placement.
Info :
When working the mesh, keep edges straight: at the beginning of each row, ch3 counts as dc; for a cleaner edge, work the first dc into the stitch of the previous row's turning chain rather than into the ch3 loop.
Round 21-28 :
Working straight rows, continue the filet grid and mark the central column of the runner with a removable marker. This central column will be used as the vertical guideline for placing stems of the three large sunflowers. (No increases or decreases - mesh remains rectangular.)
Round 29-36 :
Continue working straight rows in filet mesh until you reach the length position for the middle and top sunflower motifs. For the sample runner this adds another 8 rows between motifs and between top motif and runner end. Total mesh rows for the central area in sample: 36 rows (including the initial base rows).
Info :
Keep the mesh a little longer than you think — excess can be trimmed after blocking and attaching the border if needed. Block the completed mesh flat and let dry before attaching appliques for best alignment.
Round 37-40 :
Complete the remaining mesh to reach overall desired runner length leaving 8-10 rows at each end for scalloped border joining. Fasten off and set aside until appliques are made and arranged. Weave tails in to the back of the mesh but do not permanently close ends — you will work border into these rows.
— Sunflower Center (Make 3 - brown & med brown) :
Round 1 :
With medium brown, mr, 6 sc in magic ring (6)
Round 3 :
(1 sc, inc) x 6 (18)
Round 4 :
(2 sc, inc) x 6 (24)
Round 5 :
Switch to dark brown. (3 sc, inc) x 6 (30)
Info :
Change to darker brown at Round 5 to create the concentric center; leave a 6 inch tail for sewing. Use tight tension so the center sits slightly domed. Apply a small amount of stuffing or a little twisted yarn to slightly dome the center if you want a raised look before adding the petal ring.
Round 6 :
1 sc in each st around (30)
Round 7 :
1 sc in each st (30) — this builds the central disc to a stable diameter (approx 3.5-4 cm in sample)
Round 8 :
Dec round: (3 sc, dec) x 6 (24) — optional if you prefer a flatter center, otherwise skip to Round 9.
Round 9 :
Fasten off leaving long tail. Weave tail to underside and secure. Make 3 centers total: one for each sunflower. For varied scale, make one center slightly larger by adding an extra even round before Round 8.
— Sunflower Petals (Large - Make 16 petals per sunflower) :
Round 1 :
Attach golden yellow to the outer edge of the sunflower center with a sl st. Ch 2 (does not count), in same st: (tr, dp, dp) draw-up loop petals technique: yarn over twice, insert hook, draw up loop, repeat to produce 3 partial loops, then pull through all loops to create a long puff petal; sl st to anchor. (One petal created.)
Round 2 :
Ch 1, *sc in next st on center, ch 1, make a puff petal into next st (as Round 1); rep from * around for 16 petals total, spacing evenly; sl st to base of first petal. (16 petals)
Round 3 :
Working behind first row of petals, join with sl st to back loops at base of a petal, ch2, (hdc, dc, hdc) worked around base of petal to give petal thickness and 3D lift; sl st to join. Repeat for each petal - this gives double-layered petal definition.
Round 4 :
Ch1, working each petal top: sc around the tip of the petal working through both front and back loops of the petal ridge (3 sc along tip), sl st to base. Repeat for all petals to neatly finish petal tips. Fasten off.
Info :
For the rust/orange sunflower, use same petal construction but work petals slightly longer by adding one extra draw-up loop in the puff (i.e., 4 dp loops) to increase height. Maintain even spacing by counting center rounds and placing petals into every other stitch as needed to reach 16 petals.
Round 5 :
Block petals lightly: pin centers flat and mist with steam from a safe distance; shape petals with fingers to uniform curve. Allow to dry before attaching to base mesh.
— Small Layered Petal Detail (Optional second layer) :
Round 1 :
Using a slightly darker yellow or burnt orange, create a ring of 8 small puff petals placed between the main petals: attach yarn to center between two main petals, ch1, *puff petal (3 dp loops) into same space, sl st to center ring; rep 8 times so each is nestled under two main petals.
Round 2 :
Secure the small petals from below by weaving tail through the center ring and tightening; this provides denser look and fills gaps when the large petals are sewn down to the mesh.
Info :
When assembling, place the small layer so it tucks under the large petals at their base. This creates the lush sunflower look seen in the sample runner.
— Leaf (Make 10-12 full leaves for composition; various sizes) :
Round 1 :
Ch 15 with olive green. Row 1: sc in 2nd ch from hook, hdc, dc, tr, tr, dc, hdc, sc along the chain to the last chain; in last chain make 3 sc to turn the tip; work along opposite side of chain: sc, hdc, dc, tr, tr, dc, hdc, sc. (This creates a symmetrical leaf with 15-17 stitches per side.)
Round 2 :
Work a venation row using FLO and BLO: join at base, ch1, sc around leaf edge through both loops (approx 34 sc total depending on leaf size). Do not fasten off — leave a long tail for sewing. This gives a clean edge.
Round 3 :
With contrasting olive (same color), work a raised midrib: insert hook at leaf base center, ch 30 (length of leaf midrib); working back along chain, sc into each ch toward the leaf base using surface slip stitch or join with sl st down the middle of the leaf to form a raised ridge. Fasten off leaving a long tail. Create leaf ribs by couching with surface slip stitches from midrib out toward edges if desired.
Info :
For larger leaves, increase foundation chain to ch 19-21 and mirror the shaping. Work leaves slightly stiffer by using a slightly smaller hook (3.0mm) so they hold their sculpted curve when sewn onto the mesh.
Round 4 :
To create texture, work shallow surface slip stitches at approx 3 places radiating from the midrib to the edge, making the leaf appear veined and realistic. Use a yarn needle to couch stitches if preferred.
— Small 5-Petal Flower (Make 6-8 red flowers) :
Round 1 :
With red, mr, 6 sc in magic ring (6). Pull ring tight.
Round 2 :
Ch 1, *(ch 3, sl st in next st) x repeat around to form 6 loops for petals. Join.
Round 3 :
Working into each ch-3 loop: (sc, hdc, dc, hdc, sc) in each loop to form rounded petal. Fasten off leaving long tail for sewing. Make center by embroidering a french knot with mustard yellow yarn or by making a tiny bullion stitch center with 6 wraps.
Info :
These little flowers are sewn onto the mesh in clusters near sunflowers. Make 6-8 in red and 2-3 in cream for contrast. For a raised center, add an extra small disk worked as mr 6 sc (tight) and sew into the middle.
— Cream Rosette Flower (Make 3) :
Round 1 :
With cream, mr, 8 sc in magic ring (8)
Round 2 :
(1 sc, inc) x 8 (24)
Round 3 :
Ch 1, *in next st work (sc, ch2, tr, ch2, sc) to make 6 small scallops around the disc, rep to create layered petals. Fasten off leaving tail.
Info :
Stitch the rosette centers slightly inset from larger sunflowers to add tonal variety. Use a tight magic ring and block flat to maintain a small rosette size (~2.5 cm diameter).
— Bud Cluster (Make many small buds) :
Round 1 :
With mustard/golden yarn, ch4, join with sl st to form ring. Round 2: Into ring work 5 sc to form bud base. Pull tight. Fasten off leaving tail for sewing.
Round 2 :
Optionally wrap a tiny length of yarn around a blunt end or use taken loops to create a round bud; or work a 6-7 wrap bullion stitch into the mesh with the mustard yarn to simulate tiny flower buds.
Info :
Group 2-4 buds onto a short stem (see stems below) to create look of sunflower seedheads or filler blossoms in the sample. Sew them in clusters for natural composition.
— Surface Stems and Assembly Prep :
Round 1 :
To create stems, use matching olive yarn and a tapestry needle or your crochet hook (3.5mm). Insert yarn at the base position on the mesh where the stem should start. Using surface slip stitch: bring yarn up through mesh at starting point, *insert hook 2-3 stitches up along the chosen path and pull loop through, sl st in place; rep to desired length creating a slightly raised corded stem.
Round 2 :
For thicker stems, surface crochet a chain along the path first then couch it down by whipstitching with matching yarn to the mesh. This gives depth and robustness to the stem line. Leave ends long to weave under appliques.
Info :
Plan paths first by laying the appliques on the blocked mesh and pinning their bases. Use chalk or stitch markers to mark the path. Stems should flow naturally between sunflowers and leaves—avoid straight lines; give a gentle curve for natural look.
Round 3 :
After sewing stems, add small side twigs by branching off every few inches with a short surface slip stitch and attaching bud clusters at the end. Secure each branch with a few tiny stitches around the bud base.
— Attaching Appliques (Placement & Sewing) :
Round 1 :
Block your mesh flat. Arrange your three large sunflower centers along the central guideline at approximately 8-10 cm spacing. The sample centers are placed: lower sunflower near the bottom 1/4 of runner, middle near center, top near upper 1/4. Use pins to temporarily hold each piece in place.
Round 2 :
With a long tail from each applique, use a whipstitch or ladder stitch to sew the base of the sunflower center to the mesh by stitching into the dc stitches around the center circumference. Use tight, neat stitches and bury the tail within the mesh to hide it.
Info :
When you sew centers, do not pull too tightly — allow a tiny gap so the petals can tuck under and be sewn down separately. Sew center first, then position petals and tack down their bases with hidden stitches so they flare naturally.
Round 3 :
Position each leaf and sew only at the midrib initially. Arrange leaves around sunflowers as shown in sample — some under petals, some overlapping stems. Use extra stitches to hold heavier leaves and couch midribs with small whipstitches to the mesh to maintain curve.
Round 4 :
Sew small red flowers and cream rosettes into clusters near each sunflower. Use small invisible stitches around the base and anchor buds by sewing through mesh and back into the bud base multiple times for durability.
Info :
Arrange motifs asymmetrically for a natural botanical look: alternate leaf directions and vary petal tilt. Step back occasionally to check overall balance before committing too many sewn stitches.
— Scalloped Border & Finishing Edge :
Round 1 :
With cream yarn and 3.0mm hook, join at one corner of runner edge. Work single crochet evenly around entire runner edge along the ends and sides, putting 2 sc in each corner to turn. Maintain even sc counts so the scalloped rounds lie flat (approx 1 sc for every dc row on the mesh).
Round 2 :
Ch1, *skip 2 sc, (5 dc in next sc), skip 2 sc, sl st into next sc to form scallop; rep along the length and around ends forming scallops. At corners, work (7 dc) to make a fuller shell and keep scallop rhythm. Join with sl st and fasten off.
Round 3 :
For a picot edge: join yarn into the center of each scallop shell, *ch3, sl st into the 3rd chain to form a picot, sl st into shell center to secure; rep across. This gives delicate points like in the sample runner's edging.
Round 4 :
Block the entire runner again, pinning scallops evenly and steam/press with cloth if cotton yarn used. Check applique tensions and adjust any lifting petals by stitching gently to the mesh underside.
Info :
For stronger edges, work an additional round of sc in BLO around the scallop base before shells so the scallops stand out and do not drift. This also gives a neat seam if you choose to hem the base to another backing fabric later.
Round 5 :
Weave all loose ends into the back of the mesh using a yarn needle, then trim. Press lightly one last time to even out stitches. Your runner is now complete and ready for display.
Info :
For laundering: hand wash in cool water with mild detergent, reshape and lay flat to dry. Avoid hot water or machine agitation which can distort the scalloped border and lifted appliques.
This sunflower meadow table runner brings the warmth of summer to any table—rich layered petals, sculpted leaves and delicate lacework make it a special handmade centerpiece. The interplay of texture and color creates an heirloom feel that looks stunning displayed year-round. Enjoy the mindful process of assembling the appliques and the delight of blocking to a perfectly scalloped edge. 🧶🌻 Your finished runner will be a beautiful accent and a cherished handmade gift. 🎁