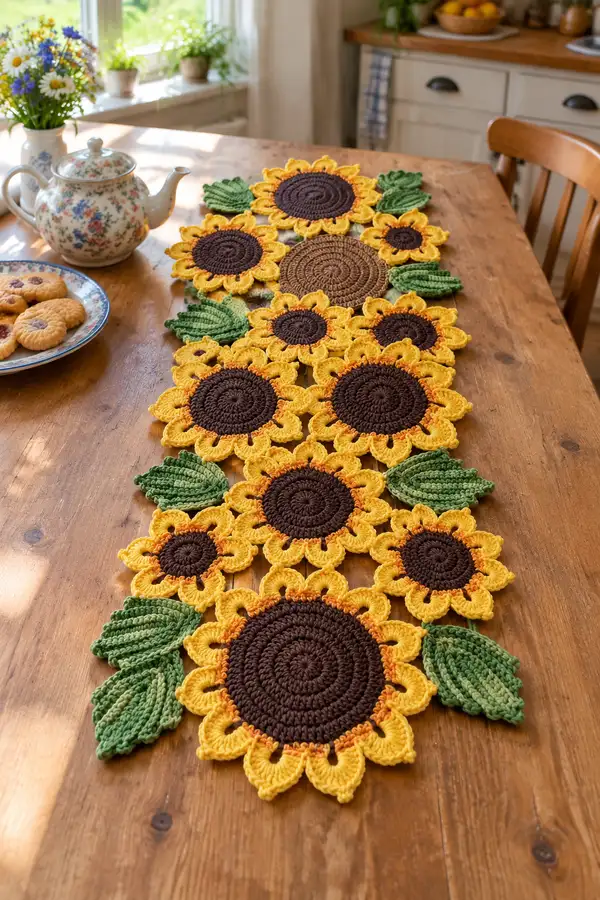
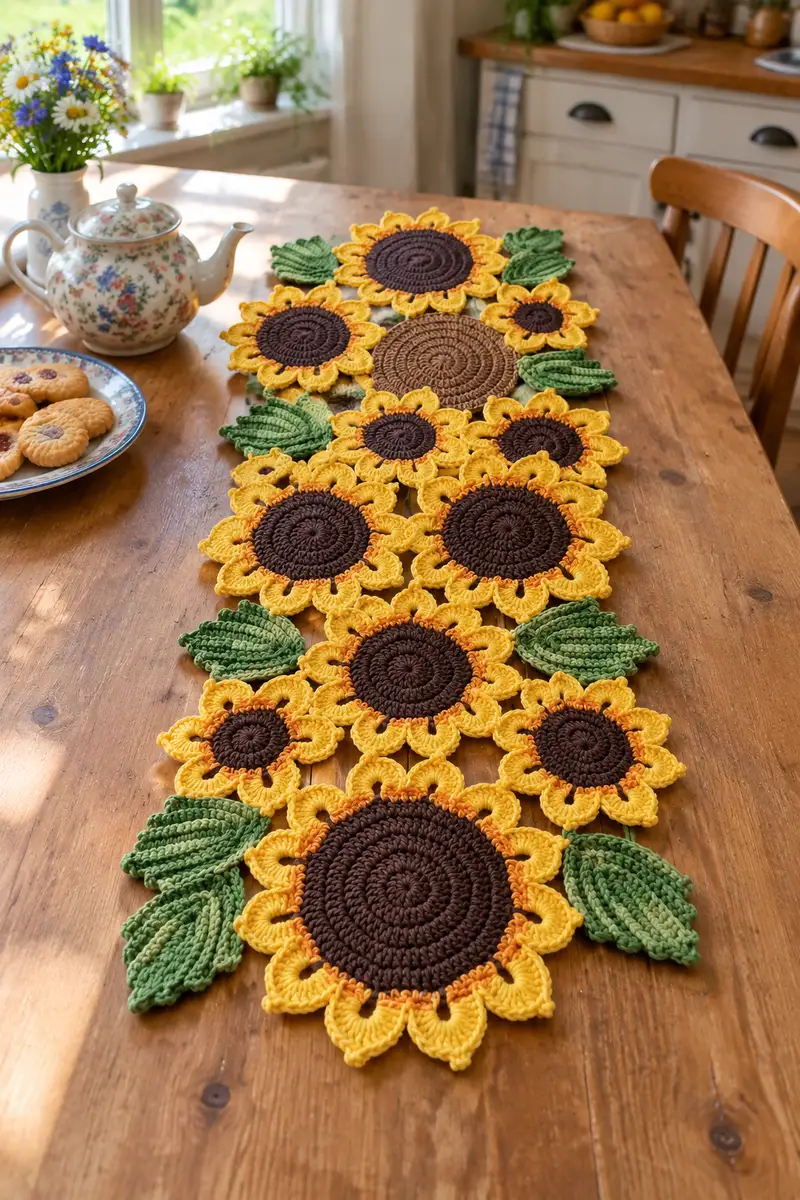
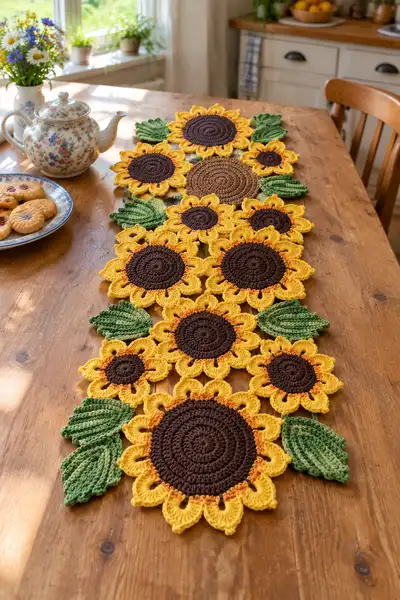
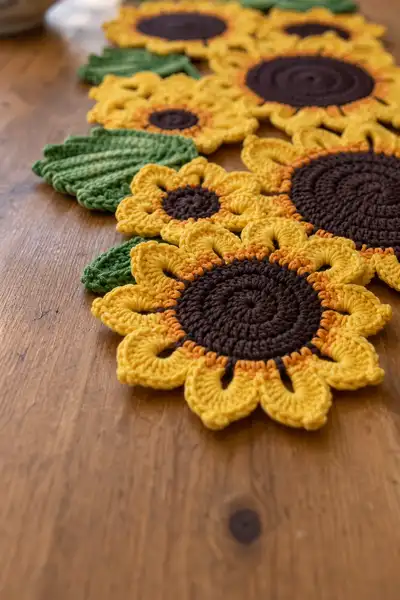
Bright, sunflower-shaped motifs arranged into a charming table runner with textured green leaves and warm accent stitches. This pattern uses round motifs in three sizes — large, medium and small — all joined together in a flowing runner layout. Worked in worsted-weight cotton for durability, the motifs feature layered centers, a warm orange transition round and sculpted petals for a dimensional, hand-stitched look. Perfect for summer or autumn table decor, this pattern includes notes for join-as-you-go assembly and optional edging.
Progress Tracker
0% Complete
— Large Sunflower Center :
Round 1 :
6 sc in magic ring (6)
Round 3 :
(1 sc, 1 inc) x 6 (18)
Round 4 :
(2 sc, 1 inc) x 6 (24)
Round 5 :
(3 sc, 1 inc) x 6 (30)
Info :
Work all center rounds in dark brown. Keep tension slightly firmer than petals so the center lies flat and distinct. Use a stitch marker to mark round starts.
Round 6 :
(4 sc, 1 inc) x 6 (36)
Round 7 :
(5 sc, 1 inc) x 6 (42)
Round 8 :
(6 sc, 1 inc) x 6 (48)
Round 9-12 :
1 sc in each st around (48)
Info :
Rounds 9-12 create a stable disc for petal attachment. If you prefer a slightly larger center, add one more even round at 48 sts before proceeding.
Round 13 :
Change to warm orange. Join with a sl st to any st, ch1, *sc in next 3 sts, ch2, skip 1 st* repeat around to create 12 small ch2 loops for petal anchors (48)
Round 14 :
Change to golden yellow. Working into each ch2 loop from previous round: sl st into ch2, ch3 (counts as first dc), (2 dc, tr, 2 dc) all into same ch2 loop, sl st to base to form petal. Repeat in each loop for 12 petals total. Fasten off golden yellow if you prefer to sew later, or continue.
Info :
Each petal here is a layered cluster that gives a scalloped look. Maintain consistent tension; petals are designed for a slightly raised profile. Use a 3.5mm hook for petals if you want them tighter and more sculpted.
Round 15 :
With golden yellow, turn shell petals into a neat point: behind each petal, insert sl st around the next 3 base stitches to anchor petals flat; this builds a tidy inner edge (48)
Round 16 :
Work an optional decorative picot round: *ch3, sl st into top of petal, sc into next base stitch* repeat around to create small bobble edging (48)
Info :
If you prefer a double-layer petal (for more depth), repeat Round 14 using a slightly different stitch combination (e.g., dc, dc, tr, dc, dc) into each ch2 loop to create fuller petals. This will slightly increase diameter.
— Large Sunflower Outer Petal Round (sculpted petal detail) :
Round 17 :
Join to the tip of a petal with sl st, ch1, sc around the outer curve of each petal: for each petal work (sc, hdc, 3 dc, hdc, sc) into the outer top of the petal, sl st into valley between petals to move to next petal (12 petals)
Round 18 :
1 sc in each st around petals to tidy edges and create consistent profile; join with sl st (approx. 84 sts depending on petal stitch count)
Info :
Count carefully as petal top clusters often change total stitch counts; the key is to work evenly around each petal so the runner lies flat. If a small ripple appears, block motif flat before assembly.
— Large Sunflower Finishing Rounds :
Round 19 :
Optional contrasting edging: Change to warm orange and work 1 sc in each st around entire motif, making 2 sc in any stitch that appears too flat to maintain circular shape (st count will vary; keep motif flat)
Round 20 :
Fasten off, weave in ends. Block flat with pins to achieve even petal spacing and flat center.
Info :
Large sunflower complete. Typical finished diameter for this pattern using worsted cotton and 4.5mm hook: approximately 6.5-8 inches across. Adjust hook or add rounds to match desired size.
— Medium Sunflower Center :
Round 1 :
6 sc in magic ring (6)
Round 3 :
(1 sc, 1 inc) x 6 (18)
Round 4 :
(2 sc, 1 inc) x 6 (24)
Info :
Medium centers stay slightly smaller than large to create visual variety in the runner; these centers will be the base for 10 petals rather than 12.
Round 5 :
(3 sc, 1 inc) x 6 (30)
Round 6-8 :
1 sc in each st around (30)
Round 9 :
Change to warm orange, *sc in next 2 sts, ch2, skip 1 st* repeat around to form 10 ch2 loops for petals (30)
Round 10 :
Change to golden yellow. Into each ch2 loop: sl st, ch3, (2 dc, tr, 2 dc) sl st to base — create 10 petals. Fasten off or continue.
Round 11 :
Work a tidy sc round around the base of petals to anchor and flatten (approx. 60 sts depending on cluster placement)
Info :
Medium sunflower diameter using the given yarn and hook: approximately 4.5-5.5 inches. Keep petals slightly smaller than large motifs for depth when assembled.
— Medium Sunflower Petal Sculpting :
Round 12 :
Work one round of (sc, hdc, 3 dc, hdc, sc) across the top of each petal and sl st to the valley; repeat around for consistency (10 petals)
Round 13 :
Fasten off and block flat. Add optional picot or sc edging if desired.
Info :
Make 3 medium sunflowers for the runner layout as shown, spacing them among the large motifs to create balance. Adjust number as you scale the runner length.
— Small Sunflower Center :
Round 1 :
6 sc in magic ring (6)
Round 3 :
(1 sc, 1 inc) x 6 (18)
Round 4 :
1 sc in each st around (18)
Info :
Small centers are compact, intended for tight little sunflowers with 8-10 tiny petals. Perfect for filling gaps in the runner layout.
Round 5 :
Change to warm orange. *sc in next st, ch2, skip next st* repeat around to create 6-9 ch2 loops depending on your chosen petal count (18)
Round 6 :
Change to golden yellow. Into each ch2 loop: sl st, ch3, (dc, tr, dc) sl st to base — small petals. Fasten off and block.
Info :
Make 4-6 small sunflowers to use as fillers between larger motifs for an organic look. Adjust petal stitch counts to maintain flatness.
— Leaf Motif (Make as many leaves as desired) :
Round 1 :
ch11, sc in 2nd ch from hook and across (10)
Round 2 :
ch1, turn, 1 sc in each st across (10)
Round 3 :
ch1, turn, BLO: 1 sc in each st across to create a prominent ridge (10)
Round 4 :
ch1, turn, (sc2tog over first 2 sts), 1 sc in next 4 sts, sc2tog over last 2 sts (8)
Info :
Using BLO creates the deep ribbed texture visible in the photos. Use a slightly smaller hook (4.0mm) for leaf ribbing if you want very pronounced ridges.
Round 5 :
ch1, turn, BLO: 1 sc in each st across (8)
Round 6 :
ch1, turn, sc2tog at ends, 1 sc in middle 4 sts (6)
Round 7 :
ch1, turn, BLO: 1 sc in each st across (6)
Round 8 :
Shape tip: sc2tog, sc in next 2 sts, sc2tog (4)
Round 9 :
Finish ridged tip: BLO 1 sc in each st (4)
Round 10 :
Fasten off leaving a long tail for sewing. Using tail, seam leaf edges together in a gentle fold so leaf has a slightly cupped shape; weave down the center to create a raised midrib if desired.
Info :
Make leaves in one or two shades of green for interest. The leaves in the photo are slightly cupped and layered; sewing a fold down the center helps them maintain curvature when laid flat.
— Small Detail Leaves (Optional) :
Round 1 :
ch8, sc in 2nd ch and across (7)
Round 2-4 :
Work 1 sc in each st BLO for three rows, decreasing one stitch at the final row to create tapered tip (7,7,5)
Round 5 :
Fasten off leaving long tail for joining. Make several small leaves to tuck between petals and larger leaves.
Info :
These smaller leaves fill gaps and add layered depth; they are optional but recommended for a natural arrangement.
— Join-As-You-Go Method for Connecting Motifs :
Info :
Each sunflower is joined at the last petal round or final sc round to neighboring motifs. Decide layout (e.g., large-medium-large-medium in alternating rows) and place motifs face down for join-as-you-go slip stitch joins.
Round 1 :
Arrange two motifs with wrong sides facing. Align petal valleys where you want joins. Insert hook through valley stitch of Motif A and corresponding stitch of Motif B, yarn over and sl st to join. Slip stitch along 3-5 stitches to secure; continue joining at each meeting valley. Repeat to connect multiple motifs into a continuous runner.
Info :
Alternatively, you can sew motifs using a yarn needle for a nearly invisible join. If using slip-stitch joins, make sure the stitches are snug to avoid gaps between motifs when the table runner is picked up.
— Edge Stabilizing Round (Runner Border) :
Round 1 :
Once all motifs are joined in your runner configuration, work a single round of sc around the entire outer edge to stabilize the joins. Where motifs meet, work sc evenly across the seam, placing 2 sc in open valleys if necessary to flatten the edge.
Round 2 :
Work one round in BLO 1 sc in each st to create a subtle ridge that helps prevent curling. Fasten off and weave in all ends.
Info :
If your runner is a little loose at joins, add an extra sc round or a hdc round to consolidate. Blocking is essential here — pin the assembled runner into shape and lightly steam or wet-block to even out motif edges.
— Optional Decorative Final Edging :
Round 1 :
With golden yellow, around entire runner: *ch4, sl st into 3rd ch from hook to form small loop, sl st into next sc on edge* repeat to create small scalloped picot edging. Keep loops evenly spaced.
Round 2 :
Switch to warm orange for a thin contrast line: 1 sc in each loop across to accentuate the petals and create unity across motifs.
Info :
Edging is optional but gives a finished, professional appearance. Work slowly along curved petal tips to keep scallops neat.
— Final Finishing and Blocking :
Info :
Block each motif flat immediately after making, using pins to spread petals evenly. After joining, pin the entire runner into final shape and steam lightly from above (do not press iron onto cotton) or use wet blocking. Allow to dry fully before trimming ends and storing.
Round 1 :
Weave in all ends at the back, trimming close. Use a small dot of fabric glue on particularly frayed ends under the runner if desired for long-term durability.
Info :
Use blocking to flatten petal peaks and ensure all motifs have similar diameters. If one motif is slightly larger, blocking will often equalize the sizes to produce a neat final runner.
This sunflower table runner is a delightful way to bring handmade charm to your home. Each motif is a small celebration of texture and color — together they form an eye-catching centerpiece that feels both rustic and refined. The join-as-you-go assembly is highly satisfying and makes the runner sturdy for everyday use. I hope this pattern sparks your creativity and brings sunshine to your table — happy stitching! 🌻🧶