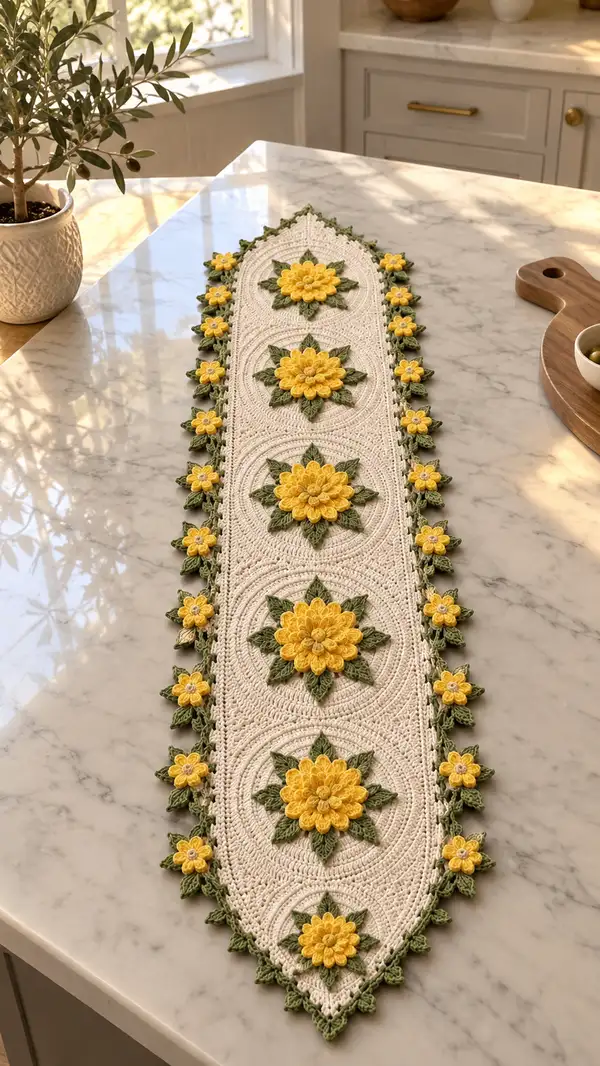
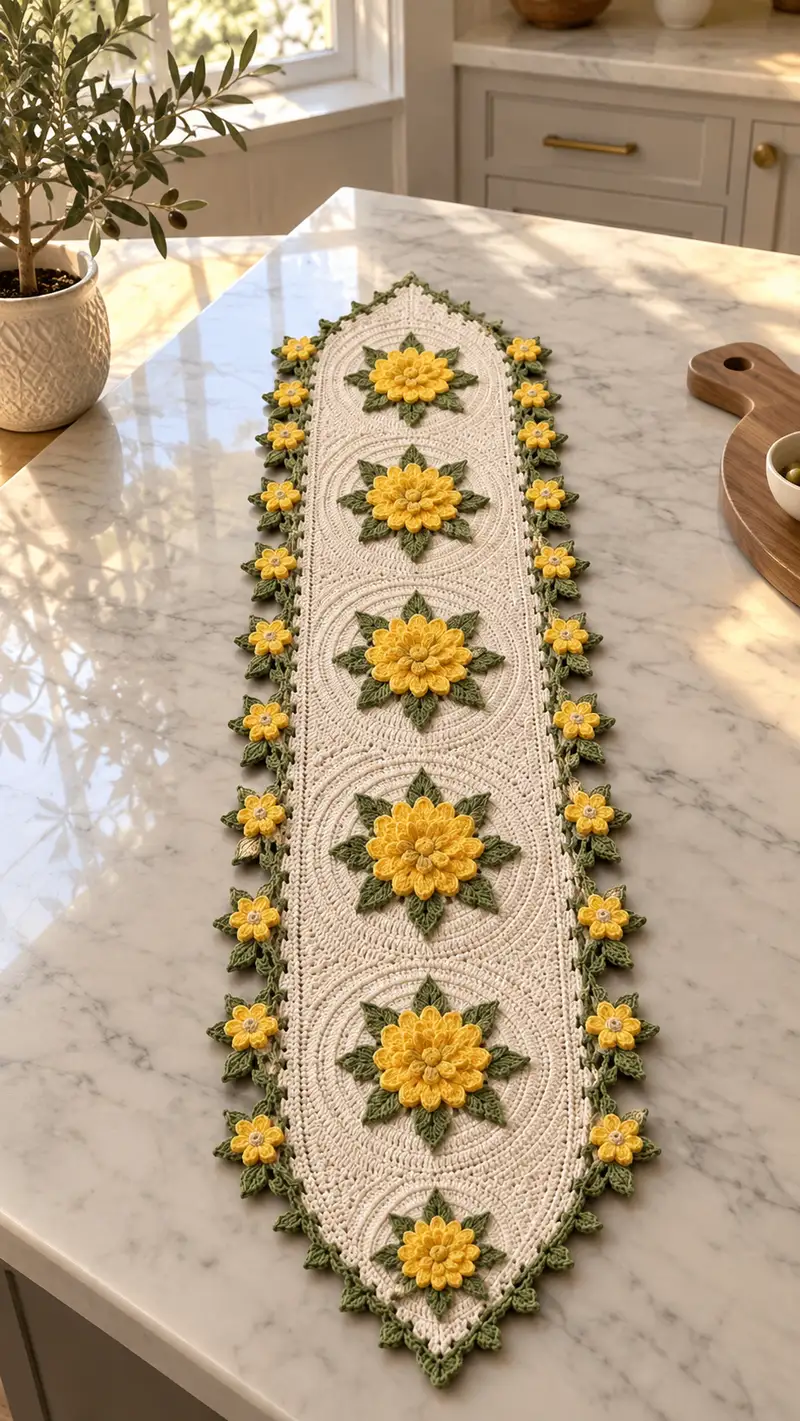
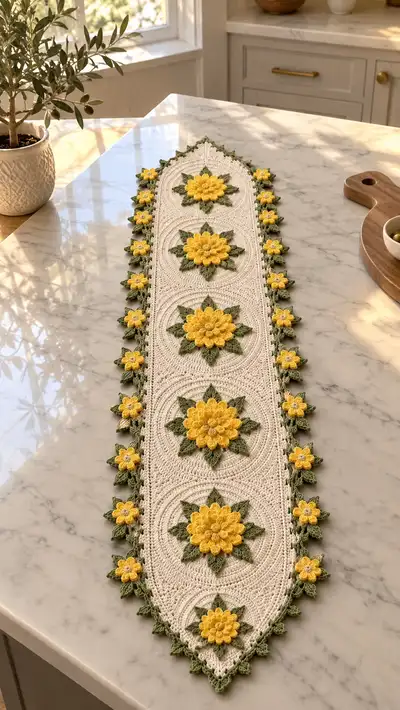
Create a bright, elegant sunflower table runner with layered yellow petals and textured green leaves set on a creamy background. This pattern recreates the long oval runner pictured, with five large sunflower applique9 motifs, delicate side flowers, and a scalloped leafy border. Designed for cotton yarn and precise stitch texture, it brings warm, handmade charm to any table.
Progress Tracker
0% Complete
— Notes & Gauge :
Info :
This runner is worked in a continuous oval base with separate applique9 motifs sewn on. Gauge is not strict for length, but match tension across panels and flowers for best results. Sample 10 cm square in sc with 3.5 mm hook = about 22 sts x 28 rows; adjust hook if your fabric is too loose.
— Center Oval Panel (Make one continuous panel) :
Foundation :
Ch 30, sc in 2nd ch from hook and across to last ch, work 6 sc in last ch (working in rounds now), continue along opposite side of foundation chain and work 1 sc in each ch back to starting ch, work 6 sc in first ch to join. Do not join with sl st; place a marker at first sc of round. Total st count after Round 1 = 68
Round 1 :
68 sc around (68)
Round 2 :
Work even around: sc in each st for straight sides; at each rounded end work 2 sc in each of the next 2 sts to expand the curve. Resulting count = 76
Round 3 :
Sc in each st around (76)
Round 4 :
Repeat increase at ends: on each rounded end work 2 sc in each of the next 2 sts (increase +8). New count = 84
Info :
These initial increases shape the oval. Check shape by laying flat: if too wide adjust by skipping one increase set on final increase round.
Round 5 :
Sc in each st around (84)
Round 6 :
Repeat corner increases as in Round 4 one more time to reach desired working width: +8 sts. New count = 92
Round 7-12 :
1 sc in each st around (92)
Info :
Begin working texture rows: the runner in the photo features concentric ridged rings. We will create these with alternating rounds of FLO dc and regular sc to create subtle raised bands. Keep stitch marker at round start to maintain alignment.
Round 13 :
1 sc in each st around (92)
Round 14 :
1 dc in each st FLO around (92)
Round 15 :
1 sc in each st around (92)
Round 16 :
1 dc in each st BLO (92)
Info :
Alternate a few rounds of dc in FLO and dc in BLO to make visible rings; adjust number of plain rounds between textured rounds to match spacing you prefer for flower placement.
Round 17-20 :
Repeat Rounds 15-16 (sc round then one post/dc round) twice more (92)
Round 21 :
Sc in each st around (92)
Info :
Mark five positions for large sunflower applique9s: Divide runner length into six equal spaces; mark the center of each of the five long motif placements by measuring and placing a removable pin or a stitch marker on the RS. Each motif will be centered on the textured rings for a sunburst look.
Round 22-30 :
Work even in sc for 9 rounds (92). These rounds create the flat field between the concentric ring sets. Keep the five center markers visible and do not sew over them.
Round 31 :
Work an accented round to emphasize the next concentric ring: *sc 6, fpdc around next st* rep around (92). This alternates sc with front post dc to create a raised texture.
Round 32-38 :
Sc in each st around for 7 rounds (92)
Info :
After Round 38 you will have a long, even oval panel with defined rings and marked centers for the five large flowers. If your runner is shorter or longer than visual reference, add or subtract repeating sets of sc rounds (in multiples of 2-4) to alter length evenly.
Round 39-44 :
Continue alternating texture rounds every 3-4 rounds to mimic concentric bands; work sc rounds between texture rounds to maintain 92 sts
Round 45 :
1 sc in each st around (92)
Round 46 :
1 dc in each st FLO around (92)
Round 47-52 :
Sc each st around (92) — these rounds form the final field where the last flower will reside
Info :
If you prefer smaller running width, you can begin decreasing symmetrically on the last 4-6 rounds to create tapered ends before the final edging; the pictured runner has a tapered diamond tip so we will shape later when starting edging.
— Large Sunflower Motif (Make 5 identical) :
Info :
Each large sunflower is made separately and applied to the center panel. Work motifs flat on RS side. This design uses a layered petal technique: a dense center disc, an inner petal layer of shorter petals, and an outer petal layer of longer petals, with green star leaves under the petals. Petal count = 12 for balanced look.
Round 1 :
With yellow yarn, mr, 6 sc in magic ring (6)
Round 3 :
(1 sc, inc) x6 (18)
Round 4 :
(2 sc, inc) x6 (24)
Round 5 :
(3 sc, inc) x6 (30)
Info :
These first rounds create a solid center disc. Keep stitches tight so center sits flush on base. Fasten off if you'd like a distinct center color change, otherwise continue with same yarn.
Round 6 :
1 sc in each st around (30)
Round 7 :
Switch to a slightly smaller hook if desired. Petal base: *ch 3, 3 dc in same st, ch 3, sl st in next st* repeat around to make 12 ch-3 petals spaced across (12 petals; work 2 sts between petal anchors as needed to keep count)
Round 8 :
Working behind the petals, sc around in back loops only of Round 6 to create a ridge for inner petal anchoring (30)
Round 9 :
Inner petal round (short petals): *in next ch-3 loop: (sl st, ch 2, (2 dc, ch 2, sl st) in same loop)* rep 12 times to create raised 3-stitch petals. Fasten and weave in tail.
Info :
Work petals gently; do not pull yarn tight or petals will curl inward. Use a small amount of starch or warm iron on a cloth to set petal shape later if desired.
Round 10 :
Switch to yellow and prepare outer petal layer: join yarn to a base stitch between inner petals. *Ch 4, 5 dc in next anchor st, ch 4, sl st in space between next petal anchors* rep 12 (this makes longer outer petals)
Round 11 :
Working behind the outer petal row, sc in each st of underlying round for stable base (30)
Round 12 :
Create petal texture: in each outer petal, work a cluster/puff finish: *yarn over, insert into petal center, yarn over pull through, repeat 3 times to make 4 loops on hook, yarn over and pull through all loops to create a large puff; secure with sl st to base.* Repeat for 12 petals. Fasten off and weave in ends.
Info :
Petal construction uses a combination of chain loops and clustered puffs to create layered dimension. Make 12 evenly spaced petals; use stitch markers on the petal anchors to ensure even spacing while working.
Round 13 :
Switch to green yarn to make star leaves beneath petals. Join green at any base stitch. *Ch 2, sc, hdc, dc, tr, dc, hdc, sc in same anchor stitch to form a pointed leaf; sl st to next anchor; repeat for 12 leaf points, spacing leaves every other base stitch as pictured.* You will create 12 short leaves (12 leaf points attached)
Round 14 :
On WS, work one round of sc around backing disc for a tidy edge: sc in each st around covering leaf joins (approx 30-36 depending on leaf anchors). Fasten off leaving tail for sewing.
Info :
Block motifs lightly by pinning them on a flat surface to flatten petals and leaves. Do not over-stretch; petals should be slightly cupped to catch light.
— Small Side Flower Motif (Make many for border) :
Round 1 :
With yellow, mr, 6 sc in mr (6)
Round 3 :
*Ch 3, sl st in next st* rep around to create 6 small loop petals; fasten off leaving tail for join. (visual flower with six loops)
Info :
Add a small cream/yellow bead or french knot with embroidery thread in the center for a polished look. These small flowers are sewn along the runner edge between leaf picots to match the picture.
— Leaf Unit (Make many for star leaves & border) :
Round 1 :
With green yarn, ch 6. In 2nd ch from hook sc, hdc, dc, hdc, sc across. Turn to work back along chain base: sl st into base to form a pointed leaf if desired. Fasten off leaving tail. Each leaf approx 5-7 sts long depending on yarn.
Info :
Leaves are worked flat and sewn under petals or along the border. Slightly stretch leaves while wet-blocking to form crisp points. Make at least 10 leaves per large sunflower (photo shows 8-10 leaf points per flower) and 2 leaves per small flower on edge.
— Edging / Scalloped Leaf Border :
Info :
Edge is worked onto the finished center panel. Work edging on RS of runner, starting at one narrow tip and moving around the perimeter. The border uses alternating green picot leaf points and small yellow flowers sewn into the picot joins.
Round 1 (Edging attach) :
With RS facing, join green yarn at tip point with sl st. Round 1 attach: *sc 6 along straight side, at corner area work (sc, ch 3, sc) in same st to make a corner picot; continue sc along next side.* Repeat around. This secures an edge base while keeping stitch count similar to center rounds. Maintain alignment by placing 6 sc between each outer motif and corner.
Round 2 (Leaf picot round) :
*Sc 4, (ch 5, sl st in 2nd ch from hook to form small picot leaf base), sc 4* repeat around. At points where small flowers attach, leave a slightly larger ch-7 loop to sew small flower center into later. Fasten off and weave in ends.
Round 3 (Leaf shaping) :
With RS facing, join at base of each ch-5 loop and work: *(sl st, ch 2, sc, hdc, dc, hdc, sc, ch 2, sl st) into loop* to form pointed leaf motif. Repeat in each loop. Fasten off tails for sewing.
Info :
Space leaves evenly; the photo shows small leaf triangles forming a pointed scallop. If your oval has different st counts, adjust number of sc between loops to keep spacing visually even. Use pins to keep spacing even as you work.
Round 4 (Final border finish) :
With green yarn, sl st around base of leaf backs to tidy join and hide tails. Fasten off and weave in ends thoroughly. This creates the green trimmed scalloped edge visible in the photo.
— Assembly: Attaching Motifs to Panel :
Info :
Before sewing motifs down, block the center panel and pressed motifs flat. Place each large sunflower on the marked centers, ensuring petals radiate over the concentric textured bands. Small side flowers get sewn into alternating picot loops along the border.
Step 1 :
Pin the first large sunflower centered on the first marked point. Use the long tail left on motif to whip stitch around inner disc onto the panel. Use small invisible stitches through the base round (Round 5-6 of motif) to secure; avoid sewing through petals directly so they retain 3D shape.
Step 2 :
Sew all five large motifs following same steps. After sewing all large flowers, fill any gaps between the sunflower leaves and the background panel by sewing flat leaves into nooks and trimming stray stitches.
Step 3 :
Sew small yellow flowers into every other picot loop along the edge. For each small flower, align center and stitch through the back loop and through the picot to hold. Add two small green leaves under each small flower by sewing leaf tips in place tucked slightly beneath the flower base.
Info :
Secure all applique9s with small neat stitches on the WS; weave in tails on the WS for a clean finish. Block entire runner one last time after assembly to even out joins and relax yarn joins.
— Optional: Tapered Diamond Tips (Shaping the narrow ends) :
Round A :
To shape pointed tips like the photo, at each narrow end decrease symmetrically for 6 rounds: *(sc 10, dec) around the short end sections* until the end tapers. Work neat invisible decreases so the tip forms a diamond point. Fasten and weave in ends.
Round B :
Finish pointed tip with a star picot: ch 3, sl st into base to form a pointed finish; clamp with a small dab of fabric glue if you want extra rigidity (optional).
Info :
Blocking after finishing is essential. Pin the runner to shape pointed ends and the scalloped edge; spray lightly with water and allow to dry fully. If using cotton, a gentle steam iron over a pressing cloth will set shape well.
— Finishing Touches & Texture Enhancements :
Info :
For small polished centers on large sunflowers, embroider a tight spiral with yellow or cream embroidery floss in the center disc. You can also add a small bead or glass pearl centrally for a vintage look. Use matching thread to avoid visible sewing tails.
Care :
Hand wash in cool water with mild detergent. Lay flat to dry to keep shape. Iron lightly on low heat through a cloth if needed after blocking.
This sunflower runner brings a cheerful, handmade touch to your table and displays beautifully in any season. Each layered petal and leaf is satisfying to craft and creates a lush, textured effect that's both elegant and cozy. Block and finish with care, and you'll have a heirloom-quality runner that brightens gatherings and everyday moments. 🧶🌻 Add a matching centerpiece to complete the look! ✨