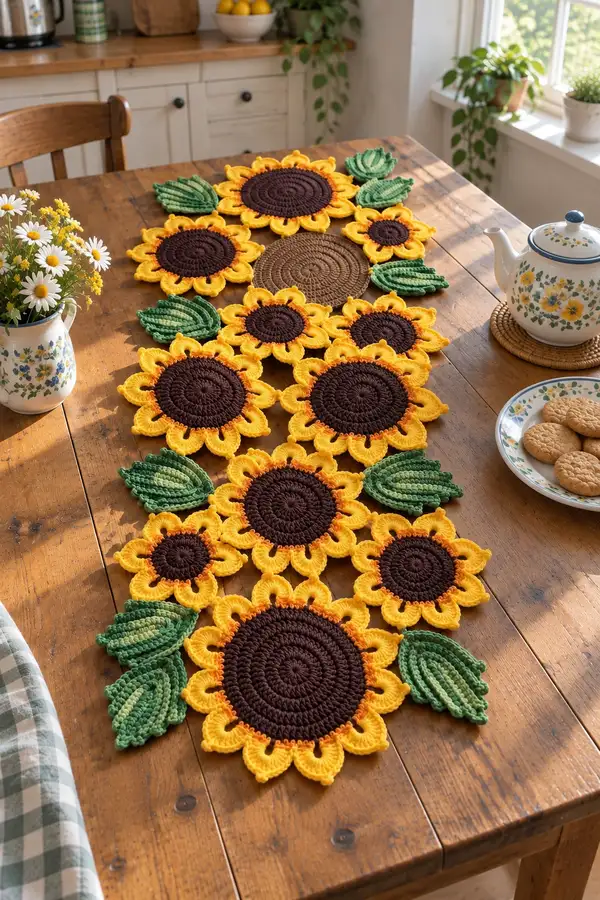
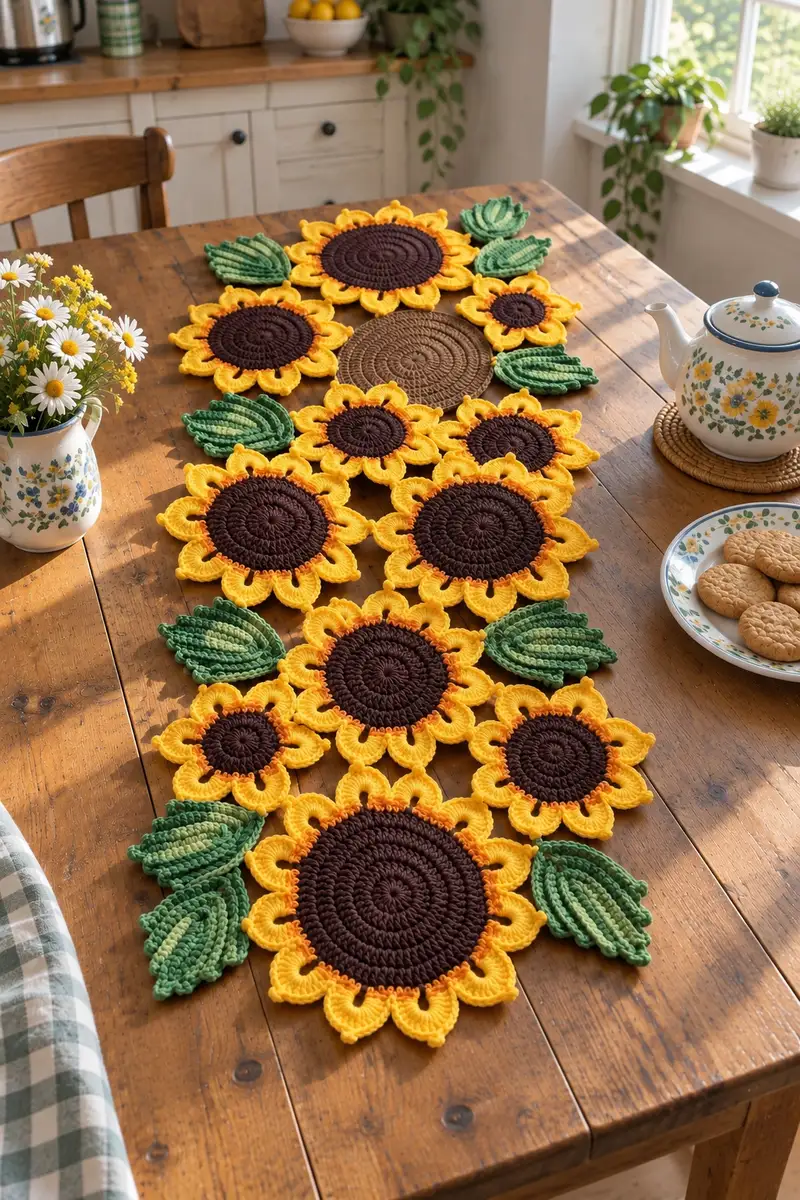
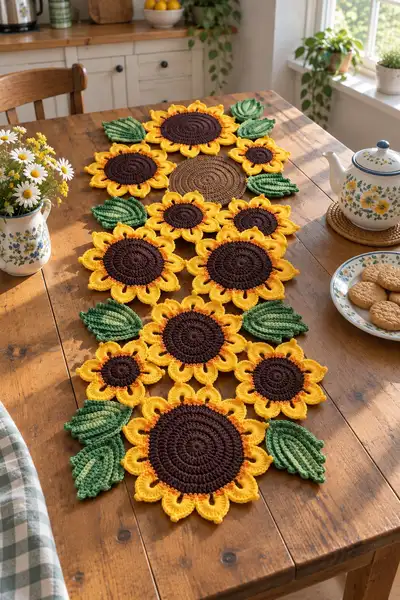
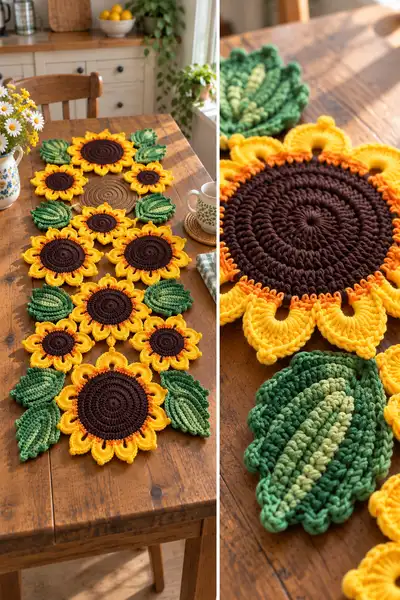
Bright sunflower motifs arranged into a long table runner with bold brown centers, golden yellow petals, and textured green leaves. This pattern creates layered, puffy petals and sculpted leaves for a cozy farmhouse look. Ideal for decorating a dining table or using as a striking centerpiece runner. Includes detailed motif sizes and clear joining instructions so you can assemble a runner that matches the photos.
Progress Tracker
0% Complete
— Overview & Gauge :
Info :
This pattern builds a runner from modular sunflower motifs and textured leaves. Gauge is not strict for motifs but approximate sizes with recommended yarn and 4.0mm hook: Large sunflower finished diameter about 16-18cm (6.5-7in), medium sunflowers 12-13cm (4.5-5in), small sunflowers 8-9cm (3-3.5in), leaf length approx 10-12cm (4-4.5in). Adjust hook size to alter finished dimensions. Work tightly so stitches are compact and centers feel dense enough to support petal shaping.
Info :
Abbreviations used: mr, ch, sc, hdc, dc, tr, inc, dec, sl st, BLO, FLO, FPdc. Puff stitch used for extra bulk in petals is 5-loop puff unless noted. Use stitch markers to mark round starts for spiral work when working in continuous rounds.
— Large Round Base Mat (optional center base used in photo) :
Round 3 :
(1 sc, inc) x 6 (18)
Round 4 :
(2 sc, inc) x 6 (24)
Round 5 :
(3 sc, inc) x 6 (30)
Round 6 :
(4 sc, inc) x 6 (36)
Round 7 :
(5 sc, inc) x 6 (42)
Round 8 :
(6 sc, inc) x 6 (48)
Round 9 :
1 sc in each st (48)
Round 10 :
(7 sc, inc) x 6 (54)
Round 11-12 :
1 sc in each st (54)
Round 13 :
(8 sc, inc) x 6 (60)
Round 14-20 :
1 sc in each st (60) - work until mat reaches desired diameter
Info :
Fasten off and weave in ends. Block mat flat using steam or wet blocking to even out rounds. This mat can sit in the center beneath a sunflower motif for extra visual layering.
— Large Sunflower Center (Make 3-4 for runner) :
Round 3 :
(1 sc, inc) x 6 (18)
Round 4 :
(2 sc, inc) x 6 (24)
Round 5 :
(3 sc, inc) x 6 (30)
Round 6 :
(4 sc, inc) x 6 (36)
Round 7 :
(5 sc, inc) x 6 (42)
Round 8 :
(6 sc, inc) x 6 (48)
Info :
Begin working in continuous rounds (spiral) if you prefer a smooth center without a noticeable seam. Use a stitch marker to mark the first stitch of each round when working continuous rounds.
Round 9 :
1 sc in each st (48)
Round 10 :
1 sc in each st (48)
Round 11 :
(6 sc, inc) x 6 (54)
Round 12-13 :
1 sc in each st (54)
Round 14 :
(7 sc, inc) x 6 (60)
Round 15-17 :
1 sc in each st (60)
Round 18 :
(7 sc, dec) x 6 (54)
Round 19 :
(6 sc, dec) x 6 (48)
Round 20 :
1 sc in each st (48)
Info :
Fasten off brown center leaving a long tail for weaving or sewing into the petals round. Block this round flat. The sturdy dense spiral of sc rounds creates the dark sunflower core. Place centers on table to plan where petals will attach.
— Medium Sunflower Center (Make 3-4) :
Round 3 :
(1 sc, inc) x 6 (18)
Round 4 :
(2 sc, inc) x 6 (24)
Round 5 :
(3 sc, inc) x 6 (30)
Round 6-8 :
1 sc in each st (30)
Round 9 :
(4 sc, inc) x 6 (36)
Round 10-12 :
1 sc in each st (36)
Round 13 :
(3 sc, dec) x 6 (30)
Round 14 :
1 sc in each st (30)
Info :
Fasten off leaving tail. These medium centers give you flexibility for mixed-scale motifs seen in the runner. Block flat and keep organized by size for assembly.
— Small Sunflower Center (Make 4-6) :
Round 3 :
(1 sc, inc) x 6 (18)
Round 4 :
(2 sc, inc) x 6 (24)
Round 5-6 :
1 sc in each st (24)
Info :
Fasten off and block. Small centers are great for-between fillers and help stagger the runner visually. Keep counts exact for consistent petal placement later.
— Contrast Joining Round (burnt orange small ring) :
Info :
This small contrast round creates the thin orange ring visible between the brown center and yellow petals. Work this round into the last round of the center or join later with slip stitches. The ring sits on top of the last brown sc round to create a visible ridge.
Round 1 :
Join orange to back loop of stitch after last brown round with sl st, ch1, *sc in next 2 BLO, sl st in next 2 BLO* around to create subtle little tacks (same number as stitches in outer round). Fasten off and weave tail to back (count matches outer st count)
Info :
Alternatively work 1 round of tiny sc in orange around the brown center then fasten off. This small pop of color reads like the photo's warm transitional ring.
— Petals — Large Sunflower (Attach to 48-60 stitch centers) :
Info :
Petal sets are worked in rounds attached to the center. For large sunflowers we will make 12 petals anchored evenly around a 48-60 stitch center. Aim to anchor every 4 or 5 stitches depending on center final count. Before starting, place marker or count stitches to find anchor points. Petals are tall clusters creating a puffy scallop.
Round 1 :
Join yellow in chosen anchor stitch on outer round with sl st, ch2 (counts as first hdc), work (hdc, dc, tr, puff (5-loop) worked into same anchor stitch or into a small chain loop made as ch3 then stitch into chain loop), then (tr, dc, hdc) into same anchor - this completes one petal top. Skip 3-4 sts (see Info for spacing) and sl st into next anchor. Repeat for a total of 12 petals. Fasten off if working petals in separate pieces.
Info :
Example anchor spacing for a 48-st center: (petal, skip 3 sts) x 12. For a 60-st center use (petal, skip 4 sts) x 12. Keep consistent spacing so petals are evenly distributed.
Round 2 :
Join yellow at base of each petal on the back side: work 3 sc evenly across the base of the petal to create a fuller foot and help petal stand up. Repeat at each petal base. Fasten off.
Round 3 :
Working into the front loops of each petal tip, work an edging of (sc, ch1, sc) to create the scalloped ridge and add puffed texture: *sc in first st, ch1, sc in next st* across each petal tip. Fasten off and weave ends.
Round 4 :
Optional: add a round of surface slip stitches in a contrasting orange along the petal base: using small hook 3.5mm, work sl st around petal base to emphasize petal separation.
Info :
The petals in the photo have a thick raised profile. Using a 5-loop puff in the center of each petal and working supporting sc rows at the base helps petals keep shape. You can add a tiny amount of stuffing into the puff before closing to enhance dimension, but this is usually not necessary with cotton worsted yarn.
— Petals — Medium Sunflower :
Round 1 :
Join yellow at evenly spaced anchors around the 36-st center. Make 10 petals by repeating (petal cluster: hdc, dc, tr, puff (3-loop), tr, dc, hdc) into anchor stitch or into a created ch2 loop; skip 2 or 3 sts between petals to keep even distribution (use skip 2 on 36-st centers).
Round 2 :
Work 2 sc along the base of each petal on the back to stabilize (2 sc per base). Fasten off and weave in ends.
Info :
Medium petals use a smaller puff (3 loops) to match scale. If you prefer a more dramatic petal, use the same technique as large petals but reduce the number of base sc to keep proportion.
— Petals — Small Sunflower :
Round 1 :
Join yellow and make 8 small scalloped petals around 24-st center: each petal = (hdc, dc, puff (2-loop), dc, hdc) into anchor stitch; skip 2 sts between petals. Work a stabilizing sc at base if desired.
Info :
Small petals are worked quickly and make charming filler flowers; keep tension steady to maintain even small scallops.
— Petal Finishing & Edge Accent :
Round 1 :
With a small crochet hook, add an accent line of tiny single crochets or slip stitches in orange at the base of the petals where they join the center. To do this, join burnt orange into the back loops at the petal base and work 1 round sc in BLO around the motif (number of stitches equals outer round stitch count). Fasten off. This creates the thin orange ring visible in the photo.
Info :
Work this orange accent carefully — it should be a delicate line and not cover the entire base. Use short, even tensions so it lies flat and visible between the brown center and yellow petals.
— Leaves (Make 8-10 in mixed sizes) :
Info :
Leaves are worked in rows (we will number them as rounds for consistent formatting) and use riffed front post stitches to create ribs. Each leaf is worked flat and then seamed or slip-stitched at the base for shaping. You will make a mixture of large and small leaves to match the photo. Consider making 6 larger leaves and 4 smaller ones for the runner layout pictured.
Round 1 :
Ch 10 (or 12 for a larger leaf). Row 1 (foundation row): Sc in second ch from hook and across (9 sc) - turn.
Round 2 :
Ch1, sc in first 3 sts, hdc in next 3 sts, sc in last 3 sts - turn. (9 sts)
Round 3 :
Ch1, sc in first 2 sts, FPdc around next 3 sts (work FPdc by working yarn behind the 3 stitches then pulling up and completing dc so the stitches sit on front), sc in last 4 sts - turn. This creates raised ribs on the center of the leaf.
Round 4 :
Ch1, sc across all stitches (9 sc). Change to variegated green in the middle 3 sts by carrying color or joining new color on the center section to create a stripe.
Round 5 :
Ch1, working decreases on both edges to shape leaf: sc2tog at start, sc across until last two sts, sc2tog - (7 sts). Fasten off if you want a pointed end, or keep working for a longer leaf.
Round 6 :
Repeat shaping rows adding one extra row of FPdc in the middle to extend the rib as desired: ch1, sc in edge, FPdc across center 3, sc in edge. Fasten off leaving tail for sewing.
Info :
To make a larger leaf, begin with ch 14 and work the same sequence increasing FPdc count to 5 and adjust decreases proportionally. Use BLO on some edge rows to create the curled scalloped rim effect like the photo.
Round 7 :
Edge: With main green, join at the pointed tip and work sc around the entire leaf edge, placing 2 sc in each outer corner to keep the shape flat. Add picot or small scallop at edge every 2 sc by working (sc, ch2, sl st into ch2) for decorative ridges. Fasten off and weave in ends.
Info :
Block leaves slightly by pinning damp leaves to shape; ribs will become more pronounced once dry. Make leaves slightly cupped by pinning edges lower than center when wet-blocking.
— Petal and Leaf Texture Techniques :
Info :
Puff stitch details: For a 5-loop puff (large petals), yarn over, insert hook, pull loop through five times (or yarn over and pull up five times total), yarn over and draw through all loops, ch1 to close puff. For smaller petals use 3- or 2-loop puff variants. Use a tight but not locked tension so puffs sit plump and distinct.
Info :
Front Post Double Crochet (FPdc): Work around the post of the stitch from the previous row by inserting hook from front to back to front around the post, yarn over and complete a dc. This creates raised ribs ideal for the leaf center veins.
— Motif Assembly & Layout :
Info :
Before final assembly, lay out all motifs on a large flat surface or blocking board to mimic the photo arrangement. The runner in the image alternates large and medium sunflowers with small sunflowers filling gaps and leaves clustered between motifs. Arrange motifs so centers and petals nestle together with some overlap for a continuous runner shape.
Round 1 :
Position motifs edge-to-edge so petals overlap by 5-10mm. Use pins to hold motifs in place and mark where petal tips meet for joining points. Join motifs with a whip stitch or slip-stitch join through both layers at each overlap point. Use yarn color matching the petal or a coordinating color to hide the join.
Round 2 :
Join centers to petals where necessary by sewing the center tail to the inner round of petals using a yarn needle. For added stability, work a few small running stitches under the orange accent round to anchor the petal bases to the brown center.
Round 3 :
Attach leaves by sewing the leaf base to the underside of petal pairs or to the small gaps between sunflowers. Be sure to pin before sewing to keep the overall runner silhouette balanced and symmetrical.
Info :
When sewing, use small, even stitches and keep the seam flat. For visible joins on the top, consider using invisible stitch (ladder stitch) or hide the join under petal edges so it is not apparent from above.
— Joining Technique: Slip-Stitch In-Place Method :
Round 1 :
With yarn and hook matching the top layer (petal color), hold two motifs with right sides facing up where they overlap. Insert hook through top layer petal base, then through second motif petal base, yarn over and sl st. Work a continuous sl st join along the overlap, spacing stitches approximately every 3-4 mm to keep motifs snug. Fasten off and weave tails.
Info :
This technique creates a subtle join that looks like a designed ridge rather than an obvious seam. Practice on scrap motifs first to get consistent tension so the join lies flat and does not pucker.
— Edging & Final Border Around Runner :
Round 1 :
Once motifs are joined into your runner shape, work a unifying border around the outermost edges. With medium green yarn, join at any outer point and work 1 round of sc evenly around all external petals and leaves, placing 2 sc in deep gaps to maintain smoothness. Count and adjust so border stitches sit evenly (approx 1 sc per 5-7mm).
Round 2 :
Switch to a contrasting green or the same green and work a decorative scallop: *skip 1 sc, (5 dc) in next sc, skip 1 sc, sl st in next sc* repeat across perimeter. This large scallop echoes flower petals and frames the runner nicely. Fasten off and weave ends.
Round 3 :
Optional: add a narrow finishing round in brown or dark green with a reverse single crochet (crab stitch) for a firm edge that resists stretching: work crab stitch in opposite direction around edge. Fasten off and weave ends.
Info :
Block the completed runner gently to ensure a flat surface and even joins. Use a light steam from an iron (do not press directly) or wet-block with pins. Allow to dry completely before using on table.
— Finishing Touches & Care :
Info :
Weave in all tails neatly on the back of the runner and trim close. If you expect heavy table usage, consider sliding a thin non-slip pad beneath the runner. Cotton yarn can be hand-washed gently; lay flat to dry to avoid stretching. Avoid hot water or machine agitation to maintain shape.
Info :
Optional: add small felt pads under heavy points like teapots to protect petals. If petals become flattened over time, lightly steam and reshape by hand, holding petals to restore puff.
This sunflower runner brings warmth and sunny charm to any table — every petal and ribbed leaf is a small celebration of texture and color. The modular approach lets you customize length while enjoying meditative, repetitive stitching. I hope making this runner fills your space with cozy farmhouse cheer and feels like a gentle creative ritual. 🌻🧶