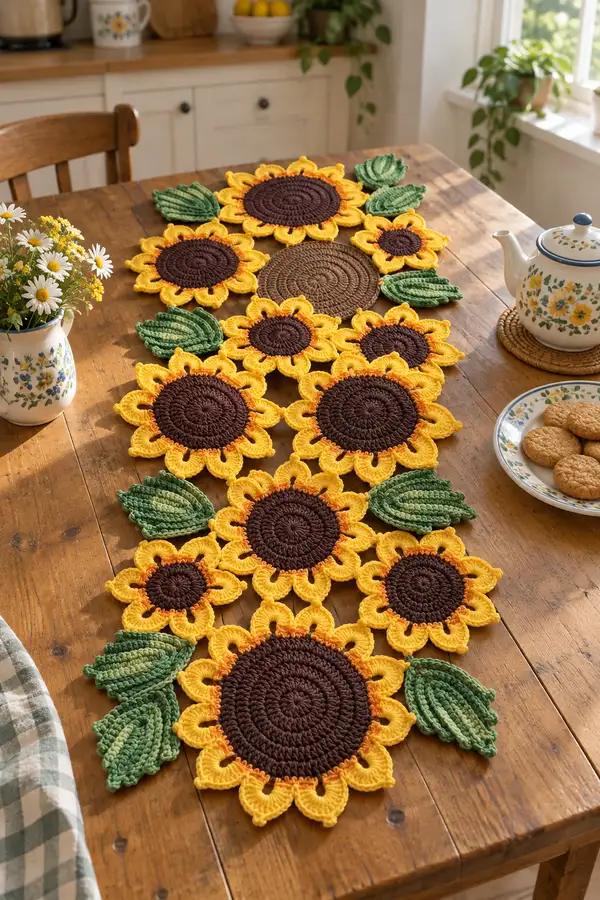
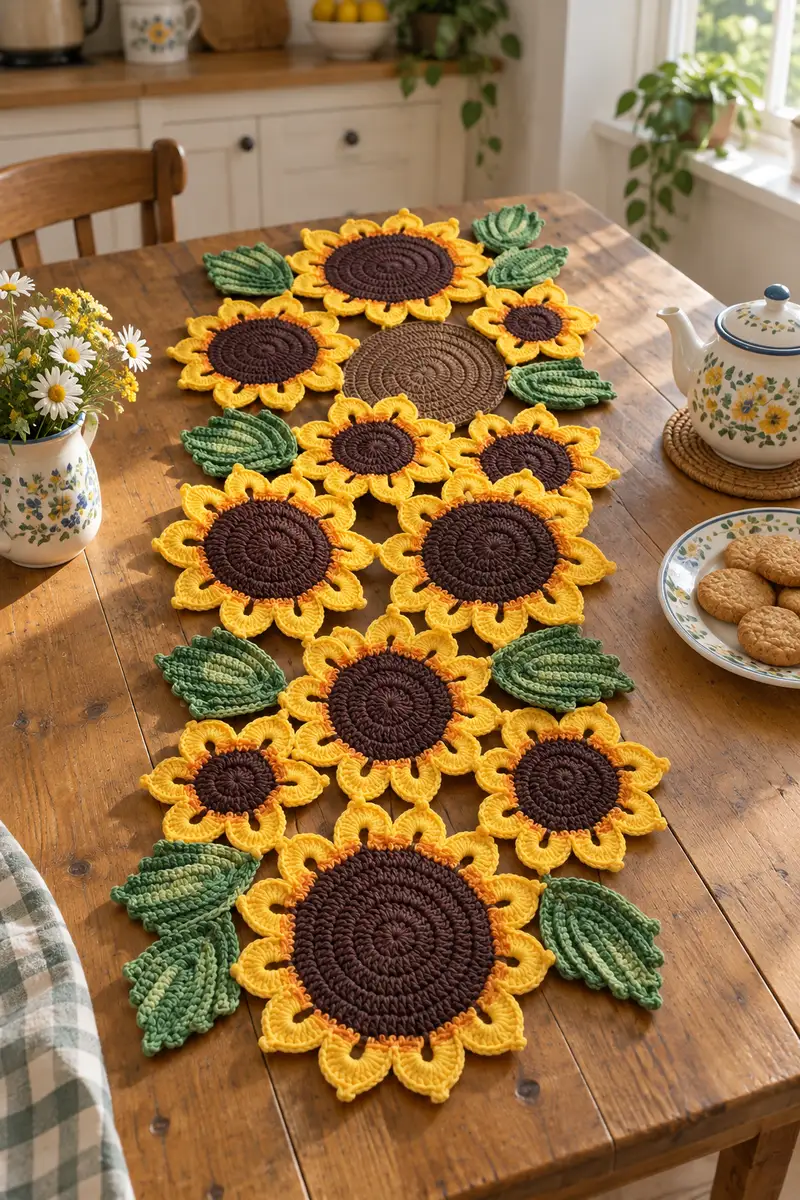
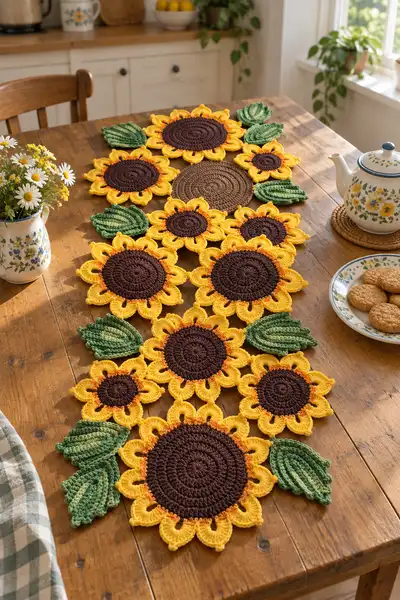
Create a sun-kissed sunflower table runner made from layered crochet sunflower motifs and leafy accents. This pattern combines bold brown centers, bright yellow petals and textured green leaves to make a warm, rustic centrepiece. Work individual motifs and join-as-you-go for a modular, customizable runner you can expand to any length. Perfect for kitchen tables, sideboards, or as a seasonal centerpiece to brighten any room.
Progress Tracker
0% Complete
— Large Sunflower Center (make 4 to form main motifs) :
Round 1 :
mr, 6 sc in magic ring (6)
Round 3 :
(1 sc, inc) x 6 (18)
Round 4 :
(2 sc, inc) x 6 (24)
Round 5 :
(3 sc, inc) x 6 (30)
Round 6 :
(4 sc, inc) x 6 (36)
Info :
Use deep chocolate brown yarn. Keep stitches tight to create a dense, flat center. Place a stitch marker in the first stitch and move it up each round to mark the beginning.
Round 7 :
(5 sc, inc) x 6 (42)
Round 8 :
(6 sc, inc) x 6 (48)
Round 9 :
(7 sc, inc) x 6 (54)
Round 10 :
(8 sc, inc) x 6 (60)
Round 11 :
1 sc in each st (60)
Round 12 :
1 sc in each st (60)
Info :
These central rounds set the diameter of the sunflower center. If you prefer a slightly smaller center, stop increases at Round 9 and work even for additional rounds.
Round 13 :
1 sc in each st BLO (60) - work back loops only to create a subtle ridge around the edge for petal join
Round 14 :
1 sc in each st (60)
Round 15 :
1 sc in each st (60)
Info :
If you want a raised textural center, switch to a slightly smaller hook for rounds 13-15 to tighten the fabric and create a shallow bowl effect.
Round 16 :
Work 60 sl sts evenly around to smooth the edge and create a neat base for petal attachment (60)
Round 17 :
Fasten off leaving a long tail for sewing or joining; weave tail inside center to hide, or use for join-as-you-go attachment to petal round
Info :
Make 4 large centers for the runner. Block flat if needed; pin to a round template to retain a perfect circle before attaching petals.
— Medium Sunflower Center (make 3-4 for mid-sized motifs) :
Round 1 :
mr, 6 sc in magic ring (6)
Round 3 :
(1 sc, inc) x 6 (18)
Round 4 :
(2 sc, inc) x 6 (24)
Round 5 :
(3 sc, inc) x 6 (30)
Round 6 :
(4 sc, inc) x 6 (36)
Round 7-10 :
1 sc in each st (36)
Info :
Medium centers are slightly smaller and use fewer even rounds. These centers are great for creating the small flower accents in the runner layout.
Round 11 :
1 sc in each st BLO to create a ridge (36)
Round 12 :
Sl st around and fasten off (36)
Info :
Make 3 medium centers; keep a consistent tension to match the size with the large centers so petals and leaves align correctly later.
— Small Sunflower Center (make 4-6 for the little accent flowers) :
Round 1 :
mr, 6 sc in magic ring (6)
Round 3 :
(1 sc, inc) x 6 (18)
Round 4-6 :
1 sc in each st (18)
Info :
Small centers are intentionally flat and compact for the tiny sunflowers. Fasten off and weave in ends once the edge is neat.
— Petal Unit (make 12 petals per large center; 10 per medium; 8 per small) :
Info :
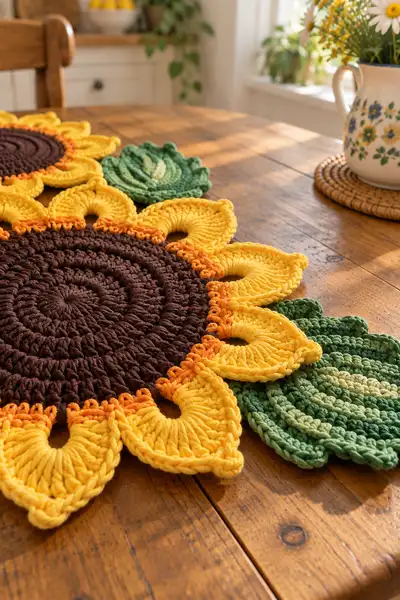
Petals are worked individually and attached to center edge. This pattern gives a slightly cupped petal with vertical ridges using tall stitches and post stitches. Use bright sunflower yellow yarn for main petal color and a small contrasting orange round at the petal base for depth.
Round 1 :
Attach yellow yarn to center edge at desired stitch (or start petal separately with ch 8 if working off-motif). Ch 8, sc in 2nd ch from hook, hdc in next, dc in next 3 ch, hdc in next, sc in last ch (this forms a short chain arch) - you should have 7 stitches across chain (7)
Round 2 :
Turn to work along opposite side of foundation chain: sc in first st, hdc in next, dc in next 3 sts, hdc in next, sc in last st. Sl st to base stitch on center and fasten off (if making petals separately) (7)
Info :
For more body, you can work the petal in rows rather than in-the-round: continue up the petal with an additional two rounds of dc clusters to create a taller petal. Adjust counts to keep symmetry.
Round 3 :
(Working on the outer edge of the petal) Join at the base and work 3 dc clusters in the central chain dc to create a pronounced peak, then 2 hdc and 2 sc on each side to round the tip, sl st to join at base (approx 7 clusters)
Round 4 :
Picot or small scallop: ch 3, sl st in 3rd ch to create a tiny picot along the outer edge of the petal, repeat 3 times evenly spaced to add decorative points. Fasten off (petal complete).
Info :
Alternatively, make petals by working a short oval: ch 10, work 2 sc into second ch, sc until last 2 chains, 2 sc in last ch, then work evenly along opposite side to base. This method creates a slightly larger petal. Aim for consistent shape across all petals.
Round 5 :
On larger petals, add vertical texture by working a row of front post double crochets (FPdc) across the central spine of the petal: FPdc in central 3 dc clusters to create a raised rib. Work 3 FPdc, then sl st and fasten off.
Info :
Make petals in sets and block them gently on a flat surface so each petal has the same curvature before attaching. For a dramatic sunflower, use 12 petals spaced evenly around the large center; 10 for medium centers; 8 for small centers.
— Petal Attachment and Orange Accent Round :
Info :
Work an orange contrast round of small slip-stitch loops or short picot stitches around the edge of the brown center to make a warm ring where petals attach. This gives the finished motif a natural two-tone look.
Round 1 :
With orange yarn, join at the outermost round of the center. *Ch 3, sl st into next st* repeat around placing small orange loops in every 2nd or 3rd stitch (depending on center crowding) to create a dotted ring. Fasten off (approx 20-30 loops depending on center size)
Round 2 :
Begin attaching petals: with yellow yarn, align a petal base to sit over an orange loop and use a whip stitch through the center base and the corresponding center stitch to secure. Repeat for each petal, spacing evenly around the center.
Info :
Use pins to hold petals in place while you sew the first few. Double-check spacing visually as you go; petals should slightly overlap at base for full look. Secure with three or more stitches per petal base for durability.
— Leaf (Make 8-12 leaves) :
Info :
Leaves are worked flat in rows with increasing and decreasing to create a tapered pointed shape; use two greens to create layered texture. Leaves include raised ribs using post stitches and are worked as single-layer units that are sewn under petals or to the sides of motifs.
Round 1 :
Using medium green, ch 10. Row 1: sc in 2nd ch from hook, sc in next 7 ch, sc in last ch, now work down the opposite side: sc in next 7 ch (16 sc total). Turn - this forms a narrow oval base (16)
Round 2 :
Ch1, sc in first 2 sts, hdc in next 3, dc in next 4, hdc in next 3, sc in last 4 sts. This starts the central bulge (16)
Round 3 :
Ch1, sc2, hdc2, dc6, hdc2, sc2 - increasing slightly at center to build leaf width (16)
Round 4 :
Working back down the leaf: dec at tip by (dc2tog) across central 2 dc, then mirror decreases on other side resulting in 14 sts (14)
Info :
To add a central rib, on the next row work front post double crochet (FPdc) along the central stitches: FPdc into 6 center stitches on the right side then mirror on the left to create a raised vein.
Round 5 :
Work 1 sc around the entire leaf edge to tidy (14). Fasten off medium green and prepare to add highlight rows with light green yarn if desired.
Round 6 :
Attach light green at the base and work 1 row of slip stitches or sc along one side of the central rib only to add highlight; reverse on the other side for variegated look. Fasten off.
Info :
For a pronounced layered effect, make half the leaves in medium green and the other half in alternating stripes of medium and light green by switching colors every 3 rows. Block leaves gently for crisp veins.
Round 7 :
If you want a more sculptural leaf, repeat rows to extend leaf length by 2-4 rows before decreasing; stitch counts must remain symmetrical so final decreases mirror the increases.
— Small Petal Variant (tiny sunflowers) :
Round 1 :
Make small center (see Small Sunflower Center) then make 8 tiny petals: ch 6, sc across, dc 2, sc back, sl st attach. Fasten off each petal and sew evenly around small center ensuring a compact silhouette.
Info :
Tiny petals are great to fill gaps between large flowers in the runner and to create visual rhythm. Work these while larger motifs are blocked so sizes match.
— Join-As-You-Go Joining & Runner Layout :
Info :
Plan your layout on a table by arranging large, medium and small sunflowers in a staggered pathway with leaves tucked into gaps. The sample runner alternates: large - medium - large - small - large - medium - large creating a long flowing row. Decide whether to join with whip-stitch or join-as-you-go slip-stitch method.
Round 1 :
Start with the first large motif placed at one end of the runner. Position the second motif next to it so petals overlap by approximately 4-6 stitches. With yarn attached to one motif, use a tapestry needle and sew through petal bases and center edges using mattress stitch for an invisible join. Make 10-12 evenly spaced passes (this is not a crochet round but is essential assembly 'round' work).
Round 2 :
Alternatively, for join-as-you-go: on the final round of attaching petals to the second motif, slip st into the corresponding outer stitch of the first motif each time you complete a petal base. This creates integrated joins without additional sewing.
Info :
When joining, maintain consistent tension so joined seams are flat. Use pins to hold positions and step back to view symmetry frequently. Space leaves into gaps by tucking their base under petal join seams and securing with a few whip stitches to both motifs.
Round 3 :
Join all motifs across the runner pattern following your layout. Use small, hidden stitches through first and second motifs around 3-4X per petal seam for stability. For high-traffic tables, reinforce joins with an extra row of slip stitches across the back side.
Round 4 :
Lay joined motifs flat and inspect both front and back for consistency. Weave in all yarn tails securely to prevent unraveling during use and washing.
Info :
If you plan to launder the runner, use cotton yarn and test a small join for laundering stability. Consider sewing a thin backing fabric to protect joins from abrasion for long-term durability.
— Runner Edge & Final Border :
Round 1 :
Once all motifs are joined, work a unifying border along the entire perimeter to blend edges. Join yellow yarn at a convenient outer stitch and work 1 round of sc evenly around all exterior petal tips and exposed leaf edges, using 3 sc in tight curves and 1 sc along straighter sections. This creates a smooth outline and unifies motifs.
Round 2 :
Round 2: 1 hdc in each st around to add body and soften the edge (maintain increases at corners or pronounced curves with 2 hdc in 1 st where needed).
Info :
For a decorative scalloped edge, work *ch 3, sl st in same st, skip 2 sts* around the perimeter, adjusting skip length for petal curves. This forms small scallops between petal points.
Round 3 :
Final finishing round: work an even round of slip stitches around the entire piece in a neutral tan or matching yellow to seal the edge and hide small join imperfections. Fasten off and weave in ends.
Round 4 :
Optional: for added structure, block the runner flat and, when dry, apply a light spray starch or fabric stiffener along the underside only to keep petals slightly lifted.
Info :
The edge unifies varied motifs and also reduces snagging when placed on a table. For heavier usage, add a cloth backing sewn to the underside aligning with the slip-stitch border for a neat, durable finish.
— Finishing Details and Care :
Round 1 :
Weave all remaining yarn tails at least 2 inches into the body of motifs and trim close. For extra security, apply a dot of fabric glue to hidden knots if the runner will be laundered frequently.
Round 2 :
Blocking: lay runner flat on a large surface, pin into shape, and mist with water or steam. Allow to dry fully before use. This smooths joins and sets petal curves.
Info :
Spot-clean with mild detergent. Hand wash in cool water if necessary and reshape while damp. Avoid tumble drying which may distort the shape of petals and leaves.
Round 3 :
Storage: store flat or rolled to avoid crushing petal texture. If stacking, place tissue paper between runners to protect raised sections.
Completing this sunflower runner brings instant warm charm to any table — the layered petals and textured leaves create delightful depth and cheer. I love how the rich chocolate centers contrast with bright yellow petals and the subtle orange ring adds realism. Each motif is a small celebration of summer you can stitch and enjoy throughout the year. 🧶🌻 Place it on your farmhouse table or gift it as a handmade centerpiece — it always sparks smiles. 😊