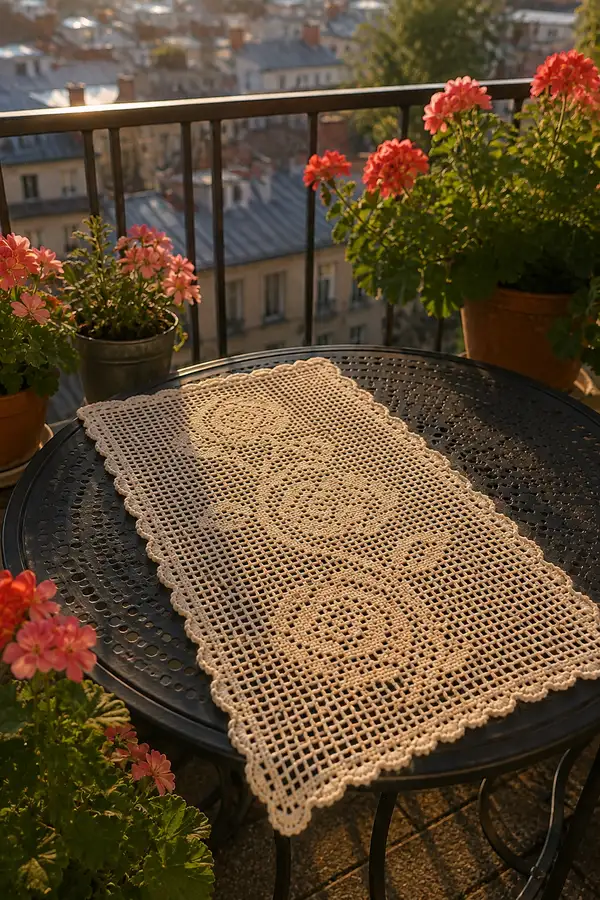
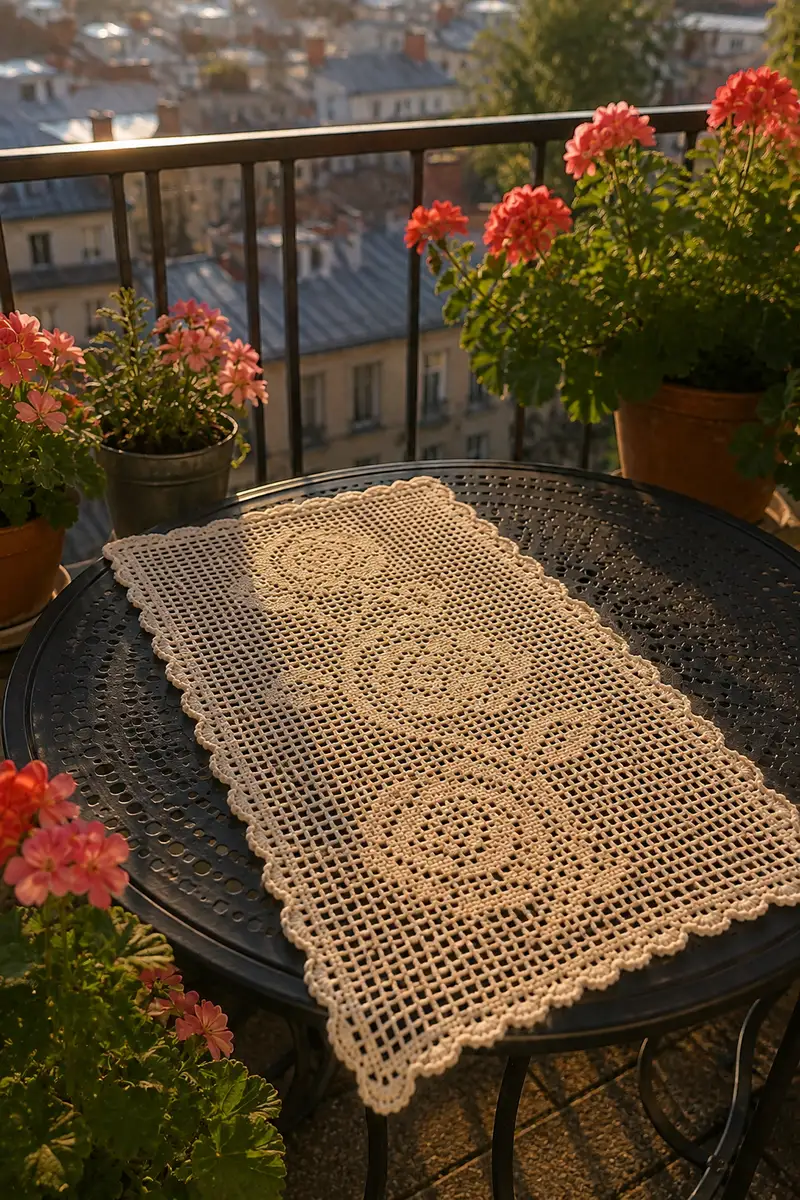
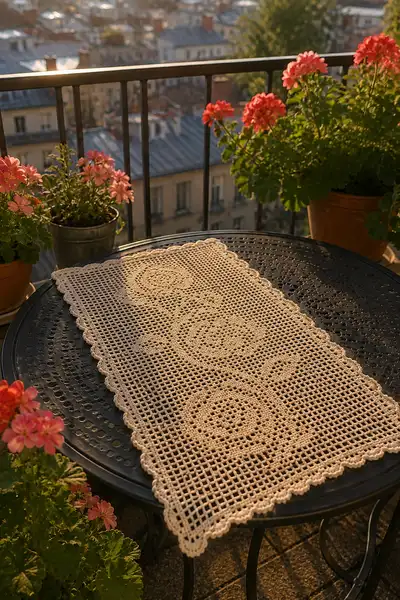
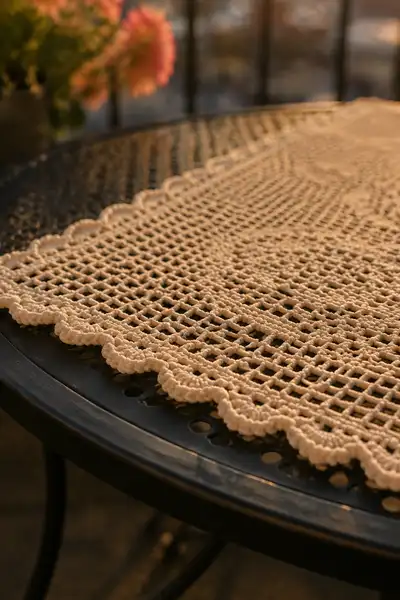
A classic vintage-inspired filet crochet table runner worked in warm cream cotton thread, featuring three delicate rose medallions running down the center and a soft scalloped edge. The open mesh ground creates an airy, lace-like look while the filled filet roses add romantic, textured focal points. Perfect for a bistro table, sideboard, or as a dresser scarf — this pattern balances traditional filet technique with a forgiving, repeatable grid.
Progress Tracker
0% Complete
— Notes & Gauge :
Info :
This runner is worked in a traditional filet technique: each mesh is one dc wide. An open mesh is worked as 1 dc, ch 2; a filled mesh is worked as 3 dc across the same width. The sample runner width is planned for 41 meshes (a comfortable narrow runner width shown in photographs). Adjust the number of meshes in multiples of 1 to widen or narrow your runner. Gauge: 10 meshes x 10 rows = approx 3" x 3" in size 10 thread with the recommended hook — check your gauge and adjust hook size if needed.
— Foundation & Border Setup :
Row 1 :
Chain 126 (this is 41 meshes x 3 ch per mesh + 3 turning chain). TURN. (126 ch)
Row 2 :
Work a dc into the 4th chain from hook (counts as first dc). Now work across: *ch 2, skip 2 ch, dc into next ch*; repeat from * across until you have established 41 meshes total. End with a dc in the top of the turning chain (you will have 41 dc including the turning dc and 40 ch-2 spaces). TURN. (41 meshes)
Info :
Always count meshes (a mesh is an open ch-2 space) at the end of each row to ensure you still have 41 meshes. Mark the center mesh with a removable marker — the central rose column will be aligned to the center mesh.
— Filet Grid Establishment (Rows 3-12) :
Row 3 :
Ch 3 (counts as first dc), dc in same dc as turning ch-3 if you prefer a solid start, then *ch 2, sk next ch-2 sp, dc in next dc* across to the last dc, dc in last dc. TURN. (41 meshes)
Row 4-8 :
Repeat Row 3 for 5 rows to establish base mesh (Rows 4,5,6,7,8). Stay consistent; do not add or remove meshes. TURN each row. (41 meshes each)
Info :
At the end of Row 8 check the counts and make sure the fabric is lying flat. This establishes a steady grid before working the first rose motif. Keep tension consistent and use a stitch marker at the center mesh (mesh 21) for reference.
— First Rose Medallion Setup (Rows 9-28) :
Row 9 :
Establish base of motif area. Ch 3, dc in same st, then work 8 open meshes (8 x [ch2, sk 1 mesh, dc]) across from the left edge until you reach the first rose block area. Continue working pattern across so that you finish the row with dc in last stitch. TURN. (41 meshes)
Row 10 :
Work back across: create a filled mesh to start the rose center placement. Sequence across to create the first filled ring: from left edge 10 open meshes, then work 5 filled meshes to create base of rose (each filled mesh = 3 dc), then 26 open meshes to right edge. Ensure the total equals 41 meshes (10 open + 5 filled + 26 open = 41). TURN.
Info :
A filled mesh is written here as 'filled' meaning you work 3 dc over the width of one mesh space; an open mesh is 'open' indicated by dc, ch-2. Count filled and open so they always equal 41 meshes per row. The rose will be built over a 5-mesh wide motif column.
Row 11 :
Left edge 10 open meshes, 3 filled, 1 open (to allow a break in the shape), 1 filled, 26 open. (10 open + 5 filled + 26 open = 41). TURN.
Row 12 :
Left edge 10 open, 5 filled (solid row), 26 open. TURN. (41 meshes)
Row 13 :
Left edge 10 open, 2 filled, 1 open, 2 filled, 26 open. TURN. (41 meshes)
Info :
These rows work together to make a stylized circular rose. If following a chart instead of written instructions, the same pattern of filled and open spaces applies. Record the pattern in a notebook for consistency down the runner length.
Row 14 :
10 open, 5 filled, 26 open. TURN. (41 meshes)
Row 15 :
10 open, 3 filled, 1 open, 1 filled, 26 open. TURN. (41 meshes)
Row 16 :
10 open, 1 filled, 3 open (creates a small gap inside the rose), 1 filled, 26 open. TURN. (41 meshes)
Row 17 :
10 open, 1 filled, 1 open, 1 filled, 28 open. TURN. (41 meshes)
Row 18 :
10 open, 5 filled, 26 open. TURN. (41 meshes)
Info :
At this point the first medallion should be clearly visible. If it reads too dense, you may drop to 2 dc for filled meshes (less common) or add more open meshes on surrounding rows to soften the shape. Keep track of which rows used breaks (open within the filled area) so later repeats line up.
Row 19 :
10 open, 2 filled, 1 open, 2 filled, 26 open. TURN. (41 meshes)
Row 20 :
10 open, 5 filled, 26 open. TURN. (41 meshes)
Row 21 :
10 open, 3 filled, 1 open, 1 filled, 26 open. TURN. (41 meshes)
Row 22 :
10 open, 1 filled, 3 open, 1 filled, 26 open. TURN. (41 meshes)
Row 23 :
Repeat Row 11 pattern: 10 open, 3 filled, 1 open, 1 filled, 26 open. TURN. (41 meshes)
Row 24 :
10 open, 5 filled, 26 open. TURN. (41 meshes)
Info :
Finish the first rose by smoothing the edges of filled vs open meshes: two rows of full filled meshes separated by rows with inserted open meshes create a vintage rose silhouette. If you prefer a larger motif, you can expand the motif width from 5 to 7 meshes but remember to add equal mesh balance to both sides to keep 41 meshes total.
Row 25-28 :
Work 4 straight grounding rows of open mesh across the entire width (ch 3, dc across with ch-2 open meshes) to set a spacer between roses. TURN each row. (41 meshes each)
— Middle Rose & Repeat Block (Rows 29-52) :
Info :
Center rose will be aligned around center mesh 21 (counting left to right = mesh 21). The center zone for the middle rose mirrors the first rose but is placed after the spacer rows. Use the center marker placed earlier to align the 5-mesh wide motif column from mesh 19 to mesh 23 (that gives the motif a symmetric placement).
Row 29 :
Start row with dc into first stitch then work open mesh pattern until mesh 18 (left of the center), then begin the center motif as follows: 8 open, 5 filled, 28 open — total 41 meshes so this row reads 8 open + 5 filled + 28 open = 41. TURN.
Row 30 :
8 open, 3 filled, 1 open, 1 filled, 28 open. TURN. (41 meshes)
Row 31 :
8 open, 5 filled, 28 open. TURN. (41 meshes)
Row 32 :
8 open, 2 filled, 1 open, 2 filled, 28 open. TURN. (41 meshes)
Info :
Mirror the filled/open sequence from the first medallion but anchored to the center marker. Check both sides of the runner for symmetry by folding the piece lengthwise to visually confirm motif alignment.
Row 33 :
8 open, 5 filled, 28 open. TURN. (41 meshes)
Row 34 :
8 open, 3 filled, 1 open, 1 filled, 28 open. TURN. (41 meshes)
Row 35 :
8 open, 1 filled, 3 open, 1 filled, 28 open. TURN. (41 meshes)
Row 36 :
8 open, 1 filled, 1 open, 1 filled, 30 open. TURN. (41 meshes)
Row 37 :
8 open, 5 filled, 28 open. TURN. (41 meshes)
Row 38-42 :
Work 5 grounding rows of open mesh across entire width to create spacing between the second and third rose. TURN each row. (41 meshes)
Info :
If you want a runner with three roses like the sample, allow at least 4-6 spacer rows between motifs so each medallion reads clearly; if you prefer tighter spacing reduce spacer rows to 2-3.
— Third Rose Placement (Rows 43-58) :
Row 43 :
Position the third rose roughly mirroring the first. From left edge: 10 open meshes, 5 filled, 26 open. TURN. (41 meshes)
Row 44 :
10 open, 3 filled, 1 open, 1 filled, 26 open. TURN. (41 meshes)
Row 45 :
10 open, 5 filled, 26 open. TURN. (41 meshes)
Row 46 :
10 open, 2 filled, 1 open, 2 filled, 26 open. TURN. (41 meshes)
Row 47 :
10 open, 5 filled, 26 open. TURN. (41 meshes)
Row 48 :
10 open, 3 filled, 1 open, 1 filled, 26 open. TURN. (41 meshes)
Row 49 :
10 open, 1 filled, 3 open, 1 filled, 26 open. TURN. (41 meshes)
Row 50 :
10 open, 1 filled, 1 open, 1 filled, 28 open. TURN. (41 meshes)
Row 51-58 :
Work 8 rows of open mesh across the full width to create a longer ground section below the third rose before edging. TURN each row. (41 meshes each)
Info :
At the very end of the grid area count your total rows. If you want a longer runner, continue adding additional full-width open mesh rows now in groups of 8-10 until the piece reaches the desired length. This pattern places three medallions spaced evenly with surrounding grounding rows.
— Finishing Grid & Preparation for Edging (Rows 59-100) :
Row 59-86 :
Continue working straight open-mesh rows across the full width (ch-3, dc then *ch2, sk next ch-2 sp, dc in next*) in groups. For the runner shown, work Rows 59 through 86 as open mesh rows to create the long spacing area between motif block and the end. TURN each row. (41 meshes each)
Info :
These long even rows are great for rhythm work — take breaks and check counts every 8-10 rows. The more even your tension, the flatter the final runner will lie and the neater your scalloped edge will appear.
Row 87-96 :
Work 10 final grounding rows as open mesh (or increase to taste if you prefer a longer end). TURN each row. (41 meshes)
Row 97 :
Work one firm row of dc across last row to stabilize the top of the scallop when you add the border: ch 3, dc in same st, then dc into each dc across (no ch-2 spaces on this row). TURN. (41 dc)
Info :
A row of solid dc helps anchor the scalloped edging if you prefer a more pronounced scallop. If you want the scallop to sit directly on the mesh, skip the solid dc row and work the scallop directly into the mesh row turning chain and dc posts.
— Scalloped Border (Worked all around the rectangle) :
Info :
Turn the work so you are at one narrow end. The scalloped border is worked in rounds around the entire perimeter. Work across the short edge first, then along the long sides, then across the opposite short edge. For consistency, the edge pattern is based on the underlying mesh spacing: every mesh corresponds to one edge repeat or two half repeats depending on how close to the corner you are.
Round 1 :
With RS facing, join with sl st to the edge of the first dc row (or start anywhere). Ch 1, evenly single crochet into each dc and around each chain-2 space along the edges; along long edges work 1 sc into each side of the dc posts and 1 sc into each ch-2 space (approx 82 sc along long edges and 20 sc across short edges — adjust to fit your counts so corners lie flat). Join with sl st to first sc. TURN.
Round 2 :
Ch 1, *skip 1 sc, 5 dc shell in next sc, skip 1 sc, sc in next sc*; repeat around entire runner. When you reach corners work an extra sc before turning the shell so the corner lies flat. Join with sl st to first sc. (Number of shells will depend on exact sc count but should repeat evenly along edges — aim for small shells spaced evenly)
Info :
If shells crowd or stretch, you may reduce shells by omitting every third shell on very short ends; conversely add shells if your edge feels sparse. Count shells on one long side and match on opposite side for symmetry.
Round 3 :
Ch 1, round of picots for definition: *sc into top of shell center, ch 3, sl st into 3rd ch (picot), sc into next sc*; repeat around. Join with sl st and fasten off. Weave in ends securely. This round gives a subtle raised scallop similar to the photographed runner.
Info :
For a chunkier scallop like the photo you can substitute 7-dc shells in Round 2 and 3-4 rounds of shell work to make the scallops pronounced and rounded. Use heavier tension or a slightly larger hook for the edge if you want it to roll outward for stronger scallops.
— Alternate Edge: Raised Puff Scallop (Optional) :
Round A1 :
After working Round 1 sc border: *skip 2 sc, (yo, insert, pull up loop) 3 times to create a puff group in next st, ch 1, sc in next sc*; repeat. Join. This creates small puff clusters around the edge for more texture similar to the pronounced bumps in the photo. Fasten off and weave ends.
Info :
Pick this option if you want the very visible rounded bumps that read from a distance in the photograph. Puff clusters require a little practice to keep uniform height — draw loops up to same height and finish each puff with a single yarn-over draw through to secure.
— Final Blocking & Finishing :
Info :
Wet-block or steam-block the runner: soak gently in lukewarm water with a small amount of wool wash if desired, squeeze out excess water (do not wring), then pin carefully to your blocking mat stretching the mesh square and shaping scallops to a soft curve. Allow to fully dry before removing pins. Blocking opens the filet mesh and defines the rose medallions and scalloped edge.
Info :
Weave in all ends on the WS with a yarn needle. If you used cotton thread, try to bury ends in the same direction of surrounding threads for an invisible finish. Store flat or roll gently to avoid misshaping scallops.
Info :
If repeating the pattern to make a longer runner, simply extend the 'open mesh grounding rows' section between motifs. Keep count of rows between roses so motifs remain evenly spaced. For a tablecloth scale up both mesh count and length proportionally.
This vintage rose filet runner brings timeless charm to any surface — a perfect heirloom-style accent that reads as both delicate and durable. The three rose medallions give rhythm down the center while the scalloped edge frames the piece elegantly. Blocking and a little patience transform simple mesh rows into a beautifully defined lace runner. I hope you enjoy every relaxing row as you create this special piece! 🧶🌹