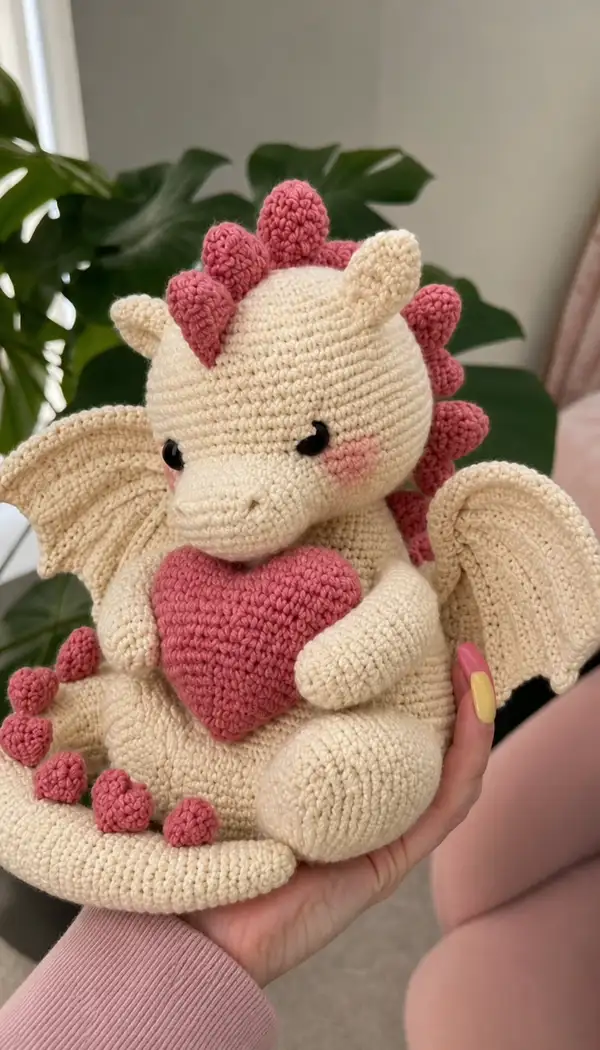
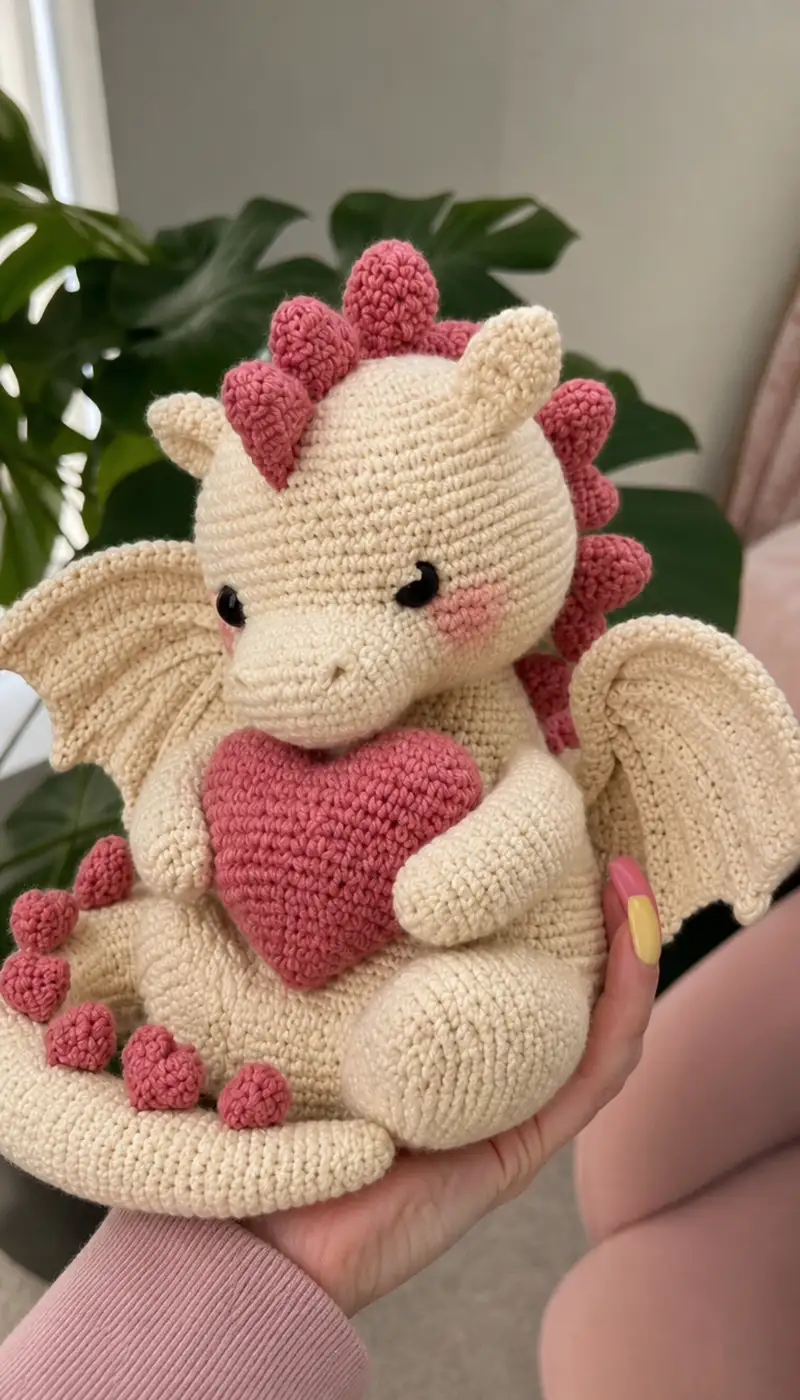
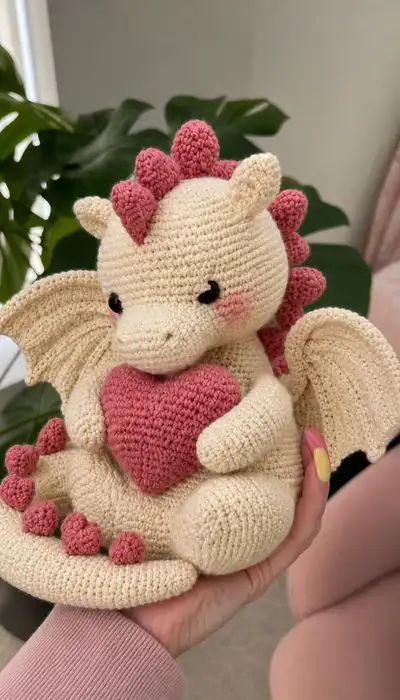
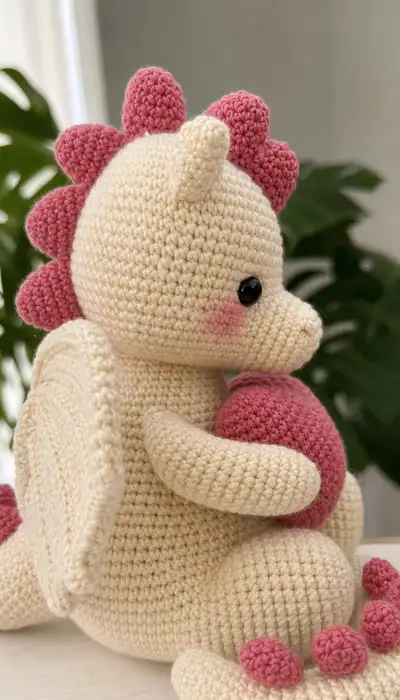
Create a cuddly cream-and-pink baby dragon with oversized wings, trailing spikes, and a small heart to hug. This pattern recreates the soft rounded head, long snout, ribbed wings, and tiny toe spikes seen in the photos. Worked in worsted-weight yarn with basic amigurumi techniques, it makes a charming gift or nursery companion.
Progress Tracker
0% Complete
— Head :
Round 1 :
6 sc in magic ring (6)
Round 3 :
(1 sc, inc) x 6 (18)
Round 4 :
(2 sc, inc) x 6 (24)
Round 5 :
(3 sc, inc) x 6 (30)
Round 6 :
(4 sc, inc) x 6 (36)
Round 7 :
(5 sc, inc) x 6 (42)
Round 8 :
(6 sc, inc) x 6 (48)
Round 9 :
(7 sc, inc) x 6 (54)
Round 10-16 :
1 sc in each st (54)
Info :
Place safety eyes between rounds 13-14 or 14-15 depending on eye size. For 10mm eyes place between rounds 14-15 about 9-11 stitches apart for the expression pictured. If embroidering eyes, mark placement now.
Round 17 :
(7 sc, dec) x 6 (48)
Round 18 :
(6 sc, dec) x 6 (42)
Info :
Begin light stuffing now to keep the top of the head rounded. Use small amounts of fiberfill and push into the crown with a stuffing tool or blunt pencil for even distribution.
Round 19 :
(5 sc, dec) x 6 (36)
Round 20 :
(4 sc, dec) x 6 (30)
Round 21 :
(3 sc, dec) x 6 (24)
Round 22 :
(2 sc, dec) x 6 (18)
Round 23 :
(1 sc, dec) x 6 (12)
Info :
After round 23 you have 12 sts — this becomes the neck base. Stuff head more firmly here because this area will give the head a nice round fullness. Leave a tail for sewing if you will close completely later when assembling with body.
Round 24-29 :
1 sc in each st (12) (work 6 rounds to form neck tube) (12)
Info :
Fasten off leaving a long tail for sewing the head to the body if you prefer to sew the neck in place, otherwise leave attached to work later when joining. Keep neck tube firm but flexible for natural attachment.
— Muzzle / Snout :
Round 1 :
6 sc in magic ring (6)
Round 3 :
(1 sc, inc) x 6 (18)
Round 4-7 :
1 sc in each st (18)
Info :
Stitch eyes or eye markers into the head before attaching the muzzle. Align muzzle under eyes so snout projects naturally. Use pins to move muzzle until it looks proportionate to the head photo.
Round 8 :
(1 sc, dec) x 6 (12)
Round 9-11 :
1 sc in each st (12)
Round 12 :
6 dec (6) - close tightly or leave a small opening for sewing
Info :
Stuff snout firmly but leave the very base slightly less stuffed so it sits against the head smoothly. Embroider two small nostril dots on the tip using matching yarn or thread before final sewing if desired.
— Horns / Small Ear Nubs (Make 2) :
Round 1 :
6 sc in magic ring (6)
Round 3-5 :
1 sc in each st (12)
Round 6 :
(1 sc, dec) x 4 then 2 sc (8) - shape into a short cone
Round 7 :
4 dec (4) - finish, fasten off leaving long tail for sewing
Info :
Sew horns to the top-of-head positions as seen in the images — one central horn between the main spikes on the forehead and two small ear nubs placed slightly to the sides above the eye level.
— Body :
Round 1 :
6 sc in magic ring (6)
Round 3 :
(1 sc, inc) x 6 (18)
Round 4 :
(2 sc, inc) x 6 (24)
Round 5 :
(3 sc, inc) x 6 (30)
Round 6 :
(4 sc, inc) x 6 (36)
Round 7 :
(5 sc, inc) x 6 (42)
Round 8 :
(6 sc, inc) x 6 (48)
Round 9 :
(7 sc, inc) x 6 (54)
Round 10 :
(8 sc, inc) x 6 (60)
Round 11-18 :
1 sc in each st (60)
Info :
This forms a wide plump torso. Work even rounds to build height. At round 14-16 pin where the arms will attach to ensure natural placement later (approx 14-18 sts down from top depending on look).
Round 19 :
(8 sc, dec) x 6 (54)
Round 20 :
(7 sc, dec) x 6 (48)
Round 21 :
(6 sc, dec) x 6 (42)
Info :
Begin inserting stuffing from this point. Stuff the body firmly at the base and moderately through the middle, leaving room at the top where the head will attach for smooth seam and neck shaping.
Round 22 :
(5 sc, dec) x 6 (36)
Round 23 :
(4 sc, dec) x 6 (30)
Round 24 :
(3 sc, dec) x 6 (24)
Round 25 :
(2 sc, dec) x 6 (18)
Round 26 :
(1 sc, dec) x 6 (12)
Round 27 :
1 sc in each st (12)
Info :
Fasten off leaving a very long tail for sewing the head. If you prefer to join head and body by continuing working, leave an opening and join by slip stitch around neck tube. Otherwise sew with mattress or whip stitch for an invisible join.
— Arms (Make 2) :
Round 1 :
6 sc in magic ring (6)
Round 3 :
(1 sc, inc) x 6 (18)
Round 4-6 :
1 sc in each st (18)
Info :
Stuff the hand end (rounds 3-6) fairly firmly so the arms hold shape when posed around the heart. Keep stuffing focused at the palm area.
Round 7 :
(2 sc, dec) x 6 (12)
Round 8-12 :
1 sc in each st (12)
Round 13 :
(1 sc, dec) x 4 then 4 sc (8) - shape towards shoulder
Round 14-18 :
1 sc in each st (8) (work 5 rounds to form upper arm and shoulder tube)
Info :
Leave a long tail for sewing. Attach arms to body around the area you marked at the beginning (rounds 14-16 of body) so that arms wrap naturally around the heart when seated. Sew securely and stuff lightly through upper arm if needed.
— Legs (Make 2) :
Round 1 :
6 sc in magic ring (6)
Round 3 :
(1 sc, inc) x 6 (18)
Round 4 :
(2 sc, inc) x 6 (24)
Round 5-8 :
1 sc in each st (24) - foot base and top
Info :
Shape the foot by making rounds 5-8 even. Stuff the foot firmly to create a stable base for sitting. Mark where the shin will start and where you will attach to the body.
Round 9 :
(3 sc, dec) x 6 (18)
Round 10-15 :
1 sc in each st (18) - leg shaft
Round 16 :
(2 sc, dec) x 4 then 2 sc (14) - shaping toward hip
Round 17-22 :
1 sc in each st (14) - finish leg tube (work 6 rounds)
Info :
Leave a long tail for sewing. Sew legs to the body base at the bottom opening; position them to create the seated pose — legs slightly forward with knees resting against the belly. Add extra stitches for stability where the leg meets the body.
— Tail :
Round 1 :
6 sc in magic ring (6)
Round 3-5 :
1 sc in each st (12)
Round 6 :
(1 sc, dec) x 4 then 4 sc (10) - begin tapering
Round 7-12 :
1 sc in each st (10) (work 6 rounds for tail length)
Round 13 :
(1 sc, dec) x 2 then 6 sc (8)
Round 14-18 :
1 sc in each st (8) - continue tail tube to tip
Info :
Leave a tail for sewing to the back of the body. If you want a poseable tail, insert thin wire before stuffing (wrap wire ends with a little tape or extra yarn to avoid poke-through). Sew the tail to the lower back central area so it curves around to the front slightly.
— Spikes (Make 12 for head & tail & toes) :
Round 1 :
6 sc in magic ring (6)
Round 3 :
(1 sc, inc) x 6 (18)
Round 4 :
1 sc in each st (18)
Round 5 :
(1 sc, dec) x 6 (12)
Round 6 :
1 sc in each st (12)
Round 7 :
6 dec (6) - fasten off leaving a long tail for sewing
Info :
Make 8 spikes for the head and back ridge, 2 medium spikes for tail tip, and 6 tiny toe pod spikes (use the same pattern but stop at round 4 for tiny toe pods). Sew spikes evenly spaced down the center back of the head and tail. For toe pods, sew clusters of three on each foot pad to match photo.
— Wing (Make 2) :
Round 1 :
6 sc in magic ring (6)
Round 3 :
(1 sc, inc) x 6 (18)
Round 4 :
(2 sc, inc) x 6 (24)
Round 5 :
(3 sc, inc) x 6 (30)
Round 6 :
(4 sc, inc) x 6 (36)
Round 7 :
1 sc in each st (36)
Info :
We will create the wing membrane and ribs next. The wings in the photo are semi-circular with concentric ribbing — achieve this by working in rows from the semi-circular base outward and using BLO for rib definition.
Round 8 :
(5 sc, inc) x 6 (42)
Round 9 :
1 sc in each st BLO (42) - creates the inner ridge
Round 10 :
(6 sc, inc) x 6 (48)
Round 11 :
1 sc in each st (48)
Round 12 :
(7 sc, inc) x 6 (54)
Round 13 :
1 sc in each st BLO (54)
Round 14 :
1 sc in each st (54) - work 2 rounds to firm up wing
Round 15 :
1 sc in each st (54)
Round 16 :
Edge: sc evenly around the semi-circle edge; (sc 6, dec) x 7 as needed to shape edge (adjust until wing lies flat) (approx 48)
Info :
Block wings flat if your yarn allows. Sew wings to the back at the center seam of the body around the area where rounds 12-16 of body meet—use several secure stitches and pin wings to achieve the slightly folded shape pictured.
— Heart Accessory :
Left Half - Round 1 :
6 sc in magic ring (6)
Left Half - Round 2 :
6 inc (12)
Left Half - Round 3 :
(1 sc, inc) x 6 (18)
Left Half - Round 4-6 :
1 sc in each st (18)
Left Half - Round 7 :
(1 sc, dec) x 6 (12)
Left Half - Round 8 :
1 sc in each st (12)
Info :
Make two heart halves with the same rounds for left and right halves. Stuff lightly. Join halves by slip-stitching and crocheting around the outer edge to form a neat heart shape. Adjust stuffing to get the plump shape seen in the photos.
Assemble Heart :
Place halves wrong sides together, sew or sc together around the outer edge, stuffing lightly before closing. After joining, add a small round of sc around the outside if you want a defined border (sc in each st around).
— Tiny Toe Pods / Decorative Bumps (Make 6) :
Round 1 :
6 sc in magic ring (6)
Round 3 :
1 sc in each st (12)
Round 4 :
6 dec (6) - finish, fasten off leaving long tails for sewing
Info :
Sew clusters of three tiny pods onto the top of each foot pad for the toe decoration seen in the photo. Make sure pods are evenly spaced and mirror each other on both feet.
— Assembly & Finishing :
Info :
Weave in all tails temporarily but keep long tails for assembly. Pin each major piece to the body before sewing to check placement and symmetry. Use mattress stitch or whip stitch for most joins to keep seams invisible.
Attach Head :
Sew head to the body using the long tail left on the body and/or head neck. Align the neck tube (head rounds 24-29) with the top opening of the body (body round 1 area). Sew evenly around, stuffing slightly as you finish to avoid gaps. Secure tail and weave in end.
Attach Muzzle :
Position muzzle under the eyes and sew into place using whip stitch from the inside of the head for an invisible join. Use small tacking stitches at the base for stability.
Attach Limbs :
Sew legs to the bottom opening of the body, spaced evenly left-right and slightly angled forward. Sew arms to the side of the torso where you marked earlier; angle so they wrap slightly inward as in photos and hold the heart when attached.
Attach Tail & Spikes :
Sew the tail to the back center lower body. Arrange the larger spikes down the head and back ridge first, spacing them evenly. Sew small toe pods onto the tops of the feet last.
Attach Wings :
Pin wings to the upper back area (on the sides of the spine) and sew through the body rounds several times to secure. Add a few stitches to the wing base on both top and bottom of the attachment to hold the slight fold visible in the photo.
Finishing Touches :
Embroider mouth lines and nostrils with matching yarn. Add blush to cheeks with a tiny bit of blush powder or fabric-safe paint if desired. Weave in and hide remaining tails securely inside the body.
Info :
For safety eyes, place and lock after round 13-15 of the head and before final stuffing. Use glue on washers if needed. For child-safe toy, embroider eyes rather than using safety eyes.
This sweet little dragon comes to life stitch by stitch, combining soft curves and playful details into a lovable companion! The row of pink scalloped spikes, ribbed wings, and the tiny heart make it a perfect handmade gift. Enjoy the soothing rhythm of amigurumi construction and savor the moment you place the finished dragon in your hands — it's pure handmade joy. 🐉🧶✨